A warm welcome to all my visitors,

Thank you for taking the time to come and look at my blog, I really do appreciate it. I would love you to leave me a comment, even if it’s just to say Hi. It means I can come visit you!

All my designs are original, so copyrighted to me. If I have been inspired by someone elses work, I have named them in the post, and where able, I have provided a link.

Please feel free to use my designs for inspiration, I just ask you to credit me, and provide a link back to my blog.

Thanks, Shaz XX

Sunday 29 March 2020

Christmas Card Club #7- Christmas Candles.

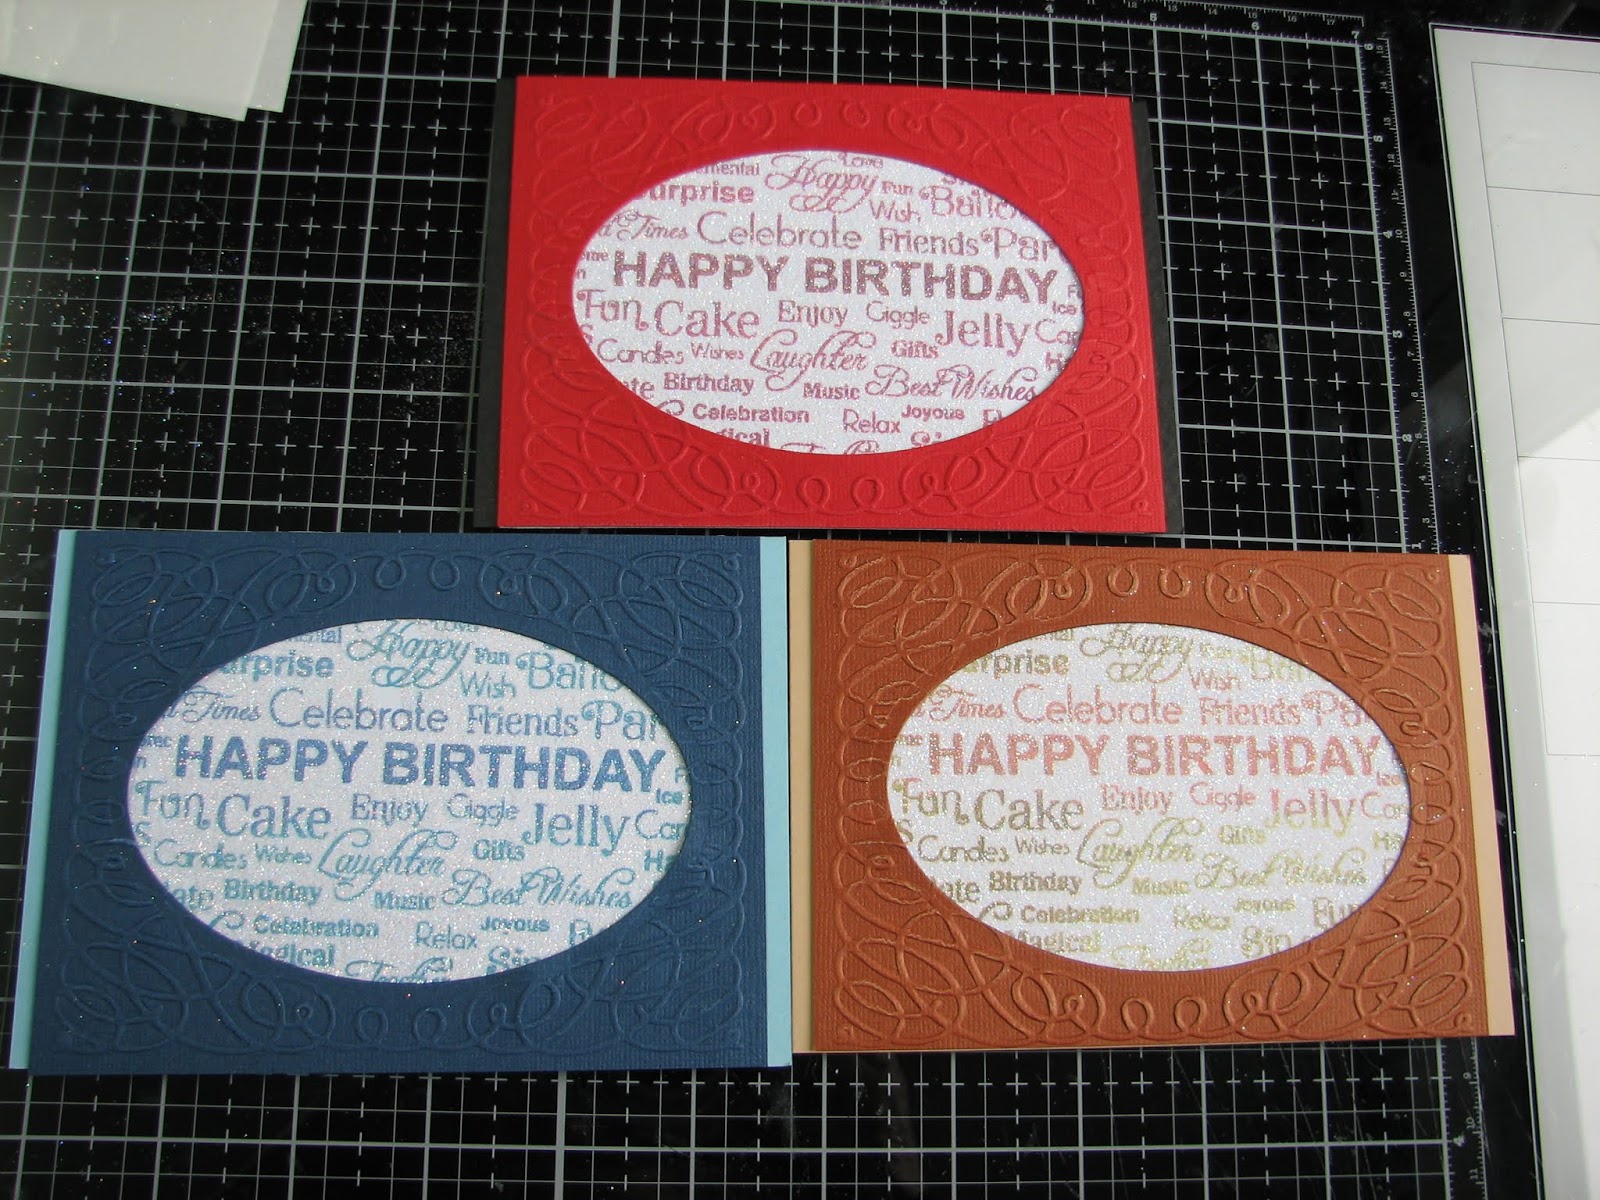
Finally getting to post today!Rita has chosen this theme, and she'd like us to feature Christmas Candles. You now how doing one thing can spark off another idea, and then that one gives you yet another? I started with one idea,using this tag stamp. I have no idea who made it, it's far more years old than I'd like to think! I can only tell you it's a clear stamp. I stamped it, then coloured using Prismacolor pencils. The vellum panels came from some vellum I found in my Christmas papers box, and I also added some tiny acrylic stars to the tag background. I've had those ages too, I ordered them to use as Tree star toppers, but when they arrived they were too tiny for that to work.
 I trimmed the cards upper corners to match the tag shape.
 It was while looking in my Papers box, I spotted the wallet with my glittered pieces in, and recalled I had some lovely Celtic Knot style candles in there. So that made another half dozen cards.

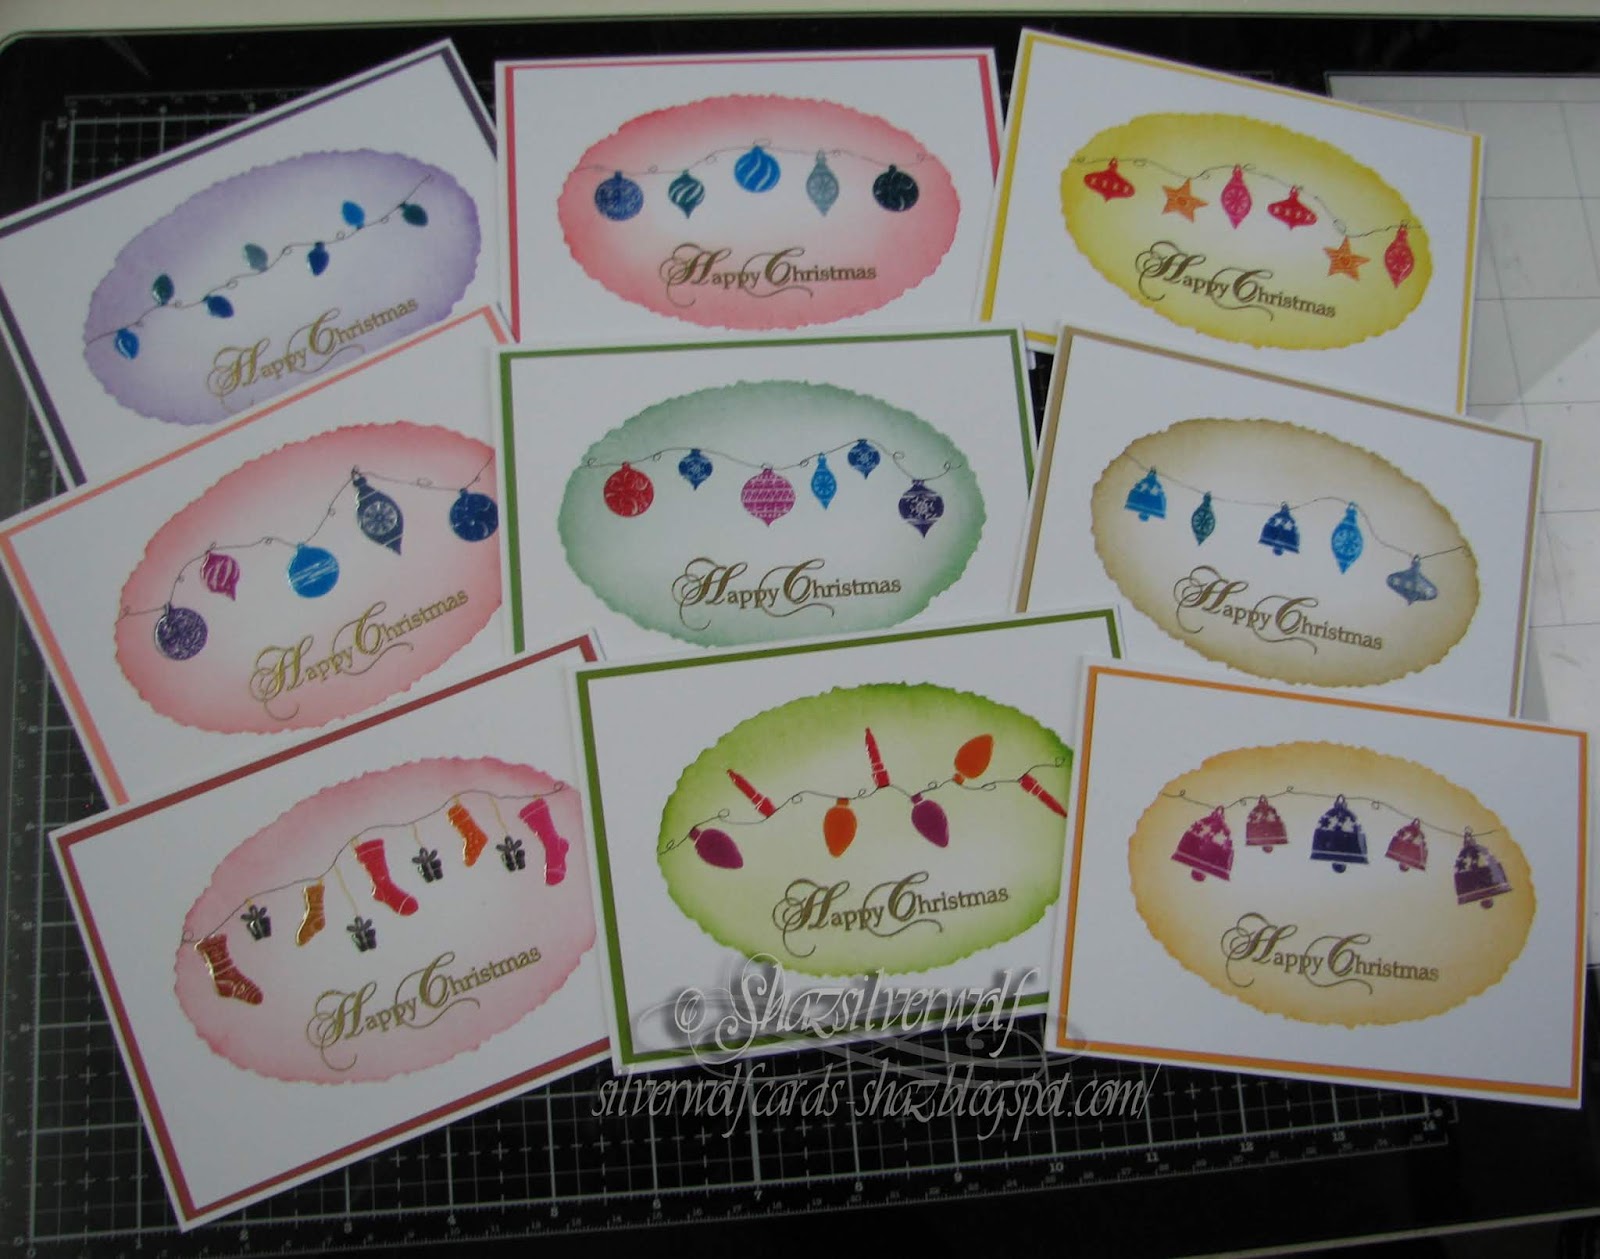
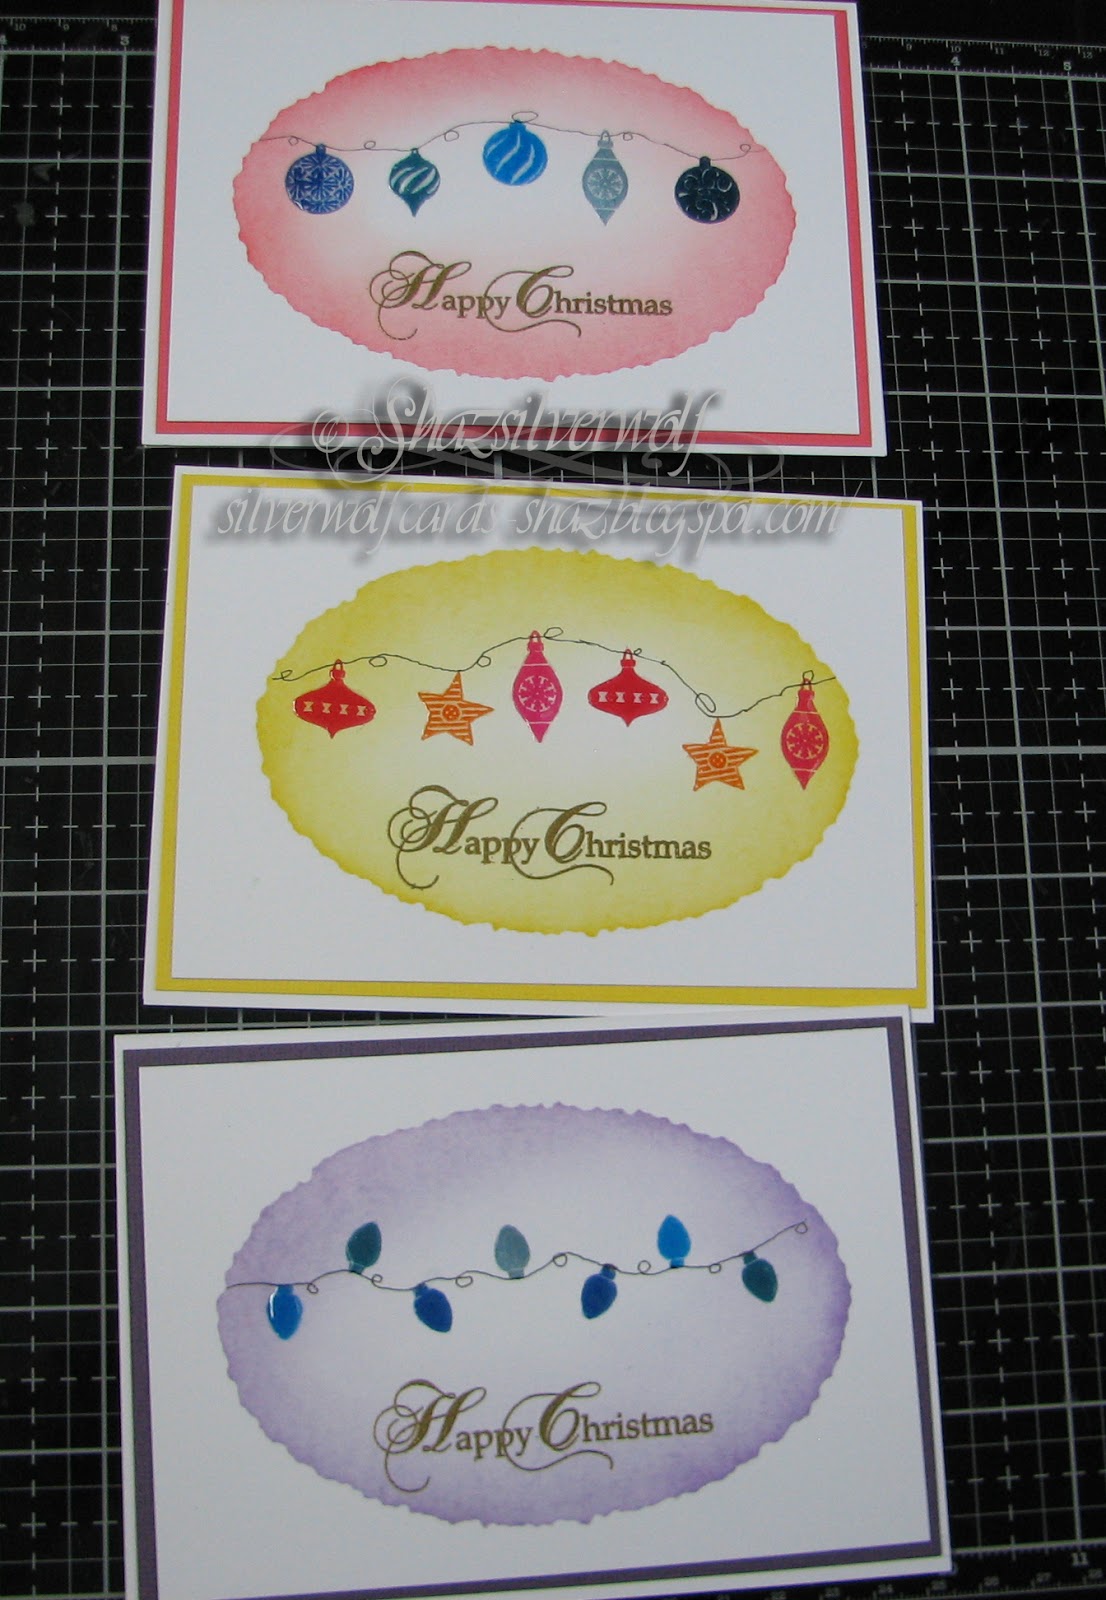
The sponged/brushed strip is an idea I've seen Eileen Godwin use a lot, just masking off the front of the card, and gently applying inks of your choice. I'm not brave enough to work directly on my card base yet, lol, so mine are matted and layered.
 The candles are attached with a little Matte Medium, and I've used some peel off sentiments.


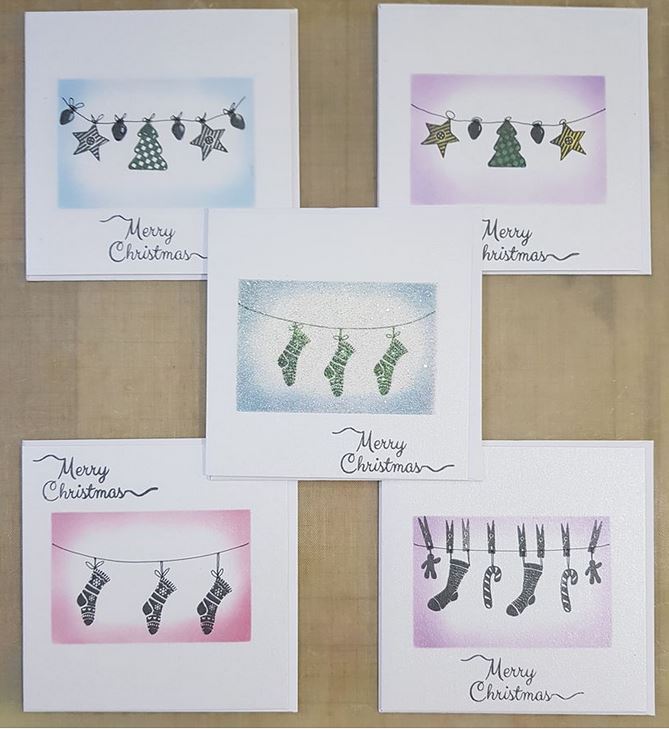
These were the final 4, I have a Card-io stamp set called Christmas by Candlelight, and wanted to use that.

To get the candles standing in Holly took a bit of thought, but finally figured it out.


I stamped two Holly Branches, which is a Lavinia stamp, and used Archival Leaf Green for that.


I wasn't going to cut masks for the holly leaves, so I tore roughly a sheet of kitchen paper, and used that to cover the holly.


Any spaces left between the candle and holly I could draw in afterwards. I'd stamped in Distress Archival Ink Barn Door, so I could use the Distress Marker for that.


Finished the stamping by adding the candle flames, then coloured the candles with the Prismacolor pencils again.


I also added some half pearls to the holly for berries, and then finally some Glossy Accents to the flames, sprinkled with a tiny bit of Glamour Dust for some sparkle.


Again, I added a peel off greeting. Partly because I'm trying to use them all up, and partly because I forgot about heat embossing until I'd matted & layered the card front, and the heat would have released the adhesive!
 So, after starting with 3, I ended up with a massive 13 for this fortnights challenge.

Wednesday 25 March 2020

WOYWW 564- The Locked Down Edition!

Well, here we are, in lockdown. Hoping you are all safe and well, along with your families. We've been being extra careful for a few weeks, to be honest, as I'm in the high risk group. Dougs been going out for any shopping, and it seems like at last, the panic buying is tailing off, as he could get bread & milk in Tesco yesterday afternoon, instead of everywhere being sold out before breakfast! So, our safe space as always, visiting desks around the world, courtesy of Julia over at The Stamping Ground.
Todays desk, working through as many of my UFO's still, as I can finish up. Will be taking a break from them for a few days, as this weekend another Christmas Card Club is due, and I almost missed the last one, lol.


These are the cards I've managed to put together from the various wallets they were stored in.


Two using Sweet Poppy stencils, and foiled afterwards, both on Brusho backgrounds. Found some old vellum with dragonflies on, to back the card on the left.


The top two are using a very old Stampers Anonymous stamp, Classic, which is a wood mount, but I think it's available as a cling mount now, in one of the sets.

The other card uses stamps from Crafty Individuals.


These are a stamp by Indigo Blu, called Bicycle, which was stamped 3 times, overlapping, with 3 generations without reinking. Inks sponged over the top. Covered with a sheet of Double sided Adhesive, then sprinkled with Glamourdust.
 The flower is a die by  Heartfelt Creations, called  Delicate Aster.
 A background stamp by Phill Martin, called  Birthday Cloud, and I did the same with these as I did with the Bicycle ones.
 The front is an old Cuttlebug Embossing folder, Scroll Frame, and I cut out the blank oval with another die. Hard to see the sparkle in these though.


Two Eclipse cards using the same stamp.


Slowly making a decent dent in the UFO's, as I'm being really good and not starting anything new until I've used up a considerable number of them.


This is the next batch I'll put together.
All trimmed down and matched up, just need to stick them down.

I end up with so many UFO's as I have a habit of making a large batch of something while I have the stuff out, then either run out of ideas, or just get bored with them!


And now we get to the Enabling part!
 
Some new stamps from Lavinia, a Tim Holtz Layering stencil, and 4 new colours of Alcohol inks.


And that's me for this week, which brings us round to ....And Finally, and this week you get a Twofer!


First off, a reminder for all in the UK that it's Clocks Forward this weekend.


And one for all us crafters everywhere, it really made me laugh when I saw it.


P.S. Our Neet came up with a fab idea to Brighten Our Days on Facebook- every day, post a pic of something you've made. It can be anything at all- crafting/baking/even gardening, and can be something new, or something you did a while back. Feel free to join in, help us beat the doom & gloom on FB.😀

Thursday 19 March 2020

Invading the UFO box!

So, five cards made so far from the UFO's. The first two are both Eclipse cards.
I used Happy as one Eclipse, and Birthday for the second card. Die cut a small sentiment to complete them.
 The stamp is by Phill Martin, called Birthday Cloud, and is roughly A5 in size.
The Alpha dies are by X-Cut, called Wedding Alpha & Numbers. 1⅜" or 3.5cm high.


The other three use the same stamp. I had stamped a number of these in different colourways, when I made some into Shaker cards.


 For these, I added some double sided adhesive sheets, then sprinkled that with Glamourdust. Because the Glamourdust is so fine, it doesn't hide what's behind it, just gives a little sparkle.
 The cover frame is an old Cuttlebug Embossing folder, Scrollwork Frame.
 Then I cut out the blank oval in the middle with an oval die. The Embossing folder is slightly too small to cover the front of the card, so I trimmed it down to leave a contrasting border, from the base card, on each side.

Wednesday 18 March 2020

WOYWW #563- The Using up UFO's Edition

Annnd another week just flew past! Wednesday again, so time to meet up at Julias place, The Stamping Ground, for our usual desk snoop.There is crafting happening, in the form of finally getting to the bottom of my UFO pile. Two reasons for that, one, I almost missed last weekends Christmas Card Club posting, as for some reason I'd mislaid a week somewhere- still have no idea where it went. Luckily, I had some suitable designs in my Christmas UFO storage, so got to catch up fairly easily.  They're in the post below. Second, my shoulder is giving me hell! Some of you may recall back some years ago now, I broke a corner off my Shoulder blade, where the Rotator Cuff attaches.
Which left me with my arm in a splint for 12 weeks. It healed fine, but occasionally it starts to ache, a dull ache that starts in my shoulder, and gradually goes down my arm. It started a couple of weeks ago, but wasn't too bad, but I think I aggravated it somewhat using my Rotary Cutter to put a fancy edge on the inserts for all those cards I was doing.
So, the inserts are on hold for the moment, although I have managed to get about half of them done. As I can't do any more of them right now, and looking through my UFO storage, I realised just how many I have, I'm going to be making as many into cards as I can.


Sort of sorted into themes, some closer to being finished than others.


And these do not include all the Christmas ones I have either.


 One small enable this week, a  die from Honey Doo, which cuts a panel for the front of a card. It's quite large,roughly 7"x5", it will do the front of a card made from A4 cardstock, folded in half.


The Mothers Day cards are finished, I added acrylic stones to the flower centres.  A strip of ribbon across the front, and a silver peel off coloured with Sharpies to match. I only have a couple of Mothers Day stamps, and both are too big for the front of the card.


Heads up here for anyone who had tickets booked for Happy Stampers in April, Inkylicious posted on FB that they've been advised by the organisers that it has been cancelled. There's nothing on the HS website yet, but they are clearly informing exhibitors.
 I also saw something on FB about another set of shows being cancelled/postponed,the Create-It shows, and I know the NEC show is postponed until June, so if you've booked any tickets for any shows, I'd recommend checking with organisers what's happening before setting out. Just seen that the Sincerely Yours show at Leigh in March has been cancelled.


 I hope everyone is keeping well, and keeping themselves & their families safe.

 With that in mind, this weeks And Finally.............


Monday 16 March 2020

Christmas Card Club #6- Wreaths/Garlands

Well, a day late, but finally here. Silly thing is, I looked at the list I have pinned up a few days ago, and thought 'That's OK, I've got a week yet!' So where my lost week went, I have no idea. Lorraine chose our theme this time, which is for Wreaths or Garlands, and fortunately, I have some wreaths amongst my UFO's/Left overs, so catching up was a bit easier than it might have been!

 I managed 5 cards,the top three using a Sweet Poppy stencil and stencil paste, from my UFO's.

I cut them out, added to card fronts with some foam pads, then added a few acrylic gems to each one. The backing papers are all from my off-cuts folder, and the peel off sentiments also helping to stash bust.


These next two use an Imagination Crafts Poinsettia stencil as the background,from my UFO's, and the wreath is a Penny Black stamp, called Adornment, from my left overs. Stamped in silver and heat embossed with glitter EP, then a few small acrylic gems added and a small silver ribbon, which is hard to see in the photo, to finish off.

 I'd made a batch of the Poinsettia backgrounds back last year, some just using plain stencil paste, some with glitter.
 I had a couple of small pots of Glitter stencil paste from amongst some craft stuff I was gifted, but they are really small pots, and for their size, I thought them expensive. For mine I used some Translucent Sweet Poppy stencil paste, and mixed in some glitter. It works really well, and is a much cheaper way of doing this. Once dry, the glitter is totally non shed. You don't have to use translucent paste, you can mix Gold glitter into Gold paste, and so on.
This was the Wreath stencil before I cut them out, it's called Bubble Wreath. The two multi colour ones were done by adding small blobs of two or three colours of paste to one side of the stencil, then just pulling it across with the spreader. You can get the paste in various colours, or you can add reinker to either translucent or white paste. Both pastes will make the colours slightly lighter, so if you do this, pick a slightly darker colour ink to mix in, as you don't want to have to add too much ink and make the paste runny.

Wednesday 11 March 2020

WOYWW #562 - The Mothers Day card Edition.

Because that's what I'm working on right now.
I stamped this image twice, using Versafine Clair Nocturne, then left that to be totally dry before colouring in with those Zenacolour pencils I bought a while back.


One in pink, and one purple.
 Then I took an idea I'd seen someone use on Fb, where she'd added Glossy Accents to some Lavinia Pods, then covered them in glitter. I didn't quite do that, I added the Glossy Accents, then sprinkled a very tiny amount of
Glamourdust onto it.


Any really ultra fine glitter would work,not just the Glamourdust.
The Glossy Accents do slightly intensify the colours of the pencils too.


A couple of close ups so you can see the sparkle, just a little, not in your face. Beauty, of course, is that it won't shed.
 Not coloured the centres, as I'm going to add acrylic stones to them.

 The stamp is by Honey Doo Crafts, called Daisy Display. I must admit, I thought they had the look of Polyanthus/Primroses, rather than daisies.


Something else I'd seen on Fb, was a product called Brusho Wax Resist. This lady that used this had mixed ultrafine glitter into some of it, then painted over her scene for a delicate glitter sparkle. I had a look for it, and thought it was a bit expensive. Had a look on Amazon, and found the Zest-It version much cheaper. Tested it out on some scrap, and it works really well. It also dries completely, so no glitter shed.
I do like the Zest-It products as they have a nice citrus smell, rather than a chemical one.
It is supposed to be used in the same way and uses as Masking Fluid, this is just an entirely different use for it.


And so I'm done.As always, it's our desk sharing day over at Julias place, The Stamping Ground, so I'll look forward to seeing everyone there later. Which brings us round to.....And Finally.....


P.S.
Just thought I'd mention, for those in the UK- Postage prices are going up on March 23rd, 6p for 1st class,and 4p for 2nd. As stamps are just marked 1st and 2nd, it's worth grabbing some before the increase. I worked it out, and that increase equates to almost a free stamp in every book if you buy them now. So yes, I did bulk buy,lol.

Wednesday 4 March 2020

WOYWW#561- The Boring Edition

It is really. As we all link up over at Julias place, The Stamping Ground for this weeks desk fest, my desk is full of pretty boring stuff.
 I'm at the bit of putting in inserts and stamping my Made By on the back.
Those are copy paper cut to fit the smaller cards I've done, as I made a couple of big batches recently.Now they have to be folded and stamped. The wallets are for any-hopefully- extras I may have when I'm done. And having just collected together all the ones I need to do, I discovered there's a lot more than I thought.

The two piles on the left are assorted ones,the other 5 piles are all Christmas cards. Left it a bit longer than I should have.


I did come across these print outs in a box. I think they are from a crafting CD bought from Joanna Sheene, but can't remember which one.Might be Thomas Kincaide? I ripped all the stuff I wanted off the CD's, and have them stored in folders on my pc. But they'll be useful for larger cards.


This is the batch of cards I made using those self cut stencils.
 Stamps are by Cardio, and I covered them with Glossy Accents after. The How To is in the post below.


Paid a visit to The Range in the week, and picked up these storage boxes. There's 2 in each pack, and cost a £1. They'll be good for storing small beads/acrylic gems/sequins etc.

And I'm done. A really cheap bit of enabling this week, lol.
 Which just leaves.....And Finally.....


Particularly relevant to us deskers, I think. 😁

Monday 2 March 2020

Christmas cards with Cardio stamps

So, on a Fb group I'm part of, a lady had posted pics of some simple Christmas cards she'd made.  I asked if she'd mind me CASE-ing them, as the idea was great, and she very kindly said I could.
 I mixed it up a little, and created a Deckle edged oval, using my Silhouette Portait 2 to cut it out of  125 micron mylar. This is perfectly thick enough for inking through, but I'd suggest a thicker one if you wanted to use pastes/paints through.
 You can also die cut mylar, so you can create stencils that way too. I just didn't have a deckle edge oval die. I also cut deckle edged stencils in rectangles, circle & square for later use.


These were the cards created by Andrea Turner that inspired me.


Having taped my stencil down with Purple tape, I used a couple of the makeup style brushes to add colour.  In every case, I used 3 shades of Distress ink, a light over almost all the oval, a medium about an inch in all round,both using the larger brush, and finally the darkest shade just around the outer edge, using the small brush.


 All together, I made 15 backgrounds.
These are sized to fit 'notecard' size, made by folding an A5 piece of cardstock.


These are some of the Cardio/Majestix  stamps I used, and I ordered another couple with stockings and ornaments in, called Great Expectations (Stockings)  and Christmas Hang-ups.
 I did the stamping using various Memento inks, in the Dew Drop pad range. I also used my stamping platform for this, wisely as it turned out, as most needed to be double stamped. I left the drawing in of the strings till I'd finished them all, and used a fine micron pen for that.
 For a few I decided to stamp a swag across the panel, and I used a Lavinia £1 holly stamp for that.
For the holly I used Versafine Clair in Shady Lane, and sprinkled on a little sparkly EP and heat set.I'd added a small patch of yellow for the lantern light using a small round make up brush, then added Liquid Pearls for the holly berries.


 Next up, I stamped the greeting in Gold Encore Pigment ink, and heat set with Detail Gold Embossing powder. The sentiment comes from a Phill Martin set called Stately Christmas Sentiments.


All the images were matted onto a toning cardstock, leaving a narrow border.
 The final step was to add Glossy Accents to all of the ornaments, lanterns and stockings.

The Cardio/Majestix sets used were:
(Baubles) Zendangles,Bells & Baubles,Elegant Baubles, and one older Rubber Stamp Tapestry set called Embellished Holiday Wreath.

Then Christmas Hang ups, Great Expectations ( Stockings), Vintage Lights, and the smallest lantern from Christmas Scenery 3. There are two others in this pack, each slightly larger.


An End of an era

An end of an era

I write this with a broken heart, that only time can heal My beautiful, wonderful wifelet Shaz (Silverwolf) passed away peacefully in the ea...