A warm welcome to all my visitors,

Thank you for taking the time to come and look at my blog, I really do appreciate it. I would love you to leave me a comment, even if it’s just to say Hi. It means I can come visit you!

All my designs are original, so copyrighted to me. If I have been inspired by someone elses work, I have named them in the post, and where able, I have provided a link.

Please feel free to use my designs for inspiration, I just ask you to credit me, and provide a link back to my blog.

Thanks, Shaz XX

Showing posts with label Versamark. Show all posts

Sunday, 7 June 2020

Christmas Card Club #12- Snowflakes.

Hi ladies, back with another Christmas Card Challenge, this weeks theme has been chosen by Gwen, who wanted to see Snowflakes.
 I was really pleased to see this theme, as I'd watched a Jennifer McGuire video a few weeks back, called Distress Oxide Resist, and had put it on my list of things to try. I even bought some Oxide sprays for doing it, lol. I've linked to her videos You Tube page.


The beauty- and what really grabbed me about Oxides- is that the colour shows even on dark or black cardstock- these are sprayed onto a navy blue cardstock. 


These are the colours I used, the Wilted Violet only in very small amounts.

The base cards are 'notecard' size-which is roughly 10½ x 14½cm, or 5¾ x 4⅛", so I cut 4 pieces of navy cardstock to fit.


To do this, you will also need a Versamark, or Embossing inkpad, Clear Detail Embossing Powder, and some Snowflake stamps.
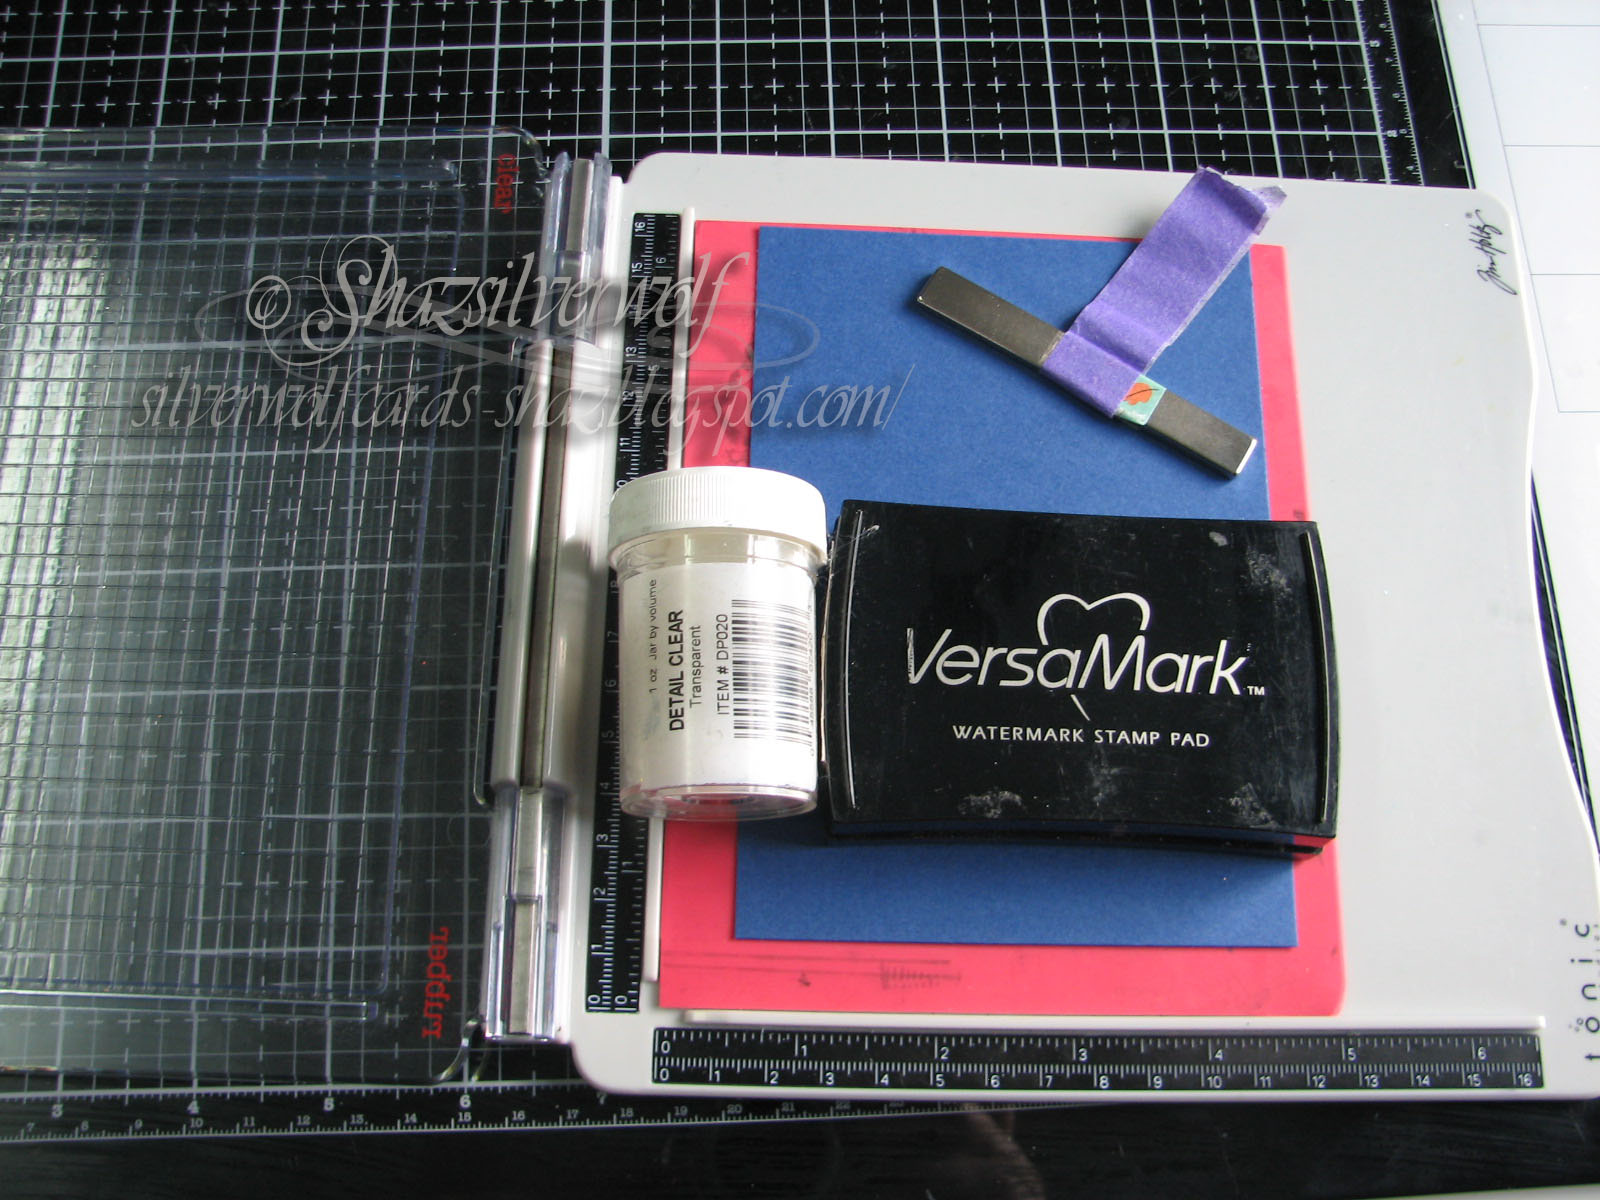

  Mine are the Tim Holtz ones, which come in two sets, one with large snowflakes, and the second with the same snowflakes in medium and small. 

I stamped 2 large snowflakes on one, and 2 medium, then switched to 2 large and 1 medium. Heat embossed them with the Clear EP. 


Now comes the somewhat messy bit, but you can help keep the mess under control by having a box to work in. Mines got some newspaper and heavy duty paper towel in the bottom too.


 Starting with the lightest colour, Tumbled Glass, I sprayed from the bottom up, concentrating the colour at the bottom. Then dried it before the next colour, as if you do it with the first colour wet, they'll just mix together.


 Next came Broken China, dry, then Mermaid Lagoon, dry, then a little of either Chipped Sapphire or Wilted Violet.


I also flicked a few droplets by undoing the top and just flicking colour from the end of the spray tube.

Dried that, then followed by flicking a few drops of water to give a bit more background texture. I also had a bottle of Cosmic Shimmer Pearl White mist, which I used right at the end, but more about that later.


Tilted them to the light in the hope the Pearl Shimmer shows up!


Next comes the fun bit- ironing off the heat embossing.


 Any iron will do- just hottest setting and no steam.
 You need some copy paper to place over your stamped piece, and run the iron over it a couple of times to melt the EP and soak it into the paper.


And you end up with the snowflakes revealing the colour of the cardstock underneath, any ink that was on the snowflakes comes off with the ironing, so they look nice and crisp.
 The Cosmic Shimmer spray had me a bit worried- handling these pieces my fingers were covered in the mica from it! I gave them a buff over with a cloth, and that seems to have fixed it, but I will be checking them a few times before I use it again!


All four ironed off, and then I decided I was going to stamp a sentiment on them, so used Phill Martins Stately Christmas sentiments, love this set as it has  lots of really great sentiments, in a gorgeous font.


 Stamped it in Versafine- I used the Happy Christmas in the bottom right-and heat embossed with Silver Detail EP.

 Added them to the card bases with DST, and I'm done.
Two things I must mention- first, I'm sorry but I only realised yesterday I've missed one weeks Challenge!
 And second, I have no idea if my font is a bit too small- please let me know if it is, or if it's OK. This new Blogger update is playing games!

Sunday, 4 September 2016

A very Goth Valentine/Wedding card, with Visible Image stamps.

Something very different, for the Goth in your life!
 The base card is an 8x8" square one.


I made the skeleton panel first, and the skeletons looking at each other and holding hands was achieved by stamping the same stamp on opposite sides of a piece of acetate. They are a Visible Image stamp, part of the Mr Bone Jangles set. They were stamped in Staz-on Black, and I discovered that you can clean Staz-on off acetate with Antibacterial hand gel. I knew from past trying it works to clean acrylic blocks, so tried it on here when one of the images didn't come out perfectly. Thats one thing I hate about Staz-on, the pads seem to need re-inking between every use!


After they were stamped, I stuck them onto double sided adhesive film, ready to add some gilding flakes.
 I trimmed it down to size first, then peeled off the front layer.

 Now it's time to practice your Ninja skills! No sudden movements, and if you can hold your breath whilst you're doing this, so much the better.


Smothered in gilding flakes, then given a good burnishing with my fingers before gathering up all the excess flake and returning it to the tub.
 And breathe again.


Flip the panel over, and it's worth the effort. Looks great.

 I decided now I would add a border of barbed wire, which comes from the 'Love is Forever' set.
 This was also stamped in Staz-on black, and care needs to be taken stamping on acetate, as the stamps will slide if you are not careful.


I used the Heart INKognito stamp to stamp out 4 hearts, 2 black and 2 red. The Black in Versafine Onyx Black, the red is Versafine Crimson Red. Again, I inked up the stamp with Versamark first, so I could hear emboss with Clear Detail powder.
 Only three hearts here, I had to stamp a fourth when I changed the layout idea.


They were all trimmed down, then matted onto either black or red card. When I trimmed them, I made sure that all four would fit on the card front, and trimmed again slightly to make it happen.
 I missed photographing a few steps, but I overstamped the hearts with the barbed wire stamp again, in Archival Black.


The four hearts were mounted onto the card front with DST, then the Skeleton Panel was added using some blobs of silicone glue on the back, partly for dimension, and partly because the flake is a difficult surface to attach any other way.


Final step was to add the words from the Love is Forever set, and they are stamped in Onyx Black, and the edges dragged across the Versafine Crimson pad. I dipped the edges in clear detail EP and heat set them.
 It was these words, that gave me the idea for stamping the skeleton couple. It's also the title of one of my favourite pieces of music- by a band called Apoptygma Berzerk. They have included in it part of a classical piece called 'Ride of the Valkyries', by Wagner. You've probably never heard of it, or them, but anyone who remembers the Old Spice ads, and that music that played in it, or the film 'Apocalypse Now' in the helicopter scene, would recognise it instantly.
 Stamp Credits:
 All Visible Image:
 Love Never Dies set- words and barbed wire
 Mr Bone Jangles Skeleton
 Heart INKognito
ALSO:
 Acetate
 Double sided Adhesive Film
 Gilding Flakes
Versafine Crimson & Onyx Black
 Black Staz-on
 8x8" card blank
 red, black & white cardstock
 Clear detail EP.


Sunday, 10 January 2016

Visible Image Christmas Cards (2)

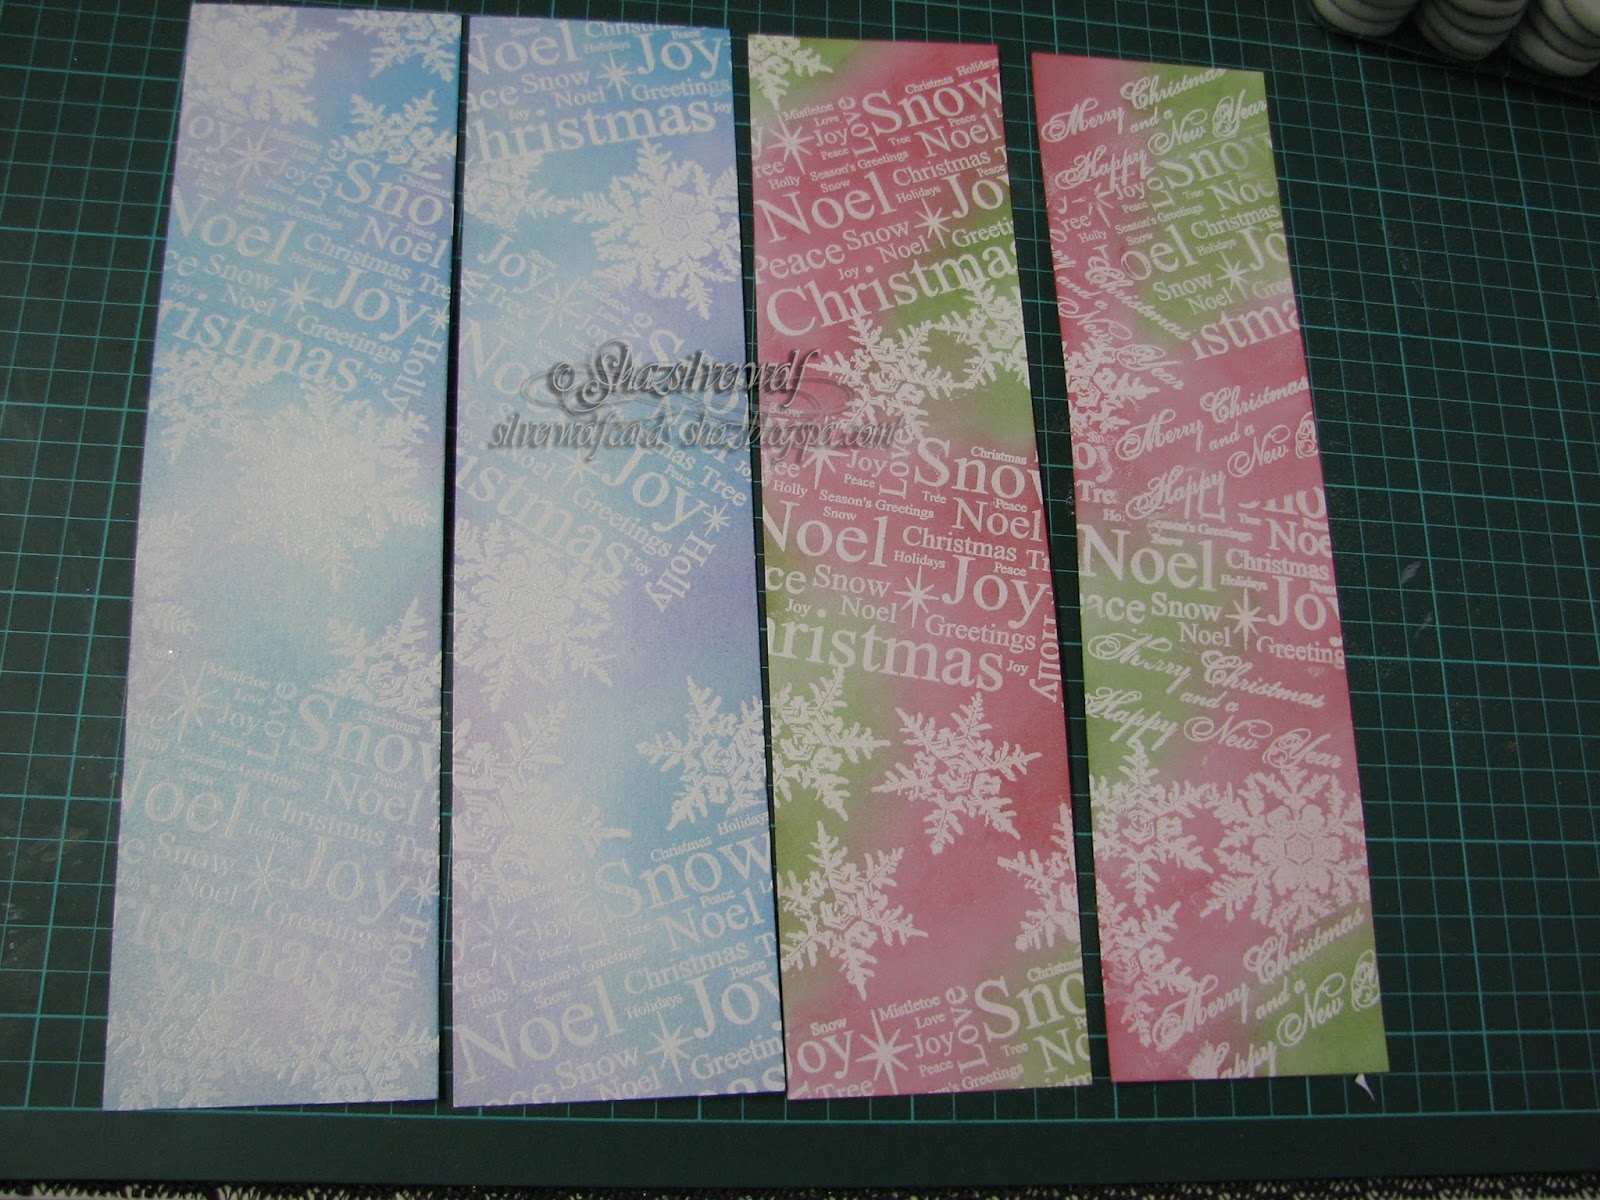
Two more Christmas cards using Visible Image stamps, actually 4 cards, as I made two in each colourway.
This one came about whilst I was putting away some white card scraps, and came across the white pearlescent strips that I've used here. I've used this basic design of resist embossing before, and it seemed like a good way to get at least 4 off-cuts out of the way.


 I began by stamping randomly the Christmas Words stamp and then coating with White embossing powder. My powder  of choice is the WOW! Embossing Powders Opaque Detail White, as it really is a proper white. I used Versamark ink for the stamping, and the pad I was using was the Versamark Dazzles pad in Frost. Yes, I fell for the hype when they came out, but frankly, I really don't see any difference between them and the original, so I just use any.
Heat set, then added Some imprints of the Merry Christmas and a  Happy New Year stamp.


I heat set these, then just roughly masked those areas with Post-Its, so I could stamp various sizes of the Snowflake Set.


When I decided I had enough stamping on there, I took a selection of Distress Inks in blues and purples for one set, and reds and greens for the second.


 I used Broken China, Tumbled Glass and Mermaid Lagoon blues, Shaded Lilac and Dusty Concord purples. The Reds were Fired Brick and Festive Berries, the greens Peeled Paint and Mowed Lawn. I gave them all a buff up with a piece of kitchen towel to take any ink off the embossing.


My card bases for these were A4 sheets of Pearlescent white card, scored and folded in half. I also wanted to create a little extra textural interest by having an embossed line down either side of my stamped and inked strip. For this, I simply lay my strip on the INSIDE of the front of the card, and made a faint line either side of it. Then I lay the card base on my scoring board, in this case the Hougie, as it has more lines to choose from.


I scored down the lines nearest to my mark, in both cases just outside my pencil line to give me room to place the strip on the outside.


The strip was attached with dst, and the Sentiment stamped in Memento Bamboo Stalk ink on the red/green combo.
The strips were longer than the card, so I trimmed off the excess and put to one side, as I have a way to use these too.


The blue/purple combo had the sentiment stamped in Archival Ink Cobalt Blue. The green one wasn't stamped in Archival, as I realised I don't have a green or red Archival pad. But Memento works just as well for clear imprint/drying time etc.


With the stamped strip and sentiment in place, it sort of seemed like it still needed something. Then I remembered this die set I was enabled into by a WOYWWer!


6 different sizes of snowflake, and all different. I wasn't sure which I wanted to use, but the largest flake was definitely too big, so I cut out the 3 middle sized ones a few times. Glad I cut out more than I needed, as the extras came in useful on the first VI card I posted below.


In the end I used one of each of the snowflakes on each card, using a Zig glue pen to attach them, and placing an acrylic block on top to make sure they stuck.
Final touch was the addition of some clear acrylic gems in the centre of the snowflakes, and around the greeting.


So I'm now up to 8 cards blogged, and I still have a few more to show and tell.

Card Recipe:
 A4 sheet of Pearlescent white card
Strip of pearlescent white card
 Stamps: Christmas Words, Snowflake set and Christmas Greeting
Die cut snowflakes,3 sizes
Acrylic gems
Distress ( or other Dye ink) in blues, purples, reds and greens
 Versamark, or other clear embossing ink.
 WOW! opaque white embossing powder

Wednesday, 2 December 2015

WOYWW #339

Well these weeks are just flying past, aren't they? Here we are, in the first week of December, and no, I'm not even slightly ready. Can we get it put back by a couple of months? But still, it's our weekly meet at Julias place, The Stamping Ground, to see what everyone is up to.
Photo taken Tuesday night, a hive of activity, which is my excuse for having a desk buried in stuff.
 I'm using peel off greetings on my cards- not because I don't have stamps, I do, but I have a stupid amount of peel offs bought back in the day before I really got into stamping, and they are just standing on a shelf in a binder. So I want to get them used.
This is the finished card-I ended up swapping to a Versamark pad and gold EP, as I found that unless I cleaned the stamp every second or third time, the pigment ink was building up and blurring the detail.
And thats my offering this week- I'm getting shorter and shorter with these posts, have you noticed? It won't last, lol. See you all later, have a great week.

Sunday, 29 June 2014

Love with your Heart

Yesterday, Saturday, Visible Image stamps were at a craft shop local to me, Pink Tulip Crafts of Studley. So Beloved Hubby took me there in the afternoon. Mark and Helen (Visible Image) are both lovely people, I've met them before at the NEC Hobbycrafts show. Mark was running a workshop, and you can see some lovely cards created there on their Facebook page. Hazel Eaton was there creating samples, and proof of my visit is me in one of the photos, happily browsing, lol.
 Anyway, when I got home, I unpacked my purchases- some new VI stamps, a couple of Indigo Blu stamps that were a real bargain at 50% off, and a Sweet Poppy stencil. I clearly unpacked my mojo as well, as after I'd put my new stamps away, I got creative. The two Visible Image stamps I used here, Love with your heart and Grunge Flourish were two stamps I already had.
 I beagn by stamping the larger square of card with the Flourish all around the edge in Versamark, adding White embossing powder and heat setting. Then onto a smaller piece I stamp the word stamp the same way.
Next I added colour, using Distress Inks and a blending tool,using Broken China, Salty Ocean, Dusty Concord and Seedless Preserves. I made the edges more prominent by going around them with more Seedless Preserves. Then a piece of kitchen roll took all the ink off the white embossing.


Broken China.


Dusty Concord next,followed by salty Ocean and Seedless Preserves.

With all the inks sponged on. Finally I trimmed the word sheet down to size, then stamped around the edges with the Flourish stamp again, this time in Chipped Sapphire.


The word section was matted onto blue card and fixed to the centre of the Flourish panel, and mounted onto a square white card blank.
 For the final embellishment, I die cut some flowers from purple and blue vellum, using the Spellbinders/Heartfelt creations die set called Delicate Aster. The centres were done with Glossy Accents and seed beads.
Supplies:
 DI in Salty Ocean, Broken China, Chipped Sapphire, Dusty Concord and Seedless Preserves.
 Visible Image stamps Grunge Flourish and Love with your Heart
Versamark pad
White WOW embossing powder
Flower Die.

Monday, 17 February 2014

playing with gilding flakes and sticky stuff.

Two products I've had forever, and never actually tried out. A tub of Judikins Sticky Stuff embossing powder, and some metal leaf. I also have some tubs of gilding flakes in various colours- rose gold, variegated green etc.
I thought I'd try it first with this stamp, Wishing Tree from Lavinia stamps.
Basically, you stamp your image in a pigment ink, I used plain old Versamark for mine, but as you can use this product with glitter as well, you could also use a coloured ink. I also worked on black card, as I thought the image would 'pop' more.

Sprinkle the Sticky Stuff embossing powder on as you would normally. Its quite coarse grained, so this is never going to work well with a highly detailed stamp, so choose accordingly.


Tip off the excess and heat with your heat gun.What you will discover is that it melts VERY quickly, much faster than normal embossing powder, and apparently it is important NOT to overheat, as it will loose its sticky. So as soon as you see it start to melt, move your heat gun.


However, once it is melted, it stays tacky for a long time, so you have plenty of time to work with it.  I lay a sheet of the leaf over the image, and now you need to burnish it well with your fingers, to make sure its attached to all the image. This will also start to flake off all the sheet not stuck to anything, so a sheet of scrap paper underneath your project, to catch the bits, is advisable. As is  not sneezing, coughing or breathing hard! Be very gentle with moving any sheets of paper/card, and DO NOT tap the back to get stray bits off- the slightest air movement sends this stuff everywhere- it makes glitter look positively restrained! After you've got most of the excess off, you need to go over it again to tidy it up, and I found a stiff paintbrush was ideal. The fine brush I used to remove any stray specks of the embossing powder.
Next I thought I'd try a more solid image, so stamped a row of mushroom groups, and a word stamp, again by Lavinia stamps.


This worked quite well, it definitely looks better on a more solid image.


Here I tried a row of Dandelion heads, Lavinia stamps. There are three in the set, but after I'd put the flake on, it didn't work so well.Two of the heads just ended up as a solid block, so I put this to one side and tried again, just using the head that came out well.


The lines of the image are far enough apart on this one for it to work, and I tried flakes on this one, a variegated copper.


The process is the same though, I found dabbing a clump onto the Sticky Stuff worked well, then burnish with your fingers, finishing with the brush.


Next up I wanted to see if I could create a scene, so I tried the Two Fairy Houses stamp, and although its quite detailed,the image remained clear enough to use.I used the sheet leaf for them, which is called Abalone. Above I stamped Trailing Vine, and used the Variegated green flake for those.


The Sticky Stuff stays tacky for a very long time, so you have plenty of time to get your leaf/flake on, there's no need to rush. With the flake,it was easier to pick a clump up in my fingers and dab it on, rather than tipping a whole pile over the image.


I added a couple more trails, some small and large mushrooms,cherry blossom branches and finally some dragonflies. The dragonflies were done in silver, the 'shrooms in Variegated Copper.When you add more images, you need to check previously flaked parts for powder, as it will stick to it, and when you heat it you will get leaf sticking where you don't want it. A few of my leaves have silvery bits on them.
With the Wishing Tree earlier, I also tried adding a Footpath stamp, and didn't like how it came out. So from this one, along with the Dandelions heads row that I didn't like,and a few off cuts from trimming down the Fairy Houses image I punched out squares. Sheer fluke, I got 9 squares.

So I matted them as a mosaic onto black card, then some gold card run through the 'bug with an embossing folder, then onto black again. Don't know why, but it screams 'Oriental' at me. Maybe the colours, maybe the cherry blossom. I don't know, lol.

I gave the Mushrooms row the same treatment.


I added a couple of Dragonflies to the Dandelion Heads row too,  in a silver/gold mix.
 So these will get turned into cards over the coming week,and I will be trying the Sticky Stuff out with glitter, as I was very impressed with how well it worked.

Supplies:
 Metal Leaf, Eberhard & Faber , or there is a Fimo Brand too.
 Metal Gilding Flake, mine came from Crafty Notions , bought at the NEC
Judikins Sticky Stuff embossing powder
Versamark Ink
 Stamps
 A lot of Patience!!!!!

An End of an era

An end of an era

I write this with a broken heart, that only time can heal My beautiful, wonderful wifelet Shaz (Silverwolf) passed away peacefully in the ea...