A warm welcome to all my visitors,

Thank you for taking the time to come and look at my blog, I really do appreciate it. I would love you to leave me a comment, even if it’s just to say Hi. It means I can come visit you!

All my designs are original, so copyrighted to me. If I have been inspired by someone elses work, I have named them in the post, and where able, I have provided a link.

Please feel free to use my designs for inspiration, I just ask you to credit me, and provide a link back to my blog.

Thanks, Shaz XX

Showing posts with label Stamps. Show all posts

Sunday, 29 March 2020

Christmas Card Club #7- Christmas Candles.

Finally getting to post today!Rita has chosen this theme, and she'd like us to feature Christmas Candles. You now how doing one thing can spark off another idea, and then that one gives you yet another? I started with one idea,using this tag stamp. I have no idea who made it, it's far more years old than I'd like to think! I can only tell you it's a clear stamp. I stamped it, then coloured using Prismacolor pencils. The vellum panels came from some vellum I found in my Christmas papers box, and I also added some tiny acrylic stars to the tag background. I've had those ages too, I ordered them to use as Tree star toppers, but when they arrived they were too tiny for that to work.
 I trimmed the cards upper corners to match the tag shape.
 It was while looking in my Papers box, I spotted the wallet with my glittered pieces in, and recalled I had some lovely Celtic Knot style candles in there. So that made another half dozen cards.

The sponged/brushed strip is an idea I've seen Eileen Godwin use a lot, just masking off the front of the card, and gently applying inks of your choice. I'm not brave enough to work directly on my card base yet, lol, so mine are matted and layered.
 The candles are attached with a little Matte Medium, and I've used some peel off sentiments.


These were the final 4, I have a Card-io stamp set called Christmas by Candlelight, and wanted to use that.

To get the candles standing in Holly took a bit of thought, but finally figured it out.


I stamped two Holly Branches, which is a Lavinia stamp, and used Archival Leaf Green for that.


I wasn't going to cut masks for the holly leaves, so I tore roughly a sheet of kitchen paper, and used that to cover the holly.


Any spaces left between the candle and holly I could draw in afterwards. I'd stamped in Distress Archival Ink Barn Door, so I could use the Distress Marker for that.


Finished the stamping by adding the candle flames, then coloured the candles with the Prismacolor pencils again.


I also added some half pearls to the holly for berries, and then finally some Glossy Accents to the flames, sprinkled with a tiny bit of Glamour Dust for some sparkle.


Again, I added a peel off greeting. Partly because I'm trying to use them all up, and partly because I forgot about heat embossing until I'd matted & layered the card front, and the heat would have released the adhesive!
 So, after starting with 3, I ended up with a massive 13 for this fortnights challenge.

Thursday, 14 March 2019

Birthday Shaker cards

Not what I had planned on making- I was intending to glitter some medallions- but a chance remark on Sarah Brennans blog yesterday, about a card front to cut an aperture out of sparked an idea.
 I bought a Phill Martin Birthday Collage background stamp a while ago, and thought it would work well for shaker cards.

I stamped up a few of them in an assortment of colours, and made 5 into shakers.


For all of them, I went over the whole stamp in a pale colour, then added some darker colours, particularly over the main Happy Birthday, but also in spots over the design, using those egg shaped sponges.


This first one I used Adirondacks for, and then switched to Versafine & Versafine Clairs.


Ive included the inkpads so you can see the colours used, and the old & new Versafines work perfectly together.


With a few, I ran the front through an embossing folder, and I found it's better to do this after die cutting the aperture, as if you do it the other way round, it tends to flatten the embossing.
 I cut the apertures with various shaped dies for a bit of a change.


 The die is a Nellie Snellen heart die, and the card base is 6" square. The embossing folder is by Creative Expressions, called Ocean Waves.


This star is a Stitched Star die bought from the Works, and the embossing folder is called Sunbeams, by Crafters Companion.


This embossing folder is an old Cuttlebug one, called Scrollwork Frame, and I used a plain Oval die for the centre.


These two weren't embossed, the top die was a Presscut one, Scalloped Edge Rectangle, and the bottom one is a Nestabilities, Petite Scalloped Ovals, Large.

I added seed beads and sequins in matching or toning colours, and a bit of table confetti too.

Wednesday, 20 February 2019

WOYWW #507- or the getting my act together edition.

Yep, because that's a thing. Of course, maybe if I did all the stamping/ putting in inserts to my cards
 and sorted out the envelopes, and  bagged them up when I made them, instead of putting them to one side ' to do later on', I wouldn't have found myself with a card mountain that needed sorting.Mainly a general assortment of cards, but also a decent- or indecent, depending on your point of view- amount of Christmas cards too. So that's been my job for the last couple of days.

 
 Last ones on my desk now are all the Christmas ones.
 It would of course make my job easier if I didn't do so many different sizes of cards, or in so many orientations.Or if I did it when I made them.😎
 Maybe next time. Most likely not, though. Know your limits, I say.

You may also spot a storage tin on the left, with the new Archival pads in Distress colours. Because yes, I'm a TH fan girl.

I'd asked my local craft store, Amelias, if they'd be getting them, and she said yes, so I'd asked- on FB- if I could pre-order the set, and a storage tin. She replied that I could, and about 3 other people had seen the message and replied to her  Me Too, lol. Anyway, she messaged me Friday to say they were in, so we popped up to collect them. And stamps may have fallen into my basket as well.😎 And a dragonfly die too.
 The Paper Artsy one with the elephant is super cool, and sort of a pre release. They got them when they went to the Frankfurt show, and can sell them, just not allowed to put them for sale on their website till the launch in a week or so. In other good news for them, Nikki (owner) posted yesterday that Amelias won Best Independent Craft Store 2019 in the Craft Business Awards. Really pleased for them, they've worked so hard to build the business, as they took it over when the previous one was failing, and they've really turned it around.


In other shopping news, lol, came across this tube of glittered washi tape in The Range. I admit I've never got into washi tape, just doesn't do it for me, but I *may* have been attracted by the glitter😎.


The general card mountain, all with inserts ready for bagging. I tend to bag them just to keep them clean till I need them.

And I'm going to need a bigger storage box, lol. It's so full, it's pips are squeaking. And I've still got a million UFO's to make up, and a lot of ideas for more too.
 So I think I'll be bringing the whole box to Junes Crop10, and any sales will go to the days charity.


Hubbys Valentine card is in this post HERE.
Last weekends Christmas cards HERE,
 So, I think I'm done, oh in reply to those who asked about the colouring last week, no I don't intend using them on cards or anything, the books are really just practice for me to get better at colouring so I can colour images for cards without getting the heeby jeebies! And in a statement I never ever thought I'd make, colouring with pencils is so relaxing! I can easily lose a couple of hours doing it.
 I'll be leaving my link as always with our Beloved Leader Julia, over at The Stamping Ground, and I'll be round to see what everyones been up to later on.
Which brings us round to......And Finally........

 So apt for this week!

Wednesday, 22 August 2018

WOYWW #481

And so here we are, another week closer to the crop, which is now less than 3 weeks away. I've been looking for stuff that needs a new home, and whilst doing that, ended up completely resorting my stamp folders! Not entirely sure how I got there, possibly worked better as a spur of the moment thing, if I'd thought about it first, I don't think I'd have started, lol.
I did have a considerable number of them sorted into folders by manufacturer, but was starting to realise that meant I forgot entirely about some stamps. Like, I had leaves and trees as a subject in one folder, but equally had a lot of both stamps in folders by manufacturer, so if I was looking for a tree, they'd get missed. So now, apart from Tim, who is now up to 3 folders(!),  Lavinia stamps and Stampscapes, they are all stored by theme. 27 folders of stamps, and 4 folders of Christmas stamps. I have about 30 wood mounted stamps, all fairly large, so they've not been unmounted. Then there's an A4 Really Useful Box of Visible Image stamps, and a smaller box of Card-io/Rubber Stamp Tapestry stamps.  At least now, when I've moved those odd items from that end cube, I have 2 new storage spaces!

Hubby contributed to the stamp collection again, with these from Whimsy stamps.  I'm not normally a 'cute' person, but the bunny upside down in one of the stockings, and cute penguins are a winner. Above is a storage box for blending tools for me to decorate and assemble, and it has a couple of drawers for spare foams etc.


Stamping an insert for our Grandsons birthday card, and it was clear that this stamp wasn't straight. The Happy part is definitely at an angle to Birthday. So, out came the scalpel, I split the two words, and now I can stamp it straight, as well as switch the individual parts with other Birthday stamps.


Bottom was the original stamp, the top one after surgery! The stamp was by Dovecraft, so only cost a couple of quid at most, and it was an easy fix, but really, what ever happened to quality control? I remember once having to throw a wood mounted rubber stamp from a set by Whispers, because they had spelt- in capital letters- Congratulations as 'ConGARTulations.'


Onwards then.


This is Morts card, cut with the Silhouette again. Sorry if it looks a bit blurry, I think the glitter in the cardstock has confused the camera a bit.  I'd already written it and sealed the envelope when I looked at this pic.

I'll blog the card, and the insert,which I jazzed up a bit, later in the week.


Some  Freebie stamps I picked up, with Creative Stamping magazine.


One last thing. You all remember this monstrosity from a couple of weeks ago. Well, one of my commenters, Jackie, Suggested colouring it with Alcohol inks. Brilliant.


Came out a little bit streaky, but at least now I can look at it without cringing.😉


Oh, almost forgot. Had a follow up with my Oncologist on Monday, after the CT scan. Seems the nodule is still shrinking, so all is good. So the radiotherapy I had, which is called SABRE, or Cyberknife, is still working a year later.

And finally................................


Remember to leave your link over at Julias, The Stamping Ground, and we'll all do our best to come visit.
Last thing, are we doing ATC's for the crop, does anyone know?


Wednesday, 14 February 2018

WOYWW #454

And a Happy Valentines Day to everyone!  Our mid-week desk-fest begins again, over at  Julias, the Mistress of the Desks,at The Stamping ground.
So, what do i have for you this week? Well, I took myself out to town for a walk around yesterday, and popped into The Works, as you do. Snagged a couple of bargains,some Black acrylic paint, and some clear Banner stamps.

 Made some Stampscapes cards, in the post below.
 Then I was working on Beloved Hubbys Valentines card, and picked up one of my pairs of scissors, when I remembered something I saw on a TH video from Creativation, on some Tonic scissors.
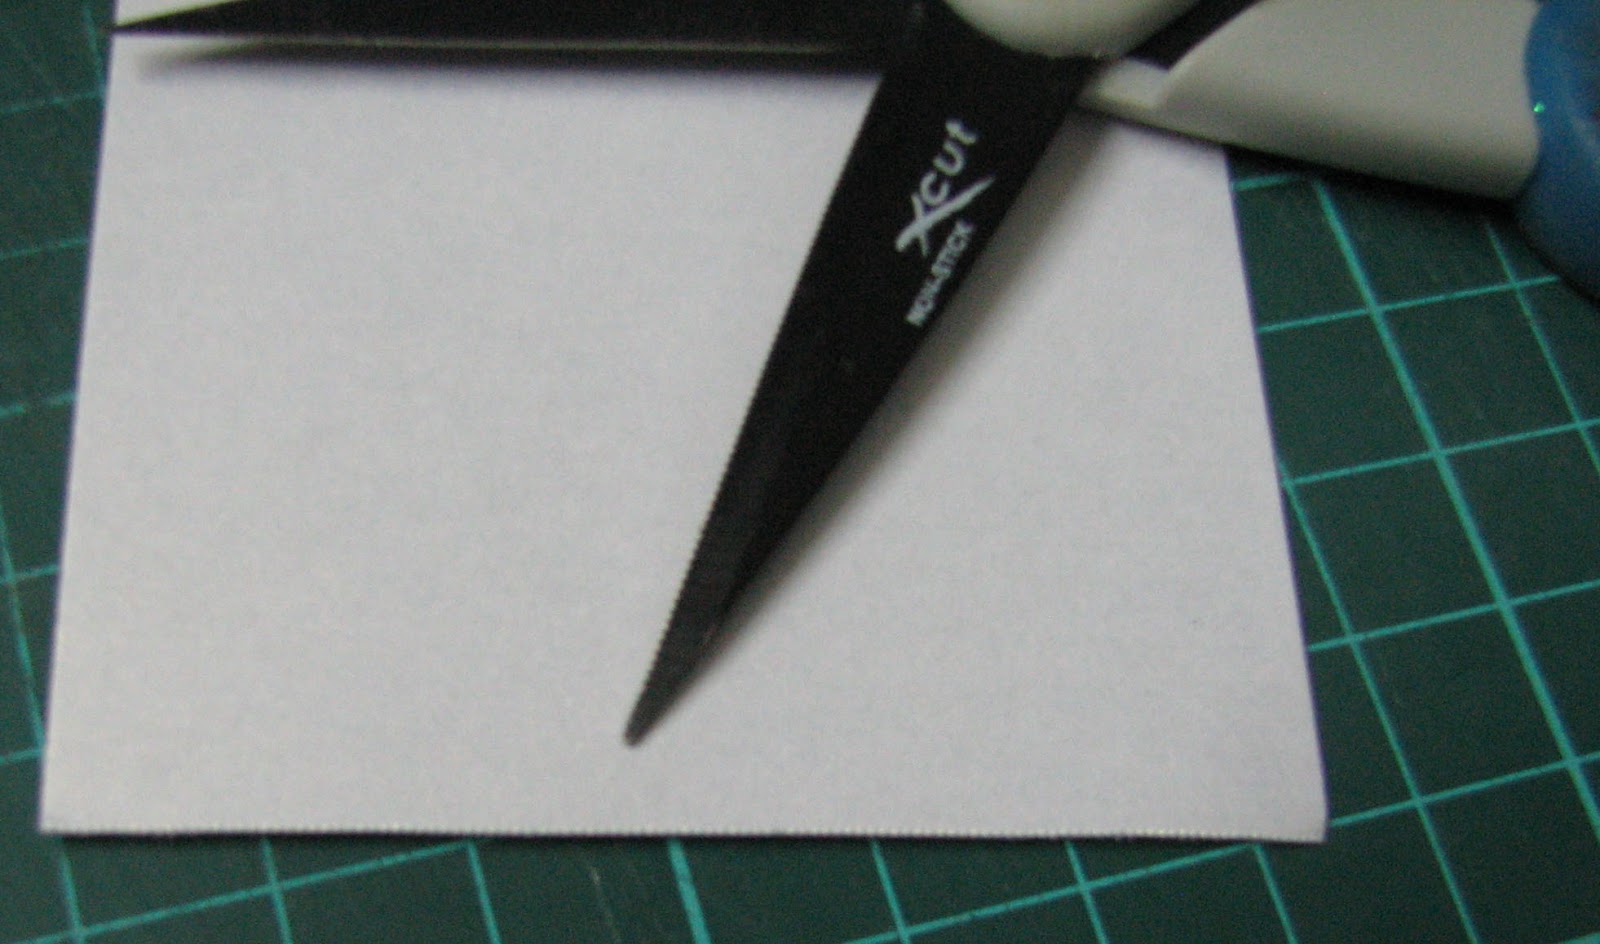
 He said as well as being non stick the pair of blades had one that was serrated, and one plain. So you could flip them over and either cut a tiny serrated edge, or a plain one. Now, rather like the other Tonic releases, these looked exactly like my X-Cut ones I've had for quite a few years. I kept meaning to check mine, as the main reason I rarely use them is I don't always like the serrated edge if I cut something out with them.
 And guess what? Yep, mine too have the same pair of blades. Leaving me with two questions- how have I never noticed this? and How come EVERY single time I've used them, I've always picked them up the same way?


Not sure how well these pics will show it, but  this way up you will get a smooth cut . I cut a piece off the card its lay on to show a smooth cut.
 Serrated blade at the top, smooth one at the bottom.


This way up- serrated blade at the bottom- you get a serrated edge, hopefully you can see it on the cardstock.

 So, apart from this exciting discovery, it convinces me even more that Tonic manufacture X-Cut.


And posted at the bottom so it won't appear on our FB feed, Beloved Hubbys card. I've never made a shaker card before, and I'll blog it in a few days, as it wasn't so much a learning curve, as a learning Ski slope, and I can't ski!


And Finally....................


Speaking for most of us, I think.😏


Thursday, 8 February 2018

A few Stampscapes Scenes.


 I have made about a dozen of these scenes, but will blog them in small batches,as it will be a photo heavy post!


Stampscapes Rubber stamps are exactly what they sound like- stamps that create scenes- landscapes/seascapes/skyscapes. This link goes to the makers US website- Kevin Nakagawa- and this next link goes to the UK supplier.
Visit Kevins website for loads of picture inspiration, and he has a massive list of You Tube videos on all aspects of scenic stamping.


The stamps blend together seamlessly, so masking isn't required, and they can be arranged and combined in an almost endless variety of scenes.

   For all my scenes, they were first stamped out in Black Dye ink, and the colour added later, using the Colorbox stylus tools and dye based inks. Adirondacks, Distress, Marvy and Memento were all used to colour them. You could also use sponges or daubers, even brushes to add your colour, I bought the Stylus tool & tips as that's what I'd watched Kevin using.


Starting with the first picture, the top left card was stamped out using the following stamps:
 144F, Cabin with Fence,
149F, Waterside Bluff, Right,
196F Pine Tree and
244E, Tree Cluster.

The cabin was stamped first, then directly below it the Waterside Bluff, R. This also comes in an opposite image, Waterside Bluff Left.
Following that, the Tall Pine on the left was added, then the 'Bushes' were stamped, using just the top portion of the Tree Cluster.
Although I said there was no need for masking, by using a torn piece of paper towel as a 'mask', then stamping the Tree Cluster with just an upper portion of the image above the top edge of the paper towel, treetops can become bushes, or tall trees made shorter, and appear to be growing out of the grass.
 The colour is added in layers, starting with the lightest value of colour, then moving up to a mid tone, then finally your darkest tone. 3 colour values are often all that is needed.The water only used 2 blue shades, the sky, 3. Moving on to browns for the cabin and rocky edge of the Bluff line.
 Followed up with green tones for the grass, the added in some meadow flowers using gel pens. You could of course use coloured inks to stamp out your scene.


The second scene, top right, picture 1, shows how you can combine different images.


 The stamps used here are:
359G, Snowy Creek, stamped out first. Although it's called Snowy Creek, it can just as easily become a creek surrounded by grass, simply by how it's coloured.
 
Next comes 144F, Cabin with Fence again. It becomes a totally different scene to the first one, just by changing out one stamp.


Next addition is 251C, Sedge Filler, which is stamped out on both banks, to turn it into a grassy meadow, rather than a snowy scene. There are a number of grass 'filler' stamps in the range, and really help to bring a scene to life.
Next the addition of some trees, again using 244E, Tree Cluster, and added in exactly the same way as for the first scene.


 Now the colour addition starts, and it is good to have some light- the white of the page- left in the sky, for a light source, and reflecting this on the ground/water in your scene.


Again, 3 values of blue were used in the sky and water. Then onto green for the grassy areas.
  A very pale green to start with, followed by a yellow green.


Then a slightly darker green was brought in,
 and then a quite dark one, all the time leaving some areas in the lighter shades, so that your scene has some depth.


 Finally some meadow flowers added again with gel pens, then a final bit of stamping, right at the front,068D, Reeds Large.


OK, final scene in this post. The longer scene uses a stamp called 049G, Lakeside Cove lge.
The image actually looks like this:
but I made it look the way it does by using a slightly longer piece of card,and not centring the image, but stamping them side by side. The 'Northern Lights' were created by streaking in some light green and purple/pink in the sky, then building up some blue layers on top. That was also reflected in the water. Brown added to the rocks, and stars created with white gel pen.

All the images were done on glossy cardstock, but matte coated works just as well. When the scenes were dry, they were sprayed with Artist Fixative, which helps to bring back the colour, as it does fade a little on drying.

All these scenes are now posted on my Stampscapes Gallery page, and all the stamps used in each image are listed next to the photo.

An End of an era

An end of an era

I write this with a broken heart, that only time can heal My beautiful, wonderful wifelet Shaz (Silverwolf) passed away peacefully in the ea...