A warm welcome to all my visitors,

Thank you for taking the time to come and look at my blog, I really do appreciate it. I would love you to leave me a comment, even if it’s just to say Hi. It means I can come visit you!

All my designs are original, so copyrighted to me. If I have been inspired by someone elses work, I have named them in the post, and where able, I have provided a link.

Please feel free to use my designs for inspiration, I just ask you to credit me, and provide a link back to my blog.

Thanks, Shaz XX

Wednesday 30 August 2017

WOYWW #430

Whats on your Workdesk Wednesday, hosted by our lovely Julia over at The Stamping Ground, as always. Mine? Not a lot, to be honest. Just the stuff I've been working on over the weekend.
 Another bunch of Stencil Paste & Hot Foil pieces, all of which are in the post below this. Tim Holtz layering stencils this time.


I did some sheets of foil on some scrap card, so I could try die cutting it for sentiments, and that worked fine too.


So now I have to turn a load of these pieces into cards, which will happen over the next few days..
 But for now, I think I've foiled pretty much everything I can, maybe do some more when I've used up all these.


Not much more going on,  Thursday I have my first Radiotherapy treatment, and if the plan he spoke about goes as planned, it'll be three more next week, then one on the Monday after, and all done.
 After that, I have the Tim Holtz Workshop to look forward to, followed the week after by our Crop meet in Llandudno.


And finally...................

Monday 28 August 2017

Hot Foil- Part Four, and the last for a while!

So, the last and final post on this subject for a while, until they start appearing as cards, anyway. Just for reference, the first three parts are here: Part One, Part Two, and Part Three. 
This is also a bit of a round-up post, as the experiments using the Dreamweaver Pastes is also here.
As Julia commented, I'm now almost foiling anything that stands still long enough! But, I did have a thought that it would probably be nice if I could have some foiled sentiment die cuts. To that end, I took some card off cuts- see, I'm being good and using stuff up- ( yes, I know I'm making more stuff that will need to be used up, but that's a minor quibble). Anyway, card offcuts- and spread them with a thin layer of stencil paste.
 Now, as it seemed a waste to wait for the laminator to heat up, just for a few strips, I also made a whole pile of other stencilled sheets, using Tim Holtz layering stencils. As you do.

It doesn't need to be very thick, just an even coating. I reckon you could even do this by brushing it on with a foam brush.


There are two with white paste on white, using Christmassy stencils, and two small ones using some of the Mini Halloween stencils.
The rest are using black glossy paste.


So, first up are the plain strips.


Done in an assortment of colours- an advantage to getting some of the foil sample packs- and means I should be able to cut sentiments to match most card bases.

 The test now, of course, is will it die cut?


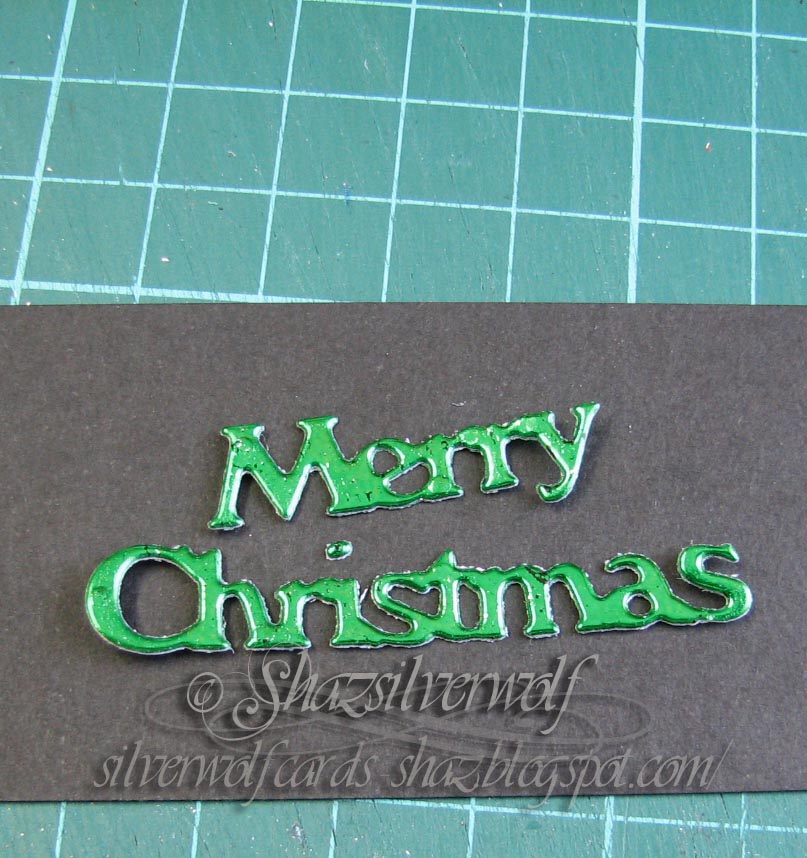
 To try it out, I chose a small die, as I thought that would probably be the hardest test for it. This die is from Crealies, and they have a lot of really useful sentiments in this size, and at a very reasonable £3.75 each.
I cut it from the green foil, as one of the images I did the other day was a Holly Wreath, so I thought this would be used on that one.
 The result? It cut through fine, and just simply pushed out of the  base.
 It even cut out the tiny dot for the 'i'.


So that's going to work just fine, and of course if you wanted to die cut a larger shape, like a layering piece, for instance, you could always foil it after cutting.


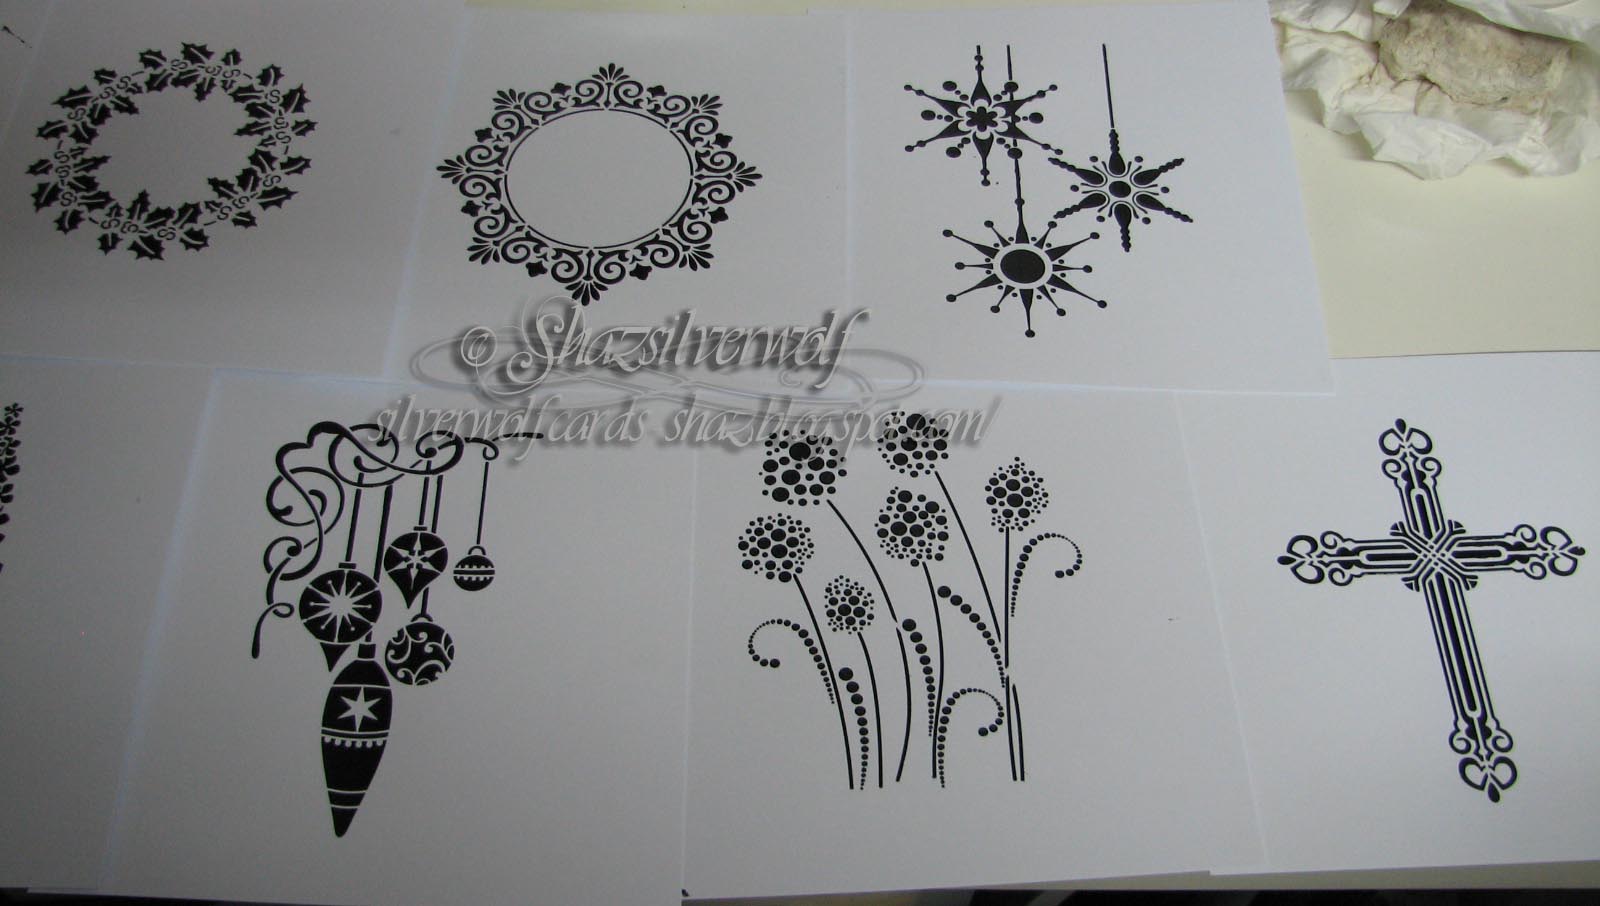
And back to those pieces I'd done with the layering stencils.


From the left the stencils are: Lace,Latticework & Mosaic.


 Blocks, Flourish & Trellis.


Gothic, and two done with a new Stencil called Splash.


 Here, the central one is Mosaic, and the two either side are another newish one called Flames.

Oh, one thing, you may sometimes find, especially with an intricate design, you need to 'burnish' it a little, to get any stray extra bits of foil off, like you get with Gilding Flake. I just used a stiff stencil brush, and that worked fine.


Skulls & Halloween words from Mini Stencil Set #23.


The last two, called Snowflakes & Holly Bough.


And now on to the Dreamweaver Embossing pastes. I had a feeling these were not going to work as well,as they are a much drier paste than the Sweet Poppy ones, not entirely down to how long I've had them. They were always quite a thick paste to spread, whereas the SP ones are gloopier, for want of a better description!
 As you can see the foil only stuck in odd patches, which does give a nice distressed look, but worthwhile only if that's the effect you wanted. I'd used a Copper foil on the guitar, and a silver one on the Copper Paste.


 Here I used Gold foil on the white paste, and Silver again on the Black.Of them all, the Black has the driest consistency, and definitely gave a poor result.


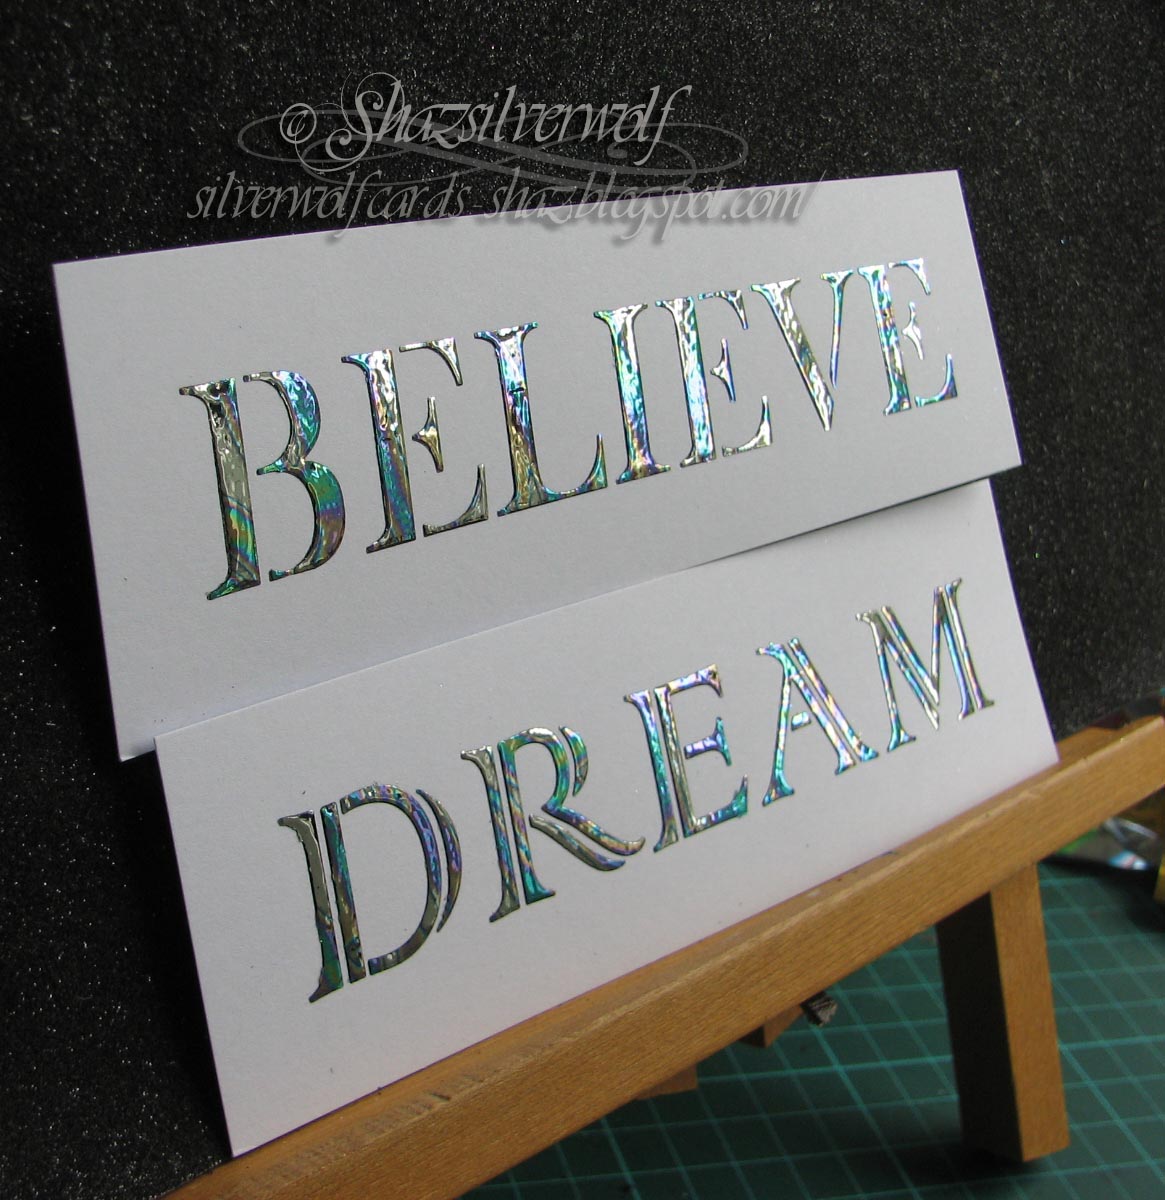
Last one, and a Translucent paste with a holographic foil.
 So overall, this doesn't work as well with Dreamweaver pastes, as it does with the Sweet Poppy, although of course it's possible that the age of my Dreamweaver pastes may have had some bearing on the results.


Finally summing this up- It's fun and very easy, especially as you can do it with just an Iron.
Foils are widely available, just don't buy the TODO brand, it won't work the same.
You can layer foils, if your piece is bigger than one sample sheet of foil, the only foil that will stick is the one in contact with the paste, so any overlap will not affect the result. You can trim off any excess  'good' foil, after you've peeled it off, and keep in a tub for later use.
 Any paste not covered with foil WILL MELT & stick to your folded paper carrier sheet. Apparently, you can avoid this by covering any uncovered areas with Vellum, according to the MINC site. You could, I think also use the clear film sheet you peel off the foil,if you put it on upside down, as I found that didn't stick, lol. Watch out for any paste on the back of your piece you intend to foil too, or that will melt & stick. We all know how I discovered that, don't we?

Thursday 24 August 2017

Hot Foils Part 3- some experiments

Back with the foils, and some experiments with glues, and stamping. One thing I realised, is that as you can add these foils with an Iron, that opens up the ability to use them in scrapbooks, art Journals and even possibly canvases!


 By the way, I found out that WOW! Embossing Powders also make a Hot Transfer Foil,called Fab Foil, and the packs are 1 Metre x 10 mm, cost £2.50, and come in quite a range of colours. Sorry the Purple foil pic is a bit fuzzy, I think it's all the reflections.


Anyway, I have a couple of glue pads, one is called The Essential Glue Pad, by Tsukineko, and the other is a Palette pad. I've never had much success with either one, to be honest, so I thought trying it with the foil & hot iron was worth a shot. I also tried some glues I have for Gilding flakes & so on, a Honey Doo one, one from Indigo Blu, and one from Sweet Poppy.


Then I had another thought. I wondered if it was possible to stamp with Stencil Paste? And guess what? It is!


So here are my 6 experiments. I wrote on each card what glue I was using, then used scraps of foil over them. From left to right, top to bottom they are: Essential Glue Pad, Sweet Poppy Stencil Paste, Palette Glue Pad, Honey Doo Mixed Media Glue, Sweet Poppy Wunda Size,and Indigo Blu Flitter Glue.


The big reveal. As I pretty much expected, the Essential Glue Pad & the Palette pad were a total fail. Even though the Essential pad says 'No Heat Needed', I've never had much luck with it as a straight glue, so this was no worse.

The Sweet Poppy Stencil Paste worked really well for being stamped, so this has real possibilities.
 Bottom row, the Honey Doo and Indigo Blue glues both took the Hot Foil really well.
 The Sweet Poppy glue I may have put on too thinly. I also realised it seemed very liquid in the bottle, and I'm sure it was thicker than that before, so it may just be past it's best. At the least, I need to try it again in case it was just me.


 The last thing I tried in this session was on a canvas. I had some I'd stencilled on with paste a while ago, so gave one a try.


It's a canvas board, and I probably ironed it for about a minute, as it was so much thicker than cardstock.


This was the result. Not a perfect transfer at all, but I think that may be due to the textured nature of the canvas. I recall all the info I read about foiling did say you needed a smooth surface. Or maybe the paste needs to be fresher than this was?
 But I think it could work well for giving a distressed look, or if it was added in small patches, for instance on the wings.

So all in all, a few possibilities raised here, and I have some more experiments drying right now. I want to see if my Dreamweaver pastes work for this, and also if regular press-down foils work this way too.

All these were done with an Iron by the way.

Wednesday 23 August 2017

WOYWW #429

Do you know, I'm shocked at how fast these weeks are going! I mean, third week into August already. The C- word will be with us far too soon for my liking.
 But that means it's Wednesday, and time for Whats On Your Workdesk Wednesday, hosted by our lovely Julia over at The Stamping Ground.


On my desk right now is the pile of Hot Foil projects I was talking about trying last week. There are two posts below this about them, both are very picture heavy, which is why I split it in two. If you want to check them out, you might want to come back when you have some spare time😀😀But it works extremely well, and what's more, you can do it with an ordinary iron as well.


 The small metal stencils are for the next round of experiments- I want to see if it works with normal press down foil,like the Stix2 ones above, and also if the process will work with Dreamweaver pastes, and then stamping with a glue pad. That's something that's never worked very well, so I'm going to see if heat makes it work better. It would also mean I could foil stamped images. So we'll see.


 We paid a visit to Amelias Crafts on Friday, and these were the things that I put in my basket. I liked the Woodware Wreath stamp, that's going to make some nice simple C Cards, and that Embossing Folder has lovely wavy lines on.
 However, this picture is what Beloved Hubby added to the basket.
A Sweet Poppy Dragonfly stencil, and  a whole pile of stamps. Those feather stamps are HUGE! To give you an idea, that pack is A4 sized.


This pic is an idea I picked up from Diana Taylor at Velvet Moth Studios blog.  She was storing spare die cuts in trading card/ currency pouches in an A4 binder, which I thought was a great idea, so I've just done the same with all my spare ones.


...and finally......


Tuesday 22 August 2017

Part Two- Hot foil, a laminator or an Iron.

This Butterfly was the last image I left yesterdays post with, and I think it's one that shows how stunning this process looks.Moving on with more images, again this is a photo heavy post, so be warned,lol.


This butterfly panel, showing two views of how the colours change depending on the light source, was done with a Holographic foil.


This one used the Sunset Rainbow foil.


Back to a holographic foil for this one of two dragonflies.


I cut the base card to match the shape of the image, and it's covered in gold foil. I got this really cheaply from E-bay, from China. 50 A4 sheets for £2.49! and 29p shipping, lol.


This Steampunk dog has the same foil on it.


These are two new Sweet Poppy stencils, and I covered these with the Oil on Water (Marble) foil.


Now we come to the pieces I did with my iron. I'd wanted to have the stems green, and the flowers a different colour, and this was a bit of a fiddly process to be honest.


Requires some patience, and preferably the ability to hold your breath for long periods. It's a bit like working with Gilding Flakes, one small breath scatters it everywhere.

 I put the image with it's foil inside my folded paper, and placed that on top of an old tea towel I use for drying my stamps, on top of my glass mat. The Iron was set to Max, and I reckon I ironed it for about 20 seconds, maybe 30.

Turned out perfectly, as you can see. The flower heads look jewel like, almost as if they are covered in Acrylic gemstones,or sequins, but without the bulk.


 I did the same here, using a foil that came in blue strips for the flowers.
 I chose these pieces to Iron, as I thought there was more chance of the small pieces moving as I fed it through the laminator, and I wanted to see how well an Iron would work. So two birds, one stone.
 By the way, there is nothing special about my iron. I wasn't going to spend out for a 'Craft' iron, and intended buying a travel Iron to do craft stuff with. However, I couldn't find one anywhere, so I just bought the cheapest Iron either Tesco or Argos had, can't remember which I got it from.


So, if you don't have a laminator, but do have stencils & paste, then you can still do this technique easily.


Right, we're almost at the end now, this is the last piece.


This foil is called Tropical Sunset, and I'll list the foils and where I got them at the end.


So, I love how these turned out. Most I think need nothing more than a sentiment adding.
 I still have a few experiments I want to try. I want to see if this works with ordinary rub down transfer foil for one. And I also wonder if this will work with rubber stamps and a glue pad. I've never had much success with Glue Pads, they've never seemed to stick properly in the past, so it's worth a try. I'll try both of those with the iron, in case the laminator gets too hot for them.
 I also want to see if this works with Dreamweaver Stencil pastes, as I have a few of those in my drawer too.
 And I want to see what the result is with different colour pastes.


It seems to me I should have given the basic instructions somewhere, and I haven't.
 You need to create your stencilled image, and Julie used Sweet Poppy Glossy Black Paste, which is what I used. I tried Glossy Bronze paste on one, and that seemed to work fine. Then leave the image to dry overnight, before adding the foil. And that's all there is to it.
 I love ideas that give me new ways to use stash, and this does that, as well as employing my laminator for more than just creating stamp storage sheets!
 I shall be trimming down the foil sheets I peeled off, as most have reasonably sized usable areas left, ideal for creating designs using more than one colour.


 Foils bought from Tonertex.:

Multi Coloured Assortment pack, which contains:  67 sheets 100mm x 100mm:
12 sheets Tropical Sunset
15 sheets Turquoise
12 sheets Slimline Rainbow
8 sheets Carnival
10 sheets Hologram Silver
10 sheets Hologram Gold
 I added to that Marble Foil and Seasparkle foil.


Foil bought from Patsy May Crafts: (on EBay)
Silver Mirror Pattern ( Holographic)

Gold Foil from E-Bay


A bit of advice on foils- when you are looking to buy them, you want TONER foils, NOT TODO foils.  I was ordering from Patsy May, and she was kind enough to take the time to advise me that the TODO foil I had ordered would not work with a laminator, apparently it's designed specifically for the TODO machine, and works with pressure & dies. It has a sort of adhesive on the back, so will stick completely to the card. So, as long as it says TONER foil, it's fine.


An End of an era

An end of an era

I write this with a broken heart, that only time can heal My beautiful, wonderful wifelet Shaz (Silverwolf) passed away peacefully in the ea...