A warm welcome to all my visitors,

Thank you for taking the time to come and look at my blog, I really do appreciate it. I would love you to leave me a comment, even if it’s just to say Hi. It means I can come visit you!

All my designs are original, so copyrighted to me. If I have been inspired by someone elses work, I have named them in the post, and where able, I have provided a link.

Please feel free to use my designs for inspiration, I just ask you to credit me, and provide a link back to my blog.

Thanks, Shaz XX

Showing posts with label Papermania. Show all posts

Sunday, 26 April 2020

Christmas Card Club #9- Bauble/baubles

Back with more Christmas Cards, this fortnights theme has been chosen by Kate, and she'd like to see a Bauble or Baubles on our cards.
 I pulled out quite a few on the theme from my Christmas UFO's, and ended up with another 18 cards for my box.


This is the collection of UFO's, some, like the glittered pieces, I did last year, others are leftovers from a couple of years ago.


In the end, not all of them got used, so they're back in the UFO folder.


I also did some pieces run through Bauble EF's, to use as backings.
 I have 3 folders with Baubles on, the blue one is by Creative, called Baubles, The one on the top right is an old Papermania one, and the one below it is another oldie, from Cuttlebug.


These are glittered baubles, the stamp was by Great Impressions, bought many years ago at the NEC.

I think I was most surprised to find matching glitter card in my stash for all of them!
 Die cut banner and small sentiment peel off added, along with a couple of acrylic gems. I'd added the Cuttlebug folder backgrounds to the card base.


These four were done with a Sweet Poppy stencil & paste, with a small sprinkling of glitter added. The stencil is called Damask Baubles.


 These four use the Papermania EF, and I've just added a few acrylic gems for a little bling. Added a die cut banner and peel off sentiment again. Also used up some Christmas paper from my stash to cover the card bases.


Final four  are again Sweet Poppy stencils and paste, this time with foil added. The stencil for the two on the left is called Christmas Season, The top right is Snowflake Bauble, and the bottom right is Holly Baubles. All were matted onto some holo/metallic foil card, then the card bases had some Christmas stash paper on them.

 So thats it, my cards for this fortnights challenge all done.

Tuesday, 10 September 2019

New Home cards with Chocolate Baroque stamps

Been a while since I did a blog post with makes, and these have finally been finished. I picked cardstock to matt them with that matched the colours used in the houses.It's from a Papermania cardstock pack called Assorted Colossal Colours, Textured Cardstock, comes in A5, A4 and 12x12" packs.
 
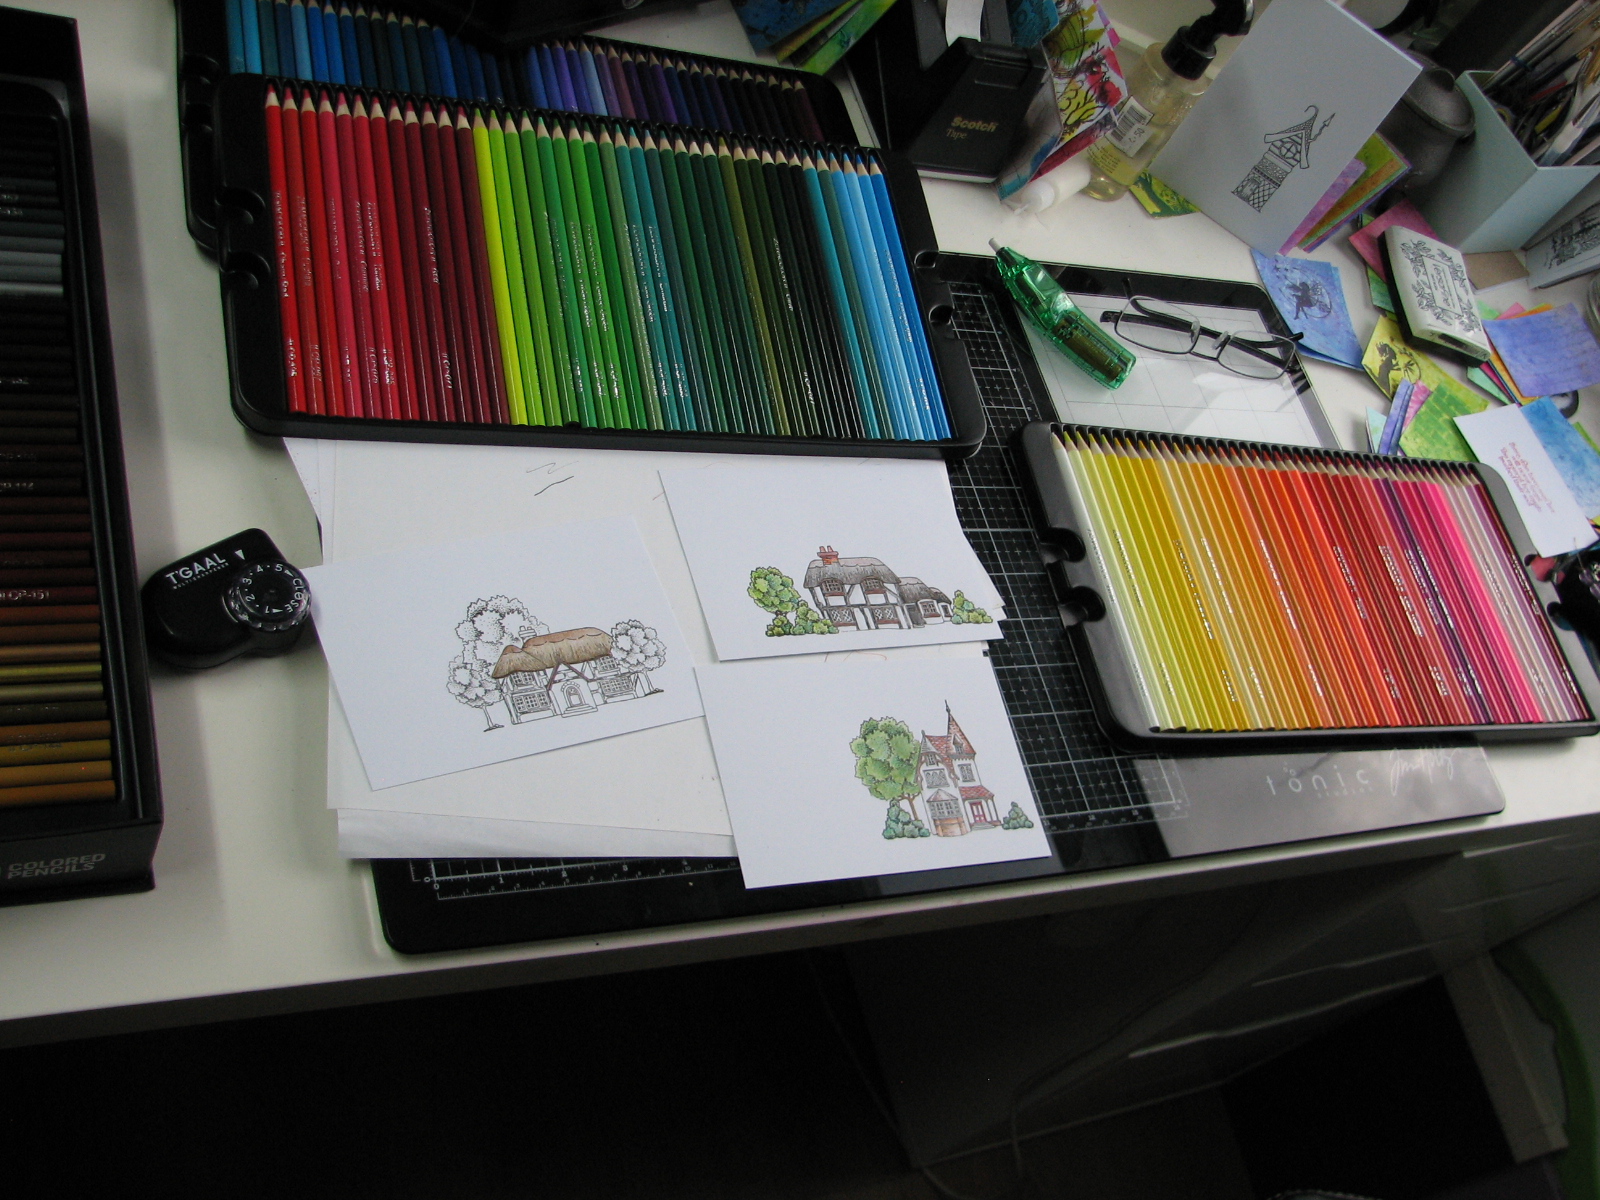
All the colour to the houses was done with the pencil set I bought recently from Amazon,  a set by Zenacolor, 160 pencils for £27.97. I found they blended fine, and produced good colour.


 The stamps I used are from two different Chocolate Baroque sets, Townhouses, and  English Cottages.


  I used some masking to allow me to stamp trees and bushes, either behind or in front of the houses.


For this I used Eclipse masking paper roll, again from Amazon. It's a great product, the whole of the sheet has a tacky glue like Post its on the back, and you can reuse each mask many times. It.s also 10 metres long, so will last for ages. I've stuck the masks onto some plastic from packaging, and dropped that into a page protector and stored with the stamps.


Once I'd finished colouring the houses, I wanted to just lightly add some grass & sky to them.

  For this I used two shades of green and blue Distress ink, and the Professional Make Up brushes. They are great for a very light application of colour, although you can easily deepen it by adding more ink if that's the look you want.


Again, I replaced the masks so I kept the colour around the images. I also added some paths to the door on some them, one or two with a Cobblestone path by Lavinia stamps, others just with a black fineliner. The Lavinia stamp is available in two sizes, large & small,I have the large, but I think the small would work better for this.


The sentiment was also cut from a shade of the matting layer.
 The right hand sentiment was bought from The Range,in  their £1 boxes, and the one on the left comes from a Phill Martin set of dies, called Scribbled Collection, that includes this one, plus the words Job,Baby Boy & Baby Girl.


 A really useful die set, the 'A New' part is a separate die, so can be combined with any of the other words. I particularly liked the inclusion of Job, as it's rare to see a die with that.


Tuesday, 28 May 2019

Cards using Clarity stencils & HoneyDoo Stamps

A few weeks ago now, I spent some time creating these panels.
  I used two different Clarity stencils, Framework Circles, and Framework Squares. Both are 7" square, and they come with the cut-outs too, so you can mask off areas easily. These cards are just from the circles ones.


  The cardstock is Clarity too, they make a 7" square cardstock pack, which fits the stencils perfectly.

All the backgrounds were created using a light, mid and darker ink, blended using brushes.


By adding each of the two darker colours over smaller portions of the shape, it helps to create a  more 3D look to them.


If you use a dry baby wipe to bring in the colour left on the stencil around the shape before you lift it off,  it does help to define the shape nicely. I picked up that tip from Barbara Gray.
 Most of these have now been turned into cards, and I'll share a few here, and do another post for the others, as there's quite a lot!


These first two use one of the flowers from a HoneyDoo set called Cherry Blossom. The sentiment is a Crealies die, and was cut three times and stacked up. 


These three also use a Honey Doo stamp, this time called Flower Power. In both cases the set comes with 3 sizes of flower, and a stem, or leaves to build up your image.
For all of them I restamped the image onto coloured vellum, then added those to some of the flowers with Glossy Accents, and either Stickles or Glass flatbacks to the centres.

They are all matted onto toning cardstock, then onto an 8" card blank.


In some cases, I lightly stamped a script stamp into the circles, using second generation stamping, and the darkest colour of ink used.


The final three in this post used butterflies, in exactly the same way. No idea what brand the stamp is,  I've had it years, and it's just a random one.


The Best Wishes die is from Crealies, and the Thinking of You is a Sue Wilson Mini Expressions die.

The cardstock used for matting is from a pack by Papermania- Capsule Collection Textured Cardstock.
 It comes is a variety of sizes, A4-which this is-A5 and 12x12. The A4 pack I get from The Range, and they seem to be the cheapest place to buy it, at £9.99. You get 75 sheets of cardstock, one of each colour, so you get quite a lot of shades of each colour, making matting a breeze.


Tuesday, 29 January 2019

UFO's Part 3

Still working down my UFO's, these two using another Clarity stencil, Framework Circles.
 I used Distress inks in two shades, applied with brushes.


After I'd done these, I really had no plan on how to use them, which is how they ended up as UFO's.
It occurred to me that flowers were the way to go, and this one is from a Honey Doo set, called Cherry Blossom, which has this flower in 3 sizes, this is the middle sized one. It also has leaves to go with them.


Getting them centred turned out to be a breeze using the Stamping Platform, but you do need to make sure your cardstock is accurately cut to size all around in order for you to be able to stamp the flowers central. I placed the first flower in one corner, then just rotated the cardstock each time to do each corner, then I moved the stamp to the space between the corners, then again just rotated the cardstock.


I'd inked the blue one to give me a darker shaded edge to each circle. Tumbled Glass and Salty Ocean Distress Inks. The flowers are stamped in Archival Cobalt Blue.


After I'd stamped all the flowers, I took a strip of pale blue vellum, and stamped some more, so I could add some layers. Wasn't sure if I wanted to double them up, so did a few extra. Stamped in Archival Cobalt, and as it's on vellum, the ink stays wet long enough to add embossing powder, and I used Stampendous Crystal to give a little sparkle.


 The orange one had been inked in Wild Honey  & Spiced Marmalade, and this time the flowers were stamped in Archival Tiger Lily.

I added a Happy Birthday sentiment in the centre circle on both. This sentiment comes from a cheap set of sentiments from Aliexpress. They are mainly small sentiments, which are often useful.
The only downside is that being cheap silicone stamps, they are rather thin, and even on the 'clear' side of the Platform, they wouldn't pick up on the lid.
However, I found a cheap and easy fix for this.  A while ago, I'd bought a silicone non stick baking sheet from Poundland, intending to use it as a craft mat.
 When I tested it out underneath my card on the platform, it raised the cardstock enough to pick up the stamps. So I cut a piece to fit the platform, as it's about 2 feet square. It will be useful, as I've found in the past that some of my unmounted bare rubber stamps are too thin to work in the platform, even on the clear side. So there's an easy fix for anyone having the same problem.


Before cutting out and adding my flowers, I added some colour to the ones on the cardstock with Prismacolor pencils, then did the same on the back of the vellum ones.

One of the things I'm loving about the Prismacolor pencils is the ability to shade just using one colour of pencil, simply by varying the pressure applied. Quick & easy is definitely a thing for me.


I matted each panel onto a matching cardstock, then mounted onto a 7" card blank, which I did have to trim slightly, as I couldn't get an even border of white card base.


The flowers were added with a dab of silicone glue, then some sparkly glass gems added to the centres, using Multi Matt Medium.


The cardstock used for the mat is from a pack by DoCrafts, the Papermania Capsule collection. It's slightly textured, and the pack has 75 sheets, each a different shade. I get them from The Range, and they come in A5 and A4 sizes, and are great for die cutting too.

Sunday, 4 November 2018

Card strips, and getting more mileage from your dies.

Six cards made using strips of off cuts, sorry if the image looks a little blurred in places, Glitter & camera lenses do not play nicely together!
I'd started off making up some panels- I haven't used the rainbow ones yet.

I had a thought the other day about a design, I'd recalled the Tim Holtz Umbrella Man die, and realised I could chop off the umbrella, and add a bunch of balloons instead.
So, I cut 3 men from the striped panels, and 3 from plain card. I also cut 3 sets of balloons from the striped panels, and a whole bunch from some pearl paper off cuts. The balloon die is semi cut through around the balloons, so I could easily separate parts and paper piece them.
 I cut balloon sets also from plain card, so I could do the piecing onto a firm base.
 I *think* the balloon set came from Aliexpress.


For the first set I made, I used the Umbrella man cut from the strip panels, and matched that up with paper pieced balloons,and a strip of glitter card/paper, die cut with a curved line die, at the bottom.

The sentiment is a Crealies die, cut from 3 layers of black card, and one layer of glitter card, and stacked up for dimension.

I  cut away the Umbrella from each one, and then re-shaped the arm a little to look more realistic.
 As the balloons are part cut, I used a double layer of foam pads behind the Heart balloon at the front, and a single layer under the others.


This black card base is a top fold card, as is the black and white one. C5 size.

Put together exactly the same as the first.


The brown version has a sheet of backing paper added, from an old paper pad by Prima.

The next set of three use the plain card Umbrella man, and strip panel balloons.
 The all also have a paper backing, The grey one on the right from an old Papermania pad set with a Steampunk theme, the other two from the Prima pad.


They are all created the same as above. One Umbrella man facing the other way, I put the cardstock on the die upside down, lol.

 The Birthday Wishes sentiment is made from two Crealies dies, Happy Birthday and Best Wishes. Again, another way to stretch your dies a little.

 You can make these more feminine or masculine, depending on the colour choices you use.

An End of an era

An end of an era

I write this with a broken heart, that only time can heal My beautiful, wonderful wifelet Shaz (Silverwolf) passed away peacefully in the ea...