A warm welcome to all my visitors,

Thank you for taking the time to come and look at my blog, I really do appreciate it. I would love you to leave me a comment, even if it’s just to say Hi. It means I can come visit you!

All my designs are original, so copyrighted to me. If I have been inspired by someone elses work, I have named them in the post, and where able, I have provided a link.

Please feel free to use my designs for inspiration, I just ask you to credit me, and provide a link back to my blog.

Thanks, Shaz XX

Sunday 26 April 2020

Christmas Card Club #9- Bauble/baubles

Back with more Christmas Cards, this fortnights theme has been chosen by Kate, and she'd like to see a Bauble or Baubles on our cards.
 I pulled out quite a few on the theme from my Christmas UFO's, and ended up with another 18 cards for my box.


This is the collection of UFO's, some, like the glittered pieces, I did last year, others are leftovers from a couple of years ago.


In the end, not all of them got used, so they're back in the UFO folder.


I also did some pieces run through Bauble EF's, to use as backings.
 I have 3 folders with Baubles on, the blue one is by Creative, called Baubles, The one on the top right is an old Papermania one, and the one below it is another oldie, from Cuttlebug.


These are glittered baubles, the stamp was by Great Impressions, bought many years ago at the NEC.

I think I was most surprised to find matching glitter card in my stash for all of them!
 Die cut banner and small sentiment peel off added, along with a couple of acrylic gems. I'd added the Cuttlebug folder backgrounds to the card base.


These four were done with a Sweet Poppy stencil & paste, with a small sprinkling of glitter added. The stencil is called Damask Baubles.


 These four use the Papermania EF, and I've just added a few acrylic gems for a little bling. Added a die cut banner and peel off sentiment again. Also used up some Christmas paper from my stash to cover the card bases.


Final four  are again Sweet Poppy stencils and paste, this time with foil added. The stencil for the two on the left is called Christmas Season, The top right is Snowflake Bauble, and the bottom right is Holly Baubles. All were matted onto some holo/metallic foil card, then the card bases had some Christmas stash paper on them.

 So thats it, my cards for this fortnights challenge all done.

Wednesday 22 April 2020

WOYWW #568- The Bauble Edition

Christmas stuff on my desk again, this fortnights theme is Baubles, and I have a few leftover stencil paste & foil ones, as well as quite a pile of glittered images. No actual design ideas yet, but thought that getting them out ready on my desk might cause inspiration to strike. We can but hope. 😀 Nothing else much changed, deskwise, stack of cards waiting for inserts at the back on the left, the wallets at the front have other Christmassy bits in that may, or may not, get used.
 No enabling this week either, all I've bought is a pencil case for those Zenacolor pencils, as it was getting to be a nuisance keep taking the trays out to find what I wanted. Then I thought it actually made more sense to combine both lots so I'd have all the available colours together. So that's what I did yesterday. Should work better, as strange as it may seem, the cheaper Zenacolor ones had a lot more reds, yellows and blues than the Prismacolors, although that's partly explained by the sheer quantity of greys in the Prismacolor ones, something like 20 of them whilst the Zenacolor only have half a dozen. Which means it's short and sweet from me this week. Hoping everyone is keeping well and staying safe. All good here at the moment.
 And so, I shall be leaving my link over at Julias place, The Stamping Ground, as always, and I'll see you there later in the day.
Which brings us round to this weeks And Finally....................................


Pretty sure many of us will have heard a few of these in our childhood!

Wednesday 15 April 2020

WOYWW #567- The Colouring Edition.

Well, as if the lockdown causing us to lose track of the days wasn't enough, now we have bank holidays sticking their nose in. Almost totally missed Wednesday this week, and that would be a Bad Thing, as this is the day we post desk pictures and share them with crafters worldwide, just as we've been doing for almost 11 years.What an achievement that is. I wasn't here right from the start, looking back I seem to have come on board around week 83. So, pop your link over at Julias place, The Stamping Ground, and join in, please. We'd love to meet you.


Desk shot taken from the side, and yes, it's an unholy mess. Cards being stacked towards the front are some of the UFO's that got finished. Well, almost finished. Need inserts and envelopes, but closer to usable than they were a few days ago. And I have tidied a lot away now, as I wanted to stamp some more images to colour.
 
 These are some coloured images, from the post below, I finished over the last week.

One thing I did learn, to colour with pencils, you need a really super smooth  cardstock. Which these weren't.  It was Smooth Stamping card, which is fine for stamping and blending ink on, or for using with markers, but not smooth enough to get a great finish with pencils.


Any surface texture does make it difficult to get a good smooth finish and blend.  So I wanted to stamp some more and I've tried the Super Smooth Lavinia stamps Multifarious card. I'll report back on the success level.

 
I've used some more of my Gorjuss stamps, to try this out, but it feels like it will work well.  I know the Gorjuss girls aren't everyone's taste, but I like the weirdness, lol. Stamped with Archival Black Soot.


I also came across this sheet of butterflies, a Visible Image stamp, and they're done on Letraset paper, which is meant for use with Promarkers. Also a sheet of Bauble images, that's an old stamp, no idea of the maker. The goth girl is also a Visible Image stamp, and she was done with Promarkers. Just needs finishing off, when I manage to do some skin colouring that looks semi realistic, at least!

 And you have an enable free week again, as I haven't bought anything, so there's that.😁
 But thats me done, just leaves.....And Finally........( And it's another twofer)


I've never said I was responsible.......


And this is surely true.😀

Monday 13 April 2020

Some Gorjuss Girl cards.

So, I have quite a few Gorjuss girl stamps, and they've rarely seen any use mainly because I'm not a confident colourer, and because I've never really been happy with what I've done, I've avoided it all the more, I think because I find it stressful rather than relaxing.
 Most of my colouring in the past has been done with Promarkers, and it's only very occasionally I produce something I'm happy with. However, I finally invested in some coloured pencils, and I bought the Prismacolor ones, as they were mid-range price wise, and supposed to be quite good, and also because I'd bought, and been bought, some colouring books, and the Promarkers usually tend to bleed through, where pencils won't do that. So anyway, I've been stamping out some images, and using them for practice over the last few months.
 I watched a few You Tube videos on using them, and gradually a few things dawned on me that have helped me be less critical of what I've done. I'll list them here, in case they help someone else.
 The first, and probably the most obvious is You are NOT going to be an expert the first time you pick up a pencil! Sounds obvious, but watching videos, and seeing examples of work others have done, and not being able to duplicate what I was seeing was making it stressful, until it finally clicked with me that they've been doing this for a long time, and probably struggled in the beginning too. It's all that practice helps them make it look so easy.
Second- I try to work too fast. I forget that the videos I'm watching have probably been sped up somewhat. So, slowing down is a key factor.
Third, it really is all down to trial & error, and practice, practice, practice! Just keep reminding myself it's only cardstock & ink.
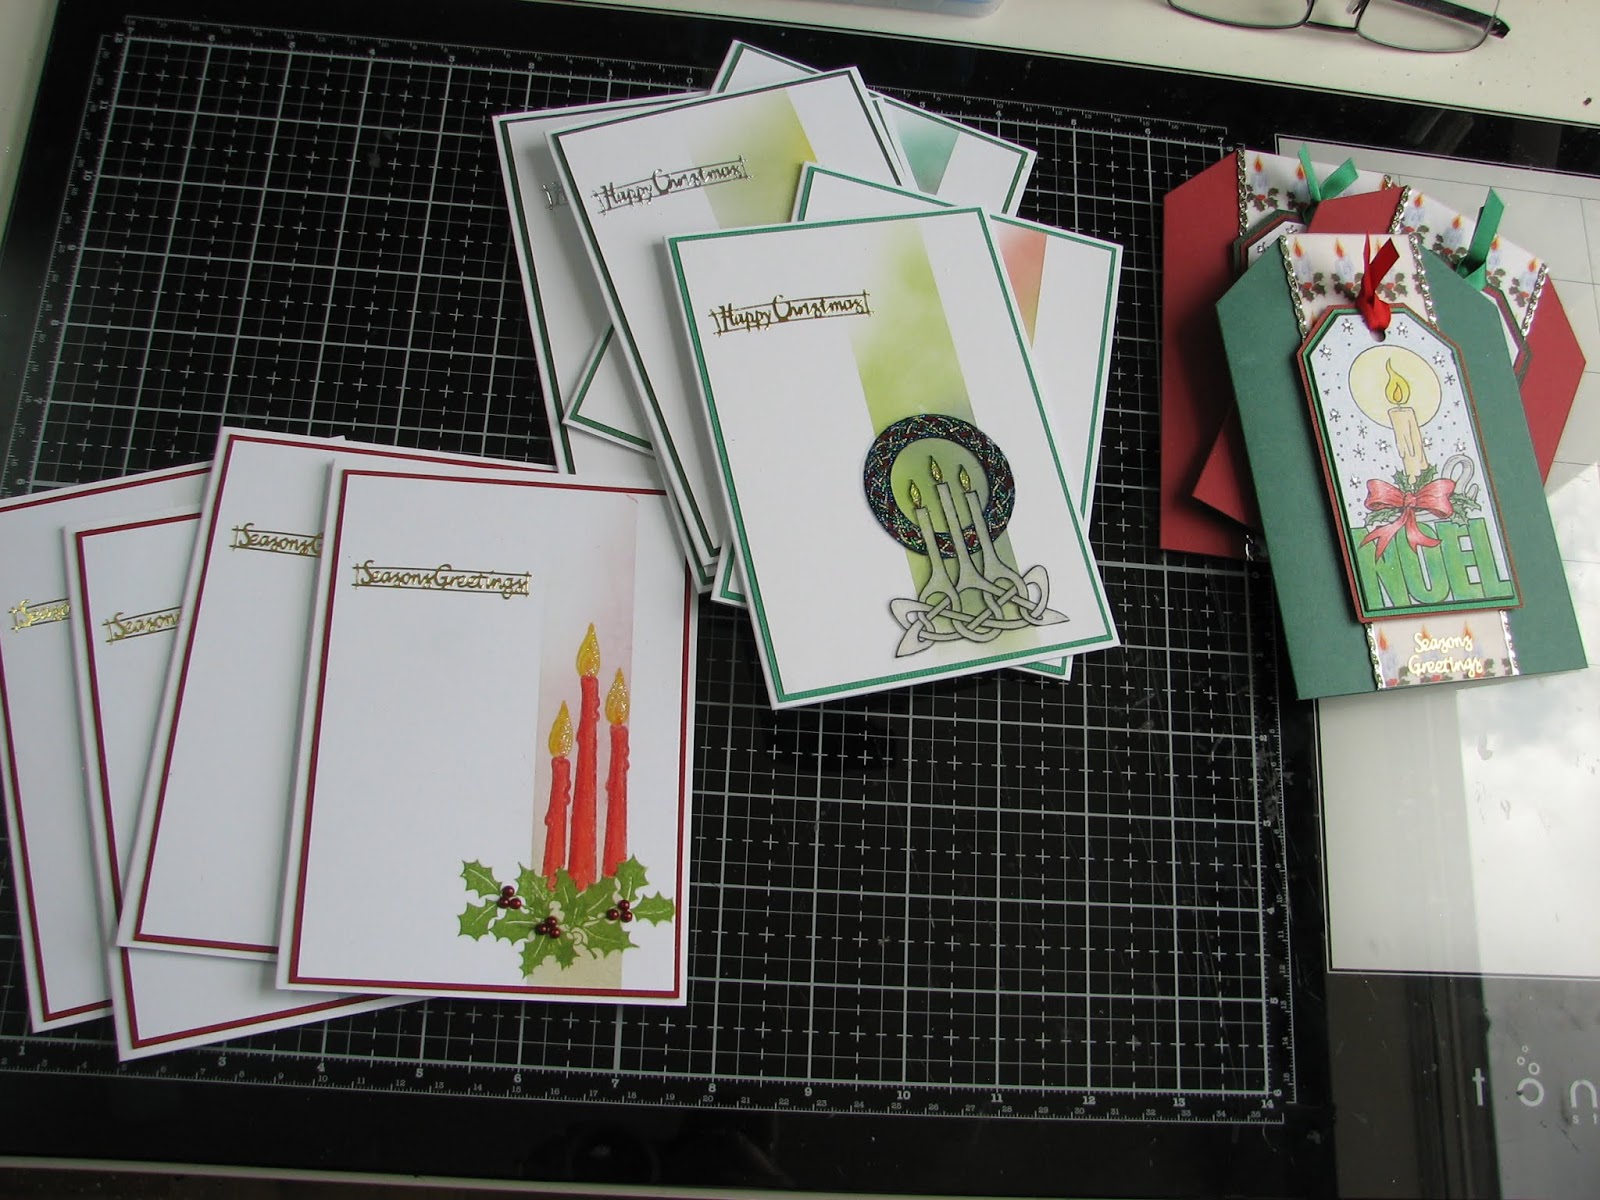
 Finally- lightness of hand! This is a biggie. Not to try to lay down a solid patch of heavy colour in one go. Take time, and layer colour to get the depth you want. And don't worry too much about shadow at the start. So I selected some cardstock to matt them on, and die cut the images with either oval or rectangle dies. A couple have some stamping on the base card, and another three have backing paper from various pads. When they were mounted, I added some acrylic gems for a bit of bling.


I die cut some small strips for the sentiment, using a die set meant for cutting slider strips on cards. That's a tip I picked up from Jennifer McGuire.  You get quite an assortment of lengths, and is by Honey Bee Stamps, called  Straight Interactive Sliders. I got them from Bumbleberry Papercrafts.


The strips I cut from the same card as the matt.

I used some small Peel Off sentiments on them, they're something else I'm gradually trying to use up. Back when I started making cards & stamping, everything was wood mounted, Barbara Gray was just about introducing the concept of clear stamps. Anyway, that meant that a single sentiment stamp was quite an expensive thing, so I bought a lot of peel offs to cover all the sentiments I'd want to be able to use. Of course now it's much easier, we can buy some great selections of sentiment clear stamps, and I do now have a lot, so the peel off stash hasn't had much use in recent years.
 I  know that the Gorjuss Girls, with their lack of nose & mouth are not everyones taste, but they are weird enough to please me,lol.

Wednesday 8 April 2020

WOYWW #566- The Bored with UFO's Edition

 I am so done with my UFO's again, so the ones left are going back in their storage wallets till the urge to finish them comes round again.This is what the desk looked like while I was doing some finishing off.
Just about to stamp up the inserts, then the backs.


A small selection of them ready to bag and put away.


Which means I can create some new ones, to replace the ones I've used, lol.

Did a small batch of those inked panel backgrounds, ready to do some stamping on in a while.


And now for what's been missing for a few weeks- The Enabling section.


Two batches this week- A few new Alcohol Ink colours, and one of the blower thingys. I've been using a straw, but apparently thats not ideal, as you can inhale fumes when drawing breath, plus, I run out of puff too easily.
So bought the gadget. Also two of the Alloys, slightly different to the older Mixatives, these are much thinner, more the consistency of normal Alcohol ink.


And a few supplies from Lavinia- some stamps, two new Clair inkpads and some Lavinia Glitter. A few of these will get stamped onto those backgrounds above.

I hope everyone and their families are keeping well and virus free.


So, apart from leaving my link over at Julias place, The Stamping Ground, I'm done.

Which just leaves.....................And Finally.....................


Wednesday 1 April 2020

WOYWW #565- The Still Hangin in there Edition.

Please tell me I'm not alone in not knowing what day of the week it is!  In fact, it's so bad now that the only day I know is Wednesday- for WOYWW and the day we need to put the bins out! So, it's time again to link up over at Julia's place, The Stamping Ground, and show your desk to the world.
Desk shot number one, tubs of punched out flowers, to help finish off another batch of UFO's.


This batch, to be precise.


One down, about 10 left to go. All made by die cutting cardstock with Tim Holtz Mixed Media dies, then backing them with some pre made backgrounds, mainly alcohol inked ones.
I've got a few backgrounds to stamp on here, extras from the weekends Christmas Card making.
 I've seen Eileen Godwin make these backgrounds, really simple, just mask off a strip of cardstock, and sponge or brush some inks into the space.Then add some stamping. Eileen usually does these as one layer cards, but I'm not actually brave enough to stamp straight onto my card base, so mine end up being matted and layered, but they still come out really thin, so good for posting.
The reason I had extra backgrounds- I started the Christmas cards using the tag stamp on the far right, then remembered I had those Celtic Candle pieces I'd glittered, and wanted something fairly minimal to go behind them. It also worked perfectly for the stamped red candles using Cardio stamps- Christmas by Candlelight.
 I'd expect the tag stamp is long discontinued, I don't even recall who made it, and the Celtic Candles was a red rubber stamp by Aspects of Design, also I think long retired, but there is a larger version, which I have but didn't use, and that one was available as a Woodware clear stamp last Christmas. And with that, I'm done. One quick message for Ali Wade, I have been visiting, but when I try to leave a comment, I get a message come up that seems to think it's a bot attempting to leave it. I think Neet was having the same problem too. I hope everyone is still well, and looking after yourselves.

 Which just leaves ...........And Finally..............., and again, you get a twofer this week.


Which is why I have so many UFO'S!!!!!!!


And this is most definitely true.😇

An End of an era

An end of an era

I write this with a broken heart, that only time can heal My beautiful, wonderful wifelet Shaz (Silverwolf) passed away peacefully in the ea...