A warm welcome to all my visitors,

Thank you for taking the time to come and look at my blog, I really do appreciate it. I would love you to leave me a comment, even if it’s just to say Hi. It means I can come visit you!

All my designs are original, so copyrighted to me. If I have been inspired by someone elses work, I have named them in the post, and where able, I have provided a link.

Please feel free to use my designs for inspiration, I just ask you to credit me, and provide a link back to my blog.

Thanks, Shaz XX

Wednesday 30 November 2016

WOYWW #391

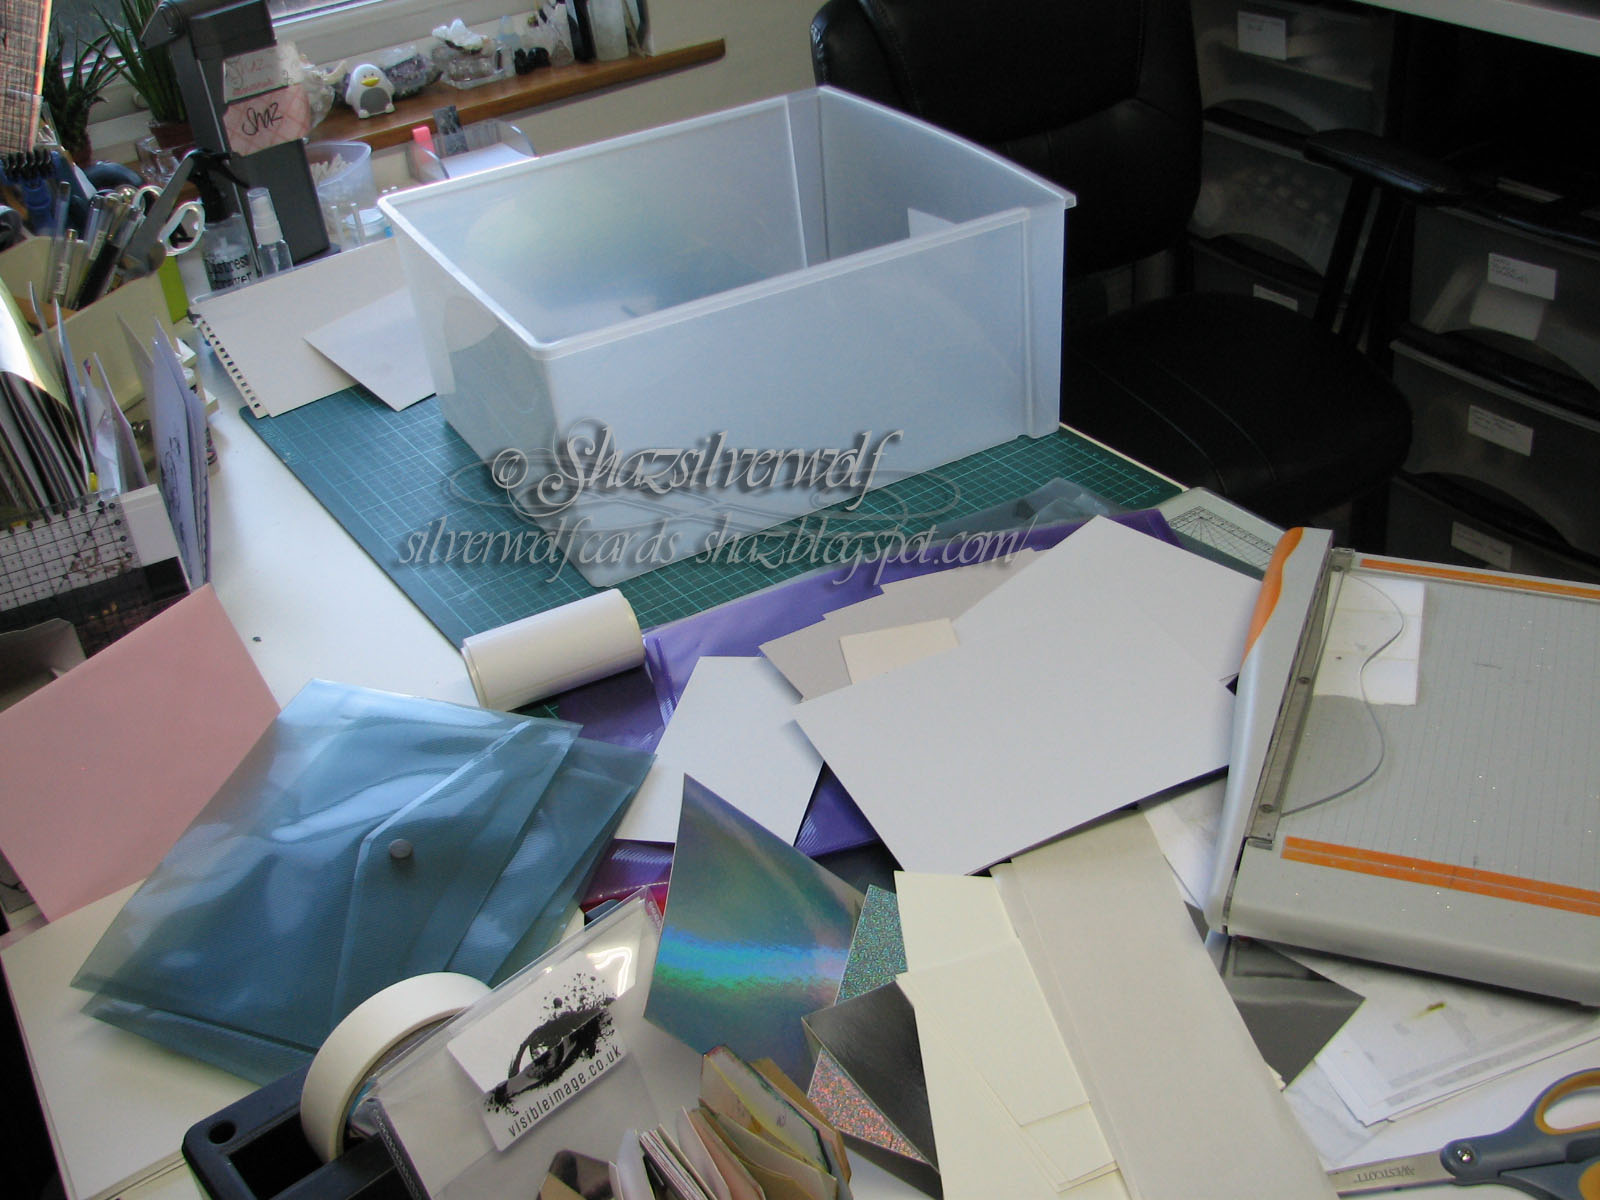
So, the after-the-crop edition then. I'll put some crop photos at the end of the post, as always a great time was had by everyone. A few new faces, and lots of regulars too. Julia had a post yesterday about it, over at Desking Central, The Stamping Ground. Jan had a post on Sunday, with more pics. But, back home, and a bit of reality. I had stored all my offcuts in a drawer behind my desk, but they needed sorting, badly. So that was Sunday's job.
That's the drawer, and I decided I was going to separate the colours into various sizes of plastic wallets.
All the wallets a while later. They are too big to stand up in the drawer, which is a nuisance, but they go in ok lay down. I can never figure out why, with all those scraps, I never have a piece in the right colour that's big enough.😡

Anyway, sorting over, I realised I was late for this fortnights Christmas Card Club, so that was next on the list. Finished card is in the post below.


Two other items on the desk, this Holly die, one of the 'from China' dies. Quite large, as you can tell- the mat is marked in 1cm squares.


Also, the enabling from Morti last week of a set of 3 Inkadinkado stamp sets from E-bay.


 Off subject, had my final test on Monday, so now it's just a case of waiting for the surgeon to send for us, once he's got all the results,and has had a look at them.
 So, the promised Crop photo's then.


Julia, Mary Anne & Christine.


  Group shot, including the Hubbies.


Christine,( Pearshaped Crafting) Margaret(Glitterandglue) and Helen (Stamping by H).


Christine, (Bishopsmate).


Our lovely LLJ, and her Hubby, Gordon.


the Morti corner! lol. Morti, Hubby Dave and Livvy.


Still have some stuff not unpacked, so I will take pics of the ATC's some people made for next week.


Me and Erika.  I managed to get inserts stamped and into some cards, between chatting and eating cake!😀


Mary Anne.

Monday 28 November 2016

Christmas Card Club- Mixed Media Trees

So, my second time of taking part, and I'm already late! I totally lost track of the days, and between hospital appointments and our weekend WOYWW crop meeting, only realised today I should have a card ready! This fortnights choice of brief was from Mary, Mixed Media trees.
Cue panic at this end!
 In the end, I used some mixed media, and some trees, and hopefully thats ok.


I started off using one of my offcuts I sorted recently, and taped it down using masking tape to give me a border. The Stencil is a Tim Holtz one, called Latticework.


Using some Cosmic Shimmer Glitter paste, in Warm Gold,  I just partially added it to the top right of the cardstock. Removed the stencil and put the card to one side to dry.
 Went off for hospital appointment! 😀


 By the time we got back it had dried, and I trimmed it square, then matted it onto some dark green cardstock. I cut two of Tims Woodland Trees Thinlits dies from the same cardstock.


Added the panel to a 6" square card base with DST.


Stuck the trees down with a glue stick, and put some weight on top to make sure they stuck. Went off for a coffee.😉


Next it needed a sentiment, so I chose one from a Phill Martin set, Scribbled Christmas Petite Sentiments, and Memento ink in Olive Grove to more or less match the trees and matt layer.
 So thats my card for this challenge, I shall try to be more on time with the next one. 😇


Wednesday 23 November 2016

WOYWW #390

Only 3 more days till the crop! Yipee! Excited, much?
As my desk shows, I'm in mid organisation of stuff to take.
 I have a plan, this time. Unusual, I normally just chuck a load of stuff in a box and wing it.
While I have been fairly prolific in card making recently, where I have been a bit tardy is in getting them ready to send out. You know, inserts stamped and attached, envelopes with them.
 So thats my plan. Add inserts to all my cards, put them with matching envelopes, maybe stamp up a few gift tags. Bag up all the birthday cards to keep them protected.
 You can see my list- the orange bit of paper. Yes, I admit, I need lists. Otherwise, I will forget something vital. Quite possibly the cards.
Considering what I plan to do, that should be simple, right?
 The list so far, is Cards, Plain Paper, Paper Trimmer, Glue rollers,Peel offs, Envelopes, Pens, Tweezers, Reading Glasses, Inkpads, Stamps, Heat tool & Embossing Powder, Inkpads,Tags.... there will be something forgotten, I know. Oh, Dies, I'll be bringing them, so bring your cardstock. I can also bring Embossing Folders, if anyone is interested, again, bring your cardstock. Baby wipes and towel for cleaning stamps. I'm just glad I'm not planning to do something complicated! If anyone has seen anything stamped they like, let me know and I'll bring the stamps, you can stamp up some images then.
In other news, the Nuclear scan went fine, Fridays CT scan eventually went fine, when they could find a vein! 4 people, and both arms involved before they found one. Just have the Lung Function test to do now on the 28th.
 OK, I think I've run out of stuff to say, so I'll be linking up at WOYWW Towers, The Stamping Ground,with our Hostess Julia.

Friday 18 November 2016

Honey Doo BIrthday Cards #2

Delving into my stack of images, and this one is up next. The stamp is called Falling Flowers, and I stamped this one in Versafine Onyx Black, and heat embossed with Stampendous Crystal Embossing Powder.
 The image was stamped and embossed again onto Black vellum, so I could cut out the flowers.
 I die cut the image using the largest die from Presscuts Scalloped Rectangle set.Matted it onto black paper, then onto a 7" square scalloped card base.
 I added a Sue Wilson Lattice ribbon & bow to the side, and a small peel off sentiment.
 A few acrylic gems were added to the spots on the design, along with some Black Diamond & Crystal Stickles for the centres of the flowers.


Second  card in this set is this gold one:


The stamp is called Butterflies & Flowers Large Corner, from Honey Doo again. This was stamped in Encore Metallic Gold, and heat embossed with a WOW Embossing Powder called Jingle Bells. Stamped as well onto Gold vellum, and I cut out the butterflies as well as the flowers. When I attached the butterflies, I cut away the rear wing, and placed them over the stamped version using a blob of Pinflair Silicone Glue for dimension. The flowers have gold mixed seed bead centres.
 I matted the image onto Gold glitter card, and repeated that with a smaller piece for the sentiment.

Thursday 17 November 2016

Honey Doo Hexagon Cards

 These turned out to be way more work than expected! :)
  
 I decided to make a batch of birthday cards, and these are the first two.I have a die set for cutting hexagons, actually, a couple of sets, this one is the CreaLies XXL die set, and I used the largest die to cut out the image. The Spellbinders ones I have don't go up anywhere near this large. These are about 5" across at the widest point.


Once I'd cut out the image, I ended up drawing round it, then using a steel edged ruler to cut the next matting sheet, and so on.


Cutting the card blank was a whole new ball game though.Working out what size blank I needed to start with, then how much border I wanted. Good job it was all straight lines, is all I can say.


I stamped up a handful of various Honey Doo images, on cardstock and on vellum, for the flowers.


As mentioned in the WOYWW post, I brought out some old friends to play with. These pads are at least 10 years old, probably more, and apart from the gold one, have never yet been reinked, but are still as good as when I bought them.


As I don't have either White or Red in the Encore- not even sure if they have any-I added a couple of Brilliance pads in, again, had these for donkeys years, and they are still great.

 I heat embossed the images using Stampendous Crystal EP. All except the Gold, for that I used a WOW powder called Jingle Bells, one of their Embossing Glitters.


Next problem was going to be keeping all the flowers I cut out in their respective designs, so I didn't get them muddled. Cue something lying around in a drawer. Those packs of disposable trays for parties, meant for nibbles.


Perfect. All cut out, and gently shaped. Not easy to shape vellum, as it doesn't stretch like ordinary paper.


I trimmed down the stamped images in an assortment of ways, either with dies, or using a fancy blade on my trimmer.


I matted up the hexagon images first, then moved onto the card base. As you can see, the fold is at the left side here, and I nearly mucked it up at the first attempt! , So, rotated the card and image till I could get one side at a fold, and that turned it into a top fold card.


    I ended up making myself a few templates for matting layers and card bases, for the next time I think this is a good idea! Wasn't really too hard, just getting the dimensions right to leave the right size border all round, and then getting that from a square card blank.

It was just after I matted these two up, I realised I'd forgotten to add a sentiment, and  using a heat tool on something with DST on, tends to make it peel. So, unembossed stamping it was then.
 You can tell how much winging it goes on here, can't you?


Finished off the flowers with a spot of Glossy Accents, and some seed beads for the centres, then attached them to the image with another spot  of Glossy Accents.

Wednesday 16 November 2016

WOYWW #389

Yep, thats another week gone, we're hurtling madly towards the Big C word! Link up at Julia's place as always, The Stamping Ground, for all the desks of delight.
A batch of stamped images on my desk, on Tuesday night, and they will still be there on Wednesday, as I'll explain in a while.


 The other half of my desk contains these- I decided, as you can see in the picture, to cut out a couple of the images with Hexagon dies- the Crealies XXL ones. I used the largest die to cut them out, then decided I needed to cut some hexagon shaped cards to use them on.


 Hence the templates on my desk, so I can just draw around and cut to size the relevant card base. For how often I'm likely to do that, I wasn't going to the expense of even larger dies.

 
 Speaking of dies, Angela Radford, you naughty little enabler you!
 I saw some cards Angela had made with this die, and decided I NEEDED it!


 I'll be doing a post with the cards I've been making, but thought I'd show you these. Some old friends I haven't played with for a while.
 Encore Metallic Pigment ink pads. I got them out to use for the stamping, so I could heat emboss. I bought these at least 10 years ago, when I first got into stamping, and everything was heat embossed. And they are as juicy now as when I bought them! Excellent value, they were.


All those flowers I punched out a couple of weeks ago? They were for this canvas Calendar I made for a FB friend, Erika. (Full post below this one.)Who, all being well, is coming to the crop. As are we now,
for definite.
My Colorectal surgeon we saw just over a week ago, said he'd try chasing up my appointments. Result? I have one today at 9.30, a Nuclear Lung Scan. You have to breathe in a radioactive gas, which shows how your lungs are absorbing oxygen, then they inject you with a radioactive dye, which shows them what the blood supply to your lungs is. Then on Friday, I have a CT scan, so he can have an up to date image. Then on the 28th, I have the other Lung Function test. So I'm good to go for the crop! Looks to me that it's unlikely I'll get the surgery before Christmas, to be honest.
Said to Doug earlier, I'm in that weird place- on one hand, I want them to hurry up and get it done, on the other hand, the longer it takes, the better.
 So I'll be around later to visit, after we get back. Being done at a Birmingham hospital,as it's a specialised test.


Sunday 13 November 2016

Canvas calendar

I had to wait a while to blog this, as it was a gift for a FB friend, so needed to wait until she'd received it.
 A while back I posted about some stencils I bought at Happy Stampers, and my friend Erika said she had the same one, and that we ought to make something for each other, which I thought was a lovely idea.My WOYWW visitors will remember seeing a picture of lots of punched flowers recently, which were for this project. As usual, I made way more than I need, so the rest are filed away for later use.


This was the card Erika sent to me, a gorgeous Copper paste embossed card, with a background in shades of purple.


 I also gone with a similar colour scheme, oddly enough, using a  canvas board base from The Works. I'd just roughly sponged on some shades of blue & purple Distress inks, then left it to dry.
 I added a sheet of Tim Holtz Tissue paper with Matt medium, and left it to dry again.

Next day I stencilled on the image, called Flower Tree. I used Pearlescent white stencil paste, also from Sweet Poppy.

While this part was drying, I punched out the flowers.Many years ago at the Hobbycrafts NEC I purchased some Paper Blox pads, which are pearlescent/glittered/metallic papers, some in a square format, some long narrow pads. I pulled out a selection of sheets, and gave them a blast with Crafters Companion Iridescent Glitter spray before punching.


In the end, I didn't use all the colours I punched out, but what the heck, now I have some punched flowers in stock, lol.


I used a selection that blended together well, and added one to each of the flowers on the tree, having shaped them a little first with a stylus tool.


The flower centres were created with Crystal Stickles.


I added some toning Liquid Pearls in pinks and purples to the dots in the image.


I knew the wording that I wanted to add, so sorted out some white tissue paper, to make it sort of blend into the background, rather than stand out.


The 'Believe' and 'Never let go of your dreams' are both from Lavinia stamps, and I stamped each twice, as I had to tear them out, and that was a recipe for something going wrong! I used Archival Cobalt ink to stamp, and Crystal Embossing Powder for some sparkle.
 By the way, the phrase is in individual words, which is why the stamping here looks a bit weird.


 I placed the Believe word to follow the shape of the tree,after tearing into individual letters, then added the phrase at the bottom on either side of the tree trunk. All done with Matt Medium.


So I was almost done, when I thought I could add a small calendar to the bottom, to make it functional, as well as nice to look at.
 Cue trip to the shops- I'd actually expected to be able to buy them at the NEC last week, but didn't see any. I got them in a card shop in town, in a pack of 5, for 99p, if anyone needs to get any. Pretty sure it was called 'A Write Card'. If your shopping centre is anything like ours, there are so many card shops, they sort of all merge together!


 I added the calendar with a couple of strips of pale purple ribbon, and made a hanging loop from the same ribbon.
Final touch, I thought a flower tree needs butterflies, so punched out a couple from some glitter paper.

Christmas Card Club- Reindeer.


This is my first time at The Christmas Card Club, and my offering for the theme of Reindeer.

 I wanted to try out using multiple colours of glitter on the wet paste, so stencilled a couple of images in case one went wrong. I also flipped the stencil, so the reindeer faces the other way.


 I used a Sweet Poppy stencil, called Caribou Snow Globe, teamed with their own PearlWhite Stencil Paste. Since I started using Lucy's instruction of 6 pieces of masking tape- 2 at the bottom, two at the top, and one either side, I've had no disasters when applying the paste.

By the way, the cardstock is Clarity Stencil Card, 7" square.
 Removing the bottom two pieces, then the side two to leave the top ones as a 'hinge' to lift your stencil away from the paste.


All goes well, apart from catching the paste slightly just on the lower left of the image. Note to remember: Do NOT wear a bracelet with any dangling pieces!
In this case, as I'm intending to cover it with glitter, it doesn't matter, as it won't show.


I've chosen 4 glitter colours, a Crystal one for the snow, a brown for the deer & the tree trunks, green for the trees, and a lovely gold sparkle one for the snow globe itself.


I've done the gold first, so that the following colours won't stick to the Globe.


 Next came the trees, and I ended up getting green on the snow,as well as down the trunk of the tree, followed by the Crystal on the snow lines.


 Finally, the brown on the reindeer. The little purple spoon is what I was using to sprinkle the glitter from. Anyone who saw my posts earlier in the year will recognise the spoons I was saving from Easter Eggs.


Then I trimmed each image down, matted onto some gold card, and attached to a 5" square card blank.
 For the sentiment, instead of stamping, I thought I'd use some peel offs, I have loads and they need to be used up! I have some very small Christmas words, and added these on the top left and bottom right of the Snow Globe.

I could have done this more easily if I'd let the paste dry, then used glue to add the glitter afterwards, I think. Trust me to do things the hard way!

An End of an era

An end of an era

I write this with a broken heart, that only time can heal My beautiful, wonderful wifelet Shaz (Silverwolf) passed away peacefully in the ea...