A warm welcome to all my visitors,

Thank you for taking the time to come and look at my blog, I really do appreciate it. I would love you to leave me a comment, even if it’s just to say Hi. It means I can come visit you!

All my designs are original, so copyrighted to me. If I have been inspired by someone elses work, I have named them in the post, and where able, I have provided a link.

Please feel free to use my designs for inspiration, I just ask you to credit me, and provide a link back to my blog.

Thanks, Shaz XX

Showing posts with label Eclipse cards. Show all posts

Wednesday, 25 March 2020

WOYWW 564- The Locked Down Edition!

Well, here we are, in lockdown. Hoping you are all safe and well, along with your families. We've been being extra careful for a few weeks, to be honest, as I'm in the high risk group. Dougs been going out for any shopping, and it seems like at last, the panic buying is tailing off, as he could get bread & milk in Tesco yesterday afternoon, instead of everywhere being sold out before breakfast! So, our safe space as always, visiting desks around the world, courtesy of Julia over at The Stamping Ground.
Todays desk, working through as many of my UFO's still, as I can finish up. Will be taking a break from them for a few days, as this weekend another Christmas Card Club is due, and I almost missed the last one, lol.


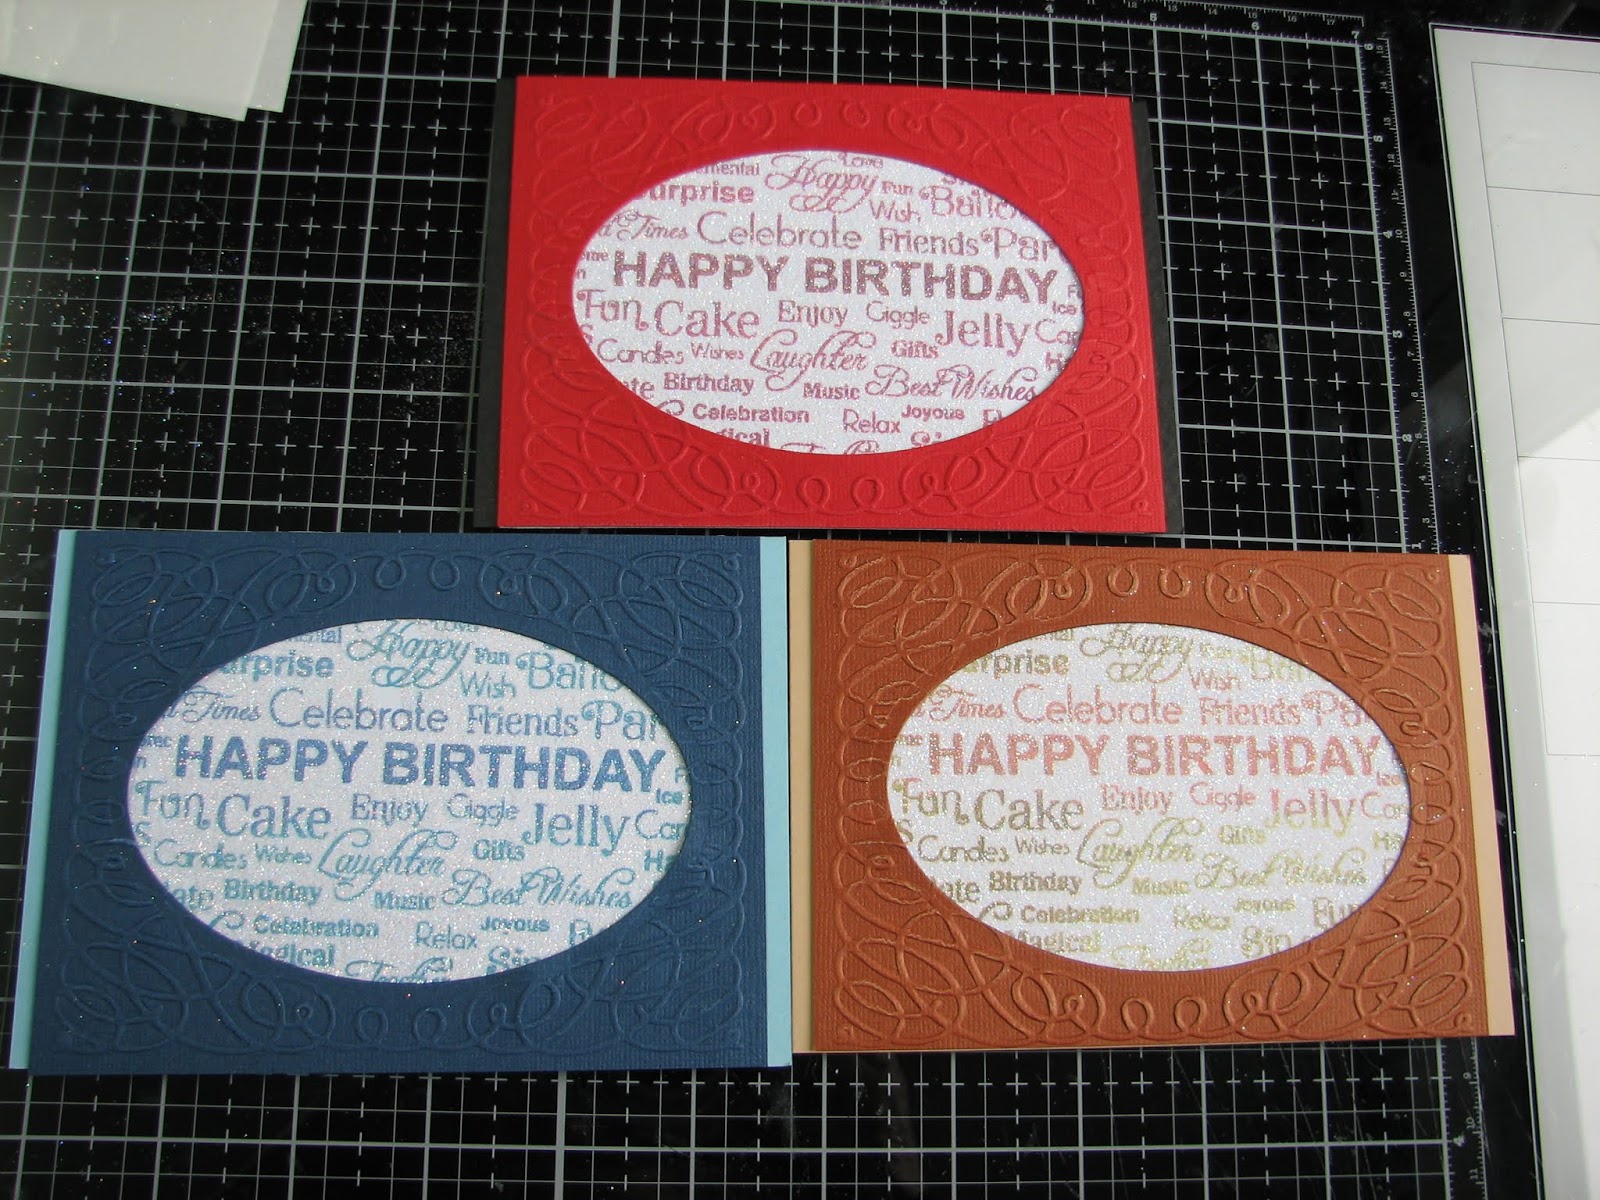
These are the cards I've managed to put together from the various wallets they were stored in.


Two using Sweet Poppy stencils, and foiled afterwards, both on Brusho backgrounds. Found some old vellum with dragonflies on, to back the card on the left.


The top two are using a very old Stampers Anonymous stamp, Classic, which is a wood mount, but I think it's available as a cling mount now, in one of the sets.

The other card uses stamps from Crafty Individuals.


These are a stamp by Indigo Blu, called Bicycle, which was stamped 3 times, overlapping, with 3 generations without reinking. Inks sponged over the top. Covered with a sheet of Double sided Adhesive, then sprinkled with Glamourdust.
 The flower is a die by  Heartfelt Creations, called  Delicate Aster.
 A background stamp by Phill Martin, called  Birthday Cloud, and I did the same with these as I did with the Bicycle ones.
 The front is an old Cuttlebug Embossing folder, Scroll Frame, and I cut out the blank oval with another die. Hard to see the sparkle in these though.


Two Eclipse cards using the same stamp.


Slowly making a decent dent in the UFO's, as I'm being really good and not starting anything new until I've used up a considerable number of them.


This is the next batch I'll put together.
All trimmed down and matched up, just need to stick them down.

I end up with so many UFO's as I have a habit of making a large batch of something while I have the stuff out, then either run out of ideas, or just get bored with them!


And now we get to the Enabling part!
 
Some new stamps from Lavinia, a Tim Holtz Layering stencil, and 4 new colours of Alcohol inks.


And that's me for this week, which brings us round to ....And Finally, and this week you get a Twofer!


First off, a reminder for all in the UK that it's Clocks Forward this weekend.


And one for all us crafters everywhere, it really made me laugh when I saw it.


P.S. Our Neet came up with a fab idea to Brighten Our Days on Facebook- every day, post a pic of something you've made. It can be anything at all- crafting/baking/even gardening, and can be something new, or something you did a while back. Feel free to join in, help us beat the doom & gloom on FB.😀

Thursday, 19 March 2020

Invading the UFO box!

So, five cards made so far from the UFO's. The first two are both Eclipse cards.
I used Happy as one Eclipse, and Birthday for the second card. Die cut a small sentiment to complete them.
 The stamp is by Phill Martin, called Birthday Cloud, and is roughly A5 in size.
The Alpha dies are by X-Cut, called Wedding Alpha & Numbers. 1⅜" or 3.5cm high.


The other three use the same stamp. I had stamped a number of these in different colourways, when I made some into Shaker cards.


 For these, I added some double sided adhesive sheets, then sprinkled that with Glamourdust. Because the Glamourdust is so fine, it doesn't hide what's behind it, just gives a little sparkle.
 The cover frame is an old Cuttlebug Embossing folder, Scrollwork Frame.
 Then I cut out the blank oval in the middle with an oval die. The Embossing folder is slightly too small to cover the front of the card, so I trimmed it down to leave a contrasting border, from the base card, on each side.

Thursday, 4 October 2018

Birthday cards for Guys.

  Trying out the Eclipse technique again, this time to make some cards that would be great for male cards, or the female music fans in your life.


It sort of started with a FB friends post from one of her friends, about her younger brother being in hospital for his 13th birthday, and asking anyone who wanted to send him a card to do so, to help brighten his day.


My card is the dark blue one in this pic, with SAM done as the Eclipse.


As I had all the stamps and stuff out, I thought I'd make a few more, in different sizes and colours.


Ive used Versafine Clair inks in Monarch (purple) Medieval Blue (dark one) and Paradise (bright blue). Versafine Clair Nocturne was used to stamp the images. The red is Versafine Crimson Red.


The stamps used are from Visible Image:
Rock Out, Guitarist, smaller guitar and Star border.
Feel the Beat, Drummer & Phrase.
Music Speaks, Large guitar.
Universal, the swirl & star in the background.


I have the original packets of Music Speaks & Feel the Beat, the packs now have extra stamps in them.


The cards all use the same method, just different colours, and using a different font set for the Die cutting.


 I also stamped and cut rough masks for the images.


After stamping and masking the main images, I used the star border stamp to go all around my cardstock in Paradise, and using second generation stamping.


I heat embossed the stars with WOW! Icicle EP.

To get a matching cardstock matt, I sponged another sheet of cardstock with the relevant Clair ink, this one was for the dark blue one. Then I matted the image onto white, trimmed to a thin layer, then matted onto this sponged card.

To matt onto this, dst won't stick to the damp ink, so you either need to let it dry, or use a wet glue instead.

  
 These were the four panels all stamped. A 5,6 and 7 inch square  image, and one A5.
 One tip when working with square card bases, if you have bought the ready scored packs. Whatever the measurement given on the pack, it actually applies to the envelope, NOT the card base. So, a 7" square card is really closer to 6¾", so you need to cut your panels accordingly.

 I used four different Alpha dies for cutting out the words, the other set is the iCraft Upper Case Alpha set I used in the NOEL Eclipse cards.
 From top left, these are X-Cut Wedding Alphabet & Numbers,
 Coles ABC, by Lawn Fawn,
and one by DieNamics called Bottom Line, which seems to be discontinued.


   In each case, I cut from the stamped image cardstock, then from white fun foam.
 When doing this technique, remember to keep all the little bits from inside letters like A,B and so on, as you will need to replace them into your cut out after you've added it to your matt/card front.
Refitting the tiny inner bits is fiddly with small dies, but makes all the difference  to the finished result.You don't need it from the fun foam.


 If you don't have fun foam handy, you can use a few layers of scrap cardstock die cuts, how many layers depends how dimensional you want it.


When adding your letters to the fun foam/card stack,it's wise to dry fit some letters first before adding glue. Depending on the font, some letters like O,H, maybe Y or W, can look as if they are symmetrical, but I found they are not necessarily so.

Another tip I found useful. When using smaller letters, Lay them out along a ruler, and a T Ruler is good for this, then gently lay some low tack tape across, and press to the card.  It's also a good idea to actually do this on top of the plate you will be feeding into your die cutting machine.This helps to stop them moving about.


On this one I staggered the letters across the design, but again used tape to hold them down to cut.


The four finished cards.


The matt layer was created exactly the same for this one.

Neither the red nor the purple have matt layers, as the card bases were an almost perfect fit.


Wednesday, 3 October 2018

WOYWW #487

 Not looking too untidy, but I have to tell the truth, I'd actually started putting stuff away when I realised I'd forgotten to take the picture. WOYWW time again, desks galore shared over at Julia's place, The Stamping Ground.  
 If you've not joined in with this, just leave your link at Julias on a Wednesday, and visit the other desks, and we'll come and visit you too. It's great fun, and we're about as close to normal as we're ever going to get.😂
 I've been playing about with Eclipse cards, hence the Alpha dies under the Stampin Up stamp case. One of my whole 3 SU stamps, lol. Behind them, some Stencil paste experiments and some foiling ones too. A couple of  Clair inkpads, some DST, and a Microfibre cloth. One from a cheap pack of 3 from Poundland. Use it to dry my stamps after babywiping them. I've noticed that wipes tend to leave fibres behind, but the microfibre cloth pulls them all off.


These Birthday cards are what I've been up to for the last day or so. You may have to enlarge the image to see the design clearly, I can see it's not too clear in this pic.


I'll blog them later in the week.


I made 4 Christmas Eclipse cards over the weekend, they're in the post below.
 Now I'm out of white Fun Foam, but I've ordered some self adhesive sheets from E-Bay.


Took myself out to town for a walk today, and as I often do, paid The Range a visit.


These small wooden snowflakes- I have some larger ones from Kaisercraft.


Also some small Christmas wood shapes,both lots by DoCrafts.

Tubs of sequins- £1.50 each, and the bag of blue ones was a £1.


 4 Different colours in each pot, a real bargain.


So that me done, just leaves
..........................And Finally

An End of an era

An end of an era

I write this with a broken heart, that only time can heal My beautiful, wonderful wifelet Shaz (Silverwolf) passed away peacefully in the ea...