A warm welcome to all my visitors,

Thank you for taking the time to come and look at my blog, I really do appreciate it. I would love you to leave me a comment, even if it’s just to say Hi. It means I can come visit you!

All my designs are original, so copyrighted to me. If I have been inspired by someone elses work, I have named them in the post, and where able, I have provided a link.

Please feel free to use my designs for inspiration, I just ask you to credit me, and provide a link back to my blog.

Thanks, Shaz XX

Showing posts with label Brayer. Show all posts

Wednesday, 20 May 2020

WOYWW #572- The Happy Birthday To Us Edition.

Yes, our 11th Birthday! What a milestone that is, eh? All down to our lovely Julia, over at The Stamping Ground. This is my UFO for the theme, and I thought I'd make it into a Birthday card to us all. The balloons and gifts are both Card-io/Majestix stamps, the 11th is Honey Doo Crafts, and I'm afraid I have no idea where the 'Birthday' balloon came from, may have been a freebie at some time.
This was the envelope I decided to work from, I can't believe how many of these stencilled sheets I have and not used yet.
 I used an assortment of Versafine Clair inkpads for the stamping, and although it's hard to see, I did cover the balloons with a coat of Glossy Accents, and sprinkled them with a little Glamourdust.
 And I learned a little trick that some might find helpful.
 When you're trying to place clear stamps on your background, ready to pick up with the lid, they can be really annoying, as they keep sticking to your fingers, am I right? Well, the 'string' on the balloons above is a separate stamp to the balloons, and was a total nightmare to get to lie where I wanted it, as it's really thin. It was driving me nuts, and I was sort of looking round my desk for a solution. And then I spotted my anti static bag, and the little dish it sits on has a good coating of powder on it. Dipped my fingers into the powder and rubbed it over my fingertips, and Yay!!! no more stamp sticking to my fingers.


 Got the Christmas cards finished, and the Caught in Crystal sheets worked out a treat.


 Nothing much in the Enabling Dept- just a 2" Speedball brayer! Came across these a few weeks ago, but couldn't find them anywhere in the UK. Not sure if they're new, or just not widely stocked. Got mine on Amazon- via Supermart USA, which are really good, as their prices are always competitive, and they ship worldwide for free.


  realised a few days too late last week that I completely forgot to add an And Finally! So this week there's two to make up for it.


So here you are....And Finally.......


Thursday, 7 July 2016

Clarity stencils- backgrounds for stamping


Here are some of the backgrounds I stencilled, using a brayer and Gelli plate, with inks. I take no credit for the technique, I watched one of Barbara Grays videos, and this was her technique. HERE is the link to the You Tube video if you want to check it out.
 I had no plans to buy a Gelli plate, this one is part of the craft stash that was gifted to me. Everything I'd seen up to now had been using paints, and that really hadn't grabbed me. This one with inks though looked more my thing.


 Barbaras technique is to lay your chosen stencil on top of the Gelli plate, then dab your ink pad straight onto it.

Using Distress Inks here, as they are nice and wet, and they are what she used.  This one on the right was using Candied Apple and Carved Pumpkin.

 Next, take your Speedball brayer, and spread the ink out evenly over the stencil.
 By the way, this stencil with the oblong shapes is called Abstract 3, by Clarity.  The one with the squares is called Abstract Squares 2.
At this stage, you really can't see much.
 Now peel off your stencil, and put to one side. Take a sheet of cardstock- Barbara produces a 7"x7" pack especially for this, and it's very good too- and lay it down over the Gelli plate.

I had some on order, so used the plain back of some pearl card for now.
Smooth out over the back of the cardstock with a reasonable amount of pressure, and trying to make sure you cover the whole of the sheet.
Peel off your cardstock to reveal the print.


You can see I missed a spot or two, where I didn't press very well.


Now for 'Spot the (unintended) mistake'!


I repeated the inking, after cleaning my stencil, lay the cardstock down- and then realised I'd forgotten to remove the stencil. I actually only realised when I took the picture. Good job the cardstock is double sided.


This time I dabbed Cracked Pistachio and Wild Honey.


I think this one was Wilted Violet and Mermaid Lagoon.


This time around, I added a Moon mask below the main stencil. This 3 colour one didn't work out- guess who forgot to remove the stencil again?


But these three did.


 I also tried with another stencil- Jo's Bubbles.I have a feeling those are going to work well with some Lavinia stamps of fairies.


 All in all I think I love this technique. It's easy to get a wide variety of backgrounds from it. I think next I may try brayering directly onto the stencil and use some of the Adirondack inks.

Wednesday, 29 June 2016

WOYWW #369

Well Hello everyone. Here we go again, with another meet-up at LLJ's place, whilst Julia carries on her recovery. Sending lots of love and huge hugs to both of you.The desk, then, as thats what you're here for.
A longer shot this week,as you can see, some blended backgrounds and blending through stencils again.
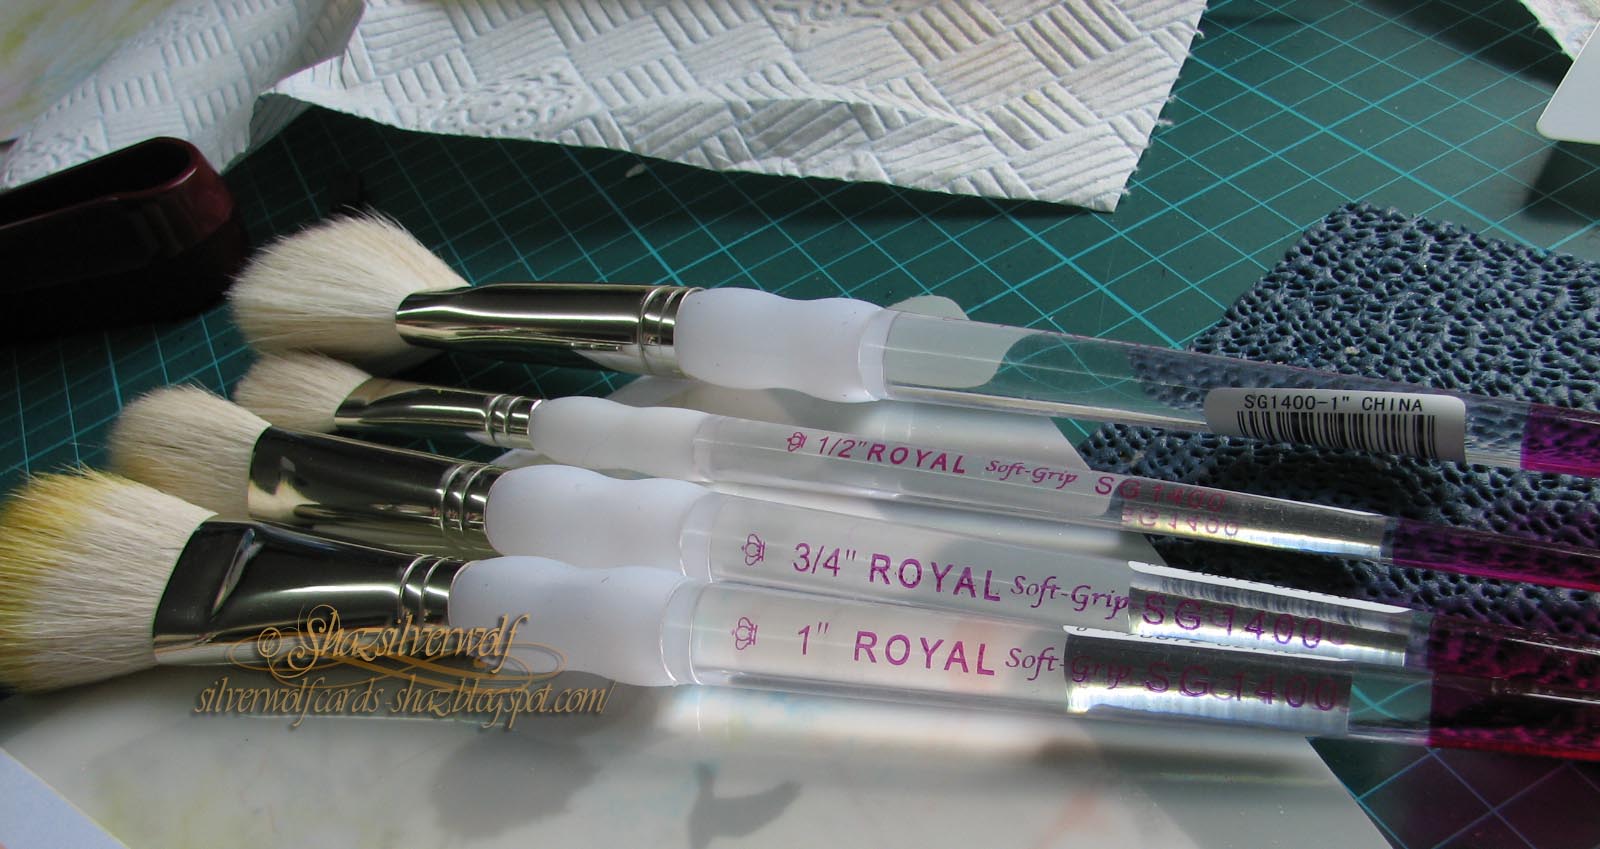
 If you like using brushes for this sort of thing, please go have a look at the previous post. There are some great bargains to be had in brushes at The Works right now, and they work brilliantly as 'colour duster' type brushes.

These are the brushes, and at 2 for £3, a real bargain compared to most 'crafters' brushes.


You can see in the previous post how well they worked, and here's another example:


The eagle eyed may well spot a Gelli plate, front left. I'd said I would never buy one, as it wasn't really my thing, but this was amongst all the craft stuff I was gifted a while back. I watched a few YouTube videos, by Barbara Gray of Clarity Stamps- where would we be without YouTube now?- and gave it a go. The result was some very nice backgrounds through stencils, using ink rather than paint. I think it was the fact most people were using paint on them at first that put me off. These two below were done with a brayer, rather than brushes, the ones on the right are with the Brushes from The Works.


I have plans for these with some small stamps- I have some Clarity Wee Folk, some Lavinia stamps,and a load of Cardio that should work nicely. I may even see if I can get a Christmas card or two out of this technique.
Reasonably short, and hopefully sweet, this week.
Quick update, saw the Registrar from the Oncology team last Friday for the results of my CT scan. Sort of ok, there is something they wanted a better picture of, so wanted an MRI. I told him my own GP was already sending me for one, due to the sciatica, and got him to refer me back to our local hospital's Oncology team.Travelling to Birmingham and back is a bit of a nightmare for the traffic, it can easily take an hour each way, and a lot more at rush hour. Local hospital is 10 minutes away.
So, I have the MRI date, it's the 13th of July, and will be a couple of weeks after that that I get any results. Hopefully it's nothing, he said it may well just be how the bone is healing.

Friday, 8 January 2016

Visible Image Christmas Cards (1)

So, I appear to be getting ahead of myself this year. Christmas Cards. In January. And no, they are not late for last year! I had a thought that perhaps I get so fed up with making Christmas cards because I tend to use 2 designs every year, One for family and close friends, and a smaller one for work colleagues and acquaintances. I nearly always wait until the NEC Hobbycrafts in November, in case I find a design or stamp I really like. Despite me having a ludicrous number of Christmas stamps.And saying every year I'm not going to buy any more. Yeah, right.
I'm in to January and the Christmas stuff is still out, and armed with my plan to make 4 or 6 maximum of any design, it seems to be working. In this last week, I've made a total of 18 cards, which I will blog over the next few days. First ones up to be blogged are the first set of  cards made with some Visible Image stamps. Tomorrow I'll blog the second set.
The hardest part of these cards has been getting a photo that showed the sparkle from the Glamour Dust!

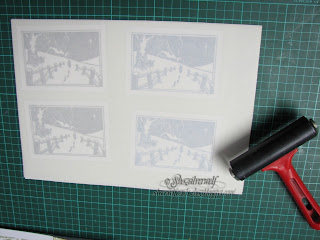


 I will say right at the start that the Christmas Words stamp AND the Snowy Scene stamp are now discontinued, but there are many similar types of stamp to be found.


The card bases are the pre-scored type available from a number of places, the only issue I had with them is that the label says they are 7"x7". As you will see later, it became clear that  this is not the case.
 My first step was stamping the Snowy Scene onto White Pearl card. I used Versafine Ink in Onyx Black and  Majestic Blue, stamping 2 of each. Then I laid over them a sheet of Double Sided Adhesive , from Stix2. I used an old brayer I keep for this sort of thing to make sure it was stuck down well with no air pockets.
Tip here: When you come to put down your adhesive sheet, DO NOT peel the covering layer off completely. Just peel it back an inch or so, and stick that edge to the edge of your card. Then slowly pull back the backing, smoothing it down as you go.
 Now you have your adhesive sheet down, cut the images down to size, either with a knife & ruler, or your cutting system. This way you only put Glamour Dust on your image, and not waste it on scrap you will cut off and throw.

Next,peel off the cover sheet on your image, place on a sheet of scrap paper, and sprinkle with Glamour Dust. I advise burnishing well with your fingers, to make sure the image is covered, and also that when you tip away the excess, what is left on the image will not shed.
Now I have all four images trimmed and coated with Glamour Dust,I matt them onto corresponding colour card and they get put to one side whilst I make the Christmas Words backing.


Using the same Versafine Inkpads, and two more sheets of Pearl card, I stamp up the backgrounds. No Stamp positioner needed for this step, it's easy to do by eye with a clear stamp. If  I was using a Rubber stamp, a Stamp Positioner may be a good idea, to make sure you don't leave any gaps.

Two sheets finished, and before attempting any trimming/cutting, give it a blast with your heat gun, as the Versafine takes a while to dry on the Pearlescent card, so it smudges easily. Guess how I figured that one out?


My next step was to cut the background down to size, and believing my card bases to be 7"x7", I cut 4 of each colour in 3 1/2" squares.Then I ran around the edges with the corresponding ink pad.


 As you can see, my pieces didn't fit.The corners at the centre should have just butted up to each other, not overlapped. So I had to cut a little off one corner to keep it flat.


 Good job I tried out a 'dry fit' first.


 I double checked my measuring, and yes my pieces were the right size. Checked the packaging on the card pack, and yes, 7"x7".


So I measured the actual card. Not 7"x7" at all it turns out. 6 3/4" square it seems.
Which is why my pieces wouldn't fit. I would have been really annoyed if I hadn't been covering up the centre  with the focal image.


I assume that the cards have been subjected to conversion to metric sizing, and the packaging doesn't reflect that, as when measured with a metric ruler, they are 170mm.


Anyway, back to the cards. All four have the words background stuck down with double sided tape.The focal image  is added with foam pads, to raise it slightly. I stamped the Merry Christmas greeting in the lower right corner in matching ink. This greeting by the way, is usually all on one line, but I needed it to have the Merry above the Christmas to fit, so I just snipped between the two words.I could have done it by masking off the word I didn't want with tape, but this way was quicker and easier. Final addition, just for balance, were a couple of snowflakes from the Creative Expressions Sue Wilson Snowflakes set of dies.I stuck these down with a Zig Glue pen, and lay them down with an acrylic block on top to make sure they stuck.
 So that's my first four cards completed!


Card Recipe:
 Visible Image stamps, Merry Christmas, Snowy Scene and Christmas Words
 Card base, 7x7.
3 sheets of pearlescent card.
Versafine in Black and Majestic Blue
Pieces of black & blue cardstock to matt image onto
Glamour Dust
Stix2 adhesive sheet
Sue Wilson Snowflake die set.
Double sided tape and foam pads.


Tuesday, 2 June 2015

Welcome Home card

My card was inspired by a Pinterest find the other day. About time I actually used some of that 'inspiration', lol.This is the card that I CASE'D, and the ladys blog is HERE.


 Made a slight alteration, this is a one layer card, but I did my panel on a separate piece of card.


I started by sponging on two shades of D I, Squeezed Lemonade and Mustard Seed.


 Then I added some of the new Fossilized Amber and Dried Marigold.
 I found out a mask, TCW (The Crafters Workshop) Mini Bricks.
 Through this I sponged Wild Honey and Spiced Marmalade D I.

Moved the stencil down and finished off the strip. Gave it a blast with the heat gun to dry it, so I could stamp.
The stamp I chose is called Agapanthus Cluster, by Stampendous, stamped in Versafine Onyx Black.


I stamped the first one about halfway up, and extended the stems with a stem from another stamp set. Re stamped it again lower down,then added a partial stamp over the left hand edge. The butterfly stamps are from an Inkylicious set.

I changed my card up a bit more, by adding some double sided adhesive sheet to the front, then sprinkling with Glamour Dust.
Once the adhesive sheet was in place, I brayered over it with a hard rubber roller, to make sure it was completely flat.
I also put the backing sheet back over the top and brayered it again, over the Glamour Dust to make sure it was stuck firmly.


Next step was to mark the width of the panel on the inside of the card, then score lines to border the panel.


It looked like it still needed something, so two butterflies were punched out of sparkly vellum, and coloured on the reverse with DI markers in matching colours.Folded up the wings, then stuck down with Pinflair glue.
 At this point I discovered that in all my stamps, I do not have a single 'Welcome' or 'Welcome Home' stamp! Neither do I have anything in my ageing peel off collection, so no other option but to hand write it. I added a small orange flat back gem to the exclamation mark. Some orange ribbon wrapped around the spine to finish.


I'm linking this to 'A Focused Journey' blogspot,
 for the 'Stop pinning and make something' party, which is Diane's idea to encourage us all to actually use some of those ideas we Pin for inspiration!


Wednesday, 16 July 2014

WOYWW # 267- the heatwave edition!

Blimey its hot! No pleasing us is there? Too cold/wet/hot/dry.Anyway, whatever the weather is, its Wednesday again, which means linking up at Julia's house, The Stamping Ground, for this weeks WOYWW. We've been doing a bit in the garden. For garden, read jungle. Cue Indiana Jones music, put on camo gear and find machetes. Not joking, honest. Its 150foot long, not desperately wide, fortunately, but sort of got away from us, growth wise.We have a Buddleia, which is next to a pergola over the pond, which has clematis growing over it. Unfortunately, the clematis grew over into the Buddleia, so we had a solid wall of greenery across the garden half way down. Now suitably hacked and shredded. Some fencing to finish replacing, and a lot more work to do, but its a start. We've discovered that is the only problem with working nights- you don't want to start doing stuff like this before you go to work to do a full shift, so its weekends only, and thats as long as its not raining!
So not much in the way of crafting done. Apart from the project I was working on last week, which I said I couldn't share. Anyone visiting our lovely LLJ will have seen it by now, an engagement card for her son and his fiancee. Granddaughters Birthday card and pressies went down well, the card I made a while back, with the Molly Rules set. Merlins verdict? Awesome, lol.
Black leggings, a black and white tunic top to go over them, and a black top were also well received. Next birthday up is my eldest sons, who is 40 this year.
I did do a little bit of stamping earlier today, using up a brayered background I made a bunch of a while ago.
The stamp set is by Inkylicious, called Daydreamer. A 3 piece set, the person & tree, the small flock of birds and the word Daydreamer.

 I added a Tim Holtz sentiment instead to mine.

Treated myself too to some more Promarkers- they are really cheap at Cowling & Wilcox.


I got the Autumn/Winter 2013 set, and a set of Flexmarkers. I've been adding Flexmarkers recently as they have really pale colours, much lighter than the regular Promarkers.
 By the way, for those who have liked the Raindrops set I've used in the past from Designs By Rhyn- Inkylicious have their own set now, which I have to say look pretty identical, so no need to order from Canada.

Wednesday, 12 March 2014

WOYWW #249

Well where did that week go? Or the weekend, for that matter? So here we all are again, meeting up in Julia's virtual front room, The Stamping Ground, for our much-loved WOYWW. My weekend plans were to visit IKEA (check), try out Julia's glorious Brilliance backgrounds, (check), and play with my new stamps from Visible Image (epic fail). The VI stamps were mainly the result of being picked as a winner for the Feb contest- £20 to spend on their stamps.
The ones on the right were the ones I picked as my prize, the two on the left just fell into my basket, the feathers because its so gloriously gothic, and the Molly Rules set, as that will be perfect for my Granddaughter Merlins birthday in July.
So, IKEA. Whats not to like? I had heard that the Expedit series was being discontinued, along with the drawers and cupboard with door fittings. The actual truth is that Expedit has been re-designed, the outer framing is a little thinner. Inner dimensions are the same though. I do hear that the big 5x5 unit is being discontinued, along with the desk attachment for the 4x2. Glad I got mine when I did.  I believe the bit about the drawers is correct too, and I did want another couple. So they are now in place in my 5x5.
It used to just have the two bottom pairs of drawers.


On to Julia's Brilliance backgrounds, and I love this.  Lovely pearly sheen to the sheets. Bit of trial and error for how much to mist, and whether to use glossy card or not, which didn't seem to make any difference as far as I could tell.


Last thing I was doing on Sunday was some brayered sheets. I bought a mylar mat, like the Splodge Away, at the NEC about 12 months ago- mainly use it for general inking techniques, but thought I would give the brayering a go, as everyone seems to like how it works. Usually I work on a scrap pad, to roll off the ink, and brayer onto the card from, which for me works just fine. And that is what I will be sticking with- I did not like the mylar mat method.  The three brown sheets on the top left were done off the mat, and for me, there is too much wet ink on the mat- when you start to brayer on, ink from the roller goes onto the mat, which I kept picking up on the brayer, when I wanted the ink to be fading out, it kept getting 'refreshed'. If that makes sense. I ended up with three almost one colour sheets. So I returned to my normal method of rolling off onto the scrap pad, then working up onto the card, and that gave me much better gradual fades/blends. Thats just my four pen'north, as they say. Each to their own, no doubt its just a knack, but the funny thing was, I had MORE trouble with the dreaded 'lines' with the mat than I do with the paper method. Whatever, I never said I was normal, thats just a vicious rumour put out by people who don't know me :).


An End of an era

An end of an era

I write this with a broken heart, that only time can heal My beautiful, wonderful wifelet Shaz (Silverwolf) passed away peacefully in the ea...