A warm welcome to all my visitors,

Thank you for taking the time to come and look at my blog, I really do appreciate it. I would love you to leave me a comment, even if it’s just to say Hi. It means I can come visit you!

All my designs are original, so copyrighted to me. If I have been inspired by someone elses work, I have named them in the post, and where able, I have provided a link.

Please feel free to use my designs for inspiration, I just ask you to credit me, and provide a link back to my blog.

Thanks, Shaz XX

Showing posts with label Heat embossing. Show all posts

Sunday, 5 July 2020

Christmas Card Club Challenge #14- Christmas Trees.

It would be really bad form if I was late with this fortnights challenge, as it's chosen by me, and I've asked for Christmas Trees, although we always have the option of Anything Goes. You can't even imagine how many photographs it took for me to get ones you could actually see clearly- Sparkly/Holographic Embossing Powders and cameras do not play nicely together!


My 4 cards are made with A4 cardstock folded in half, and I've used a selection of trees with a variety of Embossing powders for my offering  this week.
 The stamps are all by a company called Butterfly Kisses, who seem to have vanished from the industry. I bought the stamps quite a few years ago, at a couple of NEC visits, but haven't seen them for a very long time.


They are a mix of grey rubber and clear stamps,with 7 different designs for the trees. The grey rubber used to be wood mounted, but I unmounted them a long time ago.


  I finished them off by wrapping a black & white checked ribbon round them, then added the greeting onto a die cut banner label


I completely forgot to take any in-process photos, so I'm afraid it's a short and sweet entry from me this time round!


Sunday, 7 June 2020

Christmas Card Club #12- Snowflakes.

Hi ladies, back with another Christmas Card Challenge, this weeks theme has been chosen by Gwen, who wanted to see Snowflakes.
 I was really pleased to see this theme, as I'd watched a Jennifer McGuire video a few weeks back, called Distress Oxide Resist, and had put it on my list of things to try. I even bought some Oxide sprays for doing it, lol. I've linked to her videos You Tube page.


The beauty- and what really grabbed me about Oxides- is that the colour shows even on dark or black cardstock- these are sprayed onto a navy blue cardstock. 


These are the colours I used, the Wilted Violet only in very small amounts.

The base cards are 'notecard' size-which is roughly 10½ x 14½cm, or 5¾ x 4⅛", so I cut 4 pieces of navy cardstock to fit.


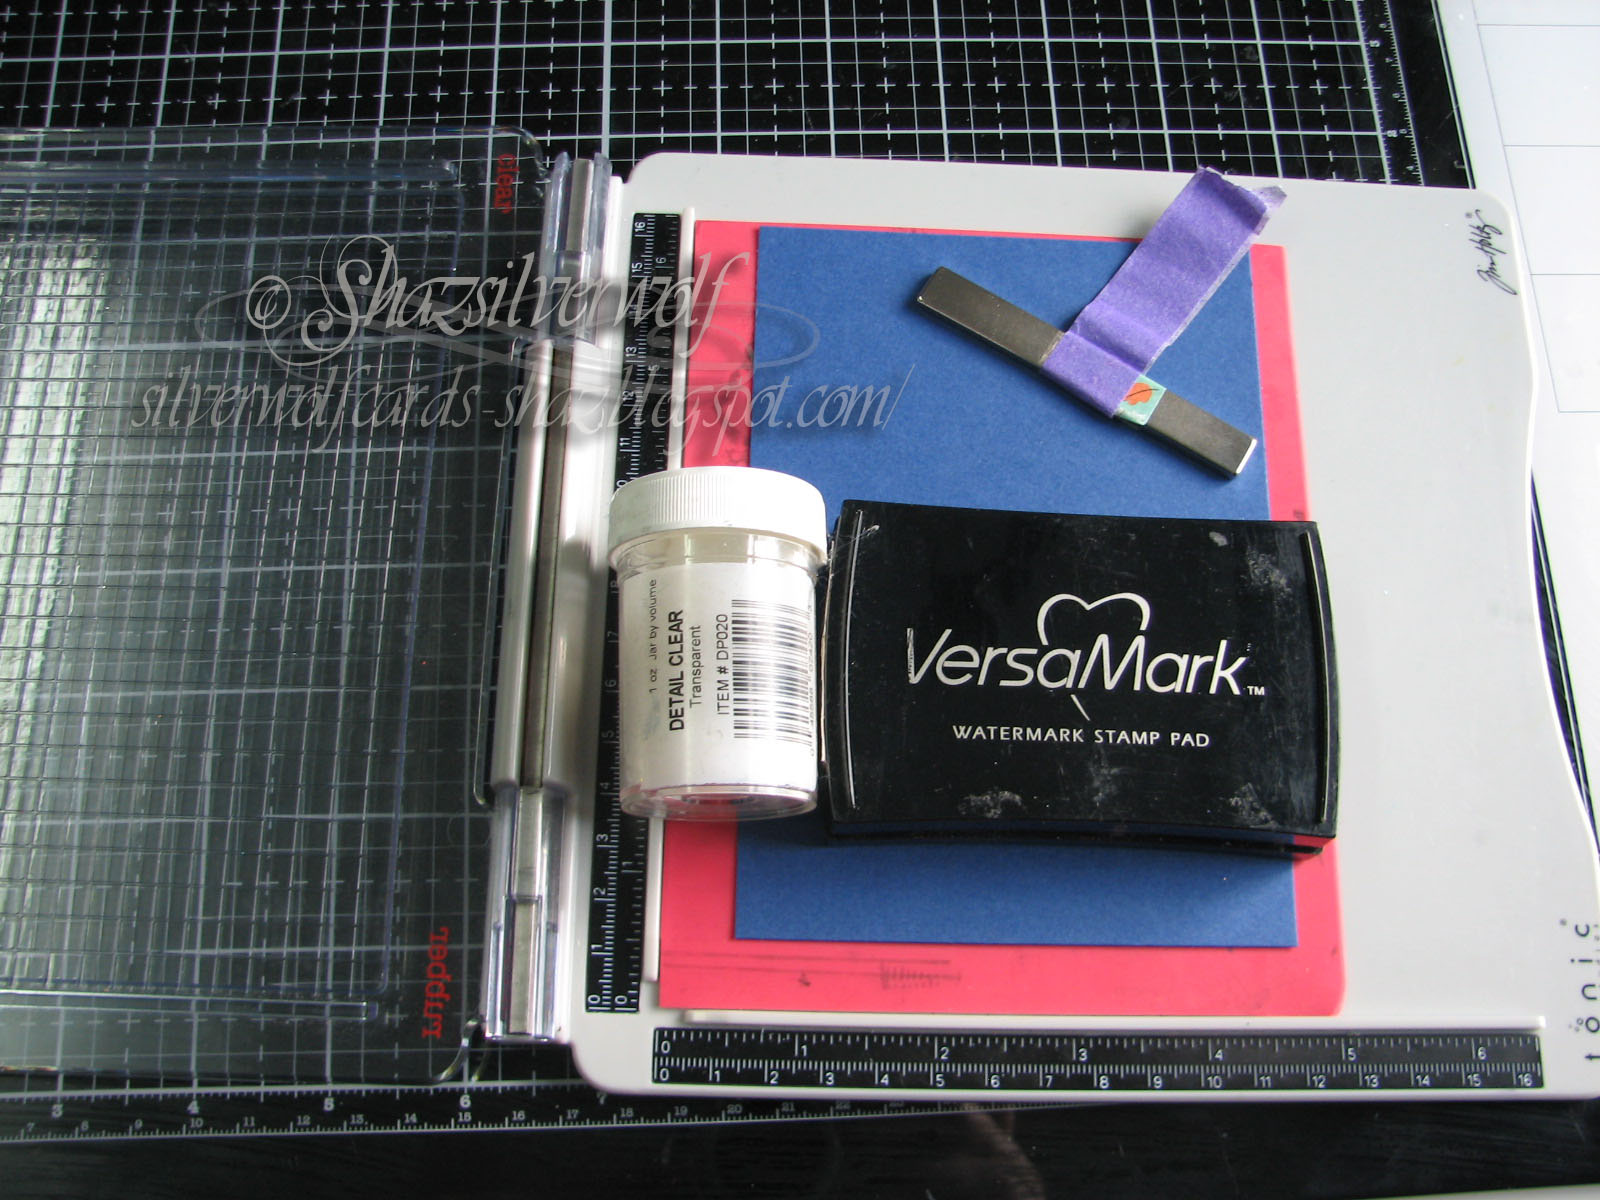
To do this, you will also need a Versamark, or Embossing inkpad, Clear Detail Embossing Powder, and some Snowflake stamps.


  Mine are the Tim Holtz ones, which come in two sets, one with large snowflakes, and the second with the same snowflakes in medium and small. 

I stamped 2 large snowflakes on one, and 2 medium, then switched to 2 large and 1 medium. Heat embossed them with the Clear EP. 


Now comes the somewhat messy bit, but you can help keep the mess under control by having a box to work in. Mines got some newspaper and heavy duty paper towel in the bottom too.


 Starting with the lightest colour, Tumbled Glass, I sprayed from the bottom up, concentrating the colour at the bottom. Then dried it before the next colour, as if you do it with the first colour wet, they'll just mix together.


 Next came Broken China, dry, then Mermaid Lagoon, dry, then a little of either Chipped Sapphire or Wilted Violet.


I also flicked a few droplets by undoing the top and just flicking colour from the end of the spray tube.

Dried that, then followed by flicking a few drops of water to give a bit more background texture. I also had a bottle of Cosmic Shimmer Pearl White mist, which I used right at the end, but more about that later.


Tilted them to the light in the hope the Pearl Shimmer shows up!


Next comes the fun bit- ironing off the heat embossing.


 Any iron will do- just hottest setting and no steam.
 You need some copy paper to place over your stamped piece, and run the iron over it a couple of times to melt the EP and soak it into the paper.


And you end up with the snowflakes revealing the colour of the cardstock underneath, any ink that was on the snowflakes comes off with the ironing, so they look nice and crisp.
 The Cosmic Shimmer spray had me a bit worried- handling these pieces my fingers were covered in the mica from it! I gave them a buff over with a cloth, and that seems to have fixed it, but I will be checking them a few times before I use it again!


All four ironed off, and then I decided I was going to stamp a sentiment on them, so used Phill Martins Stately Christmas sentiments, love this set as it has  lots of really great sentiments, in a gorgeous font.


 Stamped it in Versafine- I used the Happy Christmas in the bottom right-and heat embossed with Silver Detail EP.

 Added them to the card bases with DST, and I'm done.
Two things I must mention- first, I'm sorry but I only realised yesterday I've missed one weeks Challenge!
 And second, I have no idea if my font is a bit too small- please let me know if it is, or if it's OK. This new Blogger update is playing games!

Monday, 1 April 2019

Christmas Card Club #7- Santa

Late this week, but I'm finally here. This fortnights Challenge was set by Rita, and she wanted to see Santa on our cards.
 I've made a total of a dozen cards, in three different colours, and two designs.

 Not the most fantastic photos, sorry, but the silver EP and the Sparkly one do not play nicely with the camera lens!


  There are three green, three blue and 3 red.
 In each case I stamped then die cut with a tag die the Santa image, then die cut three more white tags and embossed each with a Christmas Embossing Folder.

I found it's better to die cut the tags, then emboss, rather than the other way round, as the embossing gets flattened going through the machine to die cut.


Made a small hit on my eyelet stash, to add one to hold each pair of tags together.

Added the tags to the card front with foam pads.


Two shades of Distress Oxides were blended over the edges.


I added Christmas Vellum to the card front, and found that if you use double sided adhesive sheet over the whole of the back of the vellum, it doesn't show. The drawback is- don't use textured card! You can see the problem you get with the red card, which was a hammer finish.


For the second design I used a stitched oblong die to cut out the stamped image and also an embossed piece the same size, then just adhered to the card. The embossed piece with DST, the image with foam tabs, just offsetting them slightly.


This Santa stamp is a really old one, it used to be wood mounted, so must be 15+ years old. I believe it was by Rubber Stampede.


This one, called St Nick, was also a rubber wood mounted stamp,so is also quite old, but it is available now as a clear stamp, part of a set from Butterfly Kisses, which can be bought from Hobby Art Stamps.
I'd originally added Vintage Photo DI around the edges on top of the colour, but it dulled it too far, so I ended up going over it with a second darker shade of the colour used.


On a side note, we see Santa in a Red suit these days, but pre-1930's, Tan or Green were the traditional colours. Thomas Nast, actually the artist who developed the Santa image we all know and love, then changed to painting him in a Red suit. This was spotted by an artist called Haddon Sundblom, who was commissioned to do a Christmas advert for Coca Cola, and he used Red as it tied in with that theme. And the rest is history!

Monday, 26 November 2018

Christmas Card Club Challenge #24- All Wrapped up!

Sorry ladies, completely lost track of what week it was.  This fortnights challenge is set by Carol, and she chose the theme 'All Wrapped Up'. I've taken a bit of  a liberty with the interpretation here, as I think I'm overflowing with Christmas cards this year, so I've made a bunch of gift tags!
  I ended up making 7 designs, in a pretty random number for each. The tags are more or less 3" square. I used a lot of off cuts to make these, so there is a little variation.


 This one uses a Holly stamp from Lavinia Stamps, stamped in Versafine Clair Rainforest, then I added  Stampendous Crystal Embossing Powder over them and heat set. Then Liquid Pearls in Garnet for the berries.
 The sentiment comes from a Hobby Art set, Winter Wishes. That was stamped in the same green ink, but not heat embossed.

The Bells come from a Card-io set called Merrily on High.
 I stamped the first bell in Gold Encore Pigment ink, masked it, then stamped the second. Heat embossed both then with the same Crystal EP.

The sentiment is from a Crafters Companion set.


Afterwards I added the holly sprigs using an old Rubber Stamp Tapestry set.
 I used the Garnet Liquid Pearls for the berries again too.


 Quite a lot of Card-io stamps used for the tags, this one is called Christmas Greenery. Stamped in Versafine Spanish Moss, heat embossed with the Crystal EP, and then the sentiment stamped in Versafine Majestic Green. I added  White Opal Liquid Pearls to the Mistletoe Berries.

 Another Mistletoe design, this time using a Lavinia Stamps Mistletoe Branch. I stamped this one in Olympia Green, added the Crystal EP, then stamped the greeting in the same colour. The same Opal White Liquid Pearls used for the berries too.


 Christmas Trees next, and these are from a Visible Image set, and I used the medium one once, then the small one was stamped in both first & second generation images, using Versafine Olympia Green.
 For these I used a Stampendous EP called Rainbow Sparkle, and although it doesn't show in the photo's, it makes it look like the trees are covered in lights.
 I added a tiny acrylic star to the top of each tree. The sentiment here is from a Phill Martin set,Scribbled Christmas Petite.


This was the biggest batch I made. All Card-io/Majestix stamps, the branch is a partial stamping of a tree from the Christmas Breeze Collection. I stamped in Clair Rainforest, first and second generation images.  I added a mix of baubles from the two sets,Zendangles and Bells & Baubles, using Versafine Majestic Blue and Deep Lagoon. The strings were drawn in with a very fine Micron pen.Sentiment again from the Crafters Companion set.The branch and baubles were heat set with the Crystal EP.
Last set used two Card-io/Majestix snowflake sets, Winters Kiss and Winter Flurry.Stamped in Encore Metallic Blue, and heat set with WOW! EP in Glacier. Sentiment again from the Hobby Art set, and stamped in Versafine Majestic Blue.

Wednesday, 21 March 2018

WOYWW #459

 Seem to be all behind at the moment- I lost a few days last week, so I was late getting my Christmas Card Club Challenge cards up, they are in the post below. Not as many as I'd planned, but time got away from me. I did get to use some really old, but totally timeless stamps though- I must have had these for at least 10 years, and they are still goodies. Chocolate Baroque, Poinsettia & Christmas Rose Script.
 But anyway, back to this weeks WOYWW, over at The Stamping Ground.
 Just a few odds and ends on my desk, a few purchases- nothing very exciting, just some texture stamps from Aliexpress:£1.58p!


 I also got a couple of sets of banner dies,they were £1.87 and £1.88 each. For the stamps & dies you can judge the sizes by the background mat- the squares are 1cm.


I've also been using the fact the dies needed putting away to catalogue them properly. I had them organised into sections in the box, but into different folders on my PC/One Note app, and some are not catalogued at all, as I have no idea of the brands, they were gifted to me. So I've been scanning them in, and trying to organise my storage to both be the same.  That's ongoing, lol.


 While I was planning on more Christmas cards, I painted some cardstock with Imagination  Starlights paints, and then used some baby wipes and paper towel to clean my brushes between colours.  You can't really see it in the pics, but there is a lot of shimmery sparkle to these, so I put them aside to dry.


Another purchase, and I don't know if I'm just late to the party with this info, or of it helps anyone else. I was watching some craft videos a couple of weeks ago- Gina K Designs at Stamp TV. She uses mainly her own stuff, but does make some gorgeous cards, and I love her ideas. Anyway, one night she had one of these erasers on her desk- A Tombow Mono Sand Eraser. She said- and demonstrated- that they are fantastic for removing stray specks of heat embossed powder- you know, the ones you always miss when dusting off stray specks? They came off really easily, and left no mark, so I ordered one off Amazon. Actually, two, as one had to come from China, but two were available from the UK- how's that for weird? They remind me very much of the old typewriter eraser pencils you could buy- and may well be the same sort of thing, if anyone has any they could try out.

For anyone planning on going to Ally Pally in April, Hubby and I are going for the first time. I know Helen (Stamping by H) is going, if anyone else will be there on Saturday, drop me a message via Facebook PM( link in sidebar), and we'll meet up and say hi!

 I notice in my last couple of posts, in the comments, I have a new commenter called Welsh Dors. Hi there, I'm afraid I cannot connect to you, as when I click on your name, it doesn't link me to you in any way, so I can't come and say hello! If you do have a Blog, would you please leave me a link in the comments, and I'll pop over. As regards the Versafine Clair pads- they are fabulous. I'd actually say even better than the original Versafine Onyx Black, and I never thought I'd be saying that at all!

For my And Finally....... this week- not a Pinterest funny, but the Mothers Day card  I received from my Beloved Eldest Son:


On a side note, feeling much better this week. Managed to see a Pharmacist, and ask if I could take decongestants with all the other things I'd been given, and she said yes, so I'm taking those which definitely is helping to clear my head cold!

Sunday, 4 March 2018

Christmas Card Club Challenge #5- Robins

This fortnights challenge is set for us by Valery, and she chose Robin/Robins.
 I've had a lot of fun with this challenge, and to prove it, here is a whole flock of Robins!

 We have a shaker card, 4 cards and 4 tags too.


The main set of stamps used is called Round Robins, and is from Hobby Art.


The Robins were stamped In Versafine Clair Nocturne, then heat embossed using clear powder.


The colouring was done with Promarkers- Tan/Firewood for the browns and Lipstick Red/Crimson for the red.


 I masked them all off, and brushed Broken China and Faded Jeans across the tops, having placed a torn piece of paper to make the hills. A thin line of Stickles in Baby Blue defined the edge.


 I added a few glittery peel off snowflakes- they were actually 'waste' from the backing sheet!


The filler was from a package I picked up the last time I went to the NEC,called Crystal Snow, but I can't recall who I got it from.I think I overdid it a little!

 While I was waiting for the Stickles to dry, I decided I'd make a few tags too, and a smaller card. The robins stamped in Nocturne again, and heat embossed. The greetings, from top left clockwise, are from Phill Martin Scribbled Christmas Petite Sentiments set.Hobby Art Winter Wishes, Phill Martin  Snowflake Sentiment Corners, and the 'odd' one is from the Hobby Art Robins set.
 The 'odd' image is from a set called Winter Birds, by Inkadinkado.

Not sure if he really is a Robin, but sort of looks similar.😊


  That one was heat embossed using Stampendous EP called Holographic, and is really cool, as the longer you heat it, the more the colours change. I just added some DI Broken China/Faded Jeans from the centre out, and used the same blues to dust around the other Robins. Punched a hole & added ribbon.

I was almost done, when I remembered I had an Imagination Crafts stencil called Singing Robins. So, I made them up using stencil paste, then left them to dry so I could foil them.


While they were drying, I went back to the robin with the letter in his beak.


Stamped his hat,then masked the hat to stamp him in place. I also stamped the letter first of all, so I could position his beak over it. Good old TH Stamping Platform!

I filled in the white parts of the hat with an embossing pen, then added Stampendous EP in Sparkle Puff. Don't know if that's available, I've had it for years, but you could get the same effect by mixing a pinch of glitter with any Puff Powder.


Added a few glittery snowflakes again, and stamped the sentiment, from a Crafters Companion set,called Festive Sentiments, in Encore Silver pigment ink. I think, along with a Gold inkpad and a normal black one, these were the very first inkpads I bought. Along with a reinker, which I think I've used once in the 15 ish years I've had it. Still works fine too.

I thought the 'snow' half of the card looked a bit bare, so I added some Embossing ink, then sprinkled on a WOW! EP called Snowfall.

So that's it  for this challenge, and 5 cards and 4 tags added to my Christmas Card collection!

An End of an era

An end of an era

I write this with a broken heart, that only time can heal My beautiful, wonderful wifelet Shaz (Silverwolf) passed away peacefully in the ea...