A warm welcome to all my visitors,

Thank you for taking the time to come and look at my blog, I really do appreciate it. I would love you to leave me a comment, even if it’s just to say Hi. It means I can come visit you!

All my designs are original, so copyrighted to me. If I have been inspired by someone elses work, I have named them in the post, and where able, I have provided a link.

Please feel free to use my designs for inspiration, I just ask you to credit me, and provide a link back to my blog.

Thanks, Shaz XX

Friday 28 June 2013

Cats & Creativity

 Another tag using Lavinia Stamps, this time sponged in Denim, Stonewashed, Pink Sherbet & Raspberry Adirondacks. The cat is stamped in Black Versafine, as was the little dragonfly, and the Vine in Olympia Green Versafine. I added some stampings of the small flower cluster in Raspberry and DI Worn Lipstick.Also a few small Star Clusters in Brilliance Moonlight white, with some Diamond Stickles on top. Random grasses from Inkylicious along the bottom, and the 'Enchantments' word is taken from the large Fairy Words background stamp, also from Lavinia Stamps. I cut the word out of the background so I could curve it around the cat.
This tag is sponged with DI, Spiced Marmalade, Worn Lipstick, Chipped Sapphire & Dusty Concord. The stamp, Tim Holtz Stuff To Say, is stamped in Versafine Onyx Black. Both the dragonfly & Butterfly were the ones I coated in the Gold sparkly embossing powder in the the earlier post.
 Supplies;
 Adirondack inks, Denim, Stonewashed, Raspberry & Pink Sherbet.
Versafine, black & Olympia Green
brilliance Moonlight White
DI Spiced Marmalade, Chipped Sapphire,dusty Concord & Worn Lipstick
Stickles, Diamond
Lavinia stamps, Vine,    Witches Cat,  
 Bugs     Flower Cluster      Fairy Words      Stars
Inkylicious, Essential Grasses
Tim Holtz Stuff to Say

Spooky Pair, or Gruesome Twosome.

Both tags have been sponged in Citrus, Lettuce & Meadow Adirondacks. In the first, a couple of the Butterflies from Tims Papillon stamp set were coloured with DI Markers, Fired Brick, Vintage Photo  & Wild Honey and stamped randomly.
Another stamp from The Stuff To say set inked with the Di markers too. I used Walnut Stain for most of the words, adding Black Soot for the two 'solid' words. I also stamped the words in two sections, just masking over the other half on the stamp with a Post-it, so I didn't get ink on the bit I wasn't using.
The Spooky Tree is from a Chocolate Baroque set, Halloween Raven, and stamped in Black Versafine. Some spooky branches added at the edges from another set, Howling Moon..A few flying birds added with a  second stamping too. The dragonfly is one that I'd glittered in the previous post, and the Skull embellishment is from Riverside Beads, added with a brad so it still moves.
The second tag is stamped with images from a (fairly) recent purchase I loved, but haven't used until now. The stamp set is called Dark Boundaries, Cherry Pie Artstamps.
All the images, the clouds/moon,Crow on a branch, railings and Bird flock are stamped in Versafine Onyx Black. Its the same Bird Flock I used to stamp on the tag above.
 Supplies:
 Adirondack inpads in  Meadow, Lettuce, Citrus.
DI Markers, Vintage Photo, Black Soot,Fired Brick, Wild Honey, Walnut Stain.
Tim Holtz Stuff To Say stamp set
Tim Holtz Papillon stamp set
Halloween Raven, Chocolate Baroque
Howling Moon, Chocolate Baroque
Dark Boundaries, Plate 52, Cherry Pie Artstamps, from De Stempelwinkel
Skull embellishment, Riverside Beads

Thursday 27 June 2013

Nature themed tags


Back with the tags, then. The first one uses Tims Papillon rubber stamp set onto a tag sponged with Sunshine Yellow, Meadow, and Lettuce Adirondacks, with a touch of Sunset Orange. The Butterflies were stamped in Colourbox Silk Green Pigment ink and heat embossed with clear powder.

The middle tag was sponged with Meadow, Cranberry,Sailboat blue & Sunset Orange. theDandelion heads are a Lavinia stamp, stamped in Versafine Black with Stickles Black Diamond added to the ends.The phrase is from a set by Hobby Arts.
A sparkly dragonfly finished it off.


Third tag, on the right, is again sponged with Adirondacks,Sunshine Yellow, Sunset Orange and a little Red Pepper. the trees are just the tops of a row of Pines by Stampscapes, coloured with Distress Markers in Forest Pine & a bit of Vintage Photo. The flock of birds is an Inkylicious stamp, a set that has a number of bird flocks and birds on it, and I used the same sentiment again.

 The sparkly Dragonfly brad in the second tag started its life as a plain bright green brad, but it didn't go with the tag at all.So I dabbed it onto a Versamark pad, and dipped it into a sparkly Black Embossing powder, by WOW.


Heated it with the heat gun- hey presto, a cool sparkly dragonfly! The tool I'm holding it with is from Woodware,called Clip-it tools. Easy to hold the brad without getting covered in ink & powder, or burning my fingers. Which is a good point, let the brad cool before you touch it- not only does the embossing powder get hot, so does the brad.


I did this again with some more dragonflies, and a rather plain metal butterfly brad, and a gold sparkly embossing powder, and these turn up later on some more tags.

Supplies:
Tim Holz Papillon Stamp set
Lavinia Stamps,Dandelions
Row of Pines, & Tall Pine,Stampscapes
Scene-its Sentiments stamp set
Take Flight, Inkylicious
Woodware Clip-it tools
 Adirondack Dye inkpads
Versamark & Black Versafine inkpads
WOW embossing glitter powder

Wednesday 26 June 2013

WOYWW #212

Hi folks, I missed last week- didn't do any crafting last week, as we went to the Download festival at Donington at the weekend. And here's the evidence!
 

Epic weekend, and the weather was quite good to us too. A bit of drizzle on Friday night, a bit on Saturday, and Sunday was glorious. I came home with a tan.And a T-shirt. And some really funky socks. Aren't these just the most awesome socks ever? So much so, I ordered some more when I got back, for Merlins birthday next month. She will love them. Turning into a little Goth, is Merlin. Beck said she calls me her Goth Nanny, rofl!

 So, to the desk then. I've been stamping some tags this week, decided it was time I did something with all the tags I'd inked.


Looking its usual untidy self, my desk. DI Markers at the back, various inkpads here, there & everywhere.A few stamped tags littering the back of the desk. Posted a couple already, more to follow.
Had some great stamps in the post today, thanks Fiona. Not had any Stampin' Up stamps before, but I'd coveted this humungous Swallowtail Butterfly for a while, and Fiona (Staring at the Sea) was using this script stamp at the crop, and I loved it.
Apology here to Debs Willis, sorry I linked to the wrong Debs to thank her for my card a couple of weeks ago. Probably wasn't awake at the time,lol. Still loving my night shifts, which some of you are finding very strange. But thats me all over. Normal, I'm not. I sleep like a log, in fact I sleep better and longer than I ever did when trying to sleep at night. It probably helps that its permanent nights, so I don't have to adjust between day & night shift.
If you've got this far and wonder what I'm rambling about my desk for, pop over to our Glorious Leaders blog, The Stamping Ground, say Hi to Julia, link up and come stalk with us. In the nicest possible way, of course. Its all done in the best possible taste! :)

Tuesday 25 June 2013

A spooky Lavinia Stamps tag

This is the third of these three tags, again with Lavinia Stamps. Tag sponged in Sunset Orange, Meadow, Oregano & Cranberry Adirondacks.
Stamps added in Versafine Onyx black, Stickles in Diamond & Black Diamond used to create bubbles coming up from the cauldron.

Stamps:
  Small Owl
Willow the Witch( comes with Cauldron)
Creeping Vine
Bats


Tag with Lavina Stamps

All of these tags will find themselves on cards, eventually. This one also uses Adirondack inks, sponged on. Pink Sherbet, Raspberry, Eggplant & Stonewashed, if I remember correctly.All the stamps are Lavinia stamps, and stamped in Versafine Onyx Black.I've added Stickles in Mystic Green to the flowers, and Frosted Lace to the stars.
Stamps used:
Fairy Wish( main stamp)
Stars 1
Creeping Vine
Fairy dust is like love words

Monday 24 June 2013

Tagging....Tim Holtz & Lavinia Stamps

Not the first pairing of stamps you'd think of, is it? Tim Holtz & Lavinia stamps. But they seemed the perfect match. I decided it was time I used up some of the tags I'd inked up an Ice Age ago. Browsing some of my Tim Holtz stamps, particularly the wordy ones, this combo sprang to mind:

The tag is coloured with Adirondacks, Sunshine Yellow, Citrus & Meadow. I split the wording of the Tim stamp, and used a Distress Marker, Vintage Photo, to make that easier.
Which left me room in the middle for my main image, from Lavinia stamps. The ivy around the edge is also a Lavinia stamp.Both stamped in Onyx black Versafine. Stickles in Diamond added to her wings.I also added Black Diamond Stickles to the ends of the flower stem.


Stamps used:
 Tim Holtz Stuff to Say, CMS110.
Lavinia Stamps Flower Fairy
Lavinia Stamps Creeping Vine
Supplies;
Adirondack dye inkpads, Sunshine Yellow
Citrus & Meadow
Versafine Onyx Black
 Distress Marker, Vintage Photo
Stickles Diamond & Black Diamond

Wednesday 12 June 2013

WOYWW # 210

Morning all! Where did that week go?Wednesday again, time for our regular drop-in at Auntie Julias Stamping Ground. Show & tell for this week then:
This arrived in my Happy Mail on Monday, from my ATC swapper, Monique. Fab ATC, gorgeous cover for it, a bunch of gloriously old dictionary pages, and a beautiful stamped mail art envelope holding it all. Did I get enough adjectives into that paragraph, do you think?


 Also arrived since last week, a lovely card from Debs, (Pen Pot),as a thank you for the flower die cuts. Already putting them to great use I see, thanks so much Deb.


What I'm doing at the moment:( well, what I would be doing if not typing):

I came across the stamped image while I was sorting stuff to take to the crop- another one of those things I keep meaning to use up. I've had the unmounted stamp set, there is four of them, for so long, I have no idea who made them, but they are old style botanical prints. I used a sheet of watercolour paper, torn from the pad, and did the crackle glaze thing, using two colours of acrylic paint, with a layer of crackle glaze between them. Overstamped it with Staz-on, and they are coloured with H2O's, I think.I'd intended using it for a card, but having seen the Art Journals going on at the Crop, I'm thinking to make either an Art Journal, or a Garden Journal, or maybe even an Arty Garden Journal, lol. I'm such a decisive person, ..... not!

 By the way, this will get me into all sorts of trouble, I know but yesterday, Tuesday, was Maggies ( Silvercrafters) birthday.......

 ENABLER ALERT........... Skip this part if your ability to resist temptation is not at its best!

I had a link in one of my e-mails the other day, from a place called  Creativity Direct. The link takes you to the page to get the free catalogue.  This LINK takes you to an e-version of it. If you like altering stuff- don't we all- you will love this!


You name it, they've got it- Canvases, frames, bird houses,magazine holders, journals, shapes, door hangers, animals,torso's, boxes - the list is endless, in wood, card, papier mache, foam,  porcelain, glass. Pretty much every craft you can name is covered too- embroidery, sewing, knitting, altered art, decoupage,glass/ceramic painting, Christmas crafts.
 Loving my night shifts- never seemed to have so much time to myself, or been less tired. Nights aren't part of the rotation shifts where we work, everyone  who works nights has asked for it. I can imagine it being miserable if you HAVE to do it & don't like it- the way I felt about having to do earlies. I was born to work nights, lol. I remember reading a long time ago, that the time of day that suits you best depends on the time you were born, and I was born in the evening. So I'm an evening/night person. Its still weird getting up and its still the same day you went to sleep though.

Friday 7 June 2013

Home made silicone moulds- really works!

A couple of posts ago, I said I would try this out and share the results. At the crop, Kyla( Li'l Pidge)showed us how to make lightweight (& cheap) embellishments using hot glue. She was using moulds made from a two part silicone putty, and I remembered seeing a You Tube video on making your own, using cheap ingredients, which I said I would share.Here is the link to the original video the lady posted.
Her mix uses ordinary silicone,and either talc,cornflour or baking powder.I came across another video, and the guy had added a few drops of acrylic paint, to colour it, and a few drops of glycerine, which seemed like a good idea. So, you need:
A tube of silicone, some cornflour/talc/baking powder and vaseline. I also highly recommend disposable gloves- this stuff is icky when you're mixing it!


Optional extras: Any acrylic paint, and glycerine, which you will find in either Chemists or the baking aisle of the supermarket.


I did the mixing on a heat proof baking sheet, (Poundland).
 Important point- make sure it says SILICONE on the tube- not all these sealants are silicone, I discovered.The first tube I bought, I assumed was silicone, as it said flexible waterproof sealant,but it wasn't.
Some of these sealants are acrylic, and it does not stay flexible when it dries. Lessons learnt here; Always read the label, and never assume anything, lol.
Squeeze a dollop of silicone onto your surface-this one is white. It does come in clear & a few other colours,you will find it has a slight vinigary smell to it.  If you want to colour the moulds add a few drops of acrylic paint and a few drops of glycerine, to help keep it supple.
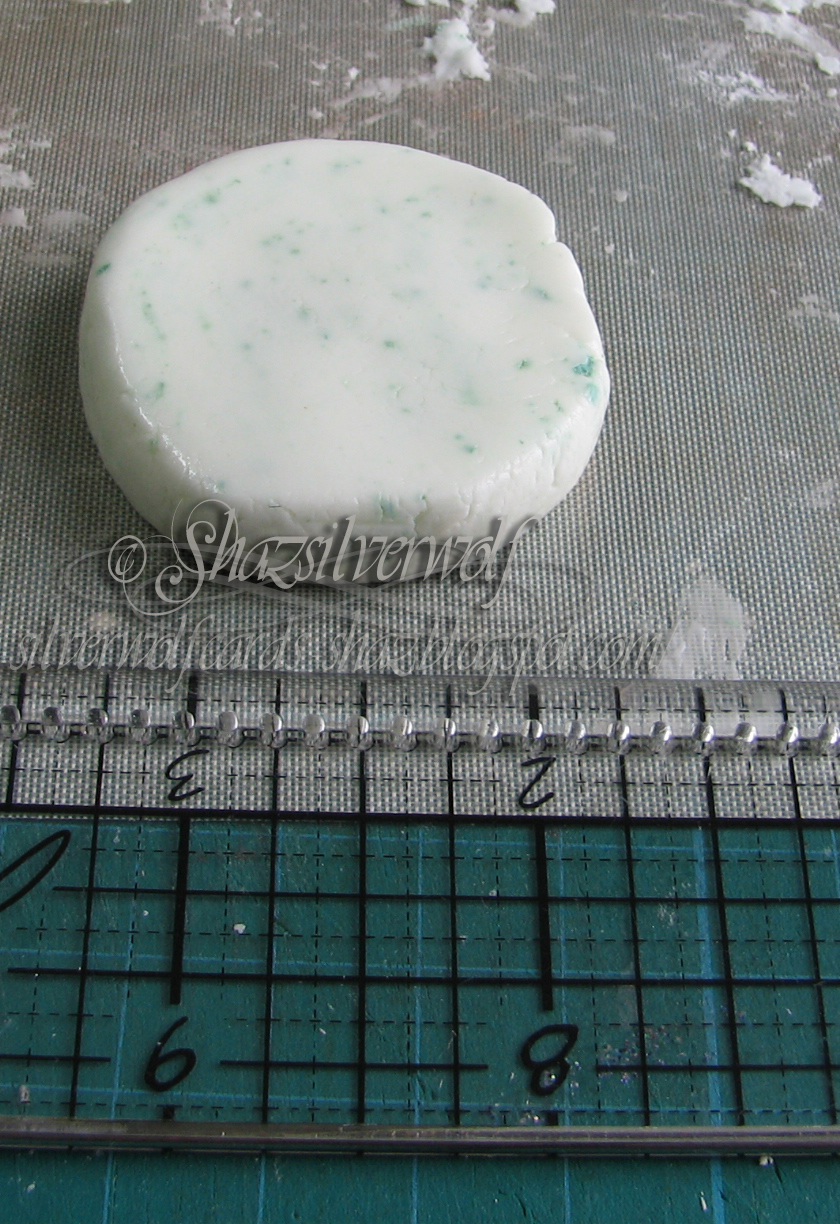
Aim to add roughly the same amount of cornflour, etc,- its not a precise thing, roughly 50/50. You can always add some more silicone or flour into the mix if you need to. I started mixing it using an old plastic loyalty card- smear a bit of Vaseline onto it first.
 I found this was slow going, so switched to mashing it together with my fingers. This is where you will appreciate the gloves. Rub some Vaseline onto them first, this stuff sticks to everything, honestly. Its a bit like making pastry, just knead it together, and you want to get to the consistency of soft pastry.Roll into a ball, and there you have it. Its that easy.

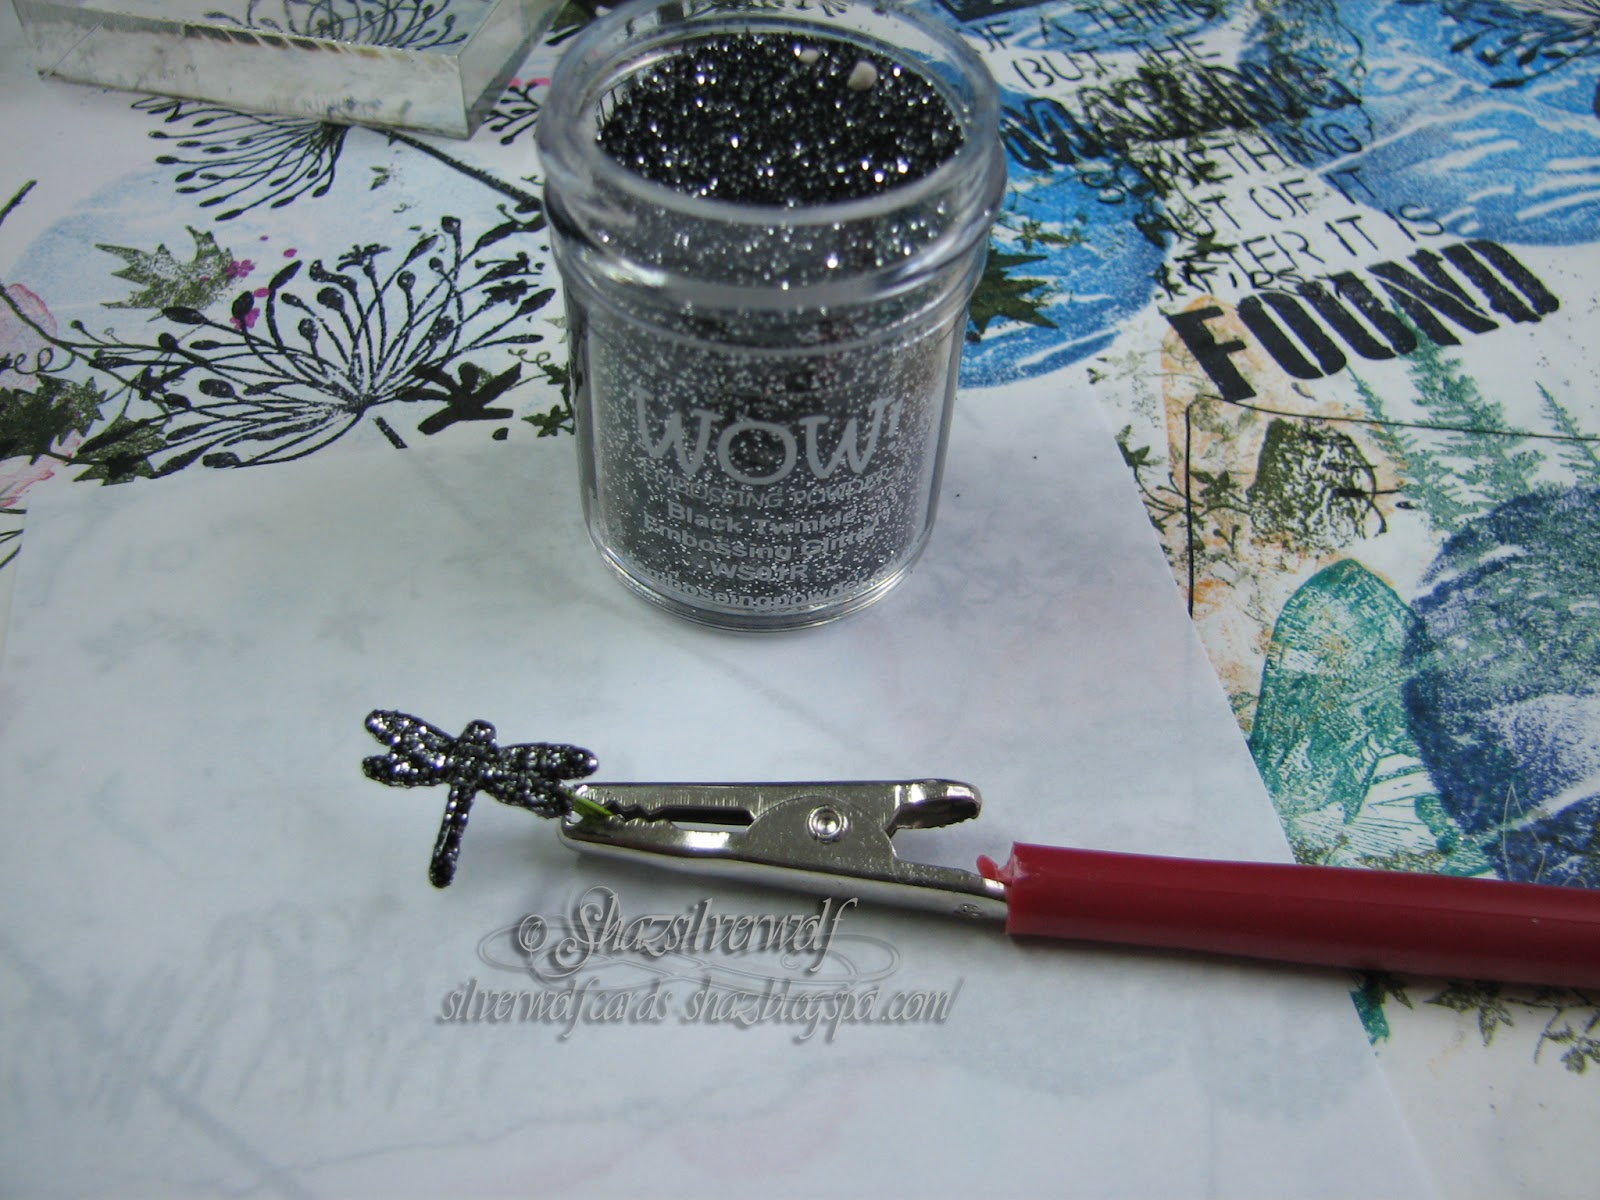
So now to start moulding stuff. I used a few metal embellishments I have, and some old ear-rings. This pic gives you an idea how big a piece I used for one mould. Remember to make it deep enough so that when you press in your embellishment, you don't go all the way through. I found if you did get any little holes because of this, you can wipe a little neat silicone over it, just to stop any leaks. Push down firmly, then make sure the mould is neat around your item. Use the plastic card to lift it off the mat, and place on something to cure.
IMPORTANT: Don't make too big a batch, I found that it cures in about 30  minutes, so you need to have your moulding items to hand, and make your moulds in that time. I used about a quarter of the tube to make a batch.

This is how many moulds I made from that quantity.
 I noticed in her video, the lady says put aside to cure at least overnight. I found these had cured(set) in about half an hour- maybe humidity has something to do with it, or perhaps different brands work differently.
This was my first mould.


All my moulds with their items.


This is a sword- yes, I had some strange ear-rings! You can see how flexible the mould is.


I coated the inside of this one with some acrylic paint, so you could see how much detail it picks out.
 So, the verdict is that this stuff is awesome! Even more so as it works out so cheap.The tube of Silicone cost me £1.99, I got it from B&M Bargains, you'll get it in Wilkinsons, B&Q, Wickes etc.The gun £1 from Poundland, as was the Vaseline.Cornflour was just over a quid from Tesco, I've got a few tubs of talc lying around that I'm going to try out.

Wednesday 5 June 2013

WOYWW #209

So, here I am, bright & early. Only bright because I'm still awake from Tuesday, lol. First week of night shift, and I'm loving it. Seems a bit weird, going to work one day & coming home the next, and going to bed & getting up the same day, but thats fine, I can do weird. Without any difficulty. Possibly to degree level, :). This weeks post-crop desk stalk starts here, at The Stamping Ground, with our fab Hostess, Julia.
 So, my desk then:
 
Unpacking what I came home from the Crop with- a lovely stamp put on the swap table by Mary Ann, a fab image of a Boot House- think  'There was an old woman who lived in a Shoe', which Debs gave me, I think she said it was a digi- stamp, but I may be wrong. I often am. A selection of die-cuts- a couple of Memory Box ones, a bagful of Jigsaw die cuts, which was another of Debs dies- never seen this before, it was a Provocraft one. Some Tim die cuts- windows/arches, with the leftovers as a stencil. A few embossed sheets using  ' Bird Call'  embossing folder. Raffle tickets- yes we ALL took them home for later use, rofl. Crafters ( Hoarders) to the core!
 I posted the link for the DIY Silicone mould making recipe in the previous post, for anyone who wanted to have a go. I might just possibly go and have a try at making up a small batch to see how it works. Have a great Wednesday.


An End of an era

An end of an era

I write this with a broken heart, that only time can heal My beautiful, wonderful wifelet Shaz (Silverwolf) passed away peacefully in the ea...