Thank you for taking the time to come and look at my blog, I really do appreciate it. I would love you to leave me a comment, even if it’s just to say Hi. It means I can come visit you!
All my designs are original, so copyrighted to me. If I have been inspired by someone elses work, I have named them in the post, and where able, I have provided a link.
Please feel free to use my designs for inspiration, I just ask you to credit me, and provide a link back to my blog.
Thanks, Shaz XX
Showing posts with label Cardio/Majestix. Show all posts
Showing posts with label Cardio/Majestix. Show all posts
Yes, our 11th Birthday! What a milestone that is, eh? All down to our lovely Julia, over at The Stamping Ground. This is my UFO for the theme, and I thought I'd make it into a Birthday card to us all. The balloons and gifts are both Card-io/Majestix stamps, the 11th is Honey Doo Crafts, and I'm afraid I have no idea where the 'Birthday' balloon came from, may have been a freebie at some time.
This was the envelope I decided to work from, I can't believe how many of these stencilled sheets I have and not used yet.
I used an assortment of Versafine Clair inkpads for the stamping, and although it's hard to see, I did cover the balloons with a coat of Glossy Accents, and sprinkled them with a little Glamourdust.
And I learned a little trick that some might find helpful.
When you're trying to place clear stamps on your background, ready to pick up with the lid, they can be really annoying, as they keep sticking to your fingers, am I right? Well, the 'string' on the balloons above is a separate stamp to the balloons, and was a total nightmare to get to lie where I wanted it, as it's really thin. It was driving me nuts, and I was sort of looking round my desk for a solution. And then I spotted my anti static bag, and the little dish it sits on has a good coating of powder on it. Dipped my fingers into the powder and rubbed it over my fingertips, and Yay!!! no more stamp sticking to my fingers.
Got the Christmas cards finished, and the Caught in Crystal sheets worked out a treat.
Nothing much in the Enabling Dept- just a 2" Speedball brayer! Came across these a few weeks ago, but couldn't find them anywhere in the UK. Not sure if they're new, or just not widely stocked. Got mine on Amazon- via Supermart USA, which are really good, as their prices are always competitive, and they ship worldwide for free.
realised a few days too late last week that I completely forgot to add an And Finally! So this week there's two to make up for it.
So, on a Fb group I'm part of, a lady had posted pics of some simple Christmas cards she'd made. I asked if she'd mind me CASE-ing them, as the idea was great, and she very kindly said I could.
I mixed it up a little, and created a Deckle edged oval, using my Silhouette Portait 2 to cut it out of 125 micron mylar. This is perfectly thick enough for inking through, but I'd suggest a thicker one if you wanted to use pastes/paints through. You can also die cut mylar, so you can create stencils that way too. I just didn't have a deckle edge oval die. I
also cut deckle edged stencils in rectangles, circle & square for
later use.
These were the cards created by Andrea Turner that inspired me.
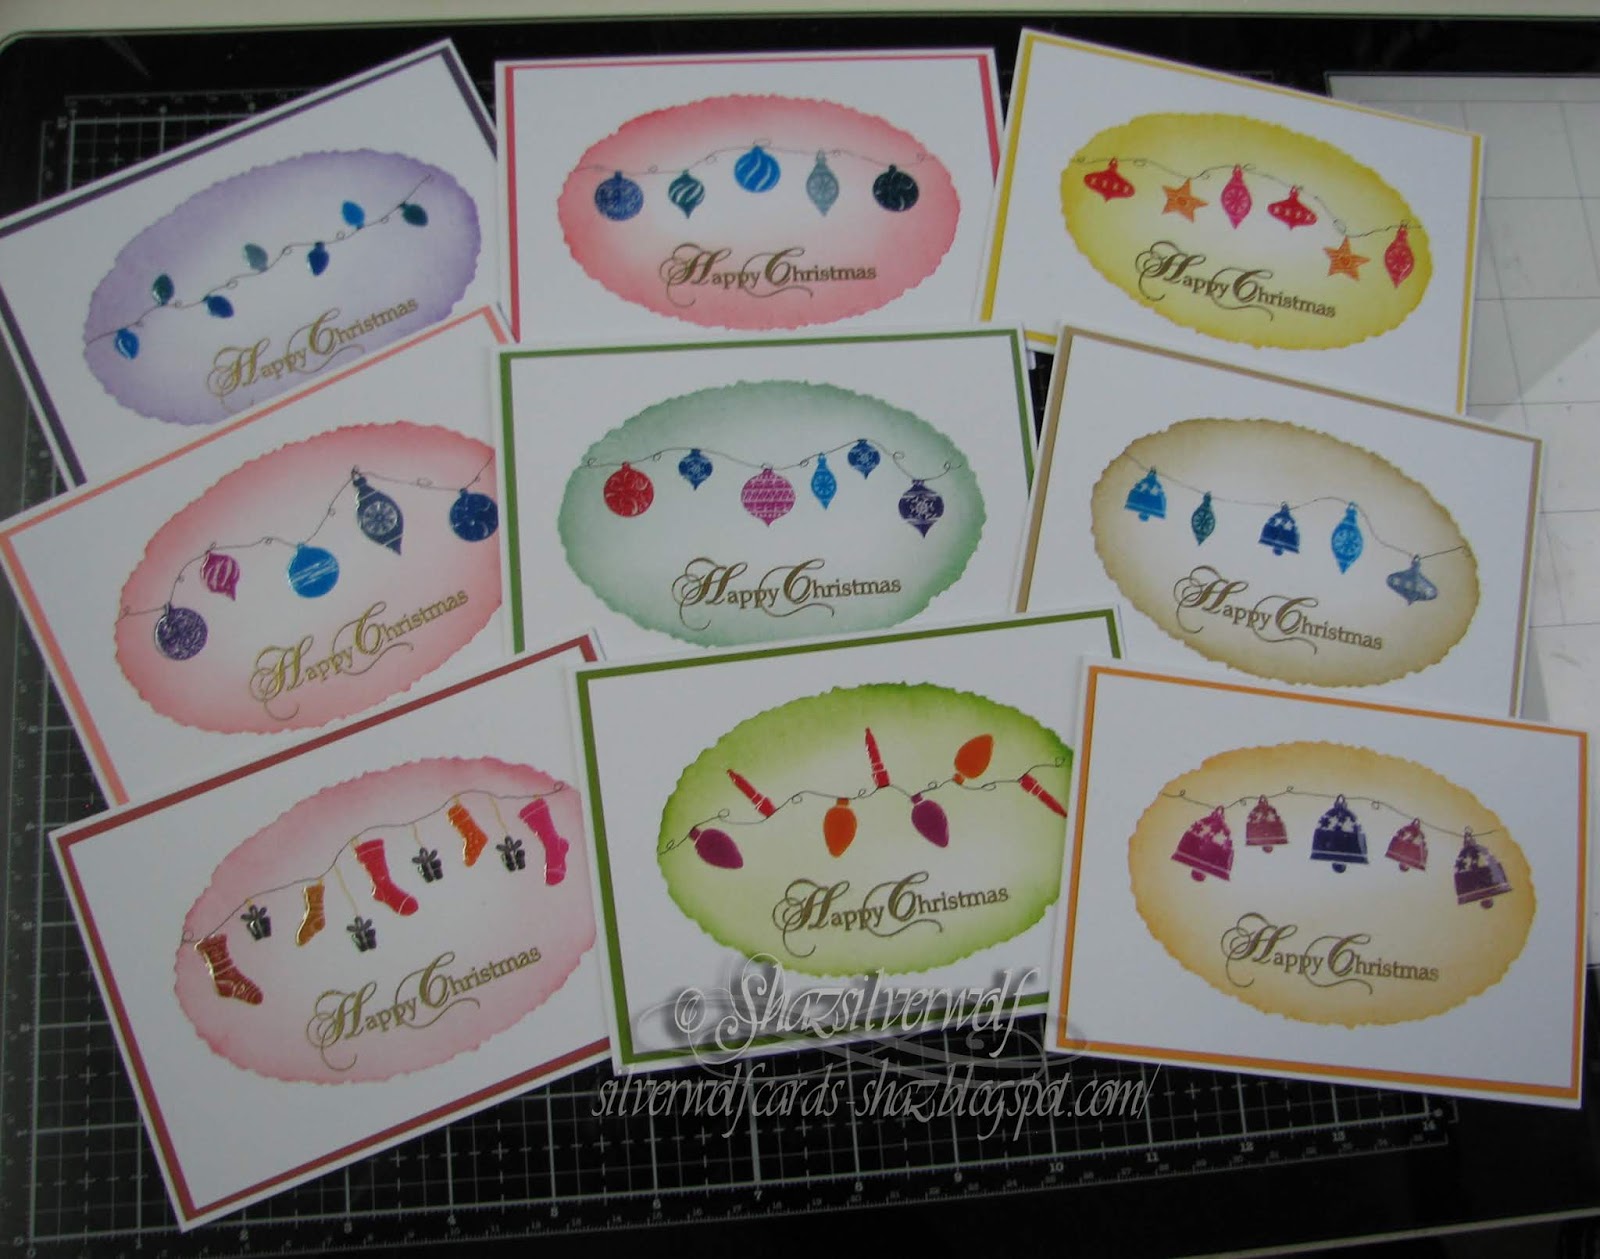
Having taped my stencil down with Purple tape, I used a couple of the makeup style brushes to add colour. In every case, I used 3 shades of Distress ink, a light over almost all the oval, a medium about an inch in all round,both using the larger brush, and finally the darkest shade just around the outer edge, using the small brush.
All together, I made 15 backgrounds.
These are sized to fit 'notecard' size, made by folding an A5 piece of cardstock.
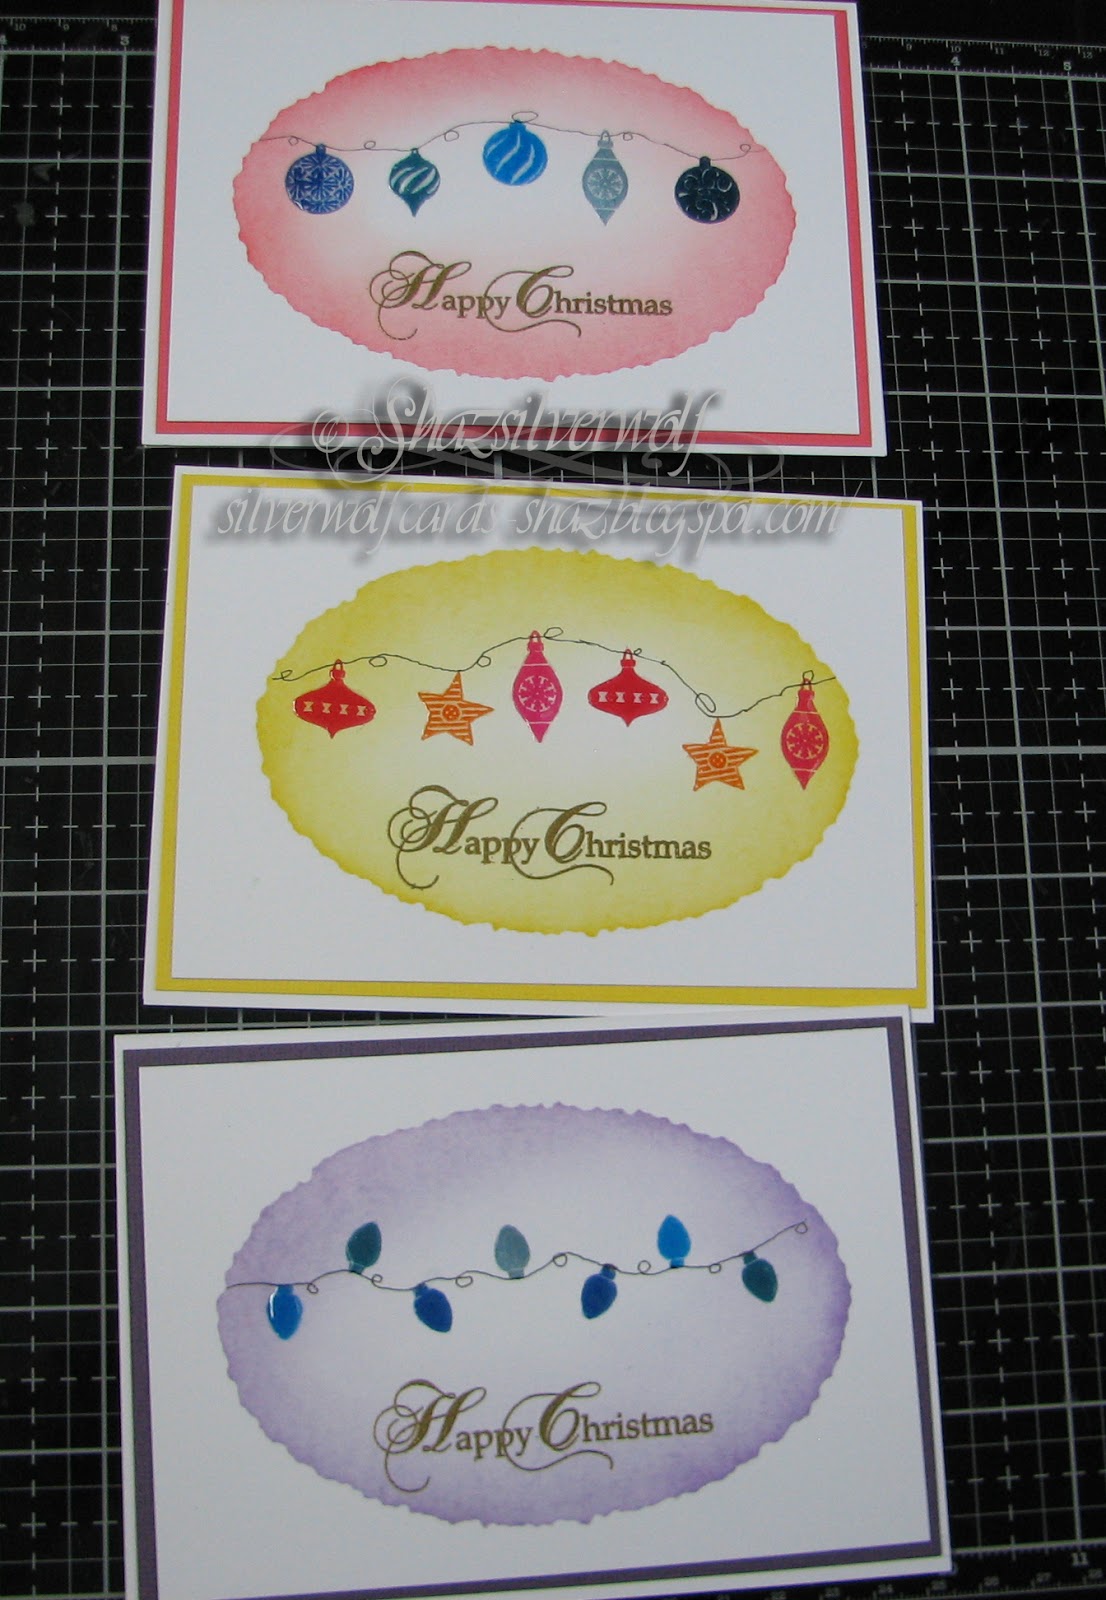
These are some of the Cardio/Majestix stamps I used, and I ordered another couple with stockings and ornaments in, called Great Expectations (Stockings) and Christmas Hang-ups. I did the stamping using various Memento inks, in the Dew Drop pad range. I also used my stamping platform for this, wisely as it turned out, as most needed to be double stamped. I left the drawing in of the strings till I'd finished them all, and used a fine micron pen for that.
For a few I decided to stamp a swag across the panel, and I used a Lavinia £1 holly stamp for that.
For the holly I used Versafine Clair in Shady Lane, and sprinkled on a little sparkly EP and heat set.I'd added a small patch of yellow for the lantern light using a small round make up brush, then added Liquid Pearls for the holly berries.
Next up, I stamped the greeting in Gold Encore Pigment ink, and heat set with Detail Gold Embossing powder. The sentiment comes from a Phill Martin set called Stately Christmas Sentiments.
All the images were matted onto a toning cardstock, leaving a narrow border.
The final step was to add Glossy Accents to all of the ornaments, lanterns and stockings.
The Cardio/Majestix sets used were:
(Baubles) Zendangles,Bells
& Baubles,Elegant Baubles, and one older Rubber Stamp Tapestry
set called Embellished Holiday Wreath.
Then Christmas
Hang ups, Great Expectations ( Stockings), Vintage Lights, and the
smallest lantern from Christmas Scenery 3. There are two others in this
pack, each slightly larger.
A desk with crafting happening too, for this weeks WOYWW over at The Stamping Ground, as always overseen by our much loved Hostess, Julia.
I used one of those stencils from last week to make a batch of backgrounds, to CASE some cards.
These were all done with Distress Inks, and the 'make up style' brushes.
They really are rather good for softer blending, although you can make them darker by adding more ink of course.
I have a couple of sets, bought from Amazon, around £10 a set, compared to £50ish for the branded 'craft' version. This is a set of assorted sizes, you can also get sets of 5 of just the larger ones for about £8. Just search for Toothbrush Style Make up Brushes. And the beauty is, you don't need a huge number of them, as you can just scrub the brush onto a Micro Fibre cloth and it will remove all the ink, without needing to wash or change to a different brush between colours.
The yellow one was done after the purple ones, as you can see no ink contamination.
The mixed size sets are really good, as you can use the smaller ones to add colour to smaller areas, which I did with the darker colour at the edges.
I've started stamping on some using lights & baubles from Cardio,and the Memento Dew Drop pads. Just have to draw in the strings, then I'm going to add some Glossy Accents over them.
These are the Cardio sets I'll be mainly using stamps from.
I also forget to mention last week that you don't necessarily need a digital cutter to make your own mylar stencils, you can die cut from them too, so you can create any shape stencil you like from your dies.
And thats my desk for this week. Which just leaves.....And Finally......
Back in with making Christmas Cards for the Christmas Card Club Challenge, and I've used both themes for my cards, and made a total of 10 cards.
The ones on the left are 4 6" square cards, and 4 'notecard' size, which I make by cutting a sheet of A4 cardstock in half on the length, then folding to give me topfold cards, or landscape sidefold.
The Fairy and large tree are by Lavinia stamps, the treeline and small deer by Cardio/Majestix.
As a finishing touch I added an acrylic star to the top of the tree, and some dots of Stickles for fairy lights.
These two are A4 cardstock folded, and use a very old stamp in my collection, called Angel Chorus Collage, by Rubber Stampede. It was stamped onto cardstock, then also onto vellum, and the vellum was torn around the design and added on top of the cardstock with a small amount of adhesive. I also added some colour to the back of the vellum image first. A few die cut flowers, and a couple of again very old backing papers, and they're finished.
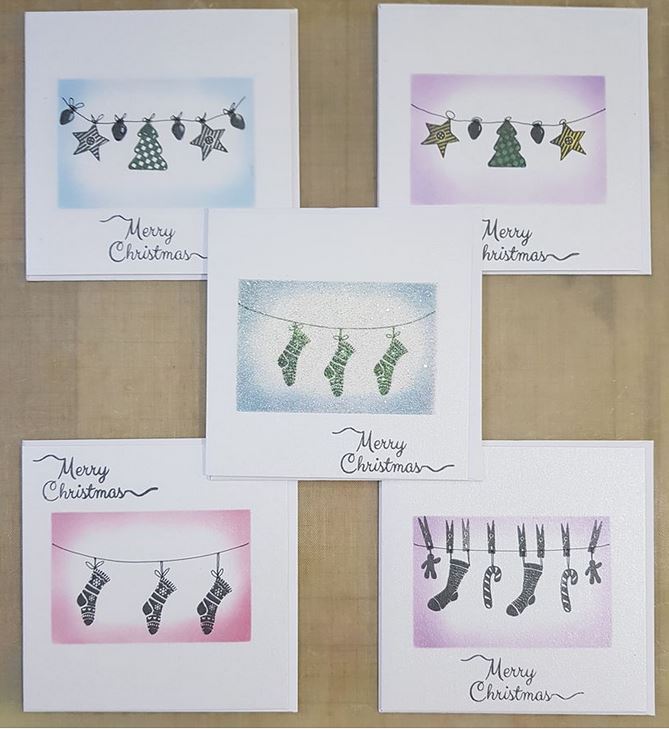
To make the bauble shapes in the first four cards, I used a variety of stencils.The very top two are using a Clarity bauble stencil. The other two square ones use a stencil cut using a Spellbinders Ornament die, 2011 Heirloom Ornaments.
The final 4 use a stencil cut using Spellbinders Heirloom Ornaments 2010.
DI Broken China & Tumbled Glass were brushed over the top edge, and I used a torn paper mask for the top hillside. I used the cheap 'Toothbrush style' make up brushes to add the ink.
The remaining ink on the stencil was dragged around the edges to define the shape, using a dried baby wipe, which I also used to add the ink over torn paper to make the hills.
This is the Clarity stencil, and I also cut a copy from thin paper to use as a mask when stamping in the trees. The paper is thinner than the stencil, so the stamping is easier to do without having a big gap caused by the depth of the stencil.
The Poinsettia is another Spellbinders die, and I believe the flourishes are by Cheery Lynn.
Almost the end of another year, so time for my look back at favourite makes of the year. One thing I did realise while looking back through my makes is that I made very few stamped cards this year, most were die cut or stencils. And I made far more Christmas cards than any other. In each of my selections, I've linked to the original blog post for more info.So, in no particular order, let's start.
One technique I really enjoyed was adding foil to stencil paste with my laminator, and these Bauble cards, using a stencil called Damask Baubles, by Sweet Poppy, really made great use of the technique.
More foiling, and most of these were done using Tim Holtz layering stencils to apply the paste through. Not used many yet, but they will make great fast cards, as the background is so striking, all they really need is adding to a card base and a sentiment.
Die cutting this time, and the die is a Tim Holtz Thinlits one, called Butterflies. You get two different shaped butterflies in it,which come as a solid shape and an overlay. I also used either a textured cardstock, or ran it through an embossing folder first. Again, nice and simple, and just need a sentiment to finish.
One of my few stamped cards, using a Honey Doo stamp called Floral Corner Flourish, with the flowers stamped again onto white pearl paper, then layered on top.
This was one of my favourite Christmas cards, although die cutting & punching out all those snowflakes was ridiculously messy! I did a few in either blue/white/silver, or white & silver.
This easel card was made for my DIL's birthday, and the majority of the colouring was done with Prismacolor pencils, which I admit have finally turned me into someone who enjoys colouring. Still struggling with the Promarkers, though! The sentiment was cut from a sheet of card I'd swiped stencil paste over, then laminated with some holographic foil.
Some more stamping appearing, these used mainly cardio stamps, and various Bauble stencils to ink & stamp through.
This technique, for using up card scraps by cutting into strips and sticking down onto paper/card, I learnt about from Jennifer Macguire, and had a lot of fun with.
There are a few posts about these, so I'll link them HERE,HERE and HERE.
These were some more quick die cut cards, using glitter card, and a few different overlay dies with a die cut sentiment.
Back to Christmas, and stamping. I'd made loads of cards, so for this Christmas Card Club challenge, I made tags. Really easy, and a great way to use those smaller stamps in a set, or stamps such as Card-io/Majestix.
And that leads me to my final favourite of the year, which I've never blogged. As WOYWWers know, this years crop had a very special guest, our own lovely ShazinOz.
I thought it would be nice for her to have a keepsake of her visit,and wanted to do a photo triptych, but being mindful of the weight going in her luggage, I made a photo frame using photo mount inserts, covered in a silvery paper stamped with a flower stamp and heat embossed in a sparkly embossing powder.I added some acetate behind the panels, and added a back afterwards, leaving room to insert the pictures. I made a panel with the WOYWW in, plus the date & place, then added a group photo taken on the day, and an older one from a previous crop of Julia & Jan together, as Julia couldn't be with us for this one. Finishing touch was some Tim Holtz corners, for protection.
So thats my round up of the year, I think my New Years Resolution must be to do more stamping!
Right then, the last of my recent run of Triple Stamped cards,and I used the technique to create myself a dozen Christmas cards. Despite what it may seem, this is actually a good way of batch making cards that appear a little more work than they really are.
The Snowflake one is the card made in the You Tube video.
Just so you know, this is quite a photo heavy post, lol.
First part was cutting all the layers, and choosing stamps.
I'll put the measurements used at the end of the post.
The first stamps I chose came from Chocolate Baroque sets, Holly Script & Mistletoe Script sets, both still available.
To the Holly, I added a couple of Card-io stamps, from a set called Festive Fircones, and also from a Rubber Stamp Tapestry peg stamp set called Cardinal in Holly.
I used Versafine Clair in Rain Forest for the stamping.
Before stamping the image stamps, I stamped and heat embossed in Gold detail powder, a sentiment on each one. I used 4 different sentiments.
The top two are from Hobby Art, the set is called Winter Wishes.
Bottom left is a very old stamp from Denami, which used to be wood mounted. Bottom right is from a Tim Holtz/Stampers Anonymous set called Scribbled Woodland.
My four pieces, all stamped and ready for matting. Word of advice, separate and layer each set individually. If you mix them up it will take forever to sort them out again into the correct order!
I used a dark green cardstock for the matt layers for these.
All layered up, and the one has a piece of ribbon over one corner. It actually makes a nice way to add something a little extra, but was really there to cover a bit of the stamping that blurred a little!
I added some red acrylic jewels to the Holly berries, but if you want to keep them as flat as possible for posting, you could colour them with markers, or use Stickles or Pearls for this.
Next we move on to the Mistletoe ones, I used the same sentiments, this time in Silver ink and Detail Powder.
The stamping was done using Versafine Spanish Moss.
I didn't have any cardstock in a similar colour for the matts, so used some white pearl cardstock that I coloured the edges of with the Versafine to match.
It seemed like a good idea at the time! But I don't recommend using Versafine on Pearl cardstock.
It seems to take forever to dry, even with heat setting.
I'd inked the edges, and left overnight. It was a good 15-18 hours before I got back to them, but it was still wet. So I heat set, but that only improved it slightly.
I had originally tried Promarkers, but even though the colour was great,
I couldn't get one even coat all the way round, and any overlaps left a
darker area.
The Versafine did give me a problem with inky smudges, so i took to wiping my fingers with a baby wipe every time I handled one. Even though I couldn't see any ink on my fingers, there clearly was!
However, I did have a fix for getting rid of the smudges.
A while ago I mentioned Tombow Mono Sand erasers, as being recommended for removing stray specks of embossing powder that had been heat set. Which it works extremely well for, I might add. I've discovered it's also very good at removing ink.
Hopefully you can see the ink smudges on the bottom layer.
Here is what it looks like after I've used the eraser on it.
So that eraser is a really useful bit of kit to have in your arsenal. Available HERE on Amazon.
The 'open' Mistletoe is the Chocolate Baroque one, the 'closed' one is from Card-io, a set called Christmas Greenery.
I've added two sizes of half pearls for the Mistletoe berries on these.
Final set of cards uses a selection of Snowflake stamps, mainly from a Clarity set called Snowflakes, with the addition of some random tiny snowflake stamps to fill gaps.
Still using the same sentiments, and again silver heat embossed.
The snowflakes were stamped using Versafine Majestic Blue, and I added some WOW! Embossing powder in Arctic Blue, which just gives the snowflakes a little sparkle.
The Snowflake embellishment is a box of wooden snowflake embellishments from Kaisercraft, picked up at my local craft store. They were coated in Oxide Broken China, then clear embossing ink. Sprinkled with the Arctic Blue EP and heat set. I then added another layer of clear embossing ink, and a layer of clear UTEE, then finally another layer of the Arctic blue while the UTEE was still hot. You could replace the UTEE with a clear powder, just maybe using two coats. Don't do too many layers though, or you will lose the detail.
I stuck them to the front with a little Glossy Accents.
To keep them flat, you could either skip the embellishment, or die cut a snowflake or two from glitter card/paper.
The
measurements for these cards are as follows: the card base is 4⅛x 5⅞.
This was created by cutting an A4 sheet of card in half lengthways,
which then gives you a 'landscape' card base, 2 from each sheet of card. The card base itself is the first matt layer.
So, your matt layers need to be:
4⅛ x 5⅞ ( card base)
3⅛ x 4⅞, and
2⅛ x 3⅞.
Your stamping layers are:
3⅞ x 5⅝
2⅞ x 4⅝ and
1⅞ x 3⅝.
It is better to use a thinner cardstock for your stamping layers than for the matt layers.