A warm welcome to all my visitors,

Thank you for taking the time to come and look at my blog, I really do appreciate it. I would love you to leave me a comment, even if it’s just to say Hi. It means I can come visit you!

All my designs are original, so copyrighted to me. If I have been inspired by someone elses work, I have named them in the post, and where able, I have provided a link.

Please feel free to use my designs for inspiration, I just ask you to credit me, and provide a link back to my blog.

Thanks, Shaz XX

Showing posts with label Distress Oxide. Show all posts

Wednesday, 30 September 2020

WOYWW #591- The Odds and Ends Edition

 Time for Whats on your Workdesk Wednesday again- is it just me, or do these weeks seem to be getting shorter? Pop over to Julias place, The Stamping Ground, to join in.


Some enabling right at the start this week- two new Visible Image stamps. I thought the star one would decoupage nicely, for quick cards, and loved the size and font on the sentiment stamp. I'm thinking stamp the Star onto the card base & heat emboss in silver, gold or sparkle EP, then stamp again onto glitter card or patterned paper, cut out and add on top. Also, the new Distress colour, Crackling Campfire.


Two cards made last weekend, should have been 3. I'm retrying the third one in the pic below. You know when somethings not gone right, so you try to fix it? And end up making an even bigger mess of it? Yeah, well that happened. The image, an old VI one, is framed, so in order not to stamp the frame across the snowflakes, I wiped the ink off the bottom part, then, completely forgetting the top part of the frame, stamped it. Looked awful, so I added in the same colour ink- which I intended doing anyway-, but it went all blotchy. So, next intended fix was to die cut a circle of double sided adhesive, place over the image, and sprinkle with Glamourdust.
The Glamourdust would hide the blotchy patch.That went well, right up to the sprinkling bit. I grabbed the bottle, and sprinkled. Except it was the Gold coloured one, not the Crystal. It hid the blotchy patch alright, but it hid everything else too! That's when I  realised every fix was making it worse, not better, so it went in the bin. This is the fresh version, and so far, so good. Good job I have a sense of the ridiculous!

Thank you to everyone for your input on White pens last week. General opinion seemed to be that A) Posca or Sakura Gelli Roll are the best, and B) and actually finding a good white pen is a bit like looking for hen's teeth!

And all that brings us round to .........And Finally.............................

Saw this last week on FB, made me laugh, so I thought I'd share with you all


...and this about sums me up. 😀


One final moan about the new Blogger- whats the new Labels thing about? Now I have to start typing each subject, then select what I want, rather than just scroll through the list. Grrr.

Wednesday, 16 September 2020

WOYWW #589- The Inking & Stamping Edition.

Well here we are again, another Wednesday has arrived. Another weekly link up over at Julias place, The Stamping Ground, to bare our desks to the world.


Two shots of my desk this week, this one a long shot, as I can't actually get far enough back- the desk behind the desk is in the way- to get a close shot.


This is a bit more of a close up on what I'm working on. I wanted to do some masculine/teen cards, and I'm getting there. The partial stencil on the card is another Eileen Godwin technique- if you've not seen her stuff, look her up on Facebook or she now has a You Tube channel of videos. She does amazing work, she really does.

The card with the drum kit at the back had to be coloured as it was a simple line stamp, a magazine freebie. I couldn't find the one I wanted- found it now, lol. You can see the VI stamp on the left of a drummer & drum kit.


These were the partially stencilled cards, using Oxide inks. I'll list all the stencils & colours when I do a blog post for them.


I think I've been very restrained during this lockdown, my crafting purchases have been few and far between. So, before I forget, here are my two most recent purchases. The Lines stamp set is by HoneyDoo, and a Christmas Bauble from Sweet Poppy. I think there are going to be a huge number of people getting Christmas Cards with this bauble on- anyone on Facebook will have seen a lot of fabulous cards made, and Lucy at Sweet Poppy has been really struggling to meet the demand for it. I think it's back on pre-order again, for the end of the month.


MIA  last week, you may recall I mentioned the kidney stent looked to be blocked on my last CT scan, and that most probably ties in with the UTI. The Urology team said they'd get me in in the next few weeks to change it early, as it's not actually due it's 12 month change till December. Anyway, the Friday after the last WOYWW I did, I had a phone call to say they'd had a cancellation in the theatre list for last Tuesday, and could I take up a short notice appointment. No problem for me, so of course took it. I did have to go and have a Covid test first, and that came back negative, so clearly what we are doing to shield ourselves is working. Anyhow, stent changed, so hopefully that'll put a stop to any uti's.

Which just leaves .........And Finally............( apologies to anyone who doesn't get it, it's a song by AC/DC, a band I desperately want to see live).

Wednesday, 10 June 2020

WOYWW #575- The Actually Finishing Stuff Edition.

I am, finally getting this batch finished. These ones had needed a bit of colour adding, and one needs fixing, as I stamped the quote, realised it needing stamping again. Didn't check my cardstock hadn't moved, so got a blurred repeat.


By the way, using the new Blogger update this week, so we'll see how that goes.


The one bottom left. So, how do we fix the unfixable? We just restamp on a separate piece, and matt it on top,lol.


Not totally happy, I think I should have just binned it, to be honest. But I expect in a couple of days and I'll be ok with it.


Made another batch, as I have more ideas. And there's always the UFO box.

For Belinda, I didn't use watercolour paper, it's just ordinary white card for stamping on.


Christmas cards using a Jennifer McGuire technique, Distress Oxide resist, in the post below.


Regarding the issue I had with my cardstock being lifted and moved out of place on my stamping platform- I have bought a bigger bar magnet off Amazon- just a rare earth magnet, not a special 'crafting' brand one-and that does help,most of the time. But, the absolute best solution I have for you, I came across on I think, SCS. Sizzix brought out some Sticky Grid Sheets, to use on Big Shot plates to hold dies in place, saves using tape. Well, some ladies had started using them in their stamping platform. I had a pack, so gave it a try.


You get 5 in a pack, they're the same size each as a Big Shot plate, so I'd guess roughly A5. On the Sizzix UK site, £7. Beware if you Google for them, as their are specific ones for the Sidekick too, which are much smaller. They really do work, they are tacky, rather than sticky, and hold your cardstock completely still and in place.


And so I'm done for this week, I'll be adding my link at Julias place, The Stamping Ground and popping round to see you all later.


Which just leaves.....And Finally......

Wednesday, 3 June 2020

WOYWW #574-The More Stamping Edition.

I have indeed done some more stamping of those inked panels from last week. Actually, a few weeks ago, but only started using them last week. As always on Wednesdays, we share our desk with the world at large, courtesy of the The Stamping Ground, home of our lovely leader, Julia.


The desk of Untidiness-working on the 'push to one side' method of crafting today.


One thing I did discover, apart from how brilliant these are for making a lot of cards really easily, is that I have a shameful amount of quote stamps that have never seen the light of day, let alone ink.

All the image stamps- apart from the large butterfly, are Lavinia stamps, the butterfly being an old Papermania one.
All the stamps have had a little colour added with pencils, then matted onto a toning cardstock. Still not brave enough to stamp directly onto a card base, lol.


The actual panel idea I saw done by Eileen Godwin, she posts lots of really easy, but stunning, technique videos on her Facebook page, well worth a look.


I'll be stamping an insert for these with 'Thinking of you', so they'll be useful for a lot of occasions.


 I'm also making another batch, so I can do a 'How to', and have more to join my UFO's!


All use Distress Oxides, and the make up brushes.


 A few I've tried flicking water on and blotting, for a bit of added oomph.
 Doing 3 different sizes again, two for 5" &  6" square, and one for 'notecard' sized cards.


Talking of Eileen, she's responsible for this weeks enabling from me. I saw her making a couple of 'age' cards, using a fab numbers stamp set from Bee Crafty stamps.

You get the TH etc, to go with them in the set.
The stamps are a good size, which was what appealed to me,they are 1¾"(4½cm) high, and , apart from the number 1, they are 1¼" (3cm) wide. All the number stamps I have are much smaller.

Shoulder seems to be improving, today it actually feels normal, but I've had that happen before, then the next day I've woken up and it's back, so not getting overly excited about it yet.


So that brings us round to this weeks.....And Finally.........


Shockingly true, both of them!


Sad to think we'd have been preparing to haul our stash along to the crop this Saturday, but hopefully maybe later in the year when it's deemed safe.


 One other thing I'll mention for those who like to go, or may be interested. The Spring Happy Stampers was cancelled for obvious reasons, and at the moment, is tentatively pencilled in for Saturday 3rd of October. All details are on the site, and if it's going ahead, that will be confirmed in August.  This is potentially the last one, I know when we've chatted with the organisers in the past, they were finding it a struggle, but they do say there may be a possibility of it continuing, so that would be great, as it's a fabulous show.

Wednesday, 5 February 2020

WOYWW #557- The 'There's stuff on the desk' Edition

There is indeed, for this weeks link up of desks far and wide, courtesy of Julia at The Stamping Ground.
 Exhibit A, m'lud.
 The Lavinia stamps mentioned last week, a few Distress Oxide Sprays. Once again, enabled by Jennifer McGuire, doing some fab Christmas cards on dark cardstock using these. So, I will be CASE-ing what she did in the near future.
And a stamp set that I will lay at Dougs door. Not that he saw them until they arrived, but he started the whole 'Just Because' thing back last year. I have a small Just Because sentiment stamp, and a small die cut too, but this Altenew set, called Just Because Builder, seemed to be a must have. It's those two words in a variety of fonts, so you can mix and match as you like. It all came about when he mentioned that when he buys me flowers, which he does now and then, he usually gets comments like 'who's in trouble then?' to which he replies, 'No, they're Just Because', and he said cards with that on would be useful. So thats the reason for them. Bought from Bumbleberry Papercrafts, who stock quite a lot of US  brands.
This week its a ' two for one' scenario, this being the desk where I do my die cutting, and I have a number of dies to put away, from the making of last weekends Christmas cards, which are in the post below.


Last weeks desk showed the dies I planned on using, and some image printed vellum.
 Now I know that vellum can be a nightmare to attach with tape or glue, as it tends to be visible. However, here's a tip that works on white or light cardstock, but not on darker ones. Use Double Sided adhesive sheet over the whole back of the vellum rather than narrow tape or glue. Because the whole of the vellum is covered, there is no difference in it to show afterwards.


 So thats it for now, bringing us round to......And Finally.......


There is so much truth in that!

Wednesday, 24 April 2019

WOYWW #516- The I'm Back Edition

Yes, back again, and only just! These bank holidays get very confusing, today has just felt like a Sunday, or maybe Monday, so I almost missed it. MIA last week, as we had a concert on Tuesday night booked in London, which meant driving down on Tuesday afternoon, and then a stopover, so hadn't done a post, or took my tablet with me. However, since we've been back I've been making some more stencil backgrounds to replicate some cards I made a while ago.
You probably remember seeing these, done with Honey Doo floral stamps.
 Well, it crossed my mind that as well as doing florals, I could use Butterfly/Dragonfly stamps too, and I'm sure if I have a good look, I can find some other stamps that would work for this.


 Made a number of them, and although the camera doesn't really show it well, the two blue ones and two red ones do use different colours. All Distress Inks.


These are also Distress inks.


These have a couple of Distress Inks, and some Adirondacks too.


Then I thought it might work well with a square stencil too.


And while I was at it, I pulled out another couple of stencils too. These are mainly Distress Oxides. I'm thinking there may be fairies involved with these!

  The stencils are all from Clarity, as is the cardstock, which is their Stencil Card, and perfectly sized at 7" for the stencils.

Tickets have arrived for the Happy Stampers Festival in May, so looking forward to that, and seeing one or two WOYWWers there!


I was looking at my stats the other day, and discovered that my first blog post was on April 20th, 2010. So 9 years of blogging!


And so, I'm done. Which brings us to....And Finally......


Yep, I know that well. And the reverse resultant panic when what I thought was a hair on my arm, actually turned out to be a humongous spider!

Sunday, 25 November 2018

Blending Brush Comparison- Clarity and Toolstation Sash Brush set.

Hi folks, and  a You Tube video post today, as I wanted to do a 'live showing' of how these Sash Brushes from Toolstation stack up against the well known and loved Clarity brushes.
 The Clarity ones are a set of four, and the normal retail is £19.99, although right now, the Black Friday weekend, they are  a third off, which is a great time to get them if you want to stock up.


The other set are Decorators Sash Brushes, from the Toolstation, and are £6.99 for a set of three, which is a great price point, assuming they do the job well. I looked at these as I'd seen someone somewhere on FB say that B&Q Sash brushes were a good alternative, and again, much cheaper. I did a Google search for the B&Q ones, as our B&Q has recently downsized a lot, and didn't want a wasted journey. Anyway, the ones that came up first in my search were a set by Toolstation, and the pic shown made them look visually at least as being very similar.


As you see, the Toolstation set does not have an equivalent to the largest Clarity brush . The Code for them is 78094.

They do appear very similar in looks, and as for the feel, I would say the Clarity ones are slightly softer, but only very slightly. Maybe slightly less rigid than the Sash brushes, but it's not a big difference.
 To test them out, I used two types of Clarity card, their 7" square Stencil card, and some A5 sized Theuva card, which has a slightly glossy coating.
 I used 3 Distress Oxide colours for testing, and worked on a blending mat.


This is the result from the Toolstation brushes. In the video you will see the comparison colour by colour, I just forget to take individual photos! Theuva card at the top, Stencil card on the bottom.


  This is the pair using the Clarity brushes. Again, Theuva card on top, Stencil card on the bottom.


 All four pieces side by side, Clarity Brushes on the Left.
 I then did a small comparison of the Toolstation brushes with an Inkylicios Blending brush.
The Inkylicious ones are much stiffer, they feel more like the old fashioned Shaving brushes, but I think they both compare well.

 My overall opinion? I felt they compared well. I'd really say there was little to choose between them, and if craft spending is an important consideration, I'd say the Toolstation ones are excellent value for money, and perform well. A very affordable way to have a set for each colour family. I only bought one set to test them out, but will definitely get some more.
I've linked the video here if you'd like to see how they perform, it runs for about 12 minutes.


Wednesday, 26 September 2018

WOYWW #486

....And I'm back in WOYWW land! Had a great week away, weather was awesome, sleeveless tops everyday. I'll put some pics at the end, so you can just bypass them if you want to get around to the other desks.
This is my desk right now, after some crafting on Sunday & Monday. A handful of cards in the middle made using stencil paste & Tim Holtzs' Flourish stencil. In the post below.
 Some sentiment dies,dst, a few more stencilled pieces waiting to be finished. My craft tidy, with beads in. Didn't use any, but the tub they were in had it's lid come off in the drawer, so they were loose in the bottom. Hence the need for some re-tidying.
 Nice and sunny today, after the last few days rain.

  Other pics you may be interested in:
 
Stuff that arrived while we were away, 3 new Oxides, Mermaid Lagoon,Hickory Smoke & Shaded Lilac.


Two Paper Artsy Fresco paints, Snowflake and a Frosting Glaze.


A great stamp from Bee Crafty.


One purchase from Tims new releases- loved the look of these starry trails when I saw them in the pre-release video.


 This is what the dies actually look like, you have a circle spiral star trail, a wavy star trail, and 7 different sized and shaped individual stars.


Now here's a product that may be useful on occasion. I had a couple of dye inkpads that were not very well attached to their bases anymore. I'd tried silicone glue, and hot glue, but neither worked. Then I saw this mentioned in a forum, when a similar question was asked. This Original Gorilla Glue is activated by misting with water, so works well in any situation where damp is an issue. Couple of blobs onto the inkpad base- no need to mist with water as the pad is wet- and hey presto, job done. Available from Amazon, of course.
.............And finally................................


Leave your link to The Stamping Ground over at Julias place, and we'll all come visit you. :)


So onto some pics from The Netherlands.


  You know you're in the Netherlands when you see Windmills. What really surprised me, as we were driving along, is how much sweetcorn is grown in Belgium and Holland!  Miles and miles of it.


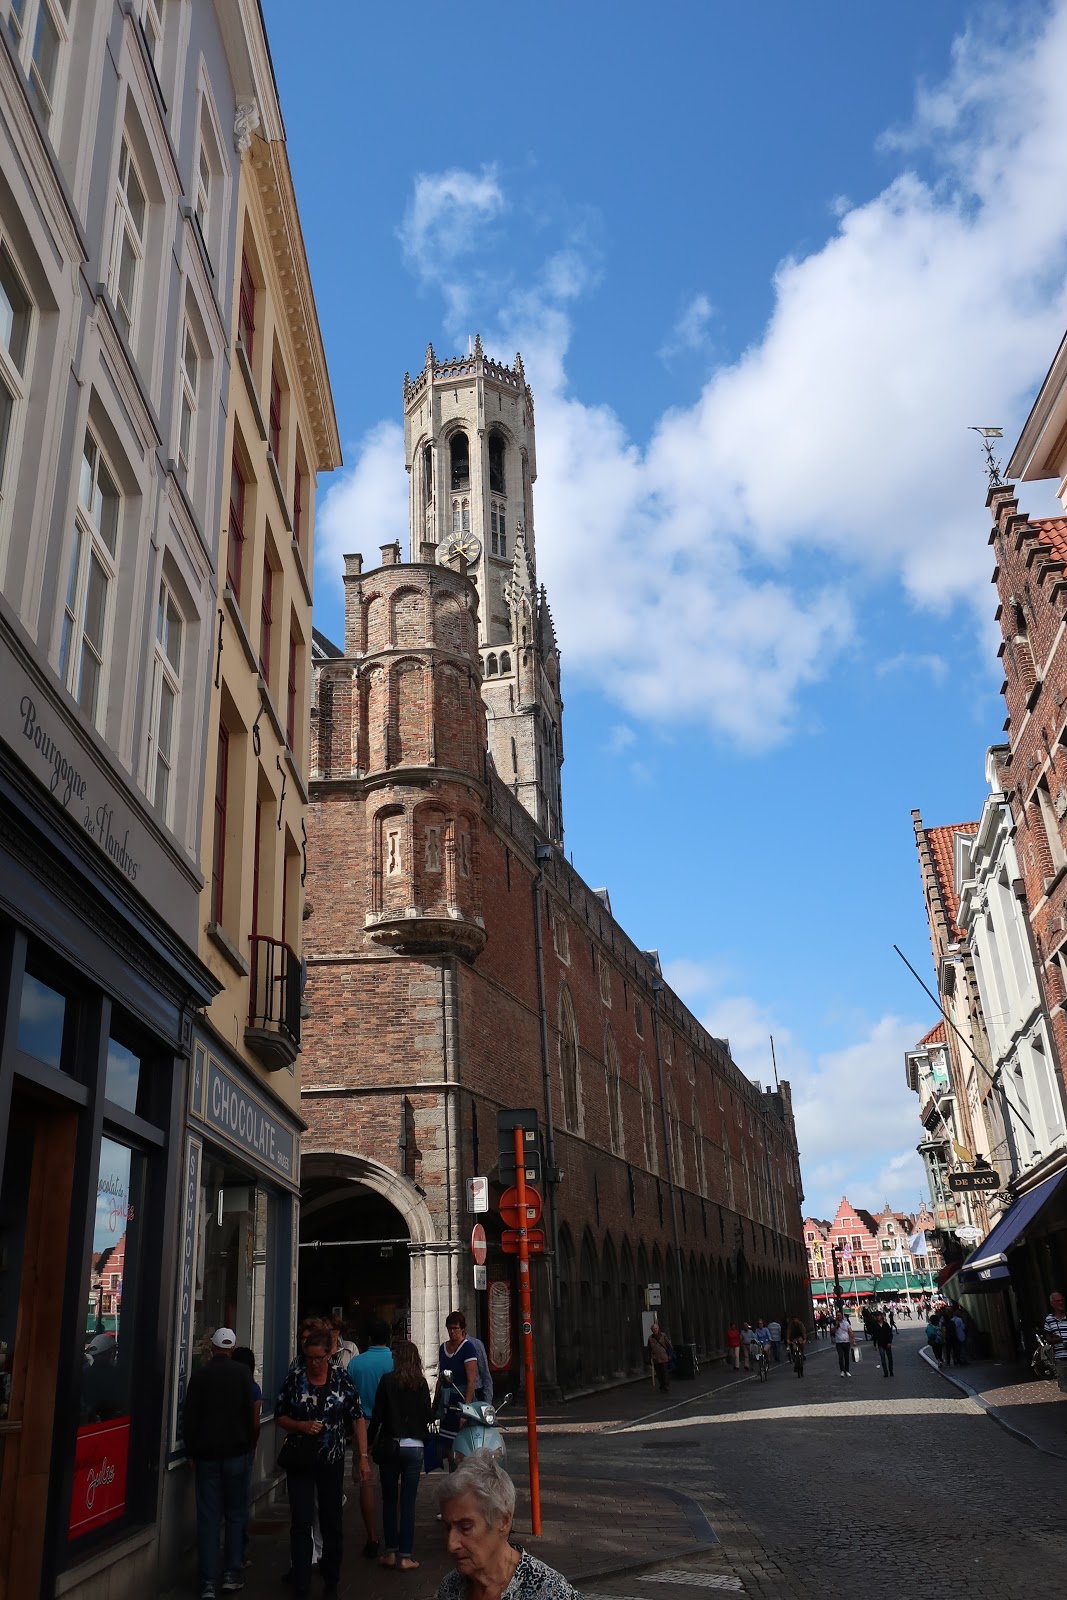
We had a stop off in Bruges on the way up. Amazing buildings to be seen, and this fantastic sculpture made from plastic rubbish, all from the beaches of Hawaii.
 Not entirely sure why they had to import plastic waste, lol.


Look at the detail in that brickwork!


Whilst in Amsterdam, we visited the Madame Tussauds there, as well as the Dungeon. Not so keen on that, but the Tussauds was great.


Closest I'm ever going to get to Johnny Depp!


The names Brooks, Doug Brooks!


Hannibal Lecter.


Dali, left, and Van Gogh, below. We also visited the Van Gogh museum in Amsterdam, and the Dali one in Bruges on the way home.


Pretty much all the waxworks were incredibly lifelike. So much so, you found yourself half expecting one of them to be a real person, who'd suddenly move & speak. Quite disconcerting, I can tell you.


Loki was a must see, and there were a few other Marvel superheros, and the props from others.


Finally on the way home, we had an overnight stay in Bruges again. This amazing building was directly opposite out hotel.


And of course, you can't possibly leave Belgium without taking some chocolate home.  There were amazing window displays of novelty chocolate products, I particularly like the Rubber Ducks.

An End of an era

An end of an era

I write this with a broken heart, that only time can heal My beautiful, wonderful wifelet Shaz (Silverwolf) passed away peacefully in the ea...