I cut 2 6" square pieces of the card, then die cut a couple of bauble shapes from each. The die set is from Spellbinders- Heirloom Ornaments 2010. Most likely retired long ago. I backed this with some cream paper marbled with gold, bought at the NEC Christmas show more years ago than I like to recall. The string for the baubles is some sparkly peel off lines, and then I added a peel off sentiment, again using stuff I've had far too long.I matted this onto some gold glitter card for a bit of sparkle. I decided the baubles didn't look 'finished ' enough, so found some red ribbon to make a bow at the top of each, which looked better. Looking at them now, I think I may go back to these and add a few acrylic gems in a pattern on the baubles, as they look a little plain, I feel. Or maybe some liquid pearls in dots to follow the swirls of the marbling. Don't know, will have to give it some thought. So thats my offering for this challenge, for the first time in ages, I'm on time, lol.
Pages
A warm welcome to all my visitors,
Thank you for taking the time to come and look at my blog, I really do appreciate it. I would love you to leave me a comment, even if it’s just to say Hi. It means I can come visit you!
All my designs are original, so copyrighted to me. If I have been inspired by someone elses work, I have named them in the post, and where able, I have provided a link.
Please feel free to use my designs for inspiration, I just ask you to credit me, and provide a link back to my blog.
Thanks, Shaz XX
Showing posts with label Spellbinders. Show all posts
Sunday, 30 August 2020
Christmas Card Club #18- Use mainly Red
This fortnights theme was set by Lorraine, who wanted us to use mainly red. A real challenge, and took some thinking about! I'd finally decided I was going to emboss some red card with a Christmas words folder, when I recalled I had a Tim Holtz pad of embossed card, and I was sure there was a red Christmas one, so in the spirit of trying to use stuff I've had forever, I dug it out with fingers crossed. And indeed there was a red, as well as a green, for Christmas. The whole pad is embossed with various holidays/special days, not all applicable to anyone outside the US, lol. Have no idea what I'll do with those.
Sunday, 5 January 2020
Christmas Card Club 2020- #1 Angels or Fairies
Back in with making Christmas Cards for the Christmas Card Club Challenge, and I've used both themes for my cards, and made a total of 10 cards.
The ones on the left are 4 6" square cards, and 4 'notecard' size, which I make by cutting a sheet of A4 cardstock in half on the length, then folding to give me topfold cards, or landscape sidefold.
The Fairy and large tree are by Lavinia stamps, the treeline and small deer by Cardio/Majestix.
As a finishing touch I added an acrylic star to the top of the tree, and some dots of Stickles for fairy lights.
These two are A4 cardstock folded, and use a very old stamp in my collection, called Angel Chorus Collage, by Rubber Stampede. It was stamped onto cardstock, then also onto vellum, and the vellum was torn around the design and added on top of the cardstock with a small amount of adhesive. I also added some colour to the back of the vellum image first. A few die cut flowers, and a couple of again very old backing papers, and they're finished.
To make the bauble shapes in the first four cards, I used a variety of stencils.The very top two are using a Clarity bauble stencil. The other two square ones use a stencil cut using a Spellbinders Ornament die, 2011 Heirloom Ornaments.
The final 4 use a stencil cut using Spellbinders Heirloom Ornaments 2010.
DI Broken China & Tumbled Glass were brushed over the top edge, and I used a torn paper mask for the top hillside. I used the cheap 'Toothbrush style' make up brushes to add the ink.
The remaining ink on the stencil was dragged around the edges to define the shape, using a dried baby wipe, which I also used to add the ink over torn paper to make the hills.
This is the Clarity stencil, and I also cut a copy from thin paper to use as a mask when stamping in the trees. The paper is thinner than the stencil, so the stamping is easier to do without having a big gap caused by the depth of the stencil.

The Poinsettia is another Spellbinders die, and I believe the flourishes are by Cheery Lynn.
The ones on the left are 4 6" square cards, and 4 'notecard' size, which I make by cutting a sheet of A4 cardstock in half on the length, then folding to give me topfold cards, or landscape sidefold.
The Fairy and large tree are by Lavinia stamps, the treeline and small deer by Cardio/Majestix.
As a finishing touch I added an acrylic star to the top of the tree, and some dots of Stickles for fairy lights.
These two are A4 cardstock folded, and use a very old stamp in my collection, called Angel Chorus Collage, by Rubber Stampede. It was stamped onto cardstock, then also onto vellum, and the vellum was torn around the design and added on top of the cardstock with a small amount of adhesive. I also added some colour to the back of the vellum image first. A few die cut flowers, and a couple of again very old backing papers, and they're finished.
To make the bauble shapes in the first four cards, I used a variety of stencils.The very top two are using a Clarity bauble stencil. The other two square ones use a stencil cut using a Spellbinders Ornament die, 2011 Heirloom Ornaments.
The final 4 use a stencil cut using Spellbinders Heirloom Ornaments 2010.
DI Broken China & Tumbled Glass were brushed over the top edge, and I used a torn paper mask for the top hillside. I used the cheap 'Toothbrush style' make up brushes to add the ink.
The remaining ink on the stencil was dragged around the edges to define the shape, using a dried baby wipe, which I also used to add the ink over torn paper to make the hills.
This is the Clarity stencil, and I also cut a copy from thin paper to use as a mask when stamping in the trees. The paper is thinner than the stencil, so the stamping is easier to do without having a big gap caused by the depth of the stencil.

The Poinsettia is another Spellbinders die, and I believe the flourishes are by Cheery Lynn.
Sunday, 28 October 2018
Christmas Card Club #22- Winter Wonderland
Back with the Christmas Cards, for this fortnights Christmas Card Club, and this time the theme has been chosen by Christine, and she wanted to see a Winter Wonderland.
I created 4 cards on the theme, all using Bauble stencils and Card-io stamps.
The first one is using a bauble stencil from Inkylicious.
All the sky inking was done in the same way, using a Clarity brush and Distress Inks. The colours were Tumbled Glass, Faded Jeans and Chipped Sapphire, concentrating the colour at the top of the bauble, and fading it out as I came towards the torn paper mask made for the hillside.
The torn paper was moved down the shape, and some Tumbled glass added over the edge with a dry baby wipe to create more hills.
I'd added a moon mask punched from the sticky edge of a Post-it note before adding any ink.
Stamping is done in Versafine Clair Nocturne.
The backing paper is from a pad I picked up from The Range, some lovely greys & silvers, including some with foil. Was only a couple of quid too. Made use of some more of those snowflakes, and a peel off greeting.
The next one is done with a stencil I cut myself, with a Spellbinders die, Heirloom Ornaments 2011. I recently bought some stencil material from E-bay to do this sort of thing, so now I have a durable stencil. This is the largest die from the set, and I also cut it from copy paper, so that I could swap it for the stencil,and stamp right up to the edges, as even thin stencil material is a bit too thick, and leaves too much gap. Another piece of backing paper from the same pad, this one has foiled stars on.
These last two are done with another die cut stencil, this time Spellbinders Heirloom Ornaments 2010. The backing paper is from a really old pack by Dovecraft, and I added silver & blue ribbon on the left.
Same stencil, this backing paper is so old I have no idea where it was from!
Forgot to say, all the hillsides were outlined with a Quickie Glue pen, and Crystal glitter sprinkled on. I dotted some onto the trees, and also added it to the cabin roof.
Also, the card bases are 8" square.
Tuesday, 11 April 2017
Mixed Media cards- Part 2
This die cut is from the Mixed Media set #2, and it does need glue on the back of the design, as it won't lay flat otherwise.
The card base is an A4 sheet of Pearl white card, folded, and with embossed scoring either side of the panel.
The paper it's backed with is a shimmery one bought a few years ago, and I have it in a few colourways. rarely used it, but it was perfect for this.
I used a Crealies die to cut the sentiment, once from the shimmer paper, and twice more from white card so I could stack them up for a dimensional look.
A few small flowers were punched from the same paper, and doubled up, then some Stickles in dark blue added to the centres.
A similar design for this one, but it's backed with an alcohol inked sheet.
The sentiment is another Phill Martin one, from Mini Baroque Occasions.
Two small butterflies punched from some shimmer paper, and very tiny acrylic gems added to the bodies.
A different die for this one, from Mixed Media set #3, and cut from an ivory base.The backing sheet is an alcohol ink one, in blues with Gold Mixative.
It was matted onto dull gold card, then onto a 6" square card base.
The sentiment is again from Mini Baroque Occasions, and was stamped in Archival Cobalt. A couple of dark blue half pearls added as well.
A 7" square base for this card, and the die is from Mixed Media set # 1. It was cut from a linen cardstock, and then trimmed with a deckle edged blade.
The backing is an oil pastel sheet, and I found some pale purpley-grey cardstock to matt it on to.
Heartfelt Creations Spellbinders die called Delicate Aster was used for the flower, and the centre is filled with Glossy Accents and seed beads.
The sentiment is from Chic Floral Occasions Borders, Phill Martin. I matted the sentiment strip onto an offcut of the backing card before sticking it down.
This one is 5"x7", the die from Mixed Media #3. The backing is a rainbow piece made with oil pastels, and the sentiment is from Mini Baroque Occasions. I repeated what I did previously, and stamped and heat embossed onto an offcut, which I then die cut with a Spellbinders Labels 8 die and mounted with foam tabs. I also added a couple of acrylic gems again.
Another 7" square card, this time the Mixed Media die was cut from black cardstock. It's backed with a different colour of the shimmer paper, and at first glance it almost looks like glitter embossing onto the card.
I backed it again with a dull gold matt.
The sentiment is stamped onto a black heart, and then matted onto a gold heart. Die set is by Nellie Snellen. The sentiment is from Butterfly Elegance Sentiments by Phill Martin, heat embossed in gold.
Some small flowers in black and gold completed the front.
And that's the end of the second batch. More to follow later in the week, I've still got a few to put together.
Monday, 27 March 2017
Mothers Day cards,with Mixed Media dies.
Two cards made, using patterned papers, peel offs and a die set called 'Delicate Asters', from Heartfelt Creations/Spellbinders.

The set has 4 different sizes of flower, along with some centres and a leafy branch. I'll be honest, I've had this a while, but my early attempts with it were a nightmare for cutting. Getting all the flowers to cut cleanly was impossible, I had to resort each time to cutting each layer individually, which, if you want a few is incredibly time consuming. However, I recently bought a Precision Base Plate for the Big Shot, which I can use in my BSPro, and that does make a difference. As does trying to line up the dies to go through at the edge of the machine, rather than the centre.
Back to the cards. I'd picked out some 7"x7" deckle edged cards that I got at Happy Stampers, and a couple of A4 sheets of white card to trim down to fit.
I'd been tossing around in my head a design for the cards, fairly simple to do, but look really lovely.
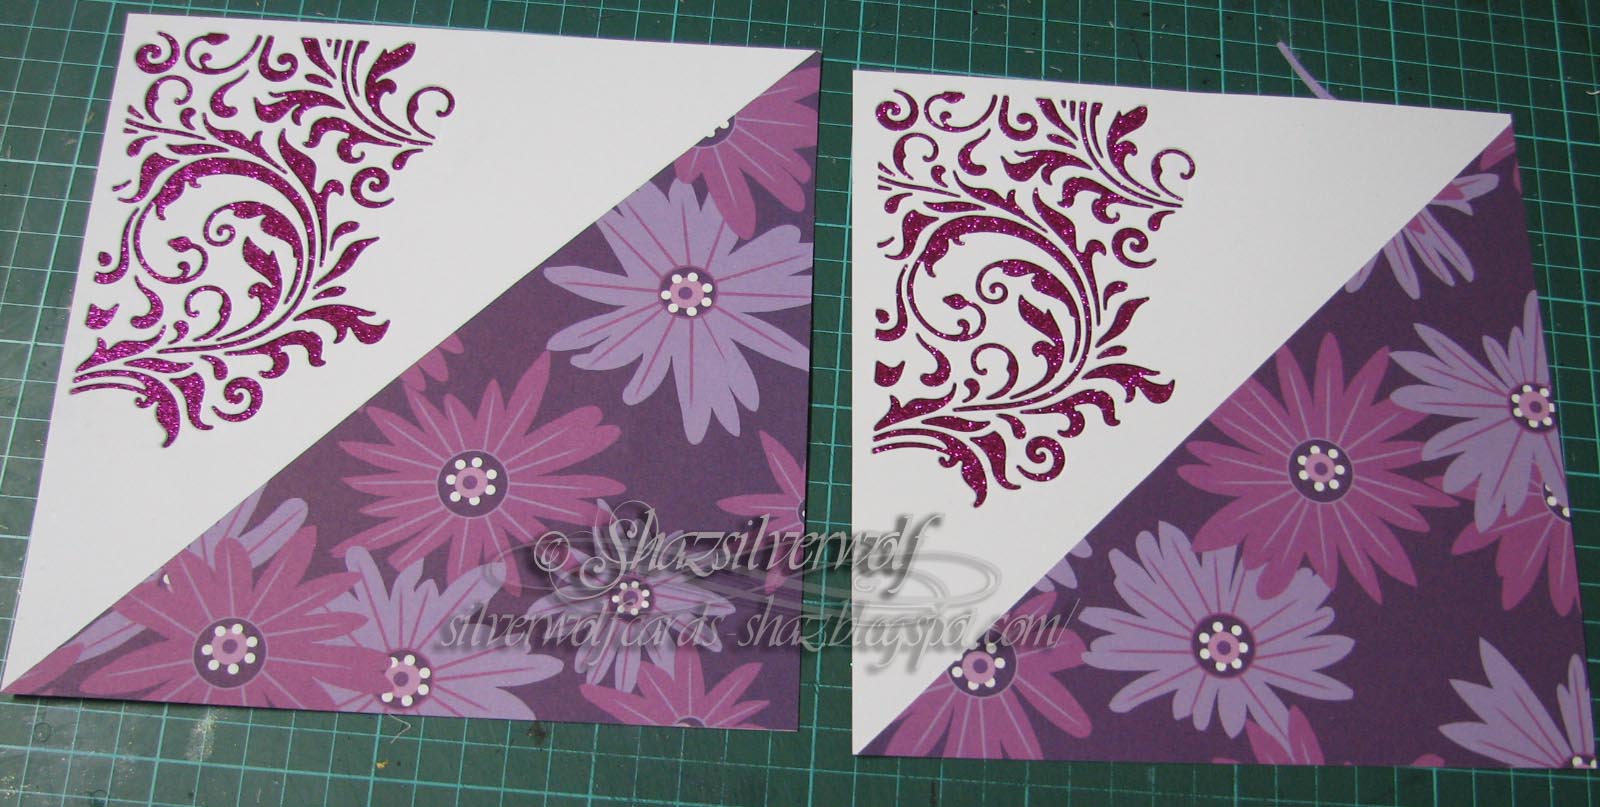
Slight jump in the pictures here, I forgot to photograph the die cut stage! I used Tim Holtz Mixed Media die set #2, and cut this from the top left corner. I cut the paper sheet into 2 triangles, and trimmed them down to fit neatly.
Next job was to find something to back the die cut with, and after rejecting patterned papers as being too 'busy', I decided on a Fuchsia coloured glitter paper.
This was going to need a wet glue to attach, and my wet glue of choice is silicone glue, or Pinflair Glue Gel.
The other point that would need to be addressed is that die cutting those MM dies does result in distinct warping of the cardstock, which meant I needed to apply glue to areas of the design, not just around the edges.
I worked on top of the glass mat, as it meant I could keep lifting the cardstock, and wiping off any glue that may have spread through the design.
flat.
While this was drying, I moved on to the flowers.
I cut some in a pale lilac pearl paper, some in white and some in a white vellum.
I only used three of the four flower sizes to build them up this time.
I shaped them using a ball stylus, my pokey tool and a foam mat.
Stacked up using Ranger Glossy Accents, and seed pearls/ seed beads added to the centres, also with Glossy Accents.
A few hours later, and the silicone glue has dried, and they are nice and flat.
Here I added some peel off strips across the edges to finish them off neatly.
Foam tape on the back to give the panel a little dimension and support.
The flowers positioned on the patterned paper - they look similar to the paper, which gave the idea to use them.
A peel off Happy Mothers Day sentiment was added just below the flowers.
Friday, 30 December 2016
Favourite Christmas Cards of 2016
Now, normally this subject would not even arise, as up until this year, my Christmas Card making has involved panic-struck frantic card making of maybe 2 designs, usually starting mid-November.Then it gets packed away as fast as possible. For some unaccountable reason, last year I wasn't sick of the sight of Christmas stuff, and carried on making cards after Christmas. I also decided I'd do 4-6 of each design, no more. And that was mainly what allowed me to work on them all year- I wasn't done in by the mass production of 1 or 2 designs.
So again in no particular order, here are my favourites of the year.
This one used a sheet of copy paper torn as a mask to sponge ink through. When the ink was good & dry,I replaced the mask, and stamped the Christmas Word Background (Visible Image) through it, which I then heat embossed with Crystal EP. A Tim Holtz die cut tree, and a die cut white sentiment finished them off. I also did a pair in red & green.
The same Words Background stamp used here,then trimmed down to give me two squares. The image is also a VI stamp, and had double sided film added, then Glamourdust for a nice sparkle. The sentiment is also VI. A couple of die cut snowflakes finished them off
This was a sort of cheat, to be honest. I came across some sheets of these bears I must have stamped years ago, and forgotten about. I added some Tumbled Glass & Faded Jeans ink with a soft brush for the sky, then used the same in markers to draw a line inside the images which I softened with a waterbrush. Drew a line around the outside of the piece with a Versamark pen, and added Crystal EP and heat set. A few acrylic gems were added to the stars.As I used a different cardstock for the sentiment piece, the colours came out a little different. The sentiment is by Stamps Away.
I've included these cards as one choice, as the creation of one gave me the pieces for the second. I'd die cut some baubles from a sheet of card, when I realised that if I embossed the cardstock first with an Embossing Folder, then arranged the die cuts carefully onto the cardstock, I could use the 'negative' version for one set of cards.
The 'positive' baubles made a second set. Which also helped make a small dent in my backing paper stash. A few scattered small acrylic gems added a bit of bling to the embossed ornaments.
The dies are both by Spellbinders, Heirloom Ornaments 2010 for the long bauble, and 2011 for the flatter round one.

These cards came about from a card seen on Pinterest.
Tim Holtz Mixed Media Dies,#1,and some patterned paper behind the cut out.
Added a die cut Poinsettia, and gold heat embossed sentiment, these were a lot quicker & easier than they look.
Final choice, and these were made using an Imagination Crafts stencil, Poinsettia Multi, and an assortment of Glitter Embossing Pastes.
The sentiment is from Honey Doo, and was heat embossed with matching EP. Acrylic gems added to the centres of the flowers.
.
There were plenty more made, and an image of them all can be seen on the Christmas Card Gallery Page, and there is a link to the relevant blog post for each design, if anyone wants product info.
So again in no particular order, here are my favourites of the year.
This one used a sheet of copy paper torn as a mask to sponge ink through. When the ink was good & dry,I replaced the mask, and stamped the Christmas Word Background (Visible Image) through it, which I then heat embossed with Crystal EP. A Tim Holtz die cut tree, and a die cut white sentiment finished them off. I also did a pair in red & green.
The same Words Background stamp used here,then trimmed down to give me two squares. The image is also a VI stamp, and had double sided film added, then Glamourdust for a nice sparkle. The sentiment is also VI. A couple of die cut snowflakes finished them off
This was a sort of cheat, to be honest. I came across some sheets of these bears I must have stamped years ago, and forgotten about. I added some Tumbled Glass & Faded Jeans ink with a soft brush for the sky, then used the same in markers to draw a line inside the images which I softened with a waterbrush. Drew a line around the outside of the piece with a Versamark pen, and added Crystal EP and heat set. A few acrylic gems were added to the stars.As I used a different cardstock for the sentiment piece, the colours came out a little different. The sentiment is by Stamps Away.
I've included these cards as one choice, as the creation of one gave me the pieces for the second. I'd die cut some baubles from a sheet of card, when I realised that if I embossed the cardstock first with an Embossing Folder, then arranged the die cuts carefully onto the cardstock, I could use the 'negative' version for one set of cards.
The 'positive' baubles made a second set. Which also helped make a small dent in my backing paper stash. A few scattered small acrylic gems added a bit of bling to the embossed ornaments.
The dies are both by Spellbinders, Heirloom Ornaments 2010 for the long bauble, and 2011 for the flatter round one.
These cards came about from a card seen on Pinterest.
Tim Holtz Mixed Media Dies,#1,and some patterned paper behind the cut out.
Added a die cut Poinsettia, and gold heat embossed sentiment, these were a lot quicker & easier than they look.
Final choice, and these were made using an Imagination Crafts stencil, Poinsettia Multi, and an assortment of Glitter Embossing Pastes.
The sentiment is from Honey Doo, and was heat embossed with matching EP. Acrylic gems added to the centres of the flowers.
.
There were plenty more made, and an image of them all can be seen on the Christmas Card Gallery Page, and there is a link to the relevant blog post for each design, if anyone wants product info.
Friday, 23 September 2016
Die Cut Baubles Christmas Cards #1
As the title implies, there are a few cards made with these Bauble die cuts.
In fact, these particular ones came about as a result of me die cutting baubles for another card. I saw the 'negative' shape left behind, and thought 'hmm, I can work with that idea'.
And so I have another 6 cards for my Christmas stash.
Eagle eyed readers may also see that there is a new page in my links at the top- a Christmas Card Gallery. I thought I'd make use of another of the 10 pages Blogger says we can have, and put the pictures all in one
place. Each set of cards does have a link to the original blog post, so if a browser wants more info about products used, they can just go to the post, but otherwise you can just look at the images.
For starters, I wanted to use an embossed background to die cut from, so I needed a big enough folder to give me room. These two- I've put some black card in them so the design shows better- are a recent purchase.
They are Crafts Too folders, bought from The Art Of Craft. Called 'Seamless Circle' and 'Happy Christmas' respectively, they measure 5 3/4" x 7 1/2"(14.6x 19cm), which means they will cover the front of an A4 sheet folded card.
I selected my first 3 dies, this set is called Heirloom Ornaments 2010 from Spellbinders. I used the middle 3 dies- there is one larger and one smaller.
I also had an idea of the paper I wanted to use. I use the word paper loosely here, as they are almost fabric like, and have a raised printed design on them.
The die cut front,from the 'Seamless Circles' folder, and the sheet I'd decided to use with it.
Double sided tape used to stick them together, them matted onto some gold card.
Some small ribbons added with a glue dot to the top of the baubles.


Next up I used some of the marbled paper- the design on this one fitted the baubles perfectly. This ones cut from the Merry Christmas folder.
A different die for this one- an X-Cut 'Stars' die set. 5 dies in this set and again, I used the middle three.
Backed again with one of the marbled paper sheets, and I added a small flourish to the top of the bauble, along with a ribbon bow.
The Flourish comes from the Tim Holtz strip die 'Winter Foliage'.
Back to the baubles for this one, and I changed it up a little, making it a landscape orientation, and just using two dies. I added a 'string' with some gold thread secured at the back with DST, then matted onto gold card again.
Still making changes, the card on the left uses Spellbinders Heirloom Ornaments 2011, and I used a mix of the two sets for the card on the right, both using the Merry Christmas folder.

The dark blue has a gold matt and bows, and as the lighter blue one has silver dots on it, it's matted onto silver card, with silver bows added.
The sentiment is from the Phill Martin set 'Snowflake Sentiments',stamped in Gold and heated with Gold Detail EP, added with pop dots. I've also added a small acrylic gem to the centre of the snowflakes in the sentiment.
I stamped and embossed a sentiment in silver to match the pale blue one.
I've also got all the 'positive' shapes left over, which will make another batch of cards, mounted onto a Christmas Paper backing, So 12 cards from one batch of die cutting.
Die Sets used:

Heirloom Ornaments 2010,(left)
Heirloom Ornaments 2011(Right)
both Spellbinders.
X-Cut Star
In fact, these particular ones came about as a result of me die cutting baubles for another card. I saw the 'negative' shape left behind, and thought 'hmm, I can work with that idea'.
And so I have another 6 cards for my Christmas stash.
Eagle eyed readers may also see that there is a new page in my links at the top- a Christmas Card Gallery. I thought I'd make use of another of the 10 pages Blogger says we can have, and put the pictures all in one
place. Each set of cards does have a link to the original blog post, so if a browser wants more info about products used, they can just go to the post, but otherwise you can just look at the images.
For starters, I wanted to use an embossed background to die cut from, so I needed a big enough folder to give me room. These two- I've put some black card in them so the design shows better- are a recent purchase.
They are Crafts Too folders, bought from The Art Of Craft. Called 'Seamless Circle' and 'Happy Christmas' respectively, they measure 5 3/4" x 7 1/2"(14.6x 19cm), which means they will cover the front of an A4 sheet folded card.
I selected my first 3 dies, this set is called Heirloom Ornaments 2010 from Spellbinders. I used the middle 3 dies- there is one larger and one smaller.
I also had an idea of the paper I wanted to use. I use the word paper loosely here, as they are almost fabric like, and have a raised printed design on them.
The die cut front,from the 'Seamless Circles' folder, and the sheet I'd decided to use with it.
Double sided tape used to stick them together, them matted onto some gold card.
Some small ribbons added with a glue dot to the top of the baubles.
Next up I used some of the marbled paper- the design on this one fitted the baubles perfectly. This ones cut from the Merry Christmas folder.
A different die for this one- an X-Cut 'Stars' die set. 5 dies in this set and again, I used the middle three.
Backed again with one of the marbled paper sheets, and I added a small flourish to the top of the bauble, along with a ribbon bow.
The Flourish comes from the Tim Holtz strip die 'Winter Foliage'.
Back to the baubles for this one, and I changed it up a little, making it a landscape orientation, and just using two dies. I added a 'string' with some gold thread secured at the back with DST, then matted onto gold card again.
Still making changes, the card on the left uses Spellbinders Heirloom Ornaments 2011, and I used a mix of the two sets for the card on the right, both using the Merry Christmas folder.
The dark blue has a gold matt and bows, and as the lighter blue one has silver dots on it, it's matted onto silver card, with silver bows added.
The sentiment is from the Phill Martin set 'Snowflake Sentiments',stamped in Gold and heated with Gold Detail EP, added with pop dots. I've also added a small acrylic gem to the centre of the snowflakes in the sentiment.
I stamped and embossed a sentiment in silver to match the pale blue one.
I've also got all the 'positive' shapes left over, which will make another batch of cards, mounted onto a Christmas Paper backing, So 12 cards from one batch of die cutting.
Die Sets used:
Heirloom Ornaments 2010,(left)
Heirloom Ornaments 2011(Right)
both Spellbinders.
Subscribe to:
Posts (Atom)
An End of an era
An end of an era
I write this with a broken heart, that only time can heal My beautiful, wonderful wifelet Shaz (Silverwolf) passed away peacefully in the ea...
-
A couple of weeks ago I mentioned that I had bought these, the new Tim Holtz Embossing Diffusers. You have probably seen, like me, the...
-
I take no credit for this discovery, a lady posted this on Pinterest HERE .Like any of us, I hate having to spend money on 'consumables...
-
This is the first of the batch of seven cards I made, thanks to some Pinterest inspiration. Here is the card that caught my eye,...