A warm welcome to all my visitors,

Thank you for taking the time to come and look at my blog, I really do appreciate it. I would love you to leave me a comment, even if it’s just to say Hi. It means I can come visit you!

All my designs are original, so copyrighted to me. If I have been inspired by someone elses work, I have named them in the post, and where able, I have provided a link.

Please feel free to use my designs for inspiration, I just ask you to credit me, and provide a link back to my blog.

Thanks, Shaz XX

Showing posts with label butterfly. Show all posts

Tuesday, 28 May 2019

Cards using Clarity stencils & HoneyDoo Stamps

A few weeks ago now, I spent some time creating these panels.
  I used two different Clarity stencils, Framework Circles, and Framework Squares. Both are 7" square, and they come with the cut-outs too, so you can mask off areas easily. These cards are just from the circles ones.


  The cardstock is Clarity too, they make a 7" square cardstock pack, which fits the stencils perfectly.

All the backgrounds were created using a light, mid and darker ink, blended using brushes.


By adding each of the two darker colours over smaller portions of the shape, it helps to create a  more 3D look to them.


If you use a dry baby wipe to bring in the colour left on the stencil around the shape before you lift it off,  it does help to define the shape nicely. I picked up that tip from Barbara Gray.
 Most of these have now been turned into cards, and I'll share a few here, and do another post for the others, as there's quite a lot!


These first two use one of the flowers from a HoneyDoo set called Cherry Blossom. The sentiment is a Crealies die, and was cut three times and stacked up. 


These three also use a Honey Doo stamp, this time called Flower Power. In both cases the set comes with 3 sizes of flower, and a stem, or leaves to build up your image.
For all of them I restamped the image onto coloured vellum, then added those to some of the flowers with Glossy Accents, and either Stickles or Glass flatbacks to the centres.

They are all matted onto toning cardstock, then onto an 8" card blank.


In some cases, I lightly stamped a script stamp into the circles, using second generation stamping, and the darkest colour of ink used.


The final three in this post used butterflies, in exactly the same way. No idea what brand the stamp is,  I've had it years, and it's just a random one.


The Best Wishes die is from Crealies, and the Thinking of You is a Sue Wilson Mini Expressions die.

The cardstock used for matting is from a pack by Papermania- Capsule Collection Textured Cardstock.
 It comes is a variety of sizes, A4-which this is-A5 and 12x12. The A4 pack I get from The Range, and they seem to be the cheapest place to buy it, at £9.99. You get 75 sheets of cardstock, one of each colour, so you get quite a lot of shades of each colour, making matting a breeze.


Wednesday, 12 September 2018

WOYWW #484- The After Crop Edition.

Yes, it's the after crop edition, and a fabulous time was had by all.  From a lovely lunch supplied by Margaret- glitter&glue- to an extra special WOYWWer joining us- ShazinOz!
 I'm sure many of you have seen all the fab pictures posted by LLJ, who blogged it after the event, and I'll add a few at the end of the post. It's a bit photo heavy, so apologies ladies.


Some of us made ATC's, and others had something different to share. 😀
 These were the ATC's I made.


Instead of colouring individual cards, I cut down some Brusho backgrounds to ATC size.


 Larger image here, so you can see the stamps used.
  The stamps I chose reflect the feeling of WOYWW, I think.


 Across the Miles is from a Christmas sentiment stamp, and that's in honour of all the WOYWWers around the world.

 Let us be Grateful.... comes from a set by Chocolate Baroque, called Words of Gratitude. The word Friends came from a stamp block I bought many years ago at a craft fair. The WOYWW used up some more peel offs, and I finally added a couple of acrylic gems to the butterflys antenna.


ATC's & tags from the croppers.Clockwise from the left, ShazinOz, Sarah Brennan, Neet, Jo ,Chris (Mrs D),Christine (Bishopsmate),Margaret, and Heather M in the centre.


LLJ had spectacle cases as her swap, and Annie (Wipso) made a gorgeous tiny bear with his own little poem.


The case is now keeping my glasses clean on my workdesk, and the little bear had a fridge magnet on his back, so as my PC unit has a magnetic backboard, that's where he lives now.


There was a raffle, where we get to choose our prizes, and my choices were a Memory bear made by Annie- with a WOYWW tag!- and a little bound notebook, which I have just realised I forgot to photograph.


Annie said if she'd known I was going to get him, she'd have made him black, lol. But green is probably my second favourite colour,😀, and he's just gorgeous. So thank you for making him Annie. 😉
 I have to find him somewhere to sit where he can see the goings on, but not get inky!


ShazinOz gave everyone a little bag of goodies she made up. And no, I haven't eaten the chocolate yet!


I took colouring to do, as the amount of time spent crafting can usually be counted in minutes, rather than hours. Well- consuming all that coffee and cake, and all that chatting doesn't do itself you know! So it was something I could stop & start easily. And I needed some practice. Okay, a lot of practice. I took my Prismacolour pencils, as I hadn't actually tried them yet, I also took a selection of Promarkers, but to be honest, I loved the pencils so much, the markers never saw daylight.
 I was amazed how easily a blended look can be achieved with them, I've never, ever got results like this with markers. But that may improve with more practice.But I really loved the results here, and I can see me doing a lot more colouring in future.


This has nothing to do with the crop- I saw these in Poundland last week, a BIG bag of sequins, in a copper and a bronze colour, and will be great for shaker cards, amongst other uses.


Last week I showed those Wedding photos, and mentioned that Rich had carved the bench they sat on. It was hard to see much of it in that pic, but here it is.


And so, on to the roundup of crop photos:


Everyone looking very industrious- don't worry, it didn't last.😁


Annie,Jo & Shaz,Elizabeth & Hubby, LLJ, Mrs D,Sarah and Christine.

 We had a lovely weekend with Annie & Jo & the Hubbies, as we all stayed in the same Travelodge.


LLJ and the spectacle cases, and Sarah.


                                   Sarah again.


 Shaz & Shaz!
 Front row from left: Heather M, Neet and Chris (Pearshapedcrafting), and the two Shaz's again.


Team DougnShaz (Thanks for that Elizabeth!) and Shaz


The traditional group photo.

And the menfolk, without whom most of us would not have got there.There were another two, but they'd sloped off to a footie match, lol.

I'm sure you'll get lots more photos from the others, we all had a fabulous day.  Join in the blog hop by leaving your link at Julia's place, The Stamping Ground,and keep your eyes peeled for announcements for next year- maybe you'll be able to join us, meeting up with all these crafting friends is just the best. AND we raised almost £170 for the two charities being supported too!


And finally...........................


I forgot to say, we're off to the Netherlands this afternoon, so I'll visit as many as I can before we go, and I'll catch up with everyone else as and when Internet access allows!


Thursday, 4 August 2016

Lavinia stamps in Jo's Bubbles

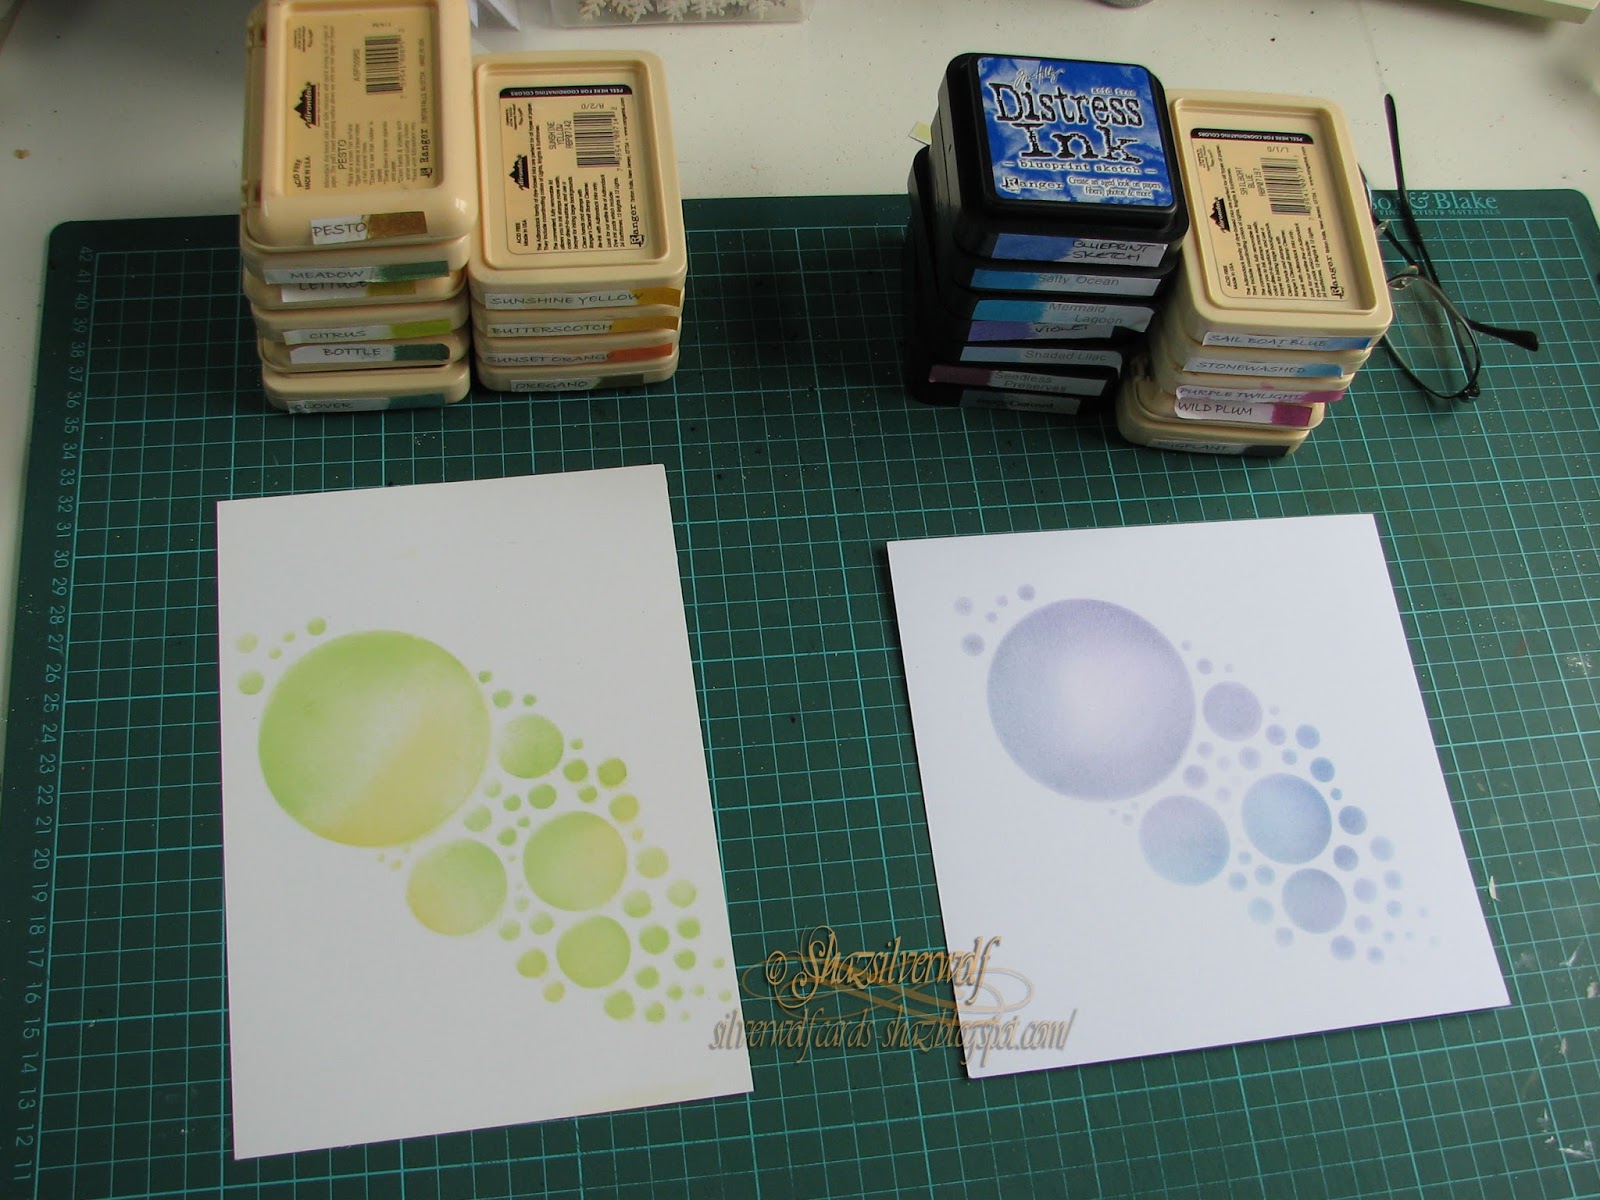
Quite a while ago now I installed a widget called ' You may also Like' which shows up at the bottom of each post. I don't know how useful visitors find it, but it does serve me as a memory jog for things I (may) have started a while ago and never finished,(who, me?) . These stencils are a perfect example of that memory jog.

The stencil itself is called 'Jo's Bubbles', and is available from Clarity Stamps. The two cards I've made here don't actually use the green & yellow one, I did stamp it, but I'm not happy, so that's been put to one side while I figure out if it's retrievable or not. But I did have another in blues and purples, a paler one, so I've used that.

First off, a selection of stamps to use. I knew I wanted to use both the Moon Fairy and the Circle of Stars in the large circle, so thought a bit of masking might be in order.


Stamped onto a Post-It note, second attempt as the first time I forgot to make sure the stamp was over the sticky bit!


She's only roughly cut out as the masking wasn't a critical thing to get right.


Stamped and masked, ready for the Circle of Stars.


The circle of stars added.  By the way, the fairy was stamped in Blueprint Sketch DI, and the Stars in Wilted Violet DI.
 I'd already decided I'd add these to this months Lavinia Stamps Challenge, which is ' No Black', and me not being able to use black is a bit like TH not being able to use brown, lol.


Came out OK in the end.


A few more stamps added- the circle directly below the Fairy has the Large Orb stamped in Shaded Lilac, further down, the circle with the Toadstool in it has the medium Orb stamped in Stonewashed Adirondack. The circle to the left of the fairy has the smallest Orb stamped in Purple Twilight Adirondack.
 Wilted Violet came back to stamp the small fairy, small toadstool and the star clusters that are dotted around the outside. I carefully used one of the small stamp cluster to add some stars into the small circles, along with a single leaf stamped in a few in Stonewashed again.
 I put this aside to dry and started on the second one.
I've oriented this one differently, with the largest circle top right. The colours are much softer too.
The Bunnies are stamped in Dusty Concord, and I used a couple of bits of Post-It to stop it going outside the circle. Some Small Mushrooms were stamped in Sailboat Blue Adirondack, next came a Dandelion Head in Shaded Lilac, again the edges were masked.


Some small birds stamped in Wilted Violet and the Star Cluster and small Orb stamped in Seedless Preserves DI.  I added a larger star in Stonewashed. This star if from a set of Lavinia Stamps that were free with a magazine a while ago. Looking at it a bit later, I thought the Bunnies circle needed something, so I masked around it again, then just stamped a portion of the Trailing Ivy stamp, using Versafine Spanish Moss.

 Finding cardstock to matt the images onto- again I can't use my goto black!

Once matted and mounted onto a 7" square card base, I added the sentiments to an open corner- both are from Lavinia Stamps. The You touch the dream one stamped in Versafine Imperial Purple, the Secrets one in Versafine Majestic Blue.
 Final touch for the Bunny card was a butterfly embellishment in the opposite corner, with a couple of acrylic gems stuck to his antenna, then some Crystal Stickles dotted on the stars and the dandelion head.


For the Moon Fairy card, a dragonfly was added, and given a coating of Stardust Stickles.The same Stickles were added to the fairies wings and dotted onto the stars.


Recipe:
 Stamps- All Lavinia Stamps:
 Moon Fairy Card
Moon Fairy, Fairy Orbs (set of 3 sizes),Small fairy-A set of three, Stars cluster- Stars1,
 Circle of Stars, Small Toadstool, Secrets are Hidden quote.

 Bunny Card
Midnight Meandering, (2 bunnies),Medium Orb,Dandelions,Small Mushrooms, Birds,
Creeping Vine, Star Cluster 1,You touch the dream quote.

Inks:

Adirondacks: Stonewashed,Sailboat Blue & Purple Twilight.

Distress Inks: 
Wilted Violet, Shaded Lilac, Seedless Preserves & Blueprint Sketch.

Versafine:
Majestic Blue, Imperial Purple, Spanish Moss.

Stickles:
Crystal, Stardust.

Stencil:
 Jo's Bubbles, Clarity Stamp.

An End of an era

An end of an era

I write this with a broken heart, that only time can heal My beautiful, wonderful wifelet Shaz (Silverwolf) passed away peacefully in the ea...