A warm welcome to all my visitors,

Thank you for taking the time to come and look at my blog, I really do appreciate it. I would love you to leave me a comment, even if it’s just to say Hi. It means I can come visit you!

All my designs are original, so copyrighted to me. If I have been inspired by someone elses work, I have named them in the post, and where able, I have provided a link.

Please feel free to use my designs for inspiration, I just ask you to credit me, and provide a link back to my blog.

Thanks, Shaz XX

Monday 31 October 2016

Memory Box Grand Happy Birthday Take Two.

 Larger cards this time, 6"x6" square. No backing paper either, just the die cut straight onto white card base. For a bit of a pop, I did add die cut balloons, from an X-Cut die set.It gives you, I think, 6 different balloon shapes and sizes, and options for strings and bows too.
 The largest balloon was stuck straight down onto the card base, then I layered the next one slightly raised, by adding a couple of squares of card to the back before sticking it down. Then for the final one I added a square of card to the back, then a couple of pop-dots. The reason I stuck the card to the back was that I die cut them from foil paper, so I wanted to make sure they didn't get flattened.
 And that was literally all there was to it. Really fast cards, which is always a bonus.


Saturday 29 October 2016

Memory Box Grand Happy Birthday Cards.

 Some really easy cards here, just requiring the Memory Box 'Grand Happy Birthday' die, and a sheet of patterned and plain card or paper.
 Memory Box dies tend to be a little on the expensive side, as far as I'm concerned, but this one's saving grace is that just the one die cut will make a nice card. You can even just die cut some fancy card/glitter card, and layered onto a card blank,and the job is done.
 All together I made 10 cards of this size, 6" x4", landscape format.

I sorted out some papers to die cut, and it's amazing just how many packs I have lying about. Mainly because I've generally worked on larger format cards, and many of the packs and pads are 6" square.

Some are 8" x8", but when you're folding an A4 sheet, they are still often less than you need. But I've deliberately started using smaller card blanks now, so I can at least make some sort of dent in the stash.
 
 I bought these Paper Blox years ago from an NEC Hobbycrafts visit, and also some long, narrow ones. I have used them often for punching shapes from, especially the narrow ones.

More pads from various sources.


The hand-crafted pad may have come from The Works a few years ago. Quite small, only about 4" x 6".


Another box full- I don't buy pads anymore, lol. Some of these, especially the Kay & Co ones in there, are 6"x6" and are years old. Probably almost antiques!


Anyway, let the die cutting commence. This sheet is from the handcrafted pad. Really nicely textured, which has given me another idea.


By the way, save all the letters of the 'birthday' word that get cut out-you're half way to another style of card,or at least have a greeting for one. As you cut more colours of paper & card, you  have the makings of a great rainbow 'Birthday' greeting for a childs card.


This one was cut from a sheet of embossed cardstock. The card pad is from Crafty Individuals.


Finding different colours and styles of paper to go with the die cuts.
Both of the cards at the front are from the Hand crafted pack. The white one is from Glitter cardstock, the dark blue from one of the Paper Blox, and the green at the top from a Kraft Core pack.


One here done with holographic card, and the other four are from embossed card.
 All the backing papers were cut to fit the front of the card, leaving a small white border. Then the Die Cut was trimmed to match in size.


 The Memory Box Grand Happy Birthday die.

Wednesday 26 October 2016

WOYWW #386

WOYWW 386- d'you know that's almost 7 1/2 years worth? Way to go Julia.Our good old Head Desker over at The Stamping Ground  could never have guessed it would be going this long, or how many amazing friendships she'd be the cause of! Or how many Desks Of Shame she'd be responsible for inflicting on the world,for that matter, lol.


No crafting going on right now, I've just cleared away after the Card-io Birthday Cards in the previous post.


The main item on my desk is a set of Inkadinkado stamps. Many of you may have seen this set on Vickie (Okienurse) blog a couple of weeks ago. I commented how awesome they were, but that as Halloween wasn't as big yet over here as it is with them, I doubted they'd be available in the UK. So the lovely lady offered to get me a set and send them to me. See what I mean about all the wonderful friends we've all made? In the envelope with the stamps were a selection of Halloween papers too, a lovely extra surprise.  So a smashing bit of happy mail.
Whats actually happening on my desk right now is a bit of reorganising. I'd started filing my wafer thin dies on magnetic sheets in A5 binders, which worked fine at first, but was now getting a bit unwieldy. I think I'm up to 8 folders, as you can only put so many in each one.

I'd seen on SCS a lot of ladies swore by Avery Elle pouches for storing stamps and dies,and raved about how strong they were, and how easy it was to find stuff. So, I bit the bullet and did a Google search. Found them on Amazon- where else?- and they come in a few different sizes, including one which they call Extra Large, which is in fact just a little smaller than A5 size.
 Which means I can just trim down my existing magnetic sheets and they fit nicely into the pouches. They have a flap at one end, so stop any dies falling out. And they are very strong, made from thick plastic.
Plus they fit into a Really Useful Box nicely, and I can make dividers from cardstock I have , and stick part of a file divider along the top for I.D. I'm only part way through, as I only ordered one pack of pouches to start with to see if I liked them. I have more ordered and will probably arrive today, so I can finish it off.
 Link HERE for the Pouches I've used.

 I've already done something similar with my metal stencils- the Sweet Poppy & Dreamweaver type- using CD sleeves for them. I used to have them in Photo Albums, but they weren't really strong enough, and the pockets were starting to tear.
 Still no news on the appointment front, I've rung at least three times now in recent weeks, and all his secretary can tell me is that he is chasing the appointments via email, and she will phone me as soon as she sees anything on screen. So, at least I will be going to the NEC Hobbycrafts next Sunday now, lol. Have a lovely day folks, I'll see you later.

Sunday 23 October 2016

Birthday Card-io for a change!

Following on from yesterdays Christmas Card-io cards, I thought the same design would make some useful birthday cards too.


So now I have 6 birthday cards to add to my stash.


A number of different Card-io/Majestix stamps were used to make these, but they all started out with some foliage being stamped first in an assortment of Adirondack and Versafine Greens.


I made sure to use plain stamping card this time around, and it worked as I wanted.

In the main, the foliage stamps are from these sets: Greenery 1, Summer Wreath and Oriental Blossom.
 I made sure to leave plenty of white space too.


The flowers on this one are from a set called Summer Meadow. Stamped in Adirondack Red Pepper and Cranberry.
All the floral elements in the cards were heat embossed with Clear Detail Powder, and the greenery had dried out so no powder stuck to it.


The same flower set used here, this time in Versafine Blue Lagoon and Adirondack Sail Boat Blue.


Here we have Gerbera Garden, using Adirondack Purple Twilight and Eggplant.The little bee is also part of the set, and was stamped in Archival Coffee, then I added a little pale orange with a Promarker.


The stamp set in this one is called Oopsy Daisy, with the two sizes of daisy stamped in both Adirondack Sunshine Yellow and Sunset Orange.
 The little blue dragonfly is from an RST set called Dragonflies at Dusk.


This one has stamps from another RST set called Triple Floral Dragonfly and a butterfly from Begonia garden. Inks used were Adirondack Mountain Rose, Pink Sherbet and Purple Twilight.


 Final card is stamped using Seasonal Rose, in Adirondack Red Pepper and Purple Twilight.


The birthday greeting is a Clarity stamp, from the set called Line Sentiments No.1. I used a matching ink from the flower colours to stamp it in, and placed the outer mask left from cutting out the circle to protect the design.


The selection of inkpads I was working from.


All six fronts mounted onto card bases, 5"x5".

Finishing touch was three half pearls in toning colours just below the sentiment.


Saturday 22 October 2016

Card-io Christmas take two.

So, as promised the second batch of cards, this time with some heat embossing thrown in.
One thing I learnt in this try out, is don't use a pearl coated card base!
 As I was using up off-cuts to do these - go me!- there was a variety of cardstock used. Some plain stamping card, and some pearlescent.
 The background stamping on the plain card dried out just fine, and I got the effect I wanted. The stamping on the pearl card however just flatly refused to dry. Despite being left overnight, and getting a blast with the heat gun for good measure, the greenery still picked up the EP.


 I'd used dye based inks, along with some Versafine, so fully expected no problems. Oh well.

So some have heat embossed greenery as well as the accent stamp.


As you can see, I did one with some Poinsettias, one with Baubles, one with a mix of the two. Another had Pine cones, and the last two had holly berries.


Versafine Crimson Poinsettias and Imperial Purple Baubles.


Baubles in Versafine Habanero,Imperial Purple and Majestic Blue.


Versafine Crimson on the small Poinsettia, and Ranger Dye ink Classic Cherry on the large one.


Crimson Versafine for the holly berries on this one
 on the right, and Classic Cherry for the one on the left.


Archival Coffee for the pine cones, two different ones from two sets.


It occurs to me that I could use this to make some Birthday Cards with, using different sets. And I will use plain stamping card next time, so I can repeat the heat embossing elements.

There are a number of sets of these stamps in the Card-io/Majestix line which are very close to the RST stamps I used, such as the Poinsettias, the Baubles and the Holly & Berries. I actually prefer working with the transparent Card-io stamps to the red rubber on wooden pegs of the RST.

Christmas and Card-io.

Well, these turned out to be quite quick and easy to do. Not actually what I had in my head originally, I was thinking along the lines of stamping a wreath of sorts.
 So, I die cut a circle from copy paper, and was going to stamp a wreath inside the circle cut out.
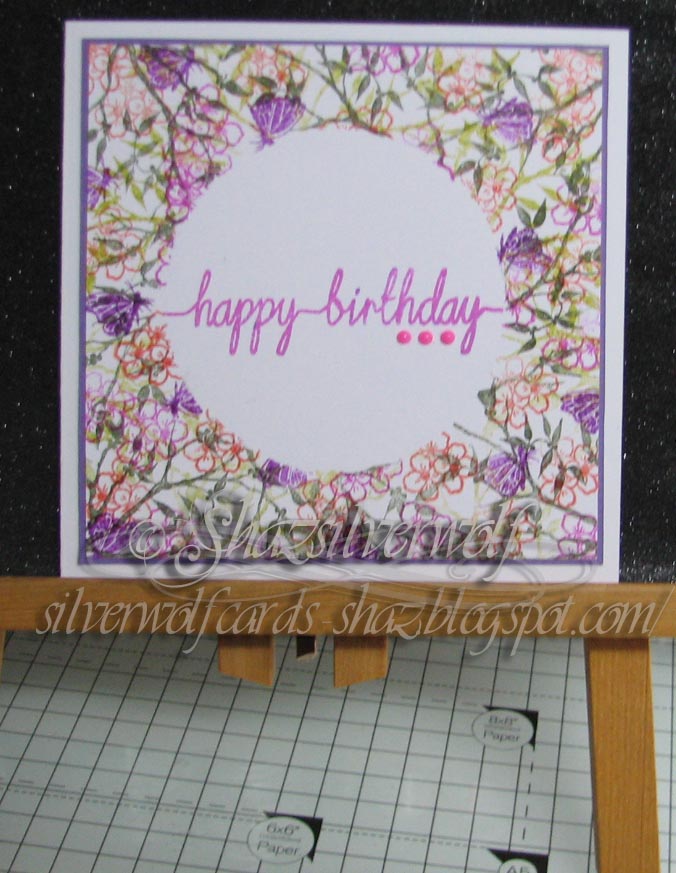
I decided the circle was too small for this to work, so swapped it around, and used the circle to mask off the centre of the cardstock, and stamped around it.


The first one I made was one of the snowflake cards, and that one, on the right, does include a Clarity snowflake, in the corners. All the other stamps I've used on all the cards are from Cardio/Majestix, or Rubber Stamp Tapestry (RST).
 I was surprised recently to see some Rubber Stamp Tapestry  sets in Hobbycrafts, I didn't think they existed anymore. The sets I have are a few (!) years old now, possibly 10 or more.
For anyone not familiar with them, they are very small stamps- very similar to Cardio/Majestix, but on wooden 'pegs', so you may have heard them referred to as Peg Stamps.


  They came in a pack like this, containing however many stamps were needed for the image. This one, Poinsettia Wreath, has four stamps in the set.
    The black line you can see on the pegs denotes which way up the image goes, to help with alignment.
 However,unlike the Card-io/Majestix stamps, these don't build up into scenes, as the sets don't contain the right sort of images.

I'd added a few lines of removable adhesive to the back of the mask, and, having decided I was going to use 5" square card bases, I cut a sheet of card to 4 1/2" square to stamp on.
 There's no reason why you couldn't stamp straight onto your card front, I'm just not that brave yet!
In the main, the inks I used on all the cards were Adirondacks, Versafine & Archival. A few Distress inks also came into play, mainly for the purples.
 The snowflakes used Adirondacks in Stonewashed, Denim and Sail Boat Blue, Versafine Majestic Blue and Deep Lagoon, and Archival Cobalt Blue. The purples were Distress Wilted Violet and Dusty Concord.I used the Cardio set called Winter Flurry, which has 6 stamps of assorted sizes. In the corner is a Clarity snowflake, from their 'Snowflakes' set, and it's the smallest of the set.


The mask removed to give a nice clean centre where I can stamp a greeting.
 I went back to the Phill Martin 'Snowflake Sentiments' set,as they are a good size for this.


I used the Archival Cobalt to stamp the greeting.

 I matted this onto a sheet of dark blue card, then onto my card base. Final touch is an acrylic gem in the centre of the snowflakes in the Greeting stamp.


All the other cards followed a similar pattern. I'm not totally happy with the second one I made,using holly sprigs and Poinsettias, I think I stamped far too much background greenery, too many flower heads, and it now looks a bit busy. But, lesson learnt, and I left more white space in future ones.


This one has a greenery sprig stamped in just two different greens, Versafine Spanish Moss and Adirondack Meadow, and I also used second generation stamping to get some variety.
 The Pine Cone is stamped in DI Gathered Twigs, and Archival Coffee.


Archival Coffee for the sentiment, a brown cardstock matt, and amber acrylic gems.


I decided to have another try with the Poinsettia set up, and was far more restrained with my stamping this time! Much happier with this one.


This was the second snowflake card, and again, less images. If I'd done some practice ones of this in my book, it would have been a good idea!
The baubles card uses stamps from RST and Cardio sets.


 Again, I think I may have got a bit too enthusiastic with the baubles. But I get told the same thing about decorating the Christmas Tree, so maybe it's a good job there isn't a tinsel stamp too, lol.


Well, having finished these, I had a thought for a second batch, which I will blog when they're done. I thought it may look good if I had embossed accents onto an unembossed background, so I've stamped up six more  backgrounds, and am leaving them to dry overnight.
 By the way, the 4 1/2" on the circle is not the size of the mask, it's just to remind me what size background I intended it to be used on. The actual size of the mask is 3".

Materials:
 3" circle mask
4 1/2" cardstock to stamp on.
 4 3/4" contasting matt.
 5" square card base.
 Card-io/Majestix/RST stamps
Dye inks in suitable colours.

An End of an era

An end of an era

I write this with a broken heart, that only time can heal My beautiful, wonderful wifelet Shaz (Silverwolf) passed away peacefully in the ea...