A warm welcome to all my visitors,

Thank you for taking the time to come and look at my blog, I really do appreciate it. I would love you to leave me a comment, even if it’s just to say Hi. It means I can come visit you!

All my designs are original, so copyrighted to me. If I have been inspired by someone elses work, I have named them in the post, and where able, I have provided a link.

Please feel free to use my designs for inspiration, I just ask you to credit me, and provide a link back to my blog.

Thanks, Shaz XX

Showing posts with label H2O's. Show all posts

Sunday, 14 April 2019

Christmas Card Club Challenge #8- Christmas or Winter Scene.

So we're back for another Christmas Card Club Challenge, and this week it's my pleasure to have chosen the theme, which is a Christmas/Winter Scene, with the alternative of Anything Goes, if the theme doesn't work for you.

I've got two cards for this week, both using the Stampendous Snowy Postcard stamp.

In each case I stamped the image twice, then cut the centre oval out of the second image so I could pop it up with Foam Tape.
 Images were stamped with Archival Cobalt for the blue, and Versafine Sepia for the brown.
I worked through a range of blue DI's for the first one, and used a Twinkling H2O blue for the oval frame. I coloured the holly leaves with green H2O's, and Liquid Pearls in Garnet for the berries.
 The Paper covering the card fronts is from an old Papermania pad, and the embossed piece was done with an Appleblossom All Occasion  Merry Christmas folder.

The Sepia one used various Brown DI's, and a brown H2O,  otherwise all was the same. In both cases, I added some clear embossing ink to the roofs and ground, then sprinkled with Stampendous Sparkle Puff powder. It doesn't puff up as much as the Inkylicious Puffy Stuff, but it's perfect for when you only want a little dimension.

Wednesday, 24 February 2016

WOYWW #351

A bit of a mess, to be honest with you. I had a few projects on the go at the same time, is my excuse.Partly the fault of getting stuff out of my UFO box. Plus I been trying to finish the Christmas Cards in the post below.I came across the Indigo Blu Blazing Poppies that I stamped out, possibly around this time last year.One set was coloured blue, which you can see on the right hand side. The other set only had a couple of flowers coloured, in shades of red. As you can see from the blue ones, I've also added some shading with Distress Inks.I'll do the same with the red ones, probably using brown shades.
 There are also some Toadstools, (Lavinia stamps), coloured with H2O's (blue & purple), and Distress Markers (red & yellow). A partly finished card at the back, the woodgrain  ( Stampin Up) with the toadstools.An assortment of inkpads, some Tombow Multi glue,acrylic blocks, (used for weighting down the toadstools), the blue parts of the card drying, after having Black Diamond Stickles added to the centres. The masks for the Poppies- I usually stamp on the top sheet, then peel off half a dozen sheets before cutting out, that way I always have spares. So that's mine, now lets all see yours. I'm off to join up with everyone at Julias, The Stamping Ground.


Monday, 3 August 2015

Brusho birthday card

You may recall, when I did the Brusho playtime a couple of weeks ago,this particular background made me say I had an idea for it. One of the WOYWWers birthday was coming up (LLJ), I already had the stamp, now I had the perfect background for it. I chose to use the background on the right.
 
The first stamp was from Lavinia stamps, a pair of boxing hares. Loved the stamp when I first saw it, and knew it would be perfect for a card for Jan, as we all know about her love for hares. As the background was done on a canvas sheet, the stamping isn't perfect, but that was easily corrected using Distress Ink Black Soot, and an Inkessentials nib. You could also use markers.
After the Hares, came a second Lavinia stamp,Moon Fairy, also touched up with Black Soot. The images were stamped In Versafine Onyx Black, by the way.


Next I added Cherry Blossom Branch, then some additional stamping along the bottom using Ivy Climber and Tiny Slender Mushrooms, all Lavinia stamps. A few grasses from an Inkylicious set, called Essential Grasses were also added.
The blossom on the branch was coloured using Twinkling H2O's in Iridescent Red, and the moon with Iridescent Blue. The same was added to her wings, but thinned down more, so the markings of the wings would show through.
I mounted the canvas panel onto some cardstock, and trimmed it down, to remove the rough edges. Then I went all round the sides with a silver Krylon pen.

At this point, I added some more of the Grasses stamping, this time in dark green, to help 'ground' the hares.

 I mounted the panel onto a card base made from folding a sheet of A4 pearl white card, in half. The greeting was stamped in Versafine 'Deep Lagoon', and a couple of acrylic gem hearts added. Finishing touch was some 'Diamond' Stickles added to the stars, and as falling stardust from the fairys hand.

Card Recipe:
Lavinia Stamps: Boxing Hares, Moon Fairy,Cherry Blossom branch, Ivy Climber and Tiny Slender Mushrooms.
 Inylicious: Essential Grasses
Inked background
Versafine Onyx Black
D.I. Black soot
Markers or nib( only needed if you have a canvas base)
   Paints for colouring Blossom & Moon


Sunday, 30 September 2012

Anniversary & New Baby


Two cards here, I pictured them side by side as its not easy to tell the size of the baby card without something to compare it to. The Anniversary card is a standard A4 sheet of card folded. The Anniversary & new baby were not for the same person, by the way!

    
The New Baby was for a work colleague leaving to have her first baby, so I made an A4 sized card, which gives plenty of room for everyone to sign. I buy a pack of A3 card from Staples for doing these. Its not particularly thick, so I add a sheet of A4 card to the back, and by the time it has papers etc on the front, it is perfectly sturdy. The punched panel uses vellum punched with two different X-cut border punches, Looped Fringe & Doily Dots.                           
 I'm actually very impressed with these border punches, they give a nice crisp cut and are really easy to line up, although I always do this by flipping it over to double check. I used a pale blue, a blue gingham and then a darker blue vellum, and added a knotted ribbon over the top. The decoupage teddy is matted onto Nesties Labels 8, and the sentiment was computer printed onto vellum and then heat embossed with silver powder. I matted that onto a piece of white card overstamped in Brilliance Pearlescent Blue with 'Precious Baby ' a u/m word collage stamp from Artifacts (The Stamp Bug). Finally added a few punched & layered flowers, with Stickles centres.


The Anniversary card also has a panel punched with the Doily Dots border punch, and is wrapped with black & red ribbon. The background paper is from a Dovecraft pad,called Charcoal Prints. The Rose Heart stamp is from Chocolate Baroque, stamped and embossed in Gold, and coloured with H2o's. I added a clump of paper roses and red and blck feathers, and secured it with silicone glue. The sentiment was stamped and embossed in gold again, onto a small tag and tied onto the ribbon with some red cord.

Wednesday, 16 March 2011

WOYWW #93

Happy WOYWW, pop over to Julia's blog at The Stamping Ground to join in,if you are new to this. So here is my desk for today.
The stamps I have used are four Botanical plates, unmounted, and I have had them for a few years, and long since forgot where I got them from, sorry. A few months ago I made up some crackled background paper to use  with stamping, and I thought the botanicals would work well. I used watercolour paper, I bought an A3 pad from The Works (Yes, I know I shop there a lot!). The first coat of acrylic was a pale yellow/ brown, which I got by mixing white and Wheat. This was coated with a layer of crackle medium, then an off-white top coat. I stamped in a mix of inks, Versafine Sepia & Olympia Green, Adirondack Espresso, and Memento Tuxedo Black.Just staring the painting process now, using H2O's, will be trying Promarkers, and maybe watercolours on some of them.
As I haven't got any finished projects, and haven't been shopping anywhere to find any bargains, I thought I would share one of my absolute favourite craft books with you this week.I'm sure I'm not the only one who has occasionally ordered a book, only to get it & open it and think, hmmm is that it? Wish I hadn't bothered.
Well this book definitely does NOT fall into that category.


The title is  Paper Transformed, A Handbook of Surface Design, Recipes & Creative Paper Projects, By Julia Andrus. The link will take you to it on Amazon.It contains an amazing number of techniques for ways to transform paper with paint, ink, pearls, glosses, glazes- you name it, its here.

All the finishes and effects are displayed as tags, this one shows 'cosmos paper'-simply put, a tag is inked, covered in Perfect Medium (or Versamark works the same) , and coated with UTEE 3 times. Then coat once more with medium/versamark, lightly brush on Perfect Pearls/ Mica Powders. Then sprinkle with UTEE again, and start heating from a distance, so it doesn't blow away. As it melts, bring the gun closer.The micas begin to sink into the UTEE. I have done the three first layers, then coated again with Versamark, flicked on some mica powders, sprinkled with UTEE and heated. This worked the same, and I didn't have to worry about the UTEE blowing away.


A page on overstamping, gilding and crackle effect.
There are pages on ageing, distressing and creating fake metal looks and effects, like rust/verdigris etc.


Batik effect


The last half of the book has projects using the effects & techniques shown in the first half of the book..

The book is 174 pages long, and every page is a delight.

There is something for everyone, and all the techniques are explained clearly in at most half a dozen steps, so they are not difficult, but they ARE all stunning. Even the cover is full of scrumptious looking projects, and unlike some, they are not just showing the best from the book on the cover!
This is one book that comes off the shelf regularly, and I guarantee it is an investment you will not regret.( You could always put it on your Birthday wish list, lol.)It costs just under a tenner on Amazon,which seems the average price. By the way, Julia Andrus has her own website,which I found earlier, and it looks stuffed to the gills with wonderful ideas.


Monday, 14 February 2011

Happy Valentines Day

I'm still with the easel cards, lol. I think I've got stuck here. Its nice to have more than one surface to adorn, though.This is todays Valentines card, using one of the Elusive Images Rose plates  from my desk a couple of weeks ago.Matted onto black & Burgundy card and tied with ribbon. A sheet of rose patterned paper was used to cover the card front.


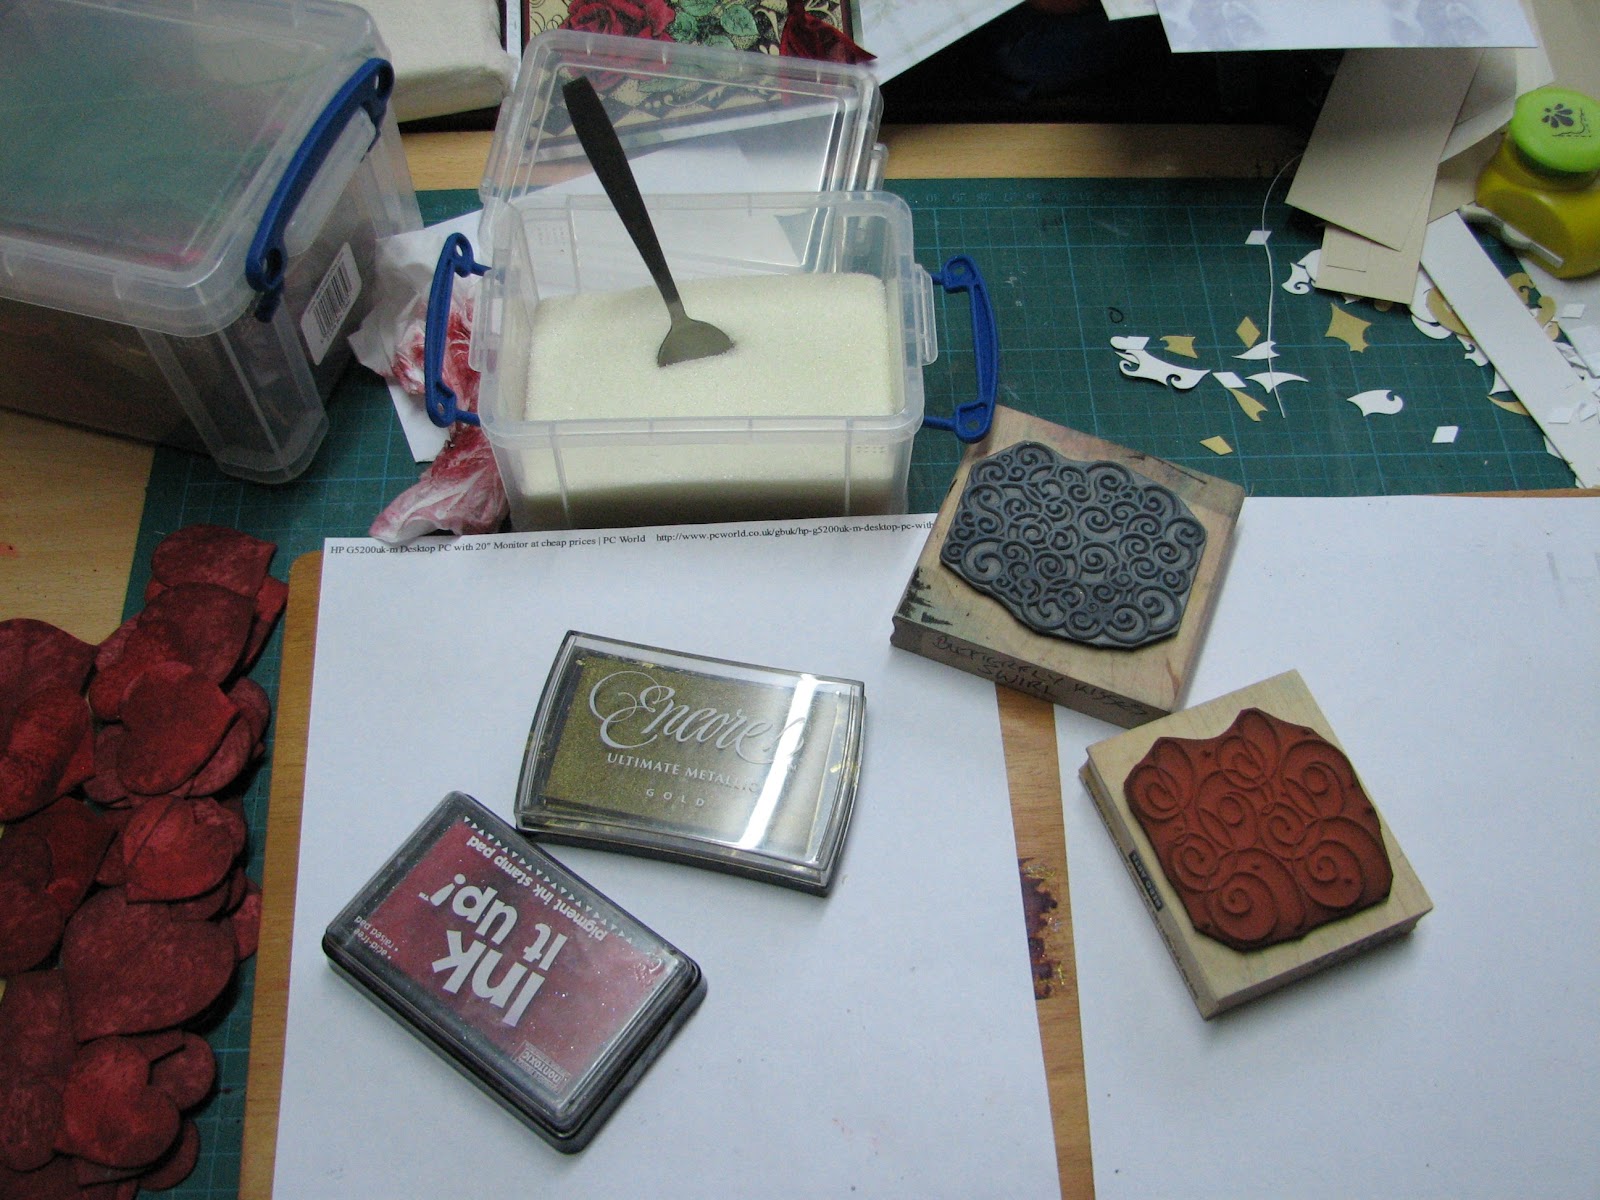
  The triple embossed hearts were made by inking first with a mix of Fired Brick, Barn Door and Aged Mahogany Distress ink, then a few were stamped with a word stamp 'LOVE' before covering with Clear embossing ink.


 Sprinkled with UTEE, 3 layers, then some were overstamped with a swirl stamp and Gold Encore Ink.The INK IT UP Pad is my clear Embossing pad- It picked up red ink the first time I used it for this, so I keep it for Reds. These pads are really cheap- only a couple of pounds, so its no loss. The Really Useful Box with the spoon in it is my UTEE- I bought it off e-bay, loose in a bag- much cheaper than buying a branded jar.
They were attached with a few dabs of silicone glue.


For the base, I covered it in a pale gold paper stamped with a lovely Baroque style stamp, by Magenta, 26019-R.
This is the stamp, and this is what it looks like when stamped a number of times to make a larger sheet. Stamped in Gold Encore, and heat embossed with Gold detail powder.

The stopper part of the card was made by cutting a band of black paper which was punched along both sides with the Martha Stewart 'String Lace' Border punch, then a panel of cream card that had been stamped with Hero Arts 'Italian Poetry' , S1832, in Gold and heat embossed. The Valentine greeting was stamped & heat embossed  in Gold again on plain vellum, then matted onto black then burgundy card, held together with a gold heart brad either end.The panel was attached with foam pads.

As I had a few images, and quite a lot of hearts, I made up some more panels, as I think this will come in handy for Weddings/Engagements/Anniversaries.


Wednesday, 2 February 2011

WOYWW #87

This is my desk for this week, and I must be honest, this is what it usually looks like when I am working! Valentines Day projects at the moment, some  have been  ordered, others are to take into work in case anyone wants one. The stamped Rose image is by Graphicus/Elusive Images, Harlequin Rose Themeplate. A couple have been stamped in black Versafine & heat embossed, the others stamped in Sepia Versafine only.I have also used a mix of card, white, cream and some marbled. The roses I have started painting with H2O's/Artquest  palettes. The single rose is also a Graphicus image, stamped on acetate & glittered on the back. I punched out some envelopes, cut up some handwriting stamped text paper, and made a bundle of 'love letters' which is tied with ribbon. The gold filigree and Lattice hearts have been cut out with the Silhouette. I am posting this at a disgustingly early time, before I go to work,to give me more time to visit everyone else when I get home. So Happy WOYWW to everyone, and if you have just come across my blog, and haven't joined in this before, visit Julias Stamping Ground Blogspot, to join in the fun and get to see lots of crafters desks & workspaces, for Whats On Your Workdesk Wednesday.

Saturday, 8 January 2011

Oriental Butterflies


Two versions of the same stamp,which is available as part of a sheet from a couple of suppliers: Tanda Stamps,Far East set 1,where it is also available as a single stamp,and in both rubber or clear polymer, or from Non Sequiteur, Plate 67, Samurai Plate. Apart from the Butterfly block, both plates have different stamps on them. For both cards, the butterfly block was stamped in black ink, then heat embossed, onto alcohol ink backgrounds. The butterflies, flowers and leaves were all painted with H2O's.For the black & red card, the design was then cut into 8 tiles then remounted onto black card, trimmed then matted onto a second sheet of inked card. The sentiment was stamped onto a scrap, matted onto black card and fixed with foam pads.The butterfly embellishment was made using fusible fibres over the butterflies on the block, then cut out and mounted with silicone glue. An Oriental coin had a length of black/gold mizhuiki cord threaded through it, and was attached with silicone glue in the opposite corner.
This card is an example of how a card can change as you are constructing it, and of the benefits of putting it aside if you aren't happy- coming back to it later often helps. This one was originally cut into 4 horizontal panels, then re-matted onto black card. I wasn't sure about it, so left it and completed the blue one.When I looked at it again, I thought the 8 squares would work better, maybe because it seems to mimic the oriental Shoji panels?
For the blue card, the background is printed from a Joanna Sheen cd,Tales of the Orient.The kanji strip on the left was done in triple embossing, using black ink as the base. The sentiment was stamped onto a scrap of inked card, and small black brads added in the corners.

Wednesday, 8 September 2010

Rose Panel Birthday

The image is from Elusive Images, Rose Stem Script . 
Coloured with H2O's. For the base I used a copper card, and a bronze piece of cardstock was run through the Cuttlebug with the D'vine swirls folder. I cut this to an oblong, then rounded two opposite corners.The image was stamped on white cardstock with Gold Encore Inkpad then heat embossed with Gold embossing powder.I trimmed this panel down, then cut three similar sized panels from fancy handmade paper. I arranged all four panels in a cascade down the cuttlebug embossed card, held inplace with DST. Gold ribbon was then wrapped around and tied in a bow before the panel was attached to the front of the card with DST.

Sunday, 25 April 2010

Here be Dragons....


Black base card cut & folded to 15cm square. The ancient script is by Elusive Images from Graphicus.( Scripts & timepieces u/m themeplate) stamped with Gold Encore pigment ink and embossed with gold detail powder, onto a slightly textured paper. I lined up a strip of gold paper with the edge of the stamped paper and tore off the edge, then moved the gold paper out a little and stuck both down with DST. The 'E' at the start was then coloured with H2O's, as in Illuminated manuscripts.The dragon stamp is by Inkadinkado, 4223P, stamped onto black card with clear embossing ink, then dusted with mica powders. Corners are punched with a southwest punch and mounted onto gold paper cut with a deckle edge blade. Mount the image to the lower left, then add an insert and a thin cord and tassel.

At the Altar 2


This one uses blue vellum border punched with a Fiskars Rope Border punch, rhen a length of ribbon added over the top. At the Altar stamped in silver onto white pearl card and blue vellum. Blue organza ribbon tied in a bow and added to the top. Spray of blue flowers addedin a curve shape, with a heart charm.

Landscape wedding


This one used a stamp called At the Altar, by Stampendous(R102). Stamped and embossed in silver first onto white pearl card, then onto Burgundy vellum. I cut out just the overdress from the vellum and attached to the main image with silicone glue.The dry embossing was from the Emboss to impress board by the Glitter Girls, then flatback acrylic gems added. Heart border peeloff is by Craft Creations. I coloured the bouquet with H2o's.Nestability scalloped oval cut & embossed, and a slot cot either end. Burgundy organza ribbon knotted through. and Names added with peeloff letters.

An End of an era

An end of an era

I write this with a broken heart, that only time can heal My beautiful, wonderful wifelet Shaz (Silverwolf) passed away peacefully in the ea...