A warm welcome to all my visitors,

Thank you for taking the time to come and look at my blog, I really do appreciate it. I would love you to leave me a comment, even if it’s just to say Hi. It means I can come visit you!

All my designs are original, so copyrighted to me. If I have been inspired by someone elses work, I have named them in the post, and where able, I have provided a link.

Please feel free to use my designs for inspiration, I just ask you to credit me, and provide a link back to my blog.

Thanks, Shaz XX

Showing posts with label Dovecraft. Show all posts

Monday, 27 March 2017

Mothers Day cards,with Mixed Media dies.


Two cards made, using patterned papers, peel offs and a die set called 'Delicate Asters', from Heartfelt Creations/Spellbinders.


The set has 4 different sizes of flower, along with some centres and a leafy branch. I'll be honest, I've had this a while, but my early attempts with it were a nightmare for cutting. Getting all the flowers to cut cleanly was impossible, I had to resort each time to cutting each layer individually, which, if you want a few is incredibly time consuming. However, I recently bought a Precision Base Plate for the Big Shot, which I can use in my BSPro, and that does make a difference. As does trying to line up the dies to go through at the edge of the machine, rather than the centre.
 Word of warning, apparently over time the Plate can cause damage to the dies, so it's one to be used sparingly.
Back to the cards. I'd picked out some 7"x7" deckle edged cards that I got at Happy Stampers, and a couple of A4 sheets of white card to trim down to fit.
I'd been tossing around in my head a design for the cards, fairly simple to do, but look really lovely.
 Next came a hunt through the patterned papers- not for the faint hearted, I assure you. Finally settled on this one, which comes from a Dovecraft pad,called Amethyst Floral Prints with  designs by Kate Knight,which is quite an oldie, but is still available, certainly  on E-Bay. My pack is 8"x8", but it also comes in 12"x12".
Slight jump in the pictures here, I forgot to photograph the die cut stage! I used Tim Holtz Mixed Media die set #2, and cut this from the top left corner. I cut the paper sheet into 2 triangles, and trimmed them down to fit neatly.
 Next job was to find something to back the die cut with, and after rejecting patterned papers as being too 'busy', I decided on a Fuchsia coloured glitter paper.
 This was going to need a wet glue to attach, and my wet glue of choice is silicone glue, or Pinflair Glue Gel.
 The other point that would need to be addressed is that die cutting those MM dies does result in distinct warping of the cardstock, which meant I needed to apply glue to areas of the design, not just around the edges.
 I sorted that by using a small paintbrush to get into some of the finer detail areas.


 I worked on top of the glass mat, as it meant I could keep lifting the cardstock, and wiping off any glue that may have spread through the design.


  A little longer than a couple of strips of tape, but does a better job. Now it needing laying down with some weight on the top to make it set 
flat.


While this was drying, I moved on to the flowers.


I cut some in a pale lilac pearl paper, some in white and some in a white vellum.

 I only used three of the four flower sizes to build them up this time.


I shaped them using a ball stylus, my pokey tool and a foam mat.


Stacked up using Ranger Glossy Accents, and seed pearls/ seed beads added to the centres, also with Glossy Accents.
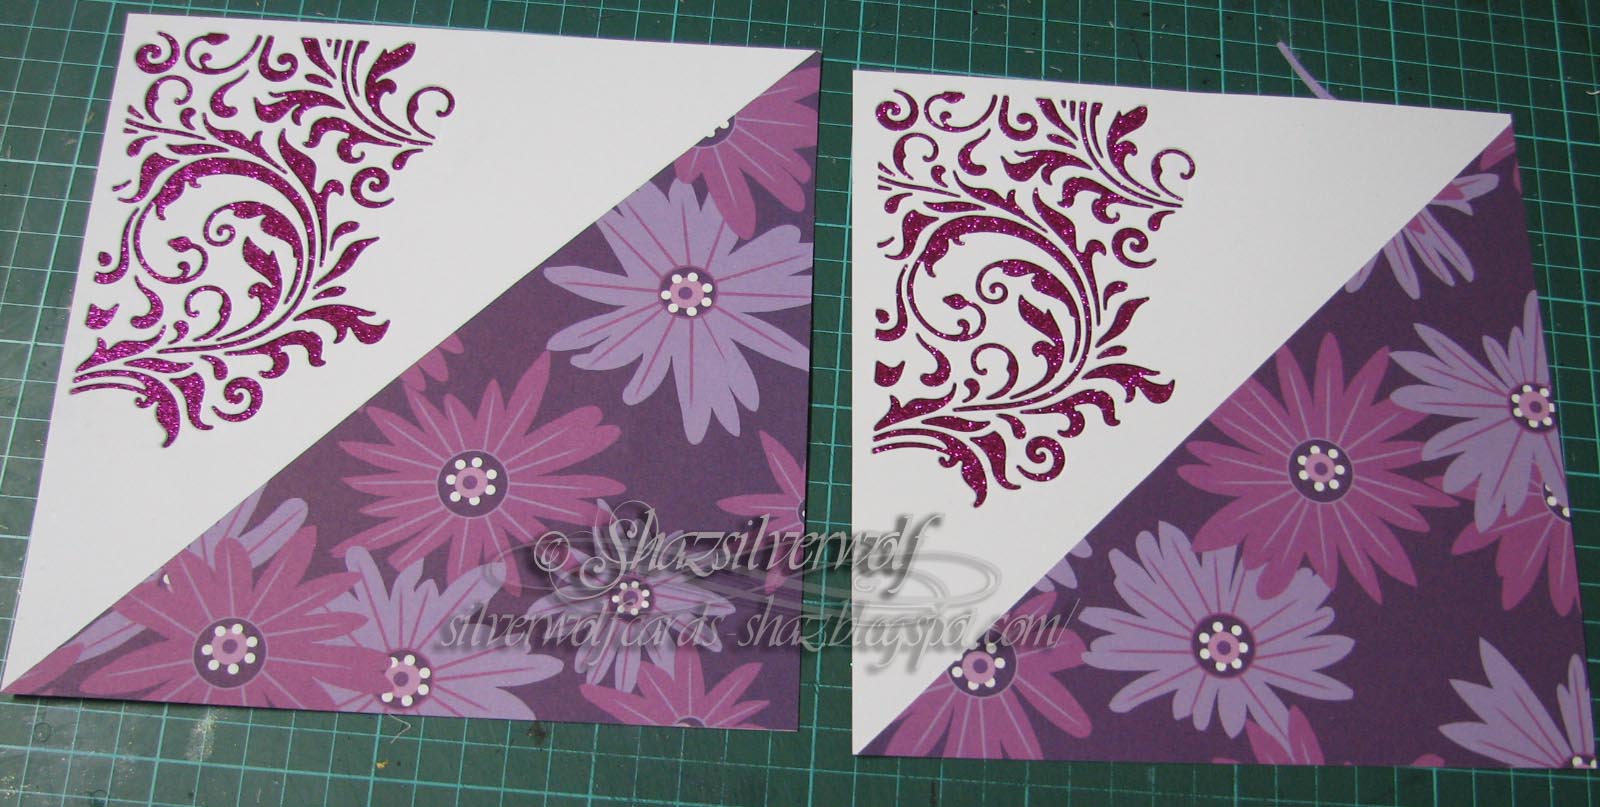


 A few hours later, and the silicone glue has dried, and they are nice and flat.
 Here I added some peel off strips across the edges to finish them off neatly.


Foam tape on the back to give the panel a little dimension and support.


The flowers positioned on the patterned paper - they look similar to the paper, which gave the idea to use them.


A peel off Happy Mothers Day sentiment was added just below the flowers.

Tuesday, 2 July 2013

Triple Stamping Butterfly


As the Swallowtail is such a large stamp, I was curious to see if I could get this to work. I cut three stamping pieces, based on the size of the stamp. They were: 6x 4 3/4,5x 3 3/4 and 4x 2 3/4. The mat layers are 1/4" bigger than the stamping pieces.( 6 1/4 x 5, etc)
 Layered the stamping pieces on top of each other, holding them together with re-positionable tape. Then I stamped & embossed the butterfly in Versamark & White embossing powder, and coloured him in the same way as the others.
 Tip here, separate the layers as you heat emboss them, as the heat makes the re-positionable tape separate, and you have sheets of card sliding everywhere.
 This one was coloured with DI in Squeezed Lemonade, Mustard Seed and Spiced Marmalade.  I matted all the layers up, and it fitted together quite well.  The base card is covered in a sheet of DP, Dovecraft Earthtones, 8&8 pad..  I have masses of paper I never get around to using! I grabbed a sheet from a 6x6 pad, by K & co, called Hydrangea stripe. I tore it at an angle, and sponged Spiced Marmalade around the edges, then ran it through an embossing folder with butterflies on. I think it was a magazine freebie. I added this to the left hand side then mounted the butterfly panel on top.  A greeting stamped in Spiced Marmalade and matted in the same way finishes it off.

Supplies:
Swallowtail Butterfly, Stampin Up
DI in Squeezed lemonade,Mustard Seed & Spiced Marmalade
 Versamark
 White Embossing Powder

Sunday, 14 April 2013

A Bit More Glittering


I've really got into this glittering lark, so as well as stamping & glittering some more images, I thought I'd share with you how I did them, what worked, what helps and what to avoid. You won't be able to avoid looking like you were at Ground Zero when a Glitter Bomb went off, so you'll just have to deal with that, :) .


I stamped up a batch of images, using Staz-on onto Transparency sheets.  Stamping onto these is a bit tricky, its very easy for the stamp to slide on the slick surface. What to do really depends on how bad the slide is, and your image. Simplest solution is to just wipe it off with Staz-on cleaner & restamp. If its not too bad, you can live with it, as you'll cut out the image later, so it may not even be seen. 
As you can see, I've not only stamped out Medallions- there are a lot of stamps that will lend themselves to this technique.


Most have been done in Black Staz-on, but these ones have been stamped using the Staz-on Blue, White & Pink.
These are an old Elusive Images set, which I believe is retired now.


So, you've got your images, the next thing you will need is a clear drying white PVA type glue. It has to be clear drying, so make sure to check for that. You also need some way of applying it, and there are a number of fine tipped applicator bottles available, as well as extra fine add on nozzles.You can see the bottles at the back of this pic, which are the ones I have been using, and also the add on very fine tips at the front. Recently I bought some by Woodware, which come as a three pack, and I really like these. For a start, the plastic the bottle is made from is really soft, meaning it doesn't take much pressure to get the glue to come out.  Important if you are going to do a lot of these, or have mobility problems with your hands.


They have a normal sized nib, an ultra fine that fits over the top, and a pin to seal.My pack cost me three quid, which is a bargain. Some places charge that for an ultra fine nib!

Last, but by no means least, you will need glitter. Ultra fine glitter is available from pretty much anywhere, and since the boom in nail art, you will find a fantastic array of colours cheaply available on E-bay. You can get Barbara Trombley's Art Institute Glitter, which is available in a stunning 400 colours- but it is dearer. I've bought a lot of mine at the Hobbycrafts NEC show, from Glitter Magic, and also E-bay.


This medallion is also an old Elusive Images stamp. I've glittered the central 3 patterns, and will put it aside to dry. Its better to do this sort of thing a bit at a time, letting areas dry between colours. This is the glittered side, and as you can see it doesn't look like much. Neither does the reverse!


But, once its dried, it looks quite stunning.
 It doesn't matter, by the way, which side you glitter, the stamped side or the reverse. Just make sure you always glitter on the same side, lol. In case off accidentally glittering the wrong side, scrape it off with a bit of scrap card, and wipe over with a baby wipe to remove all trace of the glue.
Useful tip here, don't try to apply glue from a sharp corner or point. You can bet it will pretty much always blob. Instead, apply the glue in a more open area and either push or drag the glue to the point with the fine nozzle, or a pin. Also, when you put your glue bottle down to apply glitter, lay the bottle on its side. That way you will reduce the amount of times you need to shake the bottle to keep glue at the tip. Shaking mixes in air, and then you get bubbles in your glue. Which you need to pop with a pin, or push off the visible part of the design.
With a regular design like this Medallion, always work in one direction. Doesn't matter if you work clockwise, or anti, just always go the same way. Its easy to get disorientated with these, and you end up with the colours in the wrong order on one side or another!
 So, first off apply glue to one section, and its useful to hold the image up to a window, to see if you've got right up to the edges, or left any gaps.


Next, dump a pile of glitter onto the glue. Let it sit for a moment or two, so more glitter sinks into the glue. Then tip it off onto a scarp sheet of paper, ready to return to the jar.


Continue with the sections you are going to use this colour in, being careful where you rest you hands & fingers!
Put them aside to dry. I find generally this takes under a couple of hours, especially if I lie them near a radiator. The glue has to dry by evaporation, as the transparency won't absorb any moisture from the glue, as paper would.

This is why I have a few sheets of images on the go- I can just swap from one to another as they dry.


A sheet of medallions with the first colour in each.


  The same sheet with a second colour added.


As I said, you don't only have to use Medallions. This Oriental Screen with Butterflies lends itself to this perfectly. The stamp is available as part of a sheet from Non Sequiteur (available from De Stempelwinkel).
 To glitter the butterflys, I placed the glue alongside the butterfly body, then dragged it out across the wings in streaks.
When sprinkled with glitter, it means I can get a two toned body effect.


 I do all the butterflys the same and put them aside to dry, doing the second colour when the first is dry.


I thought these Guitar images, Dimension Stamps, would be good for teen cards.


Final tip- what do you do about all the stray glitter that ends up on your desk, instead of back in the pot?
Take a brush, and sweep it onto a sheet of paper.


Then create your own custom glitter mix! All the glitter that I gather off my desk up goes into this pot.I started this pot when I first bought loose glitter in little plastic bags. The inside of the bags was still coated in glitter after I'd emptied it into pots, so I gave the bags a good rub, and collected it all onto paper. Poured it into this pot, and I've gradually ended up with a sort of Rainbow Black mix.
I also put a dab of glue on top of the glitter pots, and sprinkled it with glitter, so I could see what colour was in each pot, rather than having to lift every pot out of the box to find the colour I wanted.


I shall gradually be glittering these over the week, so I will post pictures as they are finished & dry.

Sunday, 30 September 2012

Anniversary & New Baby


Two cards here, I pictured them side by side as its not easy to tell the size of the baby card without something to compare it to. The Anniversary card is a standard A4 sheet of card folded. The Anniversary & new baby were not for the same person, by the way!

    
The New Baby was for a work colleague leaving to have her first baby, so I made an A4 sized card, which gives plenty of room for everyone to sign. I buy a pack of A3 card from Staples for doing these. Its not particularly thick, so I add a sheet of A4 card to the back, and by the time it has papers etc on the front, it is perfectly sturdy. The punched panel uses vellum punched with two different X-cut border punches, Looped Fringe & Doily Dots.                           
 I'm actually very impressed with these border punches, they give a nice crisp cut and are really easy to line up, although I always do this by flipping it over to double check. I used a pale blue, a blue gingham and then a darker blue vellum, and added a knotted ribbon over the top. The decoupage teddy is matted onto Nesties Labels 8, and the sentiment was computer printed onto vellum and then heat embossed with silver powder. I matted that onto a piece of white card overstamped in Brilliance Pearlescent Blue with 'Precious Baby ' a u/m word collage stamp from Artifacts (The Stamp Bug). Finally added a few punched & layered flowers, with Stickles centres.


The Anniversary card also has a panel punched with the Doily Dots border punch, and is wrapped with black & red ribbon. The background paper is from a Dovecraft pad,called Charcoal Prints. The Rose Heart stamp is from Chocolate Baroque, stamped and embossed in Gold, and coloured with H2o's. I added a clump of paper roses and red and blck feathers, and secured it with silicone glue. The sentiment was stamped and embossed in gold again, onto a small tag and tied onto the ribbon with some red cord.

Wednesday, 10 August 2011

WOYWW #114


First on my desk this week is another map card.The maps are from a set available from Stamp & Go.com, SIFS65,which features 6 maps, some waves, a couple of ships, and a ship in a bottle. It was stamped in Memento Tuxedo Black onto an alcohol ink background then cut into a mosaic and matted onto black card. The two tags use a stamp from Artifacts, The Stamp Bugs own stamps, Spirit of Adventure Collage. Just went to their site to get the link, and their u.m stamps are on sale at the moment, with 25% off! The Time & Tide stamp is by Paper Artsy, Clocks plate 3, which also features some of the stamps in the third picture I have posted. I sponged old Paper, Antique Linen & Walnut stain Distress inks onto some script background paper and both tags.


  The second card is again using alcohol ink backgrounds, and the Crafty Individuals stamp from a couple of posts ago. The square card base was covered in paper from Dovecrafts Aquamarine Floral Prints paper pack.


Here are some of the clock images from the Paper Artsy plate, stamped onto Distress inked card, cut out then the 'glass' created with Glossy Accents. The card was coloured by swiping Distress inks onto a craft mat (mine came from Poundland, a baking sheet) spritzing with water then wiping the card/tag across the ink. Here is a link to Tim Holtz showing how he does it. The clock hands have been cut out using the Silhouette, using a 'dingbat' font that features clocks & timepieces.Have a great Wednesday, and if you are new to this idea, visit the Amazing Julia Dunnits Stamping Ground and join the fun.

An End of an era

An end of an era

I write this with a broken heart, that only time can heal My beautiful, wonderful wifelet Shaz (Silverwolf) passed away peacefully in the ea...