A warm welcome to all my visitors,

Thank you for taking the time to come and look at my blog, I really do appreciate it. I would love you to leave me a comment, even if it’s just to say Hi. It means I can come visit you!

All my designs are original, so copyrighted to me. If I have been inspired by someone elses work, I have named them in the post, and where able, I have provided a link.

Please feel free to use my designs for inspiration, I just ask you to credit me, and provide a link back to my blog.

Thanks, Shaz XX

Showing posts with label hearts. Show all posts

Wednesday, 9 March 2016

WOYWW #353

And I'm here this week. Missing last week entirely due to having lost a day. It was almost Wednesday evening when I realised it was, in fact, Wednesday, and not Tuesday. For which I completely blame Beloved Hubby. You know how you know what day it is by what happens? Well, after the weekend,because Beloved Hubby works nights, I have two nights until Wednesday. Except last week he had Monday night off, which in my poor confused brain meant it was Sunday, and so on, and so on. Total fail. But here I am again, ready to add my link at Julias, over at The Stamping Ground.
Slightly staged desk this week, for a reason I will explain in a moment. First off though, a couple of recent purchases.
Crazy Cats and Mini Bird Crazy. The mini birds also come with the accessories on the same sheet, and yes, I have also bought the dies, as I truly detest fussy cutting.


Some of the Visible Image stamps I pre-ordered from the latest batch of releases.They came in two separate halves, as poor Mark and Helen are really struggling to keep up with orders.


Finally got the Mothers Day cards made, in the post below, as well as a couple from the masterboards. The reason I had to put what had actually been on my desk all the way down here is that I can't have the image popping up on Facebook- you know how it shows the picture that is first on your blog post?I got a request Monday morning, from our sister -in -law to be,( Dougs eldest brother is getting married this Saturday). Could I possibly make her some cards to give the bridesmaids/flower girls? Had a think, realised I had an idea that would be quick to do, so said yes. That was when I discovered there are SEVEN bridesmaids, FOUR flower girls, and a Matron of Honour!


The toppers consist of hearts/circles/squares of diamanté threaded onto ribbon, the white  card is embossed with a Cuttlebug folder, Swiss Dots. All I have to do now is print the inserts and they are good to go. I'm just glad I had a simple design in mind! So thats my show and tell for this week, I'll be round later so you can show me yours.

Sunday, 24 February 2013

Those Sparkly Hearts.....

So, a couple of weeks ago, I showed this picture- you can probably guess that Valentines Day was involved somewhere.

This is the card they ended up on:


Beloved Hubbys Valentines card for this year.
I wanted to make some glittery hearts for it, and knew that I had some glitter card that was sort of encapsulated in a gel type of coating so it didn't shed.( I get into so much trouble for leaving a trail of glitter around the house, I didn't think he'd appreciate being covered in it too!)
 I remembered getting some from The Glitter Girls at the NEC a couple of years ago. Found it, and discovered that I didn't have any red! So I had to make my own. I had two goes at it, the first one I inked the hearts with Aged Mahogany ink and added a layer of clear powder, then I tried some Red Sparkle glittery embossing powder. It looked good, but as I added more UTEE over the top, the red colour seemed to burn off the glittery powder, and it started going a blotchy silver.

So, I  die cut another couple of hearts, and inked them again. (I've got a Sizzix die with four different sized hearts on it, one of the originals for the old Red Sizzix die cutter.) The Distress ink is quite wet, so I got some normal clear embossing powder on it, and heat embossed it.
Then a layer of UTEE.

Next was a layer of Red Glitter straight on top of the hot UTEE.
I tipped off all the excess and left it to set. When it had, I covered over the glitter with some more embossing ink- I have a bottle of it, I think from a Hobbycrafts store.It has a dabber type top, but I found it easier (and less glitter on the top) by taking off the dabber top and pouring a small amount onto the heart, then spreading it over the surface with a cotton bud.


Another couple of layers of UTEE, and the glitter was sealed away inside.


Came out pretty much exactly as I'd seen it in my minds eye, which is always a pleasant surprise, lol.
Repeated the process for the second heart, and left them both to set fully while I put the layers together.
I used a dark red card base and some black ribbed card. A layer of black slightly smaller than the card front went on first, and two layers of slightly different shades of red organza ribbon. I cut another piece of black slightly larger than the two hearts side by side and matted that onto another piece of red.The sentiment, I am (fairly) sure, comes from either an old Joanna Sheene stamp set , or a Chocolate Baroque one, as its on Grey rubber, and they are the only two I can think of that use that. That was stamped and heat embossed in black on some scraps of the red card.
The hearts were added to the card strip with Pinflair glue gel, and the panel mounted with sticky foam tabs. The two sentiment pieces I added with some more glue gel.
The hearts didn't take very long to make- it was more the trial & error that took the time. I will deflinitely try this with different colour glitters- black instantly springs to mind, lol.

Thursday, 16 February 2012

Valentines Card

This was the card made for my Beloved Husband this year.I used the Black & Burgundy theme from our Wedding, and the card also incorporates some of the ribbon used in the Invitations, as I have plenty left!
 The base card is white Pearlescent, from PDA Card & Craft, which is where I buy the majority of my cardstock from. Good prices, excellent quality & choice and fast order turnaround, so whats not to like?
 The ornate background was stamped in Encore Gold Pigment ink onto black pearlescent paper, and heat embossed with Gold detail powder. The stamp itself is called Large Swirl Frame Background, by Magenta, 26019-R.


This was matted onto white pearl card, then black card. Some Burgundy ribbon was tied around the left hand side, and tied in a bow. Then I mounted the panel onto the card blank, which was cut down to a square.

For the tag, I used some dark red leather effect paper. Its a roll I have had for a while, I bought it from Hobbycrafts at the NEC a couple of years ago. I used this to cover a plain white tag, and trimmed it down.

Next I added Distress Ink in Aged Mahogany to colour the white edges of the tag, and to swipe over the texture of the paper too.
I punched a hole in the top of the tag next,then used a hole re-inforcer, coloured Black with a Promarker, to finish it off. I also used the Promarker to colour inside the hole, to hide the white edge.
 I got these from Wilkinsons, by the way. I thought they'd finish off  tags I cut myself tags nicely.


Now I selected some Black & Burgundy paper flowers (Craft Creations),and cut the heads off the stems. I used the Black Promarker again to colour the green leaves black.


A dollop of silicone glue next, and some small pieces of ribbon pressed into it, then the flower heads on top of them.

The Black & White heart  is I believe, a freebie from Craft Stamper some time ago. I stamped it in Versafine Onyx Black onto a scrap of the pearl white card, then added a couple of layers of UTEE. I put an acrylic block on it overnight to flatten it, after the UTEE had cooled down. I added it to the tag with some more silicone glue, so I could angle it slightly. A small length of black organza ribbon threaded through the tag, then finally I added it to the front of the card with some sticky tabs for dimension.

Sunday, 28 August 2011

Ruby Anniversary

 I used to work with the lady in the picture, until she retired recently, and her sister asked if I could do a card for her Ruby Anniversary.You will have seen the Harlequin Rose Panel image before, from Chocolate Baroque, as well as the triple embossed hearts.I really love those hearts, so easy to do, and very effective as an embellishment.I even did some in black & silver recently for a male birthday card- the colour makes all the difference. The Harlequin Rose is such a useful image too- Weddings, Anniversaries, Engagements,Valentines Day  all spring to mind, as well as birthdays. The die cut labels are  Nesties Labels 4, and I stuck to the dark red & black colours to fit the occasion.I also added a few stick on acrylic gems in red.

Wednesday, 18 May 2011

WOYWW #102

Happy WOYWW to all, lets hope that Blogger decides to let us play this week! I shall try to get around everyone over the next few days- overtime at work, so I am up at 5.00am, not getting home till 4.30 pm, then shower, do lunches, cook dinner, collapse! Anyway, here is my offering for the weekly stalk, lol.

This is what was on my desk this week- a 75th Birthday card for a work colleagues Mom.


  This is how it came together- some gold paper overstamped with an ornate background stamp for the bottom, and some gorgeous embossed vellum by K & Co to 
go on the main panel.

 
 Harlequin Rose panel, Elusive Images, was matted onto Gold card embossed with a Cuttlebug and Forest Branches folder.I wrapped a band of gold organza ribbon round this, then knotted some cream ribbon over it.
Then mounted it onto the front panel.
  I added some triple embossed hearts.
   
   
Then the numbers 75, cut from gold card on my Silhouette, and embossed with the Swiss Dots folder.


My Silhouette.
The finished card, with sentiment cut out with the Silhouette, along with a matt for it. 

Monday, 14 February 2011

Happy Valentines Day

I'm still with the easel cards, lol. I think I've got stuck here. Its nice to have more than one surface to adorn, though.This is todays Valentines card, using one of the Elusive Images Rose plates  from my desk a couple of weeks ago.Matted onto black & Burgundy card and tied with ribbon. A sheet of rose patterned paper was used to cover the card front.


  The triple embossed hearts were made by inking first with a mix of Fired Brick, Barn Door and Aged Mahogany Distress ink, then a few were stamped with a word stamp 'LOVE' before covering with Clear embossing ink.


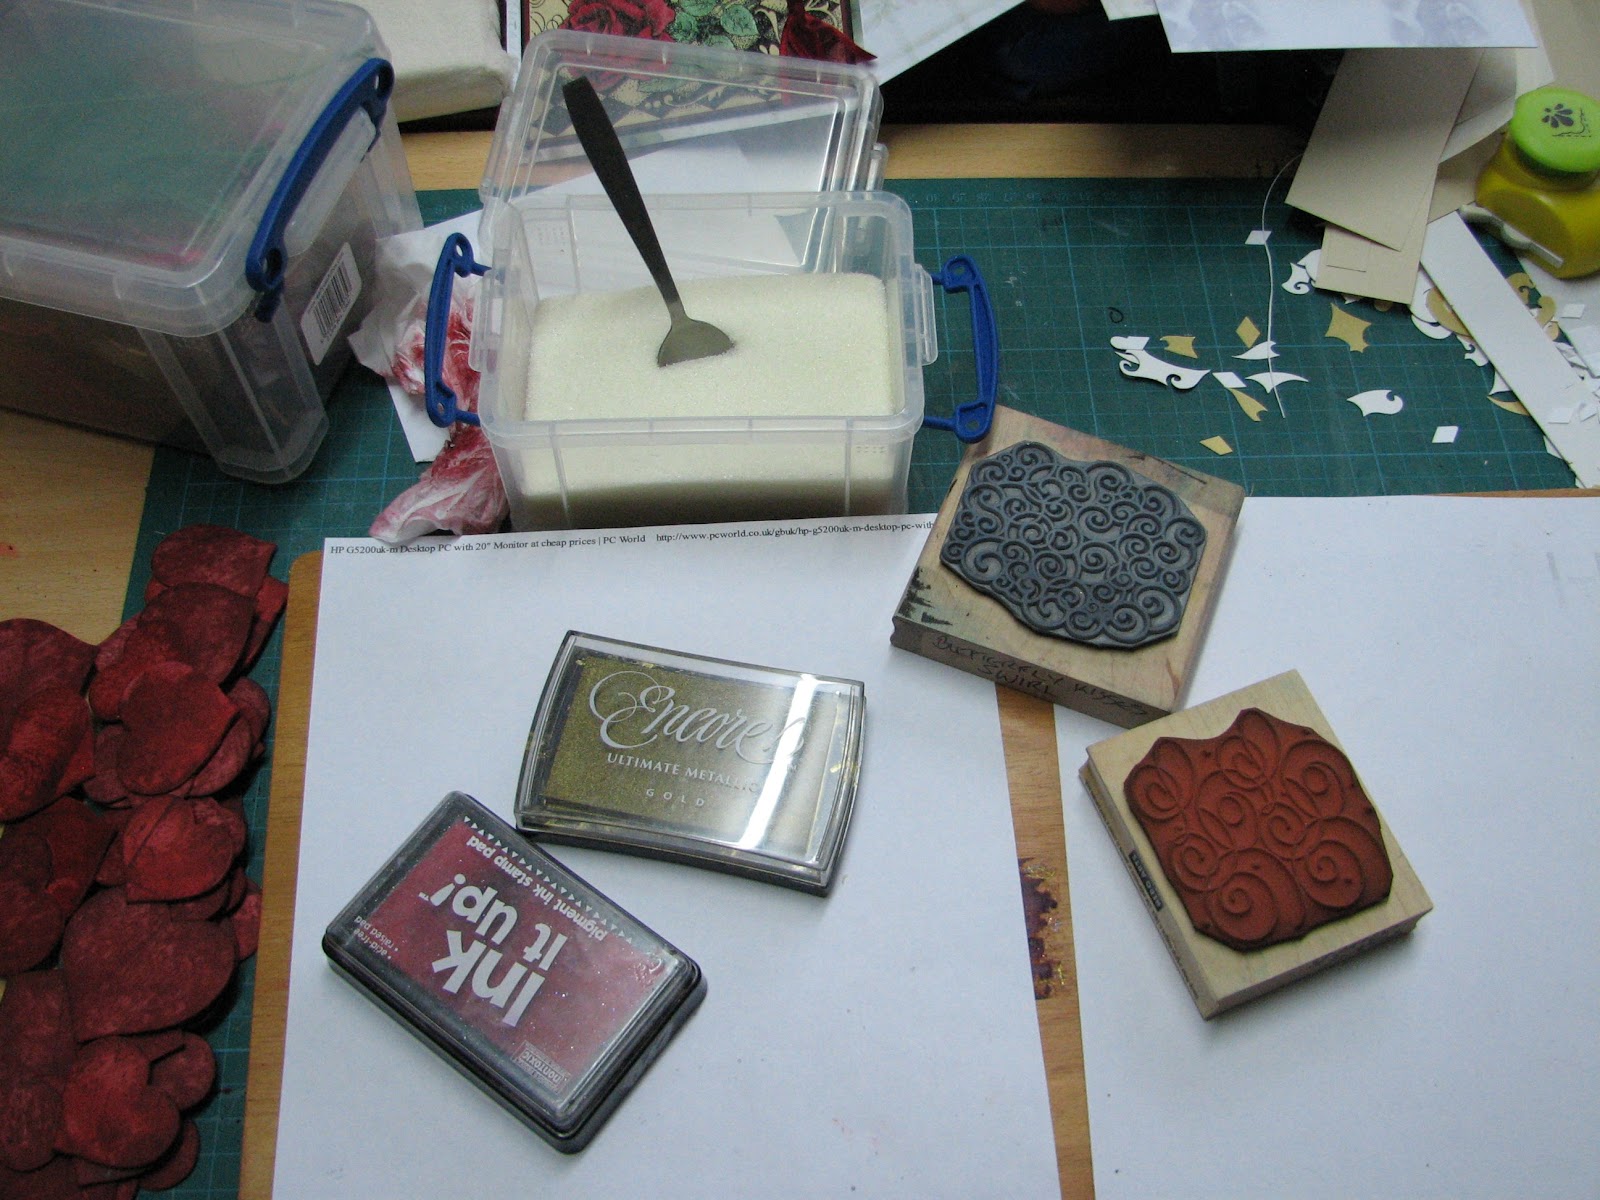
 Sprinkled with UTEE, 3 layers, then some were overstamped with a swirl stamp and Gold Encore Ink.The INK IT UP Pad is my clear Embossing pad- It picked up red ink the first time I used it for this, so I keep it for Reds. These pads are really cheap- only a couple of pounds, so its no loss. The Really Useful Box with the spoon in it is my UTEE- I bought it off e-bay, loose in a bag- much cheaper than buying a branded jar.
They were attached with a few dabs of silicone glue.


For the base, I covered it in a pale gold paper stamped with a lovely Baroque style stamp, by Magenta, 26019-R.
This is the stamp, and this is what it looks like when stamped a number of times to make a larger sheet. Stamped in Gold Encore, and heat embossed with Gold detail powder.

The stopper part of the card was made by cutting a band of black paper which was punched along both sides with the Martha Stewart 'String Lace' Border punch, then a panel of cream card that had been stamped with Hero Arts 'Italian Poetry' , S1832, in Gold and heat embossed. The Valentine greeting was stamped & heat embossed  in Gold again on plain vellum, then matted onto black then burgundy card, held together with a gold heart brad either end.The panel was attached with foam pads.

As I had a few images, and quite a lot of hearts, I made up some more panels, as I think this will come in handy for Weddings/Engagements/Anniversaries.


Tuesday, 22 June 2010

Wedding/Anniversary

Another version of the Anniversary card from an earlier post, this time in blue /silver.

Tuesday, 20 April 2010

Gold & Burgundy wedding.


Base card is cream linen A4 scored & folded. Dark Burgundy paper has a strip of Ivory wedding day paper( Craft Creations) mounted in the top half, and a strip of wedding vellum is then attached to the left side with gold eyelets. thin gold cord threaded through and tied in a bow, then mounted onto gold paper, leaving a wide border, then mounted onto the base card also leaving a border.A red & Gold padded heart attached with a glue dot. 2 Burgundy & 2 Gold roses( Craft Creations) tied together along with a rose leaf and a little gold bead cord, which I found on a market haberdashery stall. Stuck down with silicone glue, and a short length of gold ribbon tied into a bow and stuck on top, also with silicone. I punched out an envelope from Gold paper( envelope punch by Woodware)and added the small words and Heart. A corner of the envelope is pushed into the wet silicone glue. Names and Dates added in peeloff letters (The Art OF Craft).

An End of an era

An end of an era

I write this with a broken heart, that only time can heal My beautiful, wonderful wifelet Shaz (Silverwolf) passed away peacefully in the ea...