A warm welcome to all my visitors,

Thank you for taking the time to come and look at my blog, I really do appreciate it. I would love you to leave me a comment, even if it’s just to say Hi. It means I can come visit you!

All my designs are original, so copyrighted to me. If I have been inspired by someone elses work, I have named them in the post, and where able, I have provided a link.

Please feel free to use my designs for inspiration, I just ask you to credit me, and provide a link back to my blog.

Thanks, Shaz XX

Showing posts with label Purple. Show all posts

Monday, 27 March 2017

Mothers Day cards,with Mixed Media dies.


Two cards made, using patterned papers, peel offs and a die set called 'Delicate Asters', from Heartfelt Creations/Spellbinders.


The set has 4 different sizes of flower, along with some centres and a leafy branch. I'll be honest, I've had this a while, but my early attempts with it were a nightmare for cutting. Getting all the flowers to cut cleanly was impossible, I had to resort each time to cutting each layer individually, which, if you want a few is incredibly time consuming. However, I recently bought a Precision Base Plate for the Big Shot, which I can use in my BSPro, and that does make a difference. As does trying to line up the dies to go through at the edge of the machine, rather than the centre.
 Word of warning, apparently over time the Plate can cause damage to the dies, so it's one to be used sparingly.
Back to the cards. I'd picked out some 7"x7" deckle edged cards that I got at Happy Stampers, and a couple of A4 sheets of white card to trim down to fit.
I'd been tossing around in my head a design for the cards, fairly simple to do, but look really lovely.
 Next came a hunt through the patterned papers- not for the faint hearted, I assure you. Finally settled on this one, which comes from a Dovecraft pad,called Amethyst Floral Prints with  designs by Kate Knight,which is quite an oldie, but is still available, certainly  on E-Bay. My pack is 8"x8", but it also comes in 12"x12".
Slight jump in the pictures here, I forgot to photograph the die cut stage! I used Tim Holtz Mixed Media die set #2, and cut this from the top left corner. I cut the paper sheet into 2 triangles, and trimmed them down to fit neatly.
 Next job was to find something to back the die cut with, and after rejecting patterned papers as being too 'busy', I decided on a Fuchsia coloured glitter paper.
 This was going to need a wet glue to attach, and my wet glue of choice is silicone glue, or Pinflair Glue Gel.
 The other point that would need to be addressed is that die cutting those MM dies does result in distinct warping of the cardstock, which meant I needed to apply glue to areas of the design, not just around the edges.
 I sorted that by using a small paintbrush to get into some of the finer detail areas.


 I worked on top of the glass mat, as it meant I could keep lifting the cardstock, and wiping off any glue that may have spread through the design.


  A little longer than a couple of strips of tape, but does a better job. Now it needing laying down with some weight on the top to make it set 
flat.


While this was drying, I moved on to the flowers.


I cut some in a pale lilac pearl paper, some in white and some in a white vellum.

 I only used three of the four flower sizes to build them up this time.


I shaped them using a ball stylus, my pokey tool and a foam mat.


Stacked up using Ranger Glossy Accents, and seed pearls/ seed beads added to the centres, also with Glossy Accents.
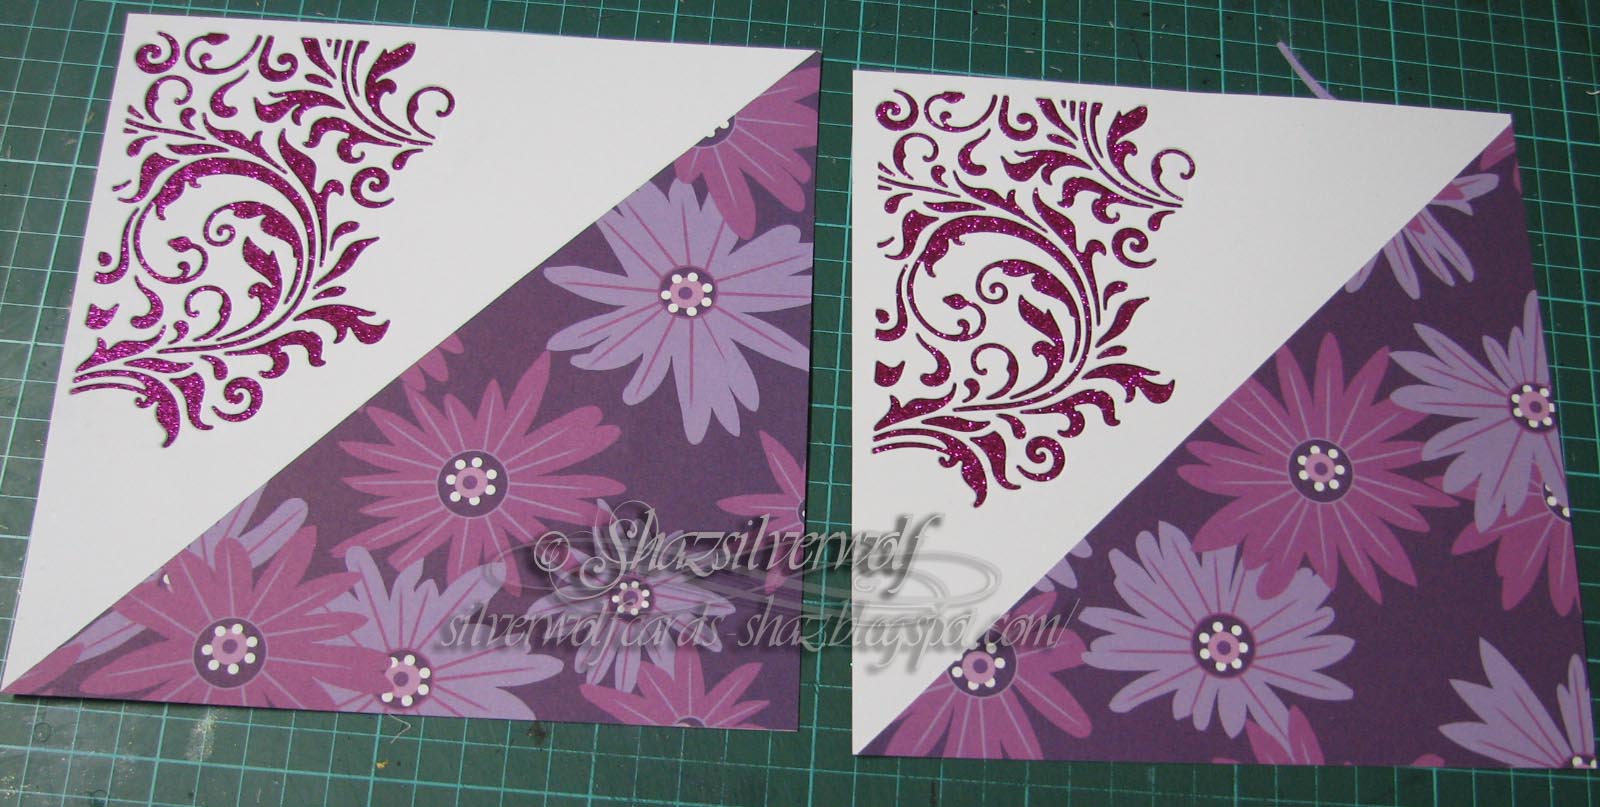


 A few hours later, and the silicone glue has dried, and they are nice and flat.
 Here I added some peel off strips across the edges to finish them off neatly.


Foam tape on the back to give the panel a little dimension and support.


The flowers positioned on the patterned paper - they look similar to the paper, which gave the idea to use them.


A peel off Happy Mothers Day sentiment was added just below the flowers.

Sunday, 9 February 2014

Same card, different colours........

As I said I would last week, here are two colour variations of the original card.  I also used a different background stamp for the purple one, another Penny Black stamp, Scroll Pattern 2636K. Which I now think was a mistake- it looks far too busy. The Daisy pattern works much better. Proof of the concept 'If it ain't broke, don't fix it!'.

I used Encore Metallic Purple inkpad for the rose and sentiment, and Dusty Concord Distress ink for the background. That did mean I had to emboss each layer of the pattern individually, as the ink was too wet to put the Stamp Positioner over without smudging it.


The blue one is a Whispers pad, Navy Blue for the Rose and sentiment, and Distress Ink Chipped Sapphire for the background. I also used Distress Markers and clear embossing powder to edge the stamped sheets this time.

Wednesday, 1 May 2013

WOYWW #204

Time is really rushing by this year, isn't it? May is here, which means I need to get started on my WOYWW 4 ATC! Not long till the crop,either. So, once again under the watchful eye of our Leader, freshly rested from her hols, Julia at The Stamping Ground, we embark on this weeks shameless display of crafting mayhem.
So here it is, in all its untidy glory, my desk this week. I sort of convinced myself that when I had a bigger desk, I'd have more room to move. Doesn't work like that though, does it? No matter how big the table, we still end up working in a space the approximate size of the project.
I've been making a batch of cards using the glittered panels, all in the previous posts, and am now trying to use up other images I've had stamped up & unused since who knows when.
 The 12x12 sheep of paper is from the Chronology Papermania pack, all steampunkey. There are a few Crafty Individuals images there, along with assorted odds & ends.So a very short & sweet post this week, and I'll be visiting this morning before work, then back at it tomorrow! Have a great week everyone, catch you later.

Monday, 29 August 2011

85th Birthday

The lady who ordered the Ruby Anniversary card, also wanted a card for her Mothers 85th Birthday, and again I went with an easel design. The base and face of the easel were covered in a rose print paper, and both edged with a silver peeloff border and corners. as the lady seems to be wearing a pale lilac and silver dress, I went with these colours for the card. I cut silver & lilac paper with a deckle edge blade on three sides, then punched a fancy border on the last side. These were layered up, then the photo matted on top. I wrapped White & lilac ribbon around the front and tied in a bow before I mounted it onto the easel. A triple embossed heart in White & silver finished the front. The base uses Nesties Petite scalloped rectangles, again in Silver & lilac with white/lilac roses (Craft Creations) in the corners.The word MOM was cut out with a Quickutz squeeze and Alphabet die. Its been a very long time since I last used that- I'm not even sure if they are still making them! I bought it very early in my crafting, to add names, ages etc to cards, then got annoyed at not having any real choice in size of letters, and that I would constantly have to buy new Alpha sets if I wanted a different style, and still not have much of a size range. So I ended up buying a Silhouette digital cutter- I found them on a really good promotion, loved the fact that I could cut any font on my PC, in any size I wanted. I have had it now for about 7 years, and I have to say it was the best money ever spent, when you consider the cost of Alphabet sets/shape dies for manual machines.

Sunday, 10 April 2011

A4 cards

Although it isn't obvious from the picture, this card is a full A4 in size. For this I use white A3 card, from Staples. This card is not particularly thick, but I resolve this by attaching a full A4 sheet of card to the back of the folded A3, and when the card front is covered, and whatever images & embellishments are added, it becomes perfectly solid. I found this much easier than other methods, which rely on attaching 2 x A4  sheets together with a fold & DST.
This was made for a lady who I work with, who is retiring, and I use the A4 size as it allows plenty of space for people signing it inside.
 For the main image I used the Penny Black 'Aspire' stamp again, onto a brayered A5 background, cut to three panels.This was matted onto grey, then gold embossed card.Before matting onto gold, I wrapped some lilac organza ribbon around the image. A folded bow was added with glue dots. I punched the corners of the gold card with a Southwest punch.The front of the card was covered with a sheet of lilac paper, from a Papermania pad. The same lilac ribbon was wrapped around the spine, and tied in a bow. Two sizes of Nesties Labels 8 were cut from gold card, and one from purple. The sentiment and name of the recipient were added in gold Peeloff letters.

 This is a second card made for a work colleague, also A4, and the image was originally the front for a square card,but I had to do this card in a hurry, so I cannibalised ! The front was covered in a piece of 12 x 12 scrapbook paper, which had words like 'friend, memories,' etc on it. The corners were covered with Happy Birthday paper. I cut the numbers from dark brown glittered paper, bought in a pad from Hobbycrafts, then cut 'shadows' from gold glittered paper.Peeloff sentiment, name and balloons completed it.

Sunday, 16 January 2011

Easel Card 2

A piece of white card was brayered with Adirondack Shell pink, then left to dry completely. The Penny Black stamp 'Aspire' 3381K, was stamped 3 times across the panel in Ancient Page Flannel, which is a dark grey, then the flowers only had a little sparkly embossing powder added to them and heated. I cut the image into three panels, with the centre one being wider than the two outer ones and matted them onto a piece of pale mauve card.This was trimmed to leave a narrow border, and a length of dotted mauve ribbon wrapped around and secured on the back with DST. A small bow was made and added with a glue dot.
My base card was cut down to the width of my stamped panel, scored and folded.The part of the card that will form the base it stands on was covered in a Purple lined paper, again adhered with DST.
To make the 'stopper', I cut a panel of silver card, and punched two strips of dark purple vellum to make the lacy edge. This was done with a fancy corner punch with the guides removed. The vellum strips were attached either side of the silver panel  with DST. I punched another strip of the purple vellum with a butterflies punch, from X-Cut, and stuck this along the centre of the silver card then edged with silver peeloff border. The whole thing was then trimmed to size and mounted to the base with foam pads. A sentiment was stamped and heat embossed, then cut out using a petite scalloped oval Nestie die. A hole was punched either end, and a small piece of the dotted ribbon threaded through, and mounted with silicone glue.

Monday, 27 September 2010

Whispers in the Wind.

Two more cards made using the crafty Individuals Treeline stamp, again on oil pastel backgrounds.I love this technique, as you never get the same effect twice, and the streakiness gives wonderful 'Evening sky' backgrounds.

Sunday, 26 September 2010

Let Sleeping Dragons Lie...

This is from a Tanda Stamps themeplate, Dragons & Fantasy plate 4.  The dragon was stamped with clear embossing ink onto black card, then an assortment of Moonglow embossing powders was sprinkled over it and heat embossed. Trimmed and matted onto gold then purple card, three dull gold brads added to bottom right corner. The backing paper is from Robert Adams Celtic CD. This was cut down and matted onto purple card. Everything mounted onto a black landscape card. If you click to enlarge the image, you will be able to see it clearly- doesn't show up well in a small image, lol.

Sympathy

A return to the same stamp for a sympathy card, this time in shades of purple. Stamped in black stazon, on an oil pastel background, then matted onto black card and trimmed to a narrow border. Two shades of purple vellum punched with a rope border and fixed down the centre of a white card blank. The sentiment is stamped onto an offcut of the background and fixed with foam pads.

Sunday, 4 July 2010

Waste Nothing,or Serendipity in action!

Just to prove that there really is no such thing as scrap to a crafter. All of these images were stamped onto 'waste' paper that I was rolling off excess ink from my brayer onto.The purple one was a sheet I had started to make a background on, then didn't like, hence the pale 'moon' , so I had put it in my scrap paper pile. When I bought this owl stamp (Crafty Individuals) ,and the treeline stamp, (Crafty Individuals) they seemed like the perfect partners to these.I probably couldn't have made more perfect backgrounds for these stamps if I had been trying.Needless to say, I now look at my sheet I'm rolling off onto as a potential new background and change to a new one before I turn it muddy!

Sunday, 25 April 2010

Get well soon


Pale blue mulberry paper torn to fit down the centre of the card.A silver mesh panel added on top. Craft Creations Vase peel off fixed onto blue patterned paper and cut out. Flowers punched from a selection of blue & purple papers. Fernleaf from a punch by Woodware.Small tag has a blue eyelet in the top with ribbon threaded through and sentiment added.

An End of an era

An end of an era

I write this with a broken heart, that only time can heal My beautiful, wonderful wifelet Shaz (Silverwolf) passed away peacefully in the ea...