A warm welcome to all my visitors,

Thank you for taking the time to come and look at my blog, I really do appreciate it. I would love you to leave me a comment, even if it’s just to say Hi. It means I can come visit you!

All my designs are original, so copyrighted to me. If I have been inspired by someone elses work, I have named them in the post, and where able, I have provided a link.

Please feel free to use my designs for inspiration, I just ask you to credit me, and provide a link back to my blog.

Thanks, Shaz XX

Showing posts with label Die Cutting.. Show all posts

Sunday, 21 June 2020

Christmas Card Club #13- Sentiment, no Image.

Back again with our regular Christmas Card Challenge, and this weeks theme has been chosen by Christine, who wants to see the Sentiment as the focal point, no image.
I've put together 6 cards, all using dies- and in the case of the JOY card, stamps- that I bought last year and never got around to using.
These are made with a Sue Wilson Die called Stacked Layering Noel Die, you get both types of NOEL, plus a 'shadow' die. The idea is that you can stack the cutaway Noel on top of the solid one, but I thought I'd get two cards out of it instead! They have both been mounted onto a piece of cardstock run through an embossing folder, in fact all six cards got that treatment, just using an assortment of folders. I used the same cardstock for the shadow as I used for the matt layer.
You also get a bauble and snowflake die in the set.


This one I did in gold & silver, and I *think* it may have been a Memory Box die, but I'm not certain. I didn't always used to keep the packaging.


The final two use a stamp and die set from Pretty Pink Posh, called Joy. I saw Jennifer McGuire use it back last year, and thought it was fab, so I broke my habit of not buying stamp/die sets. The reason I very rarely do that is that I don't like the white border that is usually left around the image when it's die cut, but with this it wasn't going to matter, and to be fair, it cuts almost exactly on the image anyway.


 The stamp is lots of tiny Christmas images, and mine are stamped white on white. There are additional small Christmas images & matching dies, but I didn't use those.
 
I also die cut the letters from white fun foam, just to add a little dimension.

This tip here Jennifer gave in her video- to position your letters nicely, line them up to a straight edge- I used one of the lines on the glass mat- then lay a length of purple tape- or any low tack tape- over the top, and use that to lift & position your letters.
Works perfectly, and the tape isn't wasted, it can be reused for something else.

Wednesday, 17 June 2020

WOYWW #576- The die cutting Edition.

Mainly die cutting about to happen, with a bit of stamping. This weekends Christmas Card Club is to use a sentiment, no image.
 As you can see, the desk has a number of things on the go-the pink envelope holds lots of inserts I've cut, and a whole pile of Versafine Clair inks for the stamping bit. The travel size platform is in evidence, complete with the Sizzix sticky sheet on, it really works incredibly well. Some coloured cardstock for some matting I was either about to do, or intend to do, can't recall which now. Dies of the Christmas sentiment variety, the blue envelope is part pieces of various Christmas themed paper which may, or may not, find themselves being used. Blue microfibre cloth for stamp cleaning, and the spray bottle with blue water in is homemade stamp cleaner. Really easy, and costs pennies per bottle. Baby bath/shampoo, water, and a couple of drops of glycerine. Into that bottle I put maybe 2 teaspoons-ish of baby bath, fill up to the top with water and then add a couple of drops of glycerine.

These are mainly the dies I'm going to work from, there is also a stamp and die set I saw JM using last year, and I bought it, and just remembered it.
It's the word JOY which stamps out with lots of tiny little images to form the letters, so a bit off from the brief, but still. I'm going to stamp it white on white, so it won't stand out too much. Made by Pretty Pink Posh.


 And thats my round up for the week, so I'll see you all over at Julias place, The Stamping Ground, where the Usual Suspects will be showing their desks to the world.
  So that just leaves us with........And Finally.......

Yep, remember every single one, and used most of 'em too! (Apart from Number 3, that would have been a waste of time)

Wednesday, 13 May 2020

WOYWW #571- The Catching Up Edition.

I am, indeed, playing catch up. I was getting a bit concerned I wouldn't make it for this weeks desk round up over at Julias place, The Stamping Ground. Because last Friday- or it may have been Thursday, who knows anymore- my PC monitor decided it was going to the great Tech graveyard. Poof! just died on me. I've been able to access the Internet on my Chromebook, but that isn't Windows based like my PC, so I can't actually access anything I'd do on my pc, and it doesn't show me any pictures on there either. So, another monitor was duly ordered from Amazon, was showing Tuesday as a delivery date, so kept my fingers crossed. And here it is! On my PC desk which is over in the corner. I didn't get any cards made for the Christmas Card Club- thats something I need to catch up with in the next few days, as this challenge was 'Windows', and I knew I didn't have a die for this, but I did have cutting files on my Silhouette. So, having got a monitor again, I've just cut out the Window shape I want to use.
I also die cut 3 Memory Box candles I want to use with them.. I haven't poked out the waste for the windows yet. I'm currently having a think about the candles- I think I'm going to need to attach the candle bodies, otherwise the window will show through.


Sorted out some acetate sheets/OHP film I've coloured with Alcohol inks, and some using the KLEAR floor polish & tissue, to back the windows with, so they'll look like stained glass.

I've also got these inked card pieces I intend to use, not sure if I'll use them for these cards or not though. Probably not.

 Not really enabling(!) but have you seen there are to be some new Distress Colours? Just sayin.😈
 And that's all my desk related stuff done.
A few of you have asked what I did with my shoulder. It's not a new injury, some of you may recall I once snapped off a corner of my shoulder blade, where the rotator cuff is joined? Believe it or not, that was back in 2012. I had it in a splint for 12 weeks, then had physio, and it did all heal. The trouble is occasionally it will become painful- and the cold & damp really upsets it. We had some cold, damp weather a couple of months ago now, and it started aching. I then spent ages using my Rotary Cutter to give my card inserts a fancy edge, and that requires quite a bit of pressure to get good clean cuts. Anyway, I obviously aggravated it no end, and it's not been happy ever since. Been resting it, occasionally putting in a sling to support it, and it's gradually returning to normal. At it's worst, it's a bit like a cross between Sciatica but going down your arm- it'll extend as far as my knuckles sometimes, or having really bashed your funny bone! So, it's been getting a lot of rest, painkilling gel & painkillers,and I do think it's a lot better than it has been. Hope you are all still staying nice & safe, and that anyone who's been ill with this blasted virus, is getting better quickly.


Wednesday, 6 May 2020

WOYWW #570- Just a little Enabling Edition.

Well, despite us all being in lockdown, the weeks still seem to be flying past. Time to pop your link over at Julias place, The Stamping Ground, and bare your desk to the world! MIA last week, only because my shoulder has been giving me a lot of trouble over the last few weeks, and I've found that alternately resting it, and occasionally having it in a sling is gradually helping to improve it. So, no crafting as yet, although I do have cards for The Christmas Card Club due this weekend, so I'll have to get my ass in gear. One little bit of enabling- just a set of dotted Oval dies from Crealies. I do have a couple of sets, but they don't go up very large, and these ones are from the XXL range.
The box on the image gives you the sizes- the smallest is 2.5x6.5, the largest 12.5 x 16.5.( equates to about 1½ x2½, and 5 x 6½ inches). I struggled a little when I was cutting out those Gorjuss Girls a few weeks ago, I had to draw around the outside of my largest oval and hand cut it for a matt. By the way, have you ever noticed just how much ovals vary? There are long and narrow ones, and shorter, wider ones, so you can't ever mix and match between sets.


Actually, I got carried away with the enabling, and haven't put the desk pic in yet! And this week you get a twofer- my desk, showing zero stuff happening, and Hubbys desk, as he's working from home. Since he was made redundant last year, he's been retraining in IT, so having done a number of courses, he feels he'd really like to get into the tutoring/training side of IT, so he's currently volunteering as a tutor with the place he did his training, as to get a qualification, a number of tutoring hours have to be completed.
 All mine contains is the pile still waiting for inserts, and a reflection of the sunlight! Thats actually the one thing I don't like about the glass mat, it's way too reflective for my liking.


Hubbys desk- two screens,a laptop, a microphone & camera, and an assortment of other 'stuff'.


Which brings us to ......And Finally..............

Hope everyone is keeping safe, and anyone who's been ill is well on the way to recovery.😍


Monday, 13 April 2020

Some Gorjuss Girl cards.

So, I have quite a few Gorjuss girl stamps, and they've rarely seen any use mainly because I'm not a confident colourer, and because I've never really been happy with what I've done, I've avoided it all the more, I think because I find it stressful rather than relaxing.
 Most of my colouring in the past has been done with Promarkers, and it's only very occasionally I produce something I'm happy with. However, I finally invested in some coloured pencils, and I bought the Prismacolor ones, as they were mid-range price wise, and supposed to be quite good, and also because I'd bought, and been bought, some colouring books, and the Promarkers usually tend to bleed through, where pencils won't do that. So anyway, I've been stamping out some images, and using them for practice over the last few months.
 I watched a few You Tube videos on using them, and gradually a few things dawned on me that have helped me be less critical of what I've done. I'll list them here, in case they help someone else.
 The first, and probably the most obvious is You are NOT going to be an expert the first time you pick up a pencil! Sounds obvious, but watching videos, and seeing examples of work others have done, and not being able to duplicate what I was seeing was making it stressful, until it finally clicked with me that they've been doing this for a long time, and probably struggled in the beginning too. It's all that practice helps them make it look so easy.
Second- I try to work too fast. I forget that the videos I'm watching have probably been sped up somewhat. So, slowing down is a key factor.
Third, it really is all down to trial & error, and practice, practice, practice! Just keep reminding myself it's only cardstock & ink.
 Finally- lightness of hand! This is a biggie. Not to try to lay down a solid patch of heavy colour in one go. Take time, and layer colour to get the depth you want. And don't worry too much about shadow at the start. So I selected some cardstock to matt them on, and die cut the images with either oval or rectangle dies. A couple have some stamping on the base card, and another three have backing paper from various pads. When they were mounted, I added some acrylic gems for a bit of bling.


I die cut some small strips for the sentiment, using a die set meant for cutting slider strips on cards. That's a tip I picked up from Jennifer McGuire.  You get quite an assortment of lengths, and is by Honey Bee Stamps, called  Straight Interactive Sliders. I got them from Bumbleberry Papercrafts.


The strips I cut from the same card as the matt.

I used some small Peel Off sentiments on them, they're something else I'm gradually trying to use up. Back when I started making cards & stamping, everything was wood mounted, Barbara Gray was just about introducing the concept of clear stamps. Anyway, that meant that a single sentiment stamp was quite an expensive thing, so I bought a lot of peel offs to cover all the sentiments I'd want to be able to use. Of course now it's much easier, we can buy some great selections of sentiment clear stamps, and I do now have a lot, so the peel off stash hasn't had much use in recent years.
 I  know that the Gorjuss Girls, with their lack of nose & mouth are not everyones taste, but they are weird enough to please me,lol.

Wednesday, 1 April 2020

WOYWW #565- The Still Hangin in there Edition.

Please tell me I'm not alone in not knowing what day of the week it is!  In fact, it's so bad now that the only day I know is Wednesday- for WOYWW and the day we need to put the bins out! So, it's time again to link up over at Julia's place, The Stamping Ground, and show your desk to the world.
Desk shot number one, tubs of punched out flowers, to help finish off another batch of UFO's.


This batch, to be precise.


One down, about 10 left to go. All made by die cutting cardstock with Tim Holtz Mixed Media dies, then backing them with some pre made backgrounds, mainly alcohol inked ones.
I've got a few backgrounds to stamp on here, extras from the weekends Christmas Card making.
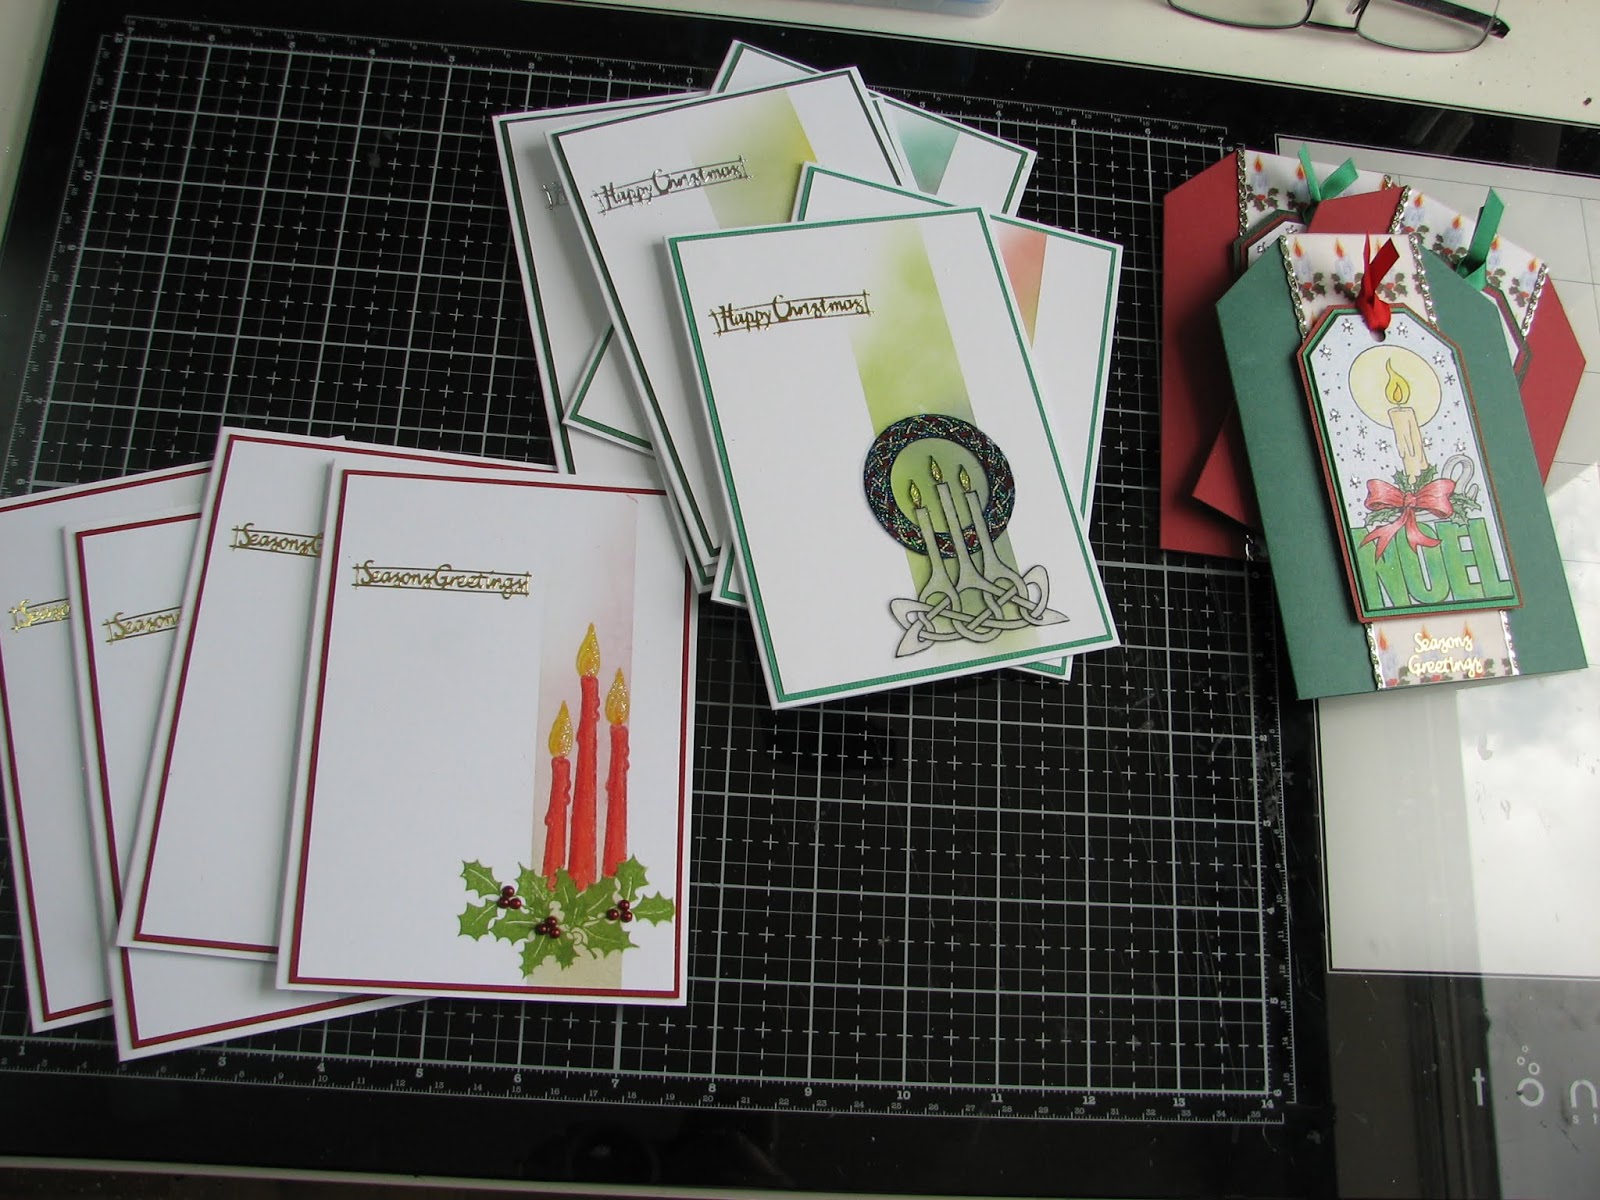
 I've seen Eileen Godwin make these backgrounds, really simple, just mask off a strip of cardstock, and sponge or brush some inks into the space.Then add some stamping. Eileen usually does these as one layer cards, but I'm not actually brave enough to stamp straight onto my card base, so mine end up being matted and layered, but they still come out really thin, so good for posting.
The reason I had extra backgrounds- I started the Christmas cards using the tag stamp on the far right, then remembered I had those Celtic Candle pieces I'd glittered, and wanted something fairly minimal to go behind them. It also worked perfectly for the stamped red candles using Cardio stamps- Christmas by Candlelight.
 I'd expect the tag stamp is long discontinued, I don't even recall who made it, and the Celtic Candles was a red rubber stamp by Aspects of Design, also I think long retired, but there is a larger version, which I have but didn't use, and that one was available as a Woodware clear stamp last Christmas. And with that, I'm done. One quick message for Ali Wade, I have been visiting, but when I try to leave a comment, I get a message come up that seems to think it's a bot attempting to leave it. I think Neet was having the same problem too. I hope everyone is still well, and looking after yourselves.

 Which just leaves ...........And Finally..............., and again, you get a twofer this week.


Which is why I have so many UFO'S!!!!!!!


And this is most definitely true.😇

Wednesday, 19 February 2020

WOYWW #559- The Return to Normal Service Edition.

And of course, by that I mean a bit of enabling to share on this weeks desk sharing link up, hosted as always by our beloved Julia, over at The Stamping Ground.
 But the first thing on my desk this week is some home cut stencils/masks.


Cut on my Silhouette, using Mylar stencil sheets.I buy them off E-Bay, and they are a great price. I buy the 125 micron as that seems fine for my uses, which are mainly to ink through. I'd possibly say you may want the thicker 190 micron (also available on E-Bay) if you wanted them to put paint or stencil paste through.


I used  deckle edged cutting files for these, just for a bit of a change. I'm intending to do some more Christmas cards (and probably others) with these, based on a design I saw posted on FB, and the maker very kindly said it was fine to CASE them.


Last week being Valentines day, and here is Hubbys card. Also inspired by something similar I saw on Fb. That one used punched hearts, in 3 rows. I made some hearts using cardstock & UTEE. some of which had glitter sprinkled in, a couple have stamping on the cardstock, and one had the impression from a crackle stamp in silver impressed in it.

And now, the moment you've all been waiting for.....drum roll....the Enabling!


 A couple of new stamp sets from VI, there are more but these two were the ones that grabbed me.


And a 3-D embossing folder from Tim Holtz,called Mechanics. Gives a great impression of riveted metal pieces. Be cool for masculine type cards.


A bunch of Christmas cards made, based around the star one from a couple of weeks ago. I found a pad of vellum in with my Christmas stuff , have no idea how many years ago I bought it,but I'm trying to get stuff thats been here years used up! I just used bauble die cuts instead of stars. Post is below this one.


So thats me done, just leaves room for.....And Finally......


Wednesday, 5 February 2020

WOYWW #557- The 'There's stuff on the desk' Edition

There is indeed, for this weeks link up of desks far and wide, courtesy of Julia at The Stamping Ground.
 Exhibit A, m'lud.
 The Lavinia stamps mentioned last week, a few Distress Oxide Sprays. Once again, enabled by Jennifer McGuire, doing some fab Christmas cards on dark cardstock using these. So, I will be CASE-ing what she did in the near future.
And a stamp set that I will lay at Dougs door. Not that he saw them until they arrived, but he started the whole 'Just Because' thing back last year. I have a small Just Because sentiment stamp, and a small die cut too, but this Altenew set, called Just Because Builder, seemed to be a must have. It's those two words in a variety of fonts, so you can mix and match as you like. It all came about when he mentioned that when he buys me flowers, which he does now and then, he usually gets comments like 'who's in trouble then?' to which he replies, 'No, they're Just Because', and he said cards with that on would be useful. So thats the reason for them. Bought from Bumbleberry Papercrafts, who stock quite a lot of US  brands.
This week its a ' two for one' scenario, this being the desk where I do my die cutting, and I have a number of dies to put away, from the making of last weekends Christmas cards, which are in the post below.


Last weeks desk showed the dies I planned on using, and some image printed vellum.
 Now I know that vellum can be a nightmare to attach with tape or glue, as it tends to be visible. However, here's a tip that works on white or light cardstock, but not on darker ones. Use Double Sided adhesive sheet over the whole back of the vellum rather than narrow tape or glue. Because the whole of the vellum is covered, there is no difference in it to show afterwards.


 So thats it for now, bringing us round to......And Finally.......


There is so much truth in that!

Sunday, 2 February 2020

Christmas Card Club 2020- #3 Stars

My these weeks just seem to fly past! Back with another Challenge from the Christmas Card Club, this time the theme has been chosen by Sylvie, and she wants to see stars- in the nicest possible way, of course! I've made a total of 11 cards for this, 2 sets of four, and one of three that I'm not entirely sure about.

The first set of four use a die set by John Next Door, called Sams Starz. The card base is 7" square, the background die does not cut the outer edges, so you can cut to any dimension you need.


The second set features a printed vellum panel and a die cut star.


The third set, which I'm not sure about. I think maybe the foil card holly is a bit too much. I may try removing it, and see if it looks better with just plain green cardstock.


This shot was my starting point- some image printed vellum I've had for more years than I can recall, a Stitched Stars die set- possibly from The Works- a plain star set from X-Cut,The John Next Door set, which has 4 dies in it, and two star wreath dies. I also used some peel off borders, and sentiments. Still tackling that peel off mountain!


 I started by adding DST adhesive sheet to the back of the vellum. This is a great way- at least against light/white cardstock- to adhere vellum without any adhesive showing. Bought this roll at the NEC.


After that, I added it to a sheet of white card. I cut this, which was roughly A4 sized, into about half,  then cut that half into 4 panels.

The panel was added to the card front, a top fold card, with DST.
I ran some glittery peel offs down each edge.


 At first I planned on using some of the 'scrap strip' sheets I made for the star, but when I tried it over the panel, it looked too busy, so swapped to stars cut from the vellum.


I cut a star 'frame' by taping together the size die I cut the stars with, and the next size down.


Bonus, I have some gold stars for another project!


Added the frame with Matte Medium.


Next I added some smaller fun foam stars to the back, for a little extra dimension. Then added the stars to the card front with some more Matte Medium.


Next up is the Star background die, and as I said, it has 4 dies in it. The background, the star with the trees, a large Star shape, and a smaller die with the images of Deer on.
 These three were all cut from White pearl card, the Star shape from Glitter cardstock.


I'd already made the red one, so decided to switch up the colours for the other 3, gold, silver and Royal Blue.


Layered the background onto a sheet of glitter card. Then layered the 'tree star' onto a glitter star too. This one I added over the centre star with some foam squares. I added the  Deer scene on top, after cutting it out with the Star shape.
Final touch was a peel off greeting, onto a small die cut strip.


Sams Starz.


 The strip die cut is one of a big set of dies intended for use making slider cards. I don't make those, but saw Jennifer McGuire recommend these to use as sentiment strips.


This is the set, Honey Bee Straight Interactive Sliders. I got mine from Bumbleberry Papercrafts.


For the last three, I completely forgot to take photos! But I die cut the circular wreath from some dull gold card, and die cut an assorted bunch of stars, mainly using dies from the Tim Holtz Thinlits set called Swirling Stars.


I added some stars to the wreath, then decided to add some holly. It was die cut from green foil using a holly branch from another Tim Holtz die set, called  Winter Greens.


 I added a vellum panel, this time to the centre of the card, then placed the wreath on top.


An End of an era

An end of an era

I write this with a broken heart, that only time can heal My beautiful, wonderful wifelet Shaz (Silverwolf) passed away peacefully in the ea...