A warm welcome to all my visitors,

Thank you for taking the time to come and look at my blog, I really do appreciate it. I would love you to leave me a comment, even if it’s just to say Hi. It means I can come visit you!

All my designs are original, so copyrighted to me. If I have been inspired by someone elses work, I have named them in the post, and where able, I have provided a link.

Please feel free to use my designs for inspiration, I just ask you to credit me, and provide a link back to my blog.

Thanks, Shaz XX

Showing posts with label dies from China. Show all posts

Wednesday, 31 October 2018

WOYWW #491- The Halloween Edition. :)

Tell me I'm not alone in wondering where on earth the weeks are going! Feels like I did this yesterday, not a week ago.Time again to leave our links over at Julia's place, The Stamping Ground, and also at #WOYWW on Instagram too now.
As you can see, I've been cutting up paper strips again.Been through my scraps folders, and reckon I've got every colour sorted now. Still got lots of ideas for designs using them.
 These are the two most recent ones.
No, you are not seeing things. Yes, I did Pink!

The fancy edges were a set of dies from Aliexpress.

 I bought another couple of sets of line/edge cutting dies that arrived Tuesday.


The top set are 5" long, cost £1.70.
The bottom set are just a bit shy of 6", cost £1.30.


I also bought a star frame set of 2 dies.

 The square is just about 5" and the circle 3½". £2.82.


 I'm careful not to buy anything I know is a copy of something else on sale, but I've not seen any of these anywhere, and the edger ones are just basic lines.


The project I couldn't show last week, my DIL's Birthday Card.
 The Fairy House is Crafters Companion, bought at Happy Stampers. All the others are Lavinia stamps. Most of the colour done with Prismacolor pencils, I'm really loving those. The sky and grass are Distress inks applied with a brush.


So, short and sweet this week. Makes a change, lol. Which just leaves .........................And Finally...........................................


Sounds like a plan to me. 😁😁😁


👻👻👻👻👻👻👻👻👻👻

Wednesday, 8 November 2017

WOYWW #440

Hello folks, and here we are at another Wednesday, over at The Stamping Ground, Julia is attempting to keep us all organised. I actually blogged a couple of times over the last week, Dies from Aliexpress Here, and the NEC Hobbycrafts Show, Here.
 Be warned, if you like dies, the Aliexpress one may cause you to visit, & spend money! But they are ridiculously cheap, as you'll see.
 So, back to the Hobbycrafts show at the NEC.
 Here's a long shot- yes, some stash was bought. I blame the stallholders, they just have so many fab inspiration pieces on show, and far too many goodies.


 Talking of inspiration, I bought some pots of gilding wax, due to these samples.
 I also bought 3 embossing folders(!) but they were 3 for 2, and it gave me great ideas to use with my existing ones too. There are some more gorgeous examples in my post.
These came from Pink Frog Crafts, as did another purchase, some glitter card. Now, for those who like glitter, but not the shedding, this glitter card is totally non shed, and super smooth. And you can do this with it:Yes, colour it with markers and even stamp on it. Cool, huh?
 He gave me a small sample to play with when I got home, to try it out before committing to a bigger piece, and I coloured mine with Promarkers,(right) and even Distress Oxides- Lucky Clover, another buy on Saturday. And it still has a glitter look to it.


 I bought a couple of dies- couldn't resist the Polar Bear & cub, and a lovely Snowflake Border.
 Heather Marshall   made a comment on how to store dies on the Aliexpress post, so I thought I'd quickly share my method here.
   
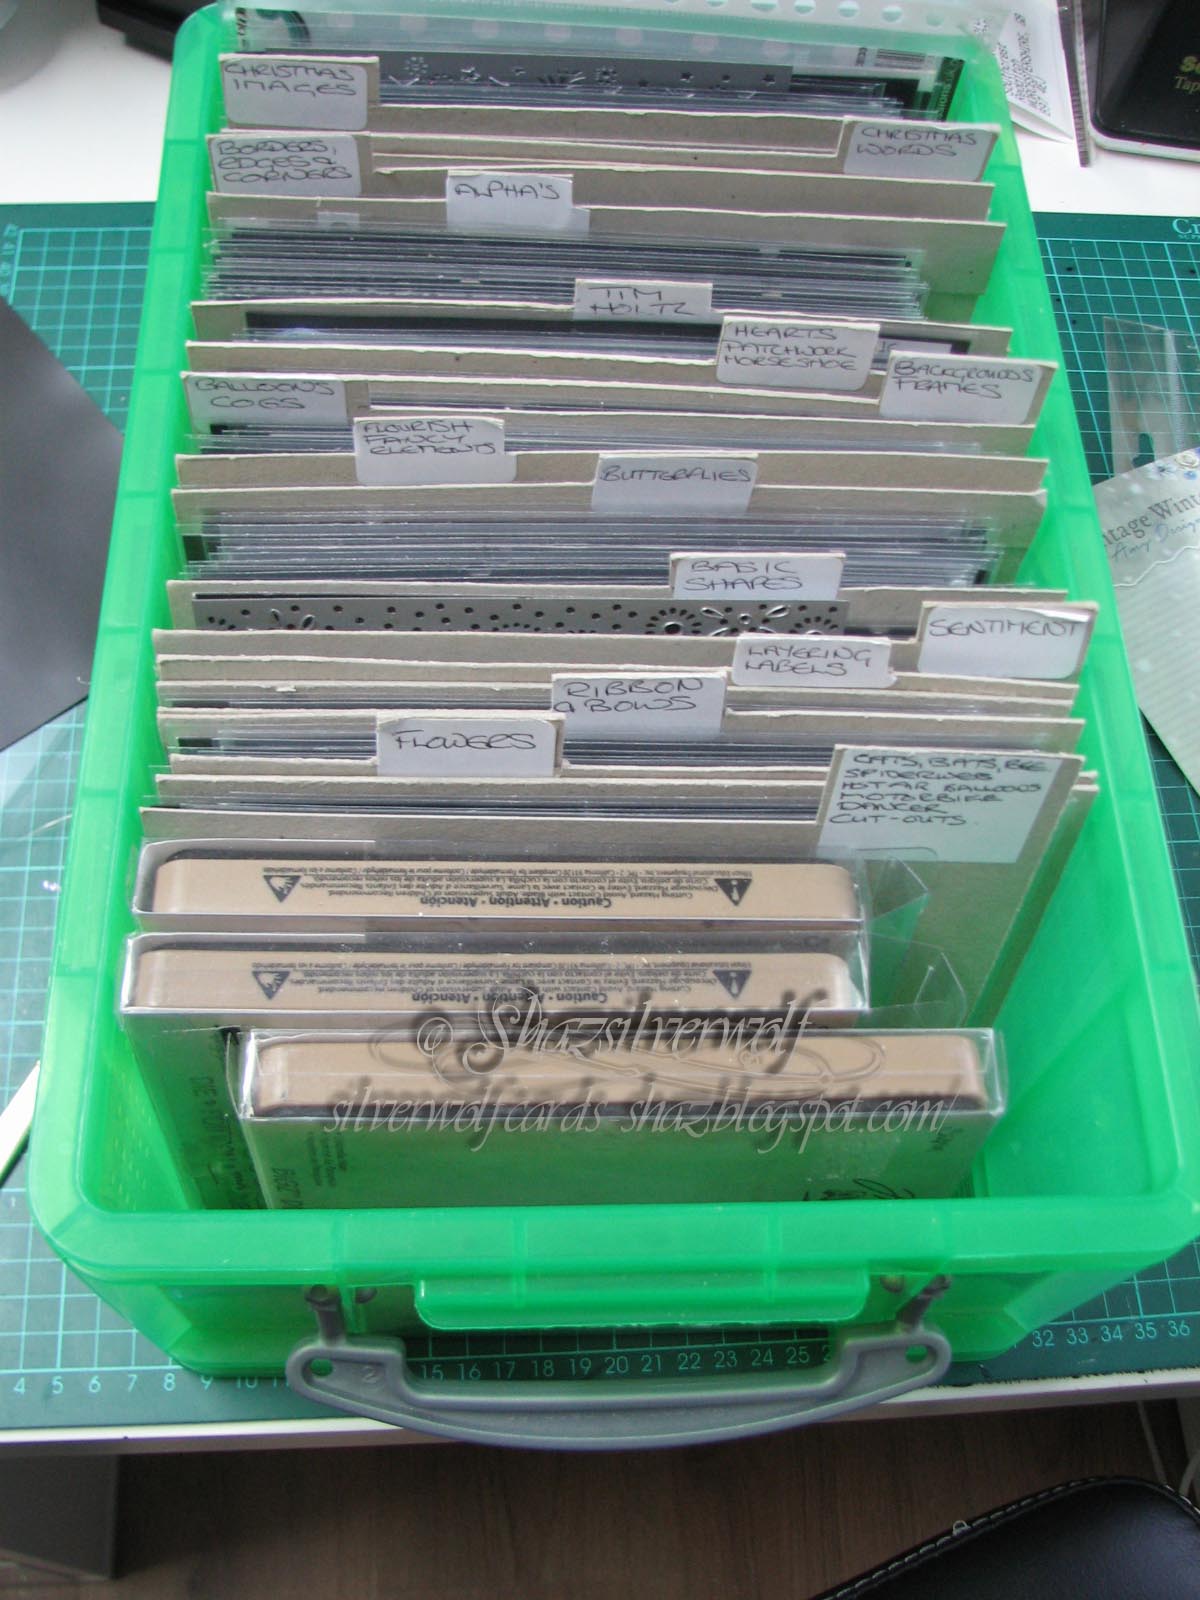
Mine are all stored in an A4 Really Useful Box, with homemade dividers, labelled with the contents of that section.The 3 Bigz dies at the front just keep them upright. I used chipboard type card- the sort on the backs of notepads etc.
 I buy A4 magnetic sheets off Amazon or E-Bay- whoever has them cheapest, and cut them down to fit the Large Avery Elle pockets.
 How many dies to a pocket depends entirely on die size. Some have half a dozen, some only one.


I did start out putting them on A5 magnetic sheets stored in A5 binders, but those quickly got heavy and unwieldy.
 I'm liking this system, it's easy to flick through and find what I want, and I don't have dies dropping off sheets in folders! The box stays on the table I use for die cutting, so I don't have to lift it either.
 Right, I think I'm done, just finish off with this- you can tell how much better I feel, my endpost funny is back!


Thursday, 2 November 2017

Cutting Dies from Aliexpress

I have a feeling it was on SCS ( Splitcoast Stampers forum) that I saw mention of Aliexpress, on a thread about buying cheap dies from China. All the people who had used it had favourable reports of the dies, and the site itself. So, as you do, I went for a browse. I had originally bought some of the cheap China dies off E-Bay, but the selection of dies available on Aliexpress is incredible. I'm pretty sure there is every type of die you'd ever want on there, including some which are clearly direct copies of some from famous brand names.
 However, I think in all the dies I bought- yes, I did go a little mad- I've not seen any of them elsewhere. Apart from the tree frame, which is similar to a Memory Box die, but that's now discontinued.
 I'm a little late with this review, as they arrived when I was feeling poorly, and haven't been unpacked till now.
So, 12 separate dies, 1 set of four dies, and an embossing folder.
 Any guesses as to the cost?
 It was an amazing £24.97! Shipping was free, and I was very impressed with the packaging too. They were in a poly bag, and wrapped up in a large sheet of foam.


You can get an idea of die sizes, as each square on my cutting mat is 5mm.
 Right, on to individual prices:
The ballerina, 79p
Hot Air Balloon, £1.75
Christmas Lampost, £1.34
Mr & Mrs, £1.16
Set of 6 cats, £1.09
Spider and web, £1.56
Tree Frame, £2.65 ( the most expensive die)
Motorbike, £2.00

 Embossing Folder, £1.31 .

The 'Mixed Media' type dies.

Circles Cut Out (Middle) £1.86
Flower style cut out, (Right), £1.77
Honeycomb cut out, top, £1.89.


Set of 4 cut out dies   £2.58


So I have to report no issues with ordering, delivery or prices. As a number of these dies are ones that I will use only very occasionally, I'm very happy to get them as cheaply as these.


The only thing to do now is probably the most important issue, and check on the cutting standard.

First up is the set of 4 Mixed Media type dies. They gave a clean cut, with just a few bits to poke out. I'd usually help this process by using either Waxed paper, or a Tumble Drier sheet, new or used, both work fine, between the die and the cardstock, but for the purpose of trialling the cutting ability I wanted to use them 'as is'.
 Impressed with the cuts, especially on the tiny squares one.


The Honeycomb corner completes the set, and I had no cutting issues at all- all cut cleanly and needing no shimming, just the standard cutting sandwich on my Cuttlebug.


Followed by the circles and the long narrow Honeycomb. As before, clean cuts, no shims.


 This is the flower-like cutting die, again, good clean cuts, no shims.


Next up, the spider & web. This one most definitely would benefit from waxed paper/drier sheet, as while it cuts cleanly, the 'bits' do need poking out, and the web is very delicate to remove from the die. But like the others, clean cuts and no shims.


The set of 6 cats cut cleanly and popped straight out of the dies. No shims. This set came all joined together, and that was how I cut them, and I think I shall leave them joined.


The motorbike, and the first one that needed shimming to get clean cuts. You can see here a few parts, particularly on the wheels, did not cut all the way through. Shimming with a single sheet of cardstock fixed this easily though.


Top die cut is after shimming, bottom one before.You get some nice embossed engine detail too.


The ballerina cut and popped out of the die easily.


The hot air balloon also cut cleanly and needed no shimming.This will be a great one for paper piecing, I think.


The  Letters cut cleanly, as did the little hearts that came with it.


Almost done, the Christmas Lamp Post. Like the others, a nice clean cut with no shims.


The eagle eyed amongst you have probably noticed cut marks on my 'C' plate- evidence of the times I've put the die and cardstock in upside down!


The bunch of balloons, a clean cut, no shimming, another one which will work well for paper piecing, and the front balloon cuts all the way through, so could have foam pads/silicone glue put behind it and give some dimension.


The final die, a tree frame. I'd been looking for one of these, a Memory Box die, which is oval rather than oblong, but it seems to be discontinued. However, this is a perfectly fine replacement, and cut perfectly.

You can see my well used 'B' plate underneath! But it still works just fine.


So that's all the dies trialled, and only one, the motorbike, needed shimming. Some, like the Mixed Media type dies, would definitely benefit from the waxed paper/ drier sheet, as although they cut cleanly, you do have a few bits to poke out.

 So, if you're wondering if the Aliexpress dies are worth a go, my answer is a resounding Yes. I have no complaints about either the shipping times, the cost, or the cutting.A total of 16 dies,and an embossing folder, at a cost that you'd normally pay for a couple of 'Big Name' dies works for me very nicely, thank you.😀
 Just so you know, there are 49 pages of dies, with 36 dies to a page! Plus, they obviously update & add dies regularly, as I've just been back and there are loads of new dies since I last visited, about 6-8 weeks ago.


Wednesday, 26 April 2017

WOYWW #412

Another week further into the year, and another WOYWW,hosted as always by our lovely leader, Julia, over at The Stamping Ground. And I'm sending Julia hugs, and hoping her poor eye is somewhat better by now.
On the desk, these dies from The Works. Great deal at the price, and although I had some I'd bought of the Dies from China, these go much bigger.
One niggle- why do die manufacturers stick them down with such ridiculously strong tape? The struggle to get them off without bending any, then you have to remove all the sticky residue from them.
 Another die, bought from Joanna Sheene is a nice trailing ivy. Cuts beautifully, and that was only held down by a really light sticky stuff, which wiped straight off. So plus point to Joanna for that.
 I've put it on my cutting mat so you can see the size.


I'd been going back to some of the stencils I did a few weeks ago, and it dawned on me I've been doing stencils, and die cut cards for weeks, and I haven't done any stamping. So I stamped out the Teasels stamp in white,to sponge some ink over. Then I wanted to add a dragonfly, and spotted  The Dragonfly Flourish stamp, so did some of those too. I'll finish them off over the next few days, and get the cards posted up.


Talking of Teasels, did you know they were the inspiration behind Velcro? Some guy was struggling to get them off his sons coat and a lightbulb went off, and as they say, the rest is history.


Another stencil experiment, and I'll get these made up too, and explain how I ended up with the ones below. It all started with a card I saw on Pinterest, lol.


No idea where I'm going with these, hopefully inspiration will strike in the near future, or they'll find themselves in the UFO box, which is getting kinda full.

Quick mention, just over a week till Happy Stampers. Anyone else who is going, give us a shout, and we'll meet up. I know Neet ( Hickydorums) is going.
 I finally have the date for my scan, it's a CT, not an MRI which is good, as they don't take as long. Scan is an Saturday, then we have a meeting with the Oncologist on the 5th of May for the results. Fingers crossed.
 And finally, this:

Thursday, 19 January 2017

Cheap 'From China' Cutting dies- A review.

I've had a few people wonder how the cheap wafer thin dies I've been buying from China were going to perform, and I promised a review. So this is it, and I do warn you now that it is a long post, and VERY picture heavy, as I wanted to show the cut quality for you. I'll add sizes, set quantity and price I paid with each set.In each case, I've measured at the widest point(s). For starters, HERE is the link to the E-Bay page of dies currently on offer. There are many more besides the ones I have bought. The most I paid was £3.65, the cheapest 99p. And generally, they are free shipping too.


I'll start with one of the newest ones, a set of stitched stars. There are 8 pieces in the set, the largest being 4½", the smallest ¾" wide. They were £2.95.


All were cut in my Cuttlebug, and unless I say otherwise, were cut with the standard 'C' plate, die/card, 'B' plate recipe.
 Just used an average weight of cardstock too, not too thick or too thin.

All pictures will enlarge, so you can get a close look at the cuts.


In every case, I got a nice clean cut, no shimming required.


 The Happy Birthday Circle is next, and measures 3" across and cost £3.13.


It gave a nice clean cut to the outer circle, and seemed to have cut the sentiment as well.


It hadn't totally cut through the sentiment though, there were some ragged edges on the 'H' in Birthday. So I added a sheet of copy paper as a shim, and tried again.


This time it cut perfectly.


Next we have a pair of butterflies,the largest is 2"x1¾", the smallest 2" x1¼". The pair cost £1.44.


 Nice clean cuts on the outside edge, and all the bits popped out easily.


 Next up is the butterfly border. That measures 3¾" x 1½", and cost 99p.

 I little trick here you may or may not know. Using a tumble drier sheet between the die and cardstock helps to stop the diecut sticking inside the die, in much the same way as waxed paper will.
 This can be handy if you want to add colour to your die cut after, so don't want any wax residue on it.


Again, nice clean edges, and you can see the whole thing has come straight out of the die.


Another nice cut.


 Next up is a die for a small bow. this cost 99p, and the finished size of a folded bow is 2" x ½".
 It has a serrated edge to it, but doesn't pose any problems with the cut.


You also get some nice tiny heart confetti when you poke out the heart details on the bow!


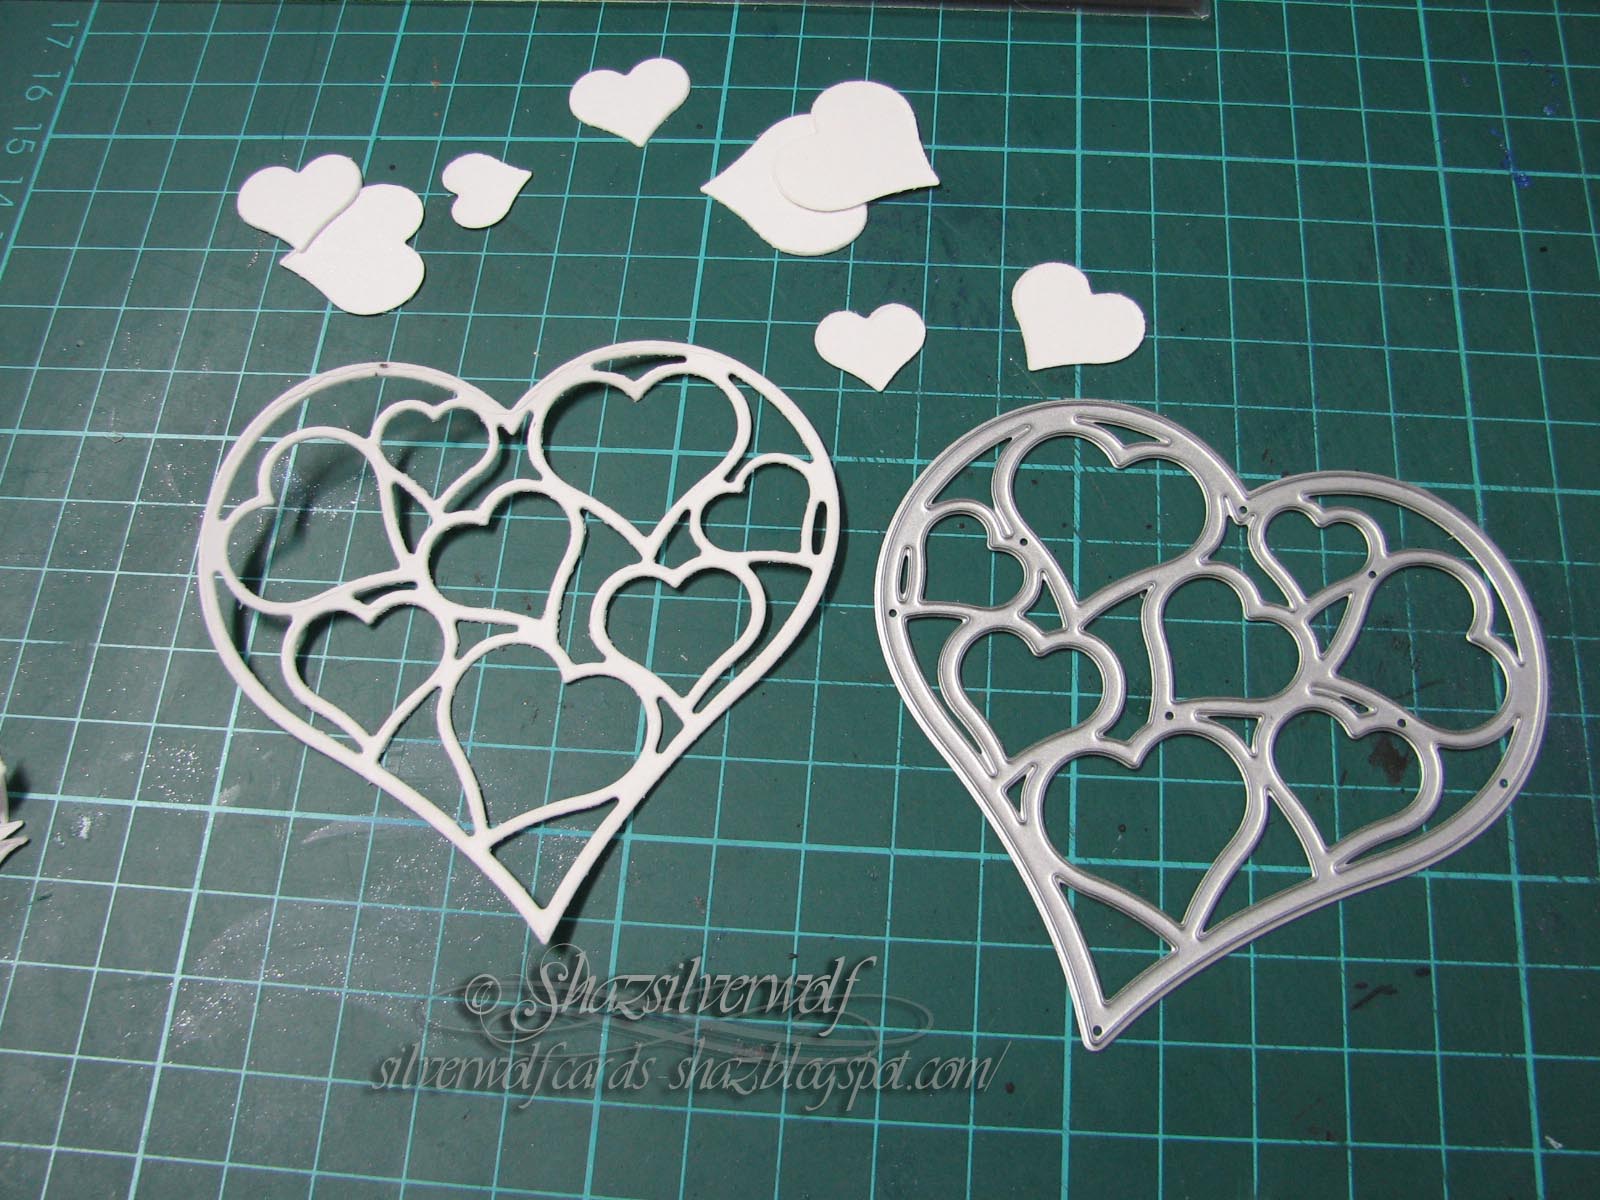
This next Heart full of Hearts measures 3" and cost £1.75. It also gives you some nice small hearts.
 Nice clean cuts, and no pieces left behind.


The next die is a Winter/Christmas scene, measures 3¼" x 2¾" , and cost £1.80. I've used some more drier sheet on this one, and it all just popped straight out.


Again, no cutting problem, nice clean cuts.


This die is a frame with an oblong section and 3 small squares.
 It cost £3.09, and measures 4½" x 3¼".


 The frame has a stitched detail, and cut nice straight edges with no problem.


The next one cuts a circles background, and measures4" x 2¾", and cost £2.09.
 The cut was perfectly clean on all the circles, however, I did notice that the edge of the die left a slight indentation on the cardstock in places. Which would be fine if you are going to trim it down with a border, but if you wanted to use it on a larger sheet of cardstock, it would need some shims cutting to slightly smaller than the die, and replacing the 'B' plate to prevent this.


Next on to a large Holly die, which is 4¾" x 3¾", and cost £1.21.
 Again, cut easily with no problems.


Following this is the second new die this week, which is an Ivy wreath
This measures 2½" and cost £1.29.


Gave a lovely clean cut, which sort of surprised me. I'd expected some problems with this, but it was fine.


On white cardstock, so you can see the detail.


 Now we'll move on to the Stitched Squares set. There are 7 pieces in this set, ranging between 3"  for the largest, to ¾" for the smallest. Cost was £1.79.

First 4 cuts, and all cut cleanly.


The largest square, and you can see, cuts nice and clean, with clear 'stitching' detail.


Now the stitched circles, 8 pieces in this set, and cost was £2.39. The largest circle is 3½" diameter, the smallest ¾".

Looking at this, it crossed my mind that the bottom two would make an excellent snowman! 😀


Here are all the sizes, and every one cut with no issues.


A Merry Christmas die next, and this one is a good size, 4" x3", cost was £1.49.


My first cut with this was not a successful one, it only cut the outer edge.


So I used the thin metal shim from Cheery Lynn underneath it for the next attempt, as the inner part of the die had barely made an impression, so I thought it would need more than a paper/card shim.


That method cut it out fine, and when all the bits were popped out, and it was removed from the die, it was perfect.


So, a simple fix for that one.


Last but one now- congratulations if you've stayed with it this far!- a set of stitched curvy lines.


4 in the set, they are approximately 6" long,and cost £2.69.


Again, all cut fine, and the stitched detail is nice and clear too. Of course, you have the option to use the non-stitched edge, if you wanted.

I thought these would be really useful for making snowy/hillside masks, instead of tearing, and getting ragged edges.


OK, so now we are on to the last die, and I've deliberately left this one till last, as I had trouble when I first tried it.

This snowflake background is the largest die by far, at 5¼" square. The cost was £3.65. At first with my cuts it was cutting around the outside edge, but not in the centre.
Now, to be honest, I think this says more about the uneven pressure from the 'Bugs rollers than the die, as it's not the first time I have had problems with the very centre of the machine.
 Anyway, the first cut.
 As you can see, it cuts into the cardstock, but not all the way through, apart from the edges. I also tried it with copy paper, and the result was the same.

I tried a number of different shimming options, but none was more successful than the others. I was just about to give up on it, when I thought I'd have one last try, this time adding the shim BELOW the die/paper/'B' plate, instead of on top of the 'B' plate. I cut 4 sheets of copy paper to 5¼" square, then used a little low tack tape to hold them together.


And success! I had just one spot, on one arm of a snowflake that I needed to cut through, but otherwise it turned out fine.

So, I've stored that shim in with the die, so I don't have to try and remember how it works next time!
 Just had to edit here, as I forgot to say that I still needed to turn this die 3 times and rerun it through, but it did eventually get the cut.


So, overall, I have got to say that for me, these dies have performed just as well as those that are way more expensive. Those Stitched Circles, for instance. Mine were £2.39, most Name Brands are in the £20 region. So yes, I'll be buying more when I see some I like.😀😀

Final pic- my 'Bug cutting plates!
As you can see, well used, and marked! So, if you're new to this, don't worry when your plates start to get marked. Although I will add this advice here:
  1. Try and keep one plate for the top, which will get marked,and one for the bottom, which doesn't. As you can see, I failed there. Although I do have a brand new spare pair I got cheap.
  2. Alternate the side you use of your top plate, to help minimise warping. They will warp, this just helps to keep flattening them.
  3. Don't panic when you hear cracking sounds! It's (usually) just the die cutting into the top plate, or the warped plate flattening a little. 
  4. Take your time when getting to know your machine, and what it's capabilities are. Not every machine will accept the same sandwiches- I've seen people use sandwiches in their 'Bug that mine would never accept. If you need to experiment with shims, take one plate out of the sandwich, and shim with cardstock till you get a good cut. Then see if you can swap out some cardstock for a 'B' plate. You will eventually get to know what your machine will and won't accept.
  5.  If your sandwich does not go in fairly easily, and the handle turn also fairly easily, then stop. DO NOT try to force something through. Strip down your sandwich and try something else. Better scrap cardstock with poor cuts, than a broken machine.


An End of an era

An end of an era

I write this with a broken heart, that only time can heal My beautiful, wonderful wifelet Shaz (Silverwolf) passed away peacefully in the ea...