A warm welcome to all my visitors,

Thank you for taking the time to come and look at my blog, I really do appreciate it. I would love you to leave me a comment, even if it’s just to say Hi. It means I can come visit you!

All my designs are original, so copyrighted to me. If I have been inspired by someone elses work, I have named them in the post, and where able, I have provided a link.

Please feel free to use my designs for inspiration, I just ask you to credit me, and provide a link back to my blog.

Thanks, Shaz XX

Showing posts with label Phill Martin sentiment stamps. Show all posts

Sunday, 1 March 2020

Christmas Card Club #5- Post Box/Mail Box

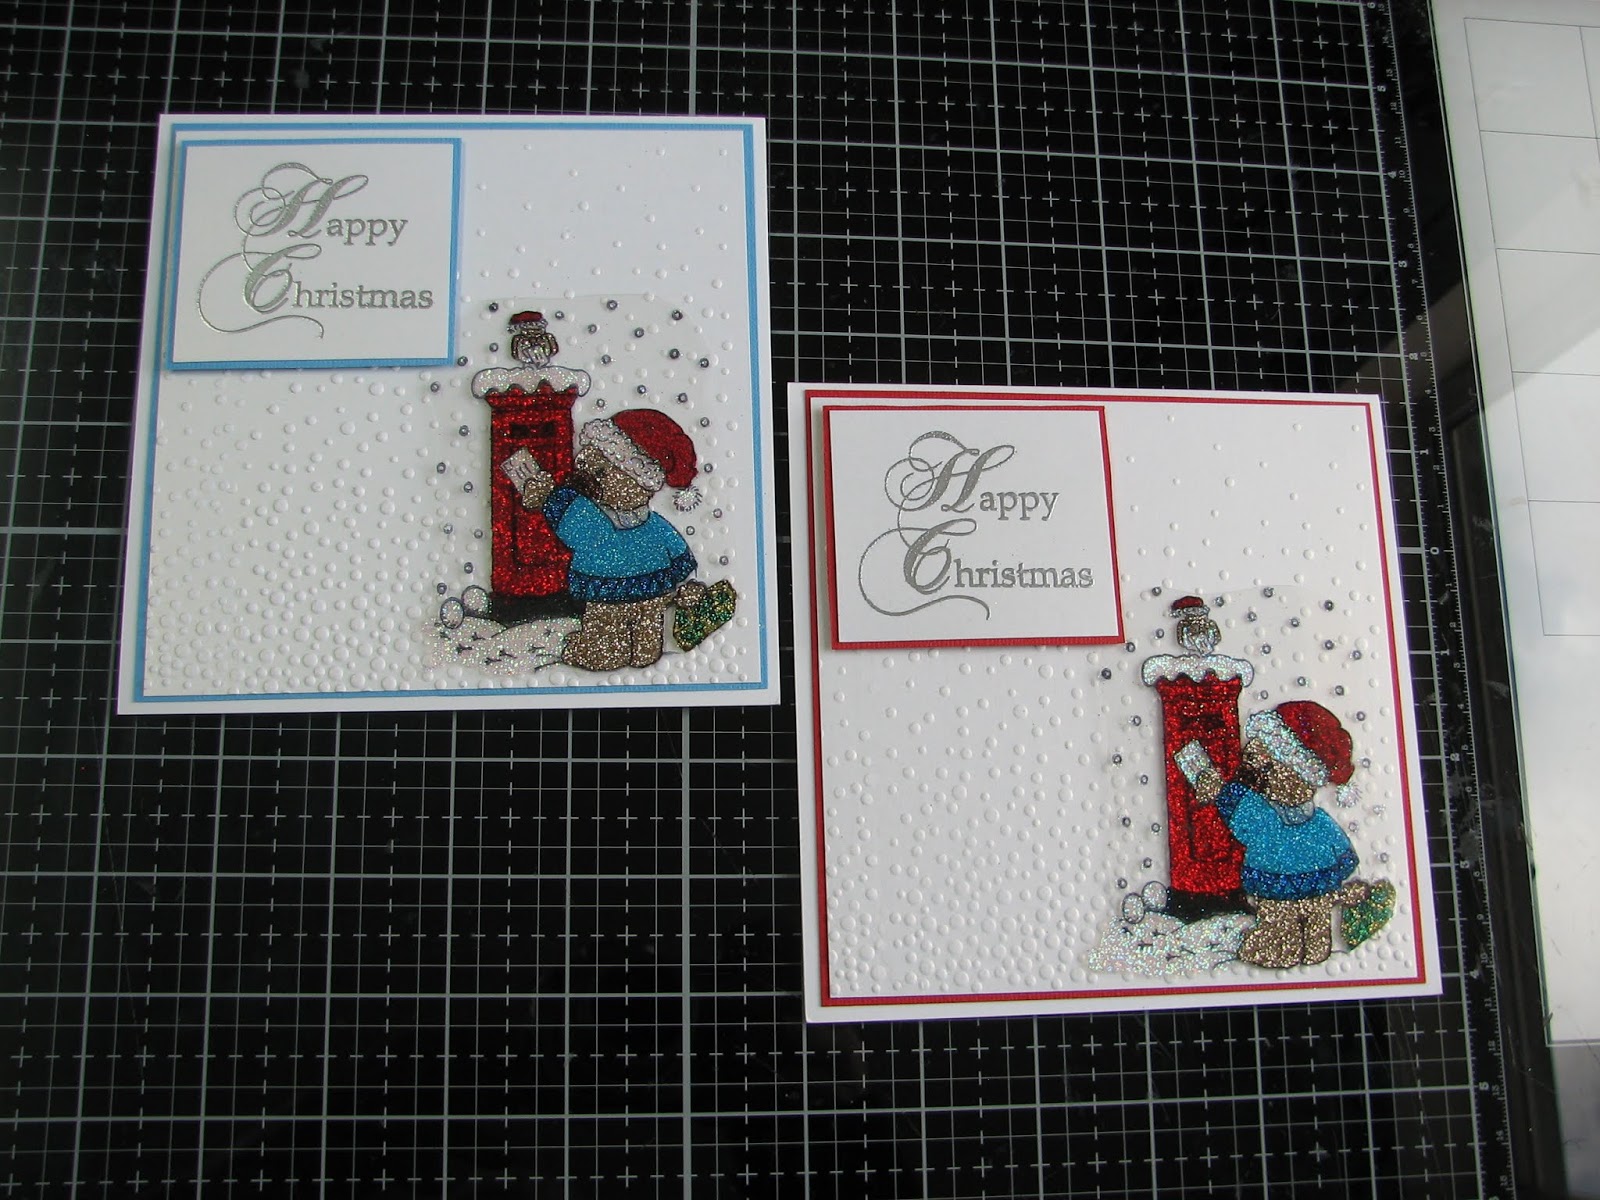
Two cards from me for this fortnights challenge, this time set by Valery Anne, who wanted us to feature post or mail boxes.
 What came to mind were the Christmas images I was glittering last year, and I recalled a Teddy Bear posting a letter image, which would be perfect.
 I embossed some pearl white card with an Embossing Folder from Crafters Companion, called Elegant Snowfall.
I cut a matt for each card, which are 6" square by the way, then matted the trimmed down embossed cardstock onto that.


I added the image with a few dots of silicone glue.

I've no idea who made the Bear stamp, I *think* it's from some sheets of clear stamps I bought a couple of years ago, when our local craft store was having a big sale.


I heat embossed with Silver Detail EP the chosen sentiment, and again matted onto matching cardstock.


The sentiment comes from a Phill Martin set called Stately Christmas Sentiments, which is a lovely font, with some great sentiments.  I originally thought that ' From our House to yours at Christmas' would be ideal for these cards, but it was too large for the card! Available still from Honeypot Crafts.

Thursday, 22 February 2018

Quick & Easy Butterfly die cut cards

As promised yesterday, here is the blog post on the Butterfly cards.
 I saw a You Tube video a couple of nights ago making these cards, and I'm sorry but I forgot to make a note of the name of the crafter, and trying to search You Tube using key words brought up masses of similar cards!
 The lady used plain vellum behind the Butterfly, and added colour using markers.
But it reminded me I have some vellum sheets that are multicoloured, and thought I'd use up some scraps to do these.
 You could also use plain vellum and blend ink over it, or I reckon you could also use acetate and Alcohol inks, or Alcohol markers.
 The Butterfly die is a Tim Holtz/Sizzix Thinlets set:


 You get the base Butterfly, and the Wings overlay, which is the part used to cut out the cards.
Base are the top pair, overlay is the bottom ones.


The card bases themselves are White Pearl cardstock,topfold, and made by cutting an A4 sheet in half lengthways. It's better to use white as a base, as darker card will not show the pattern on the vellum very well.

4 pieces of black cardstock for the fronts, I've used two Black Linen card, and two plain card so I can run them through an embossing folder. They are trimmed to leave around a 1/4" border all round.

 The two folders I chose are a Cuttlebug one, called Forest Branches, and the stone wall effect one was bought at a Craft fair, and I have no idea of the brand!

Both are slightly too small to fill the card front in one go- I think they made them based on the standard US card sizes, thank heaven they are getting larger these days!


Anyway, there is a way to resolve this without leaving a harsh line where you joined it.
I ran the Forest Branches through the 'Bug, and as you can see it doesn't quite extend all the way to the bottom.
 Now, for the fix.
 Line up your cardstock so it extends out of the bottom of the folder,and allowing the pattern to continue down.  Like so:

Now, lay your top plate in place, BUT line up the edge of the B plate with the very edge of the Embossing Folder, not past it. This looks odd in my picture, but that's because the B plate is a bit warped.😀
 Now run through the machine again.


Result- a completely embossed piece, with no lines.


After both were embossed I started cutting out the four butterflies.

Also, be careful where you place the cut out. You'll need to add DST/tape runner later to matt the panel onto the card, and if it  goes behind the vellum on the wings it will show. You can see bottom right I cut that one a bit close, so had to trim down a strip of tape for that bit.


Now for the vellum.


Having a look through my stash, I found these oddments.
Hard to believe how much vellum was a 'thing' back in the day. Rarely see it used now except for Parchment work.


 I cut the vellum down to fit behind the butterfly cut out.

Used a Stix2 tape runner to attach it to the back.
It's a good idea to mark the top of the vellum, so you get the pattern you wanted.


Vellum all stuck down, ready to add the butterfly bodies.


I also cut out the bodies of the butterflies using scraps of glitter paper/card. You can skip this, or add Stickles/Pearls to the bodies.


Trimmed them to shape, and added to the body with Glossy Accents.


 The next step was to fold up the wings slightly either side of the body, then attach to the respective panel with glue dots.


The panels added to the card base with DST.


Now for a sentiment. I chose some Text dies from Crealies.  
They are only small, so ideal for smaller cards. And not expensive either.


I went with Birthday, Sympathy and Get Well, and cut each sentiment 3 times, so I could layer them up for some dimension. I cut them from the same white pearl card as the bases.


I layered them up with Glossy Accents, and put an acrylic block on top to make sure they stuck well.
 While those were sticking, I stamped inserts for the card.
 The sentiments are from Phill Martin sets, Feel Better Soon and So Sorry for you loss from a set called Mini Baroque Occasions Sentiments, and Very Happy Birthday from the Butterfly Elegance set.
 I added some random small butterflies of unknown origin to the edges, all stamped In Versafine Majestic Blue.
 The sentiments were added using Glossy Accents again, and this was when I realised I hadn't actually kept the dot from the 'i' in Birthday.
Rectified that with a clear acrylic gem, from a pack of Anitas 2mm stones.




Sunday, 20 August 2017

Honey Doo Cards


 Finally getting some of those card fronts put together. All these images are from Honey Doo stamps, those on the left here are all a design called Butterflies & Flowers Large Corner. All the sentiments are from sets by Phill Martin.
 I've added some Sue Wilson Dies ribbon & bows to them, the Red one uses Lattice Bow over the Classic Bow, which is plain. The green ones use Filigree Bow over the Classic.


The sentiment on all three is from Butterfly Elegance sentiments, and the stamping was done in Brilliance Pearlescent scarlet, and heat embossed with WOW! Sparkling Poinsettia EP. I used the same ink & powder to stamp the image onto red vellum, after cutting them out, I shaped the petals using an embossing tool, the added tiny red seed beads to the centres with Glossy Accents.
 The greens were done in the same way, this time using Brilliance Pearlescent Jade, and WOW! Golden Pine EP. A corner rounder was used to add some interest, doing opposite corners in the left hand card.


Both these cards use the same stamp, Floral Corner Flourish, but in the black card I placed it centrally, and in the purple card, it's in the corner.   I added clear gems to the dots in the black card, and purple one to the purple card.Purple Glitz WOW! EP was used there, and on the black one, I used Clear Hologram Sparkle.
 The sentiments are from Scribbled Sentiments, and Scribbled Corner sentiments.
Again, I rounded opposite corners on all the layers, and also on the base card of the purple one.


This blue card is stamped with Shower Bouquet, In Brilliance Pearlescent Blue, embossed with Arctic Blue WOW! EP. Acrylic gems added to two opposite corners, and sentiment from Scribbled Sentiment Corners. The backing paper is from an old Papermania pad.


Back to Floral Corner Flourish for the pink card, stamped in Pearlescent Coral, and Clear Hologram Sparkle powder. Pink gems, a Scribbled Corner sentiment, and rounded corners finish it off.


So thats all the Honey Doo cards finished, next post will be some Emboss resist with Brushos, amongst others.


Saturday, 25 February 2017

Card for a New Home.

Right,I made this card a few weeks ago, and with waiting for it to arrive, then going into hospital, I've just realised that I hadn't blogged it.

The main stamp is by Hobby Art, from a set called 'Hares'. We spotted this at The Happy Stampers Festival last year, and as Doug pointed out, it would be perfect for anything for LLJ, as she is known for her love of Hares. So when Jan announced they were moving to Wales, and that they had a date for moving in, I remembered this stamp set.
This is the journal I was trying out some scenes using Card-io stamps in a while back, and I can't figure why I've never done this before, instead of winging it and hoping for the best. I've always got a stack of scrap paper under my work, and have occasionally done a test imprint on that, but never tried figuring out placement and colour.
 Anyhow, first off I stamped him in black, then built up the grasses around him using an assortment of green dye inkpads, and some stamps from an Inkylicious set called 'Essential Grasses'. Which it is, I think. A great selection of types of grass.


I didn't think I liked the black version, so instead tried it in Archival Rich Cocoa, which is what I went with for the card.
 When I stamped him onto the card base, I also stamped another onto Post-its, so I could mask him when I wanted to add the sky.
 The hare was coloured with Distress Markers in Antique Linen, and Walnut stain, using a waterbrush to drag the colour.
Bit of a jump here to the finished scene, when I realised I'd forgotten to take any 'in the process' pictures!
 I stamped the hare in Archival Rich Cocoa, then the grasses surrounding him in Adirondack Meadow and Lettuce.
 Tearing some scrap paper into hill shapes, I used a soft brush to create the hills with the Adirondack greens again.
Using Adirondack Sunshine Yellow and Sunset Orange, along with a dry baby wipe, I created a sunrise behind the hills, then put the mask over the hare.
Again using a soft brush I applied Adirondack Stonewashed all over the sky area, then added Sailboat Blue onto the upper portion of the sky, to get a sort of mottled look.
 A portion of fencing from another Hobby Art set was stamped in Archival Black onto one hilltop, then an Inkylicious Flock of Birds, and a butterfly added.


 The corners were rounded off- this little rounder from X-Cut is actually really good, better than other cheap ones I've had. I do have the Corner Chompers, but this one was handy.

 I matted the image onto dark blue cardstock, then rounded those corners too.
 Next it needed a sentiment, and one of the Phill Martin sets I've bought recently, Mini Baroque Occasions Set, has a New Home one in it.
 That was stamped in Archival Cobalt in the upper left of the scene.
I mounted the image onto a 7" square card base, then tied a blue and white spotted chiffon ribbon along the bottom.
 And then it was done.

Stamps Used:
 Hobby Art, March Hares
Hobby Art, Woodland Glade( Hillside fence)
Inkylicious, Essential Grasses
Inkylicious Take Flight( lots of bird flocks)
Inkylicious Playful Cats ( Butterfly)
 Phill Martin Mini Baroque Occasions Sentiment Set.


Thursday, 29 September 2016

Honey Doo Cards #2

The second half of the batch started the other day.

   No step by step, as I covered that in the post HERE.  The only slight difference is the Black & White card, which uses a different stamp-called 'Butterflies & Flowers Large Corner.'


 The sentiment is Scribbled sentiments from Phill Martin, and two sets of black half pearls were added for balance.
 All three panels fit onto an A4 folded cardstock base.


This blue one has a Ribbon & Bow die cut, Filligree Bow along the bottom, and to balance, a Phill Martin Decadant Damask Sentiment matted along the top. I masked off the Damask centrepiece again.


Finally, the Plum coloured one, and again another Ribbon & Bow die cut, this time Lattice. I left the Plum coloured cardstock matt a little longer than the image, and added the ribbon on top.
 In each case, I've added a few half pearls to some of the circles of the design.

Tuesday, 27 September 2016

Honey Doo Crafts Birthday Cards.

Well, as there's been such a lot of Christmas Cards lately, I thought it was time for a break, and a change. Birthday Cards it is then.
The stamp used in these is from Honey Doo Crafts, and is called Flower Fountain.


I stamped out a couple in each colour, using Archival ink in Plum, Cobalt and Jet Black.


I stamped two on each sheet of A4, then cut down roughly, so I could decide on the card size later.


Next step was to sort out some coloured vellum, and again stamped each image twice. As the Archival ink was on vellum, it stayed wet long enough for me to heat emboss with clear powder.
 I only want the flowers out of these images, to layer onto the original stamped piece.


Cue the fussy cutting. Not my favourite pastime, I admit, although these curved tweezer scissors I found in a drawer- yes, I was looking for something else entirely- did make it much easier.


Next step was embossing some lines on the reverse of the flowers, roughly following the stamped detail, to give some shape & texture to the petals.


First colour completed.

I used a white vellum with coloured dots in, and a vellum colour to match the flowers too. Love how the black vellum flowers came out, they look sort of pinstriped.


I did give them a blast of Crafters Companion Silver Glitter spray, and when dry, created centres with some Glossy Accents and matching seed bead mixes.
 The Black stamped piece was trimmed down o that it would fit a 5" x7" card base once it was matted onto black cardstock.
 I left the black matt longer than the image, and wrapped around it a ribbon & bow made with a Sue Wilson die, called Filigree Bow. Once it was stuck to the card front, I added the Vellum flowers, with small Pop Dots to give a little dimension.
This one I left without a greeting, which I tend to do with a % of the cards I make, so I can use it for whatever I need at the time.


 The process was similar with the Blue card, although this time I cut a narrow panel to attach another Ribbon bow to, this time using a Lattice Bow die, also by Sue Wilson.


 I also stamped a Birthday Greeting on this one, a Phill Martin Scribbled Corner Sentiments stamp.

This one is an A4 sheet folded sized card.


For the final in this set of three, I first matted the image onto a plum coloured card, trimmed to fit another A4 folded card.
This time I used another Phill Martin sentiment,  from a set called Decadent Damask Sentiment Borders. There is a damask accent in the top centre of the stamps, but I didn't want that, so I just masked it off while I inked the stamp, then removed the masking tape before stamping it in Plum Archival along the base of the card.


In each case I also added a few half pearls to some of the circles in the design.

An End of an era

An end of an era

I write this with a broken heart, that only time can heal My beautiful, wonderful wifelet Shaz (Silverwolf) passed away peacefully in the ea...