A warm welcome to all my visitors,

Thank you for taking the time to come and look at my blog, I really do appreciate it. I would love you to leave me a comment, even if it’s just to say Hi. It means I can come visit you!

All my designs are original, so copyrighted to me. If I have been inspired by someone elses work, I have named them in the post, and where able, I have provided a link.

Please feel free to use my designs for inspiration, I just ask you to credit me, and provide a link back to my blog.

Thanks, Shaz XX

Showing posts with label WOW! Embossing Powders. Show all posts

Wednesday, 12 February 2020

WOYWW #558- The Organising Edition.

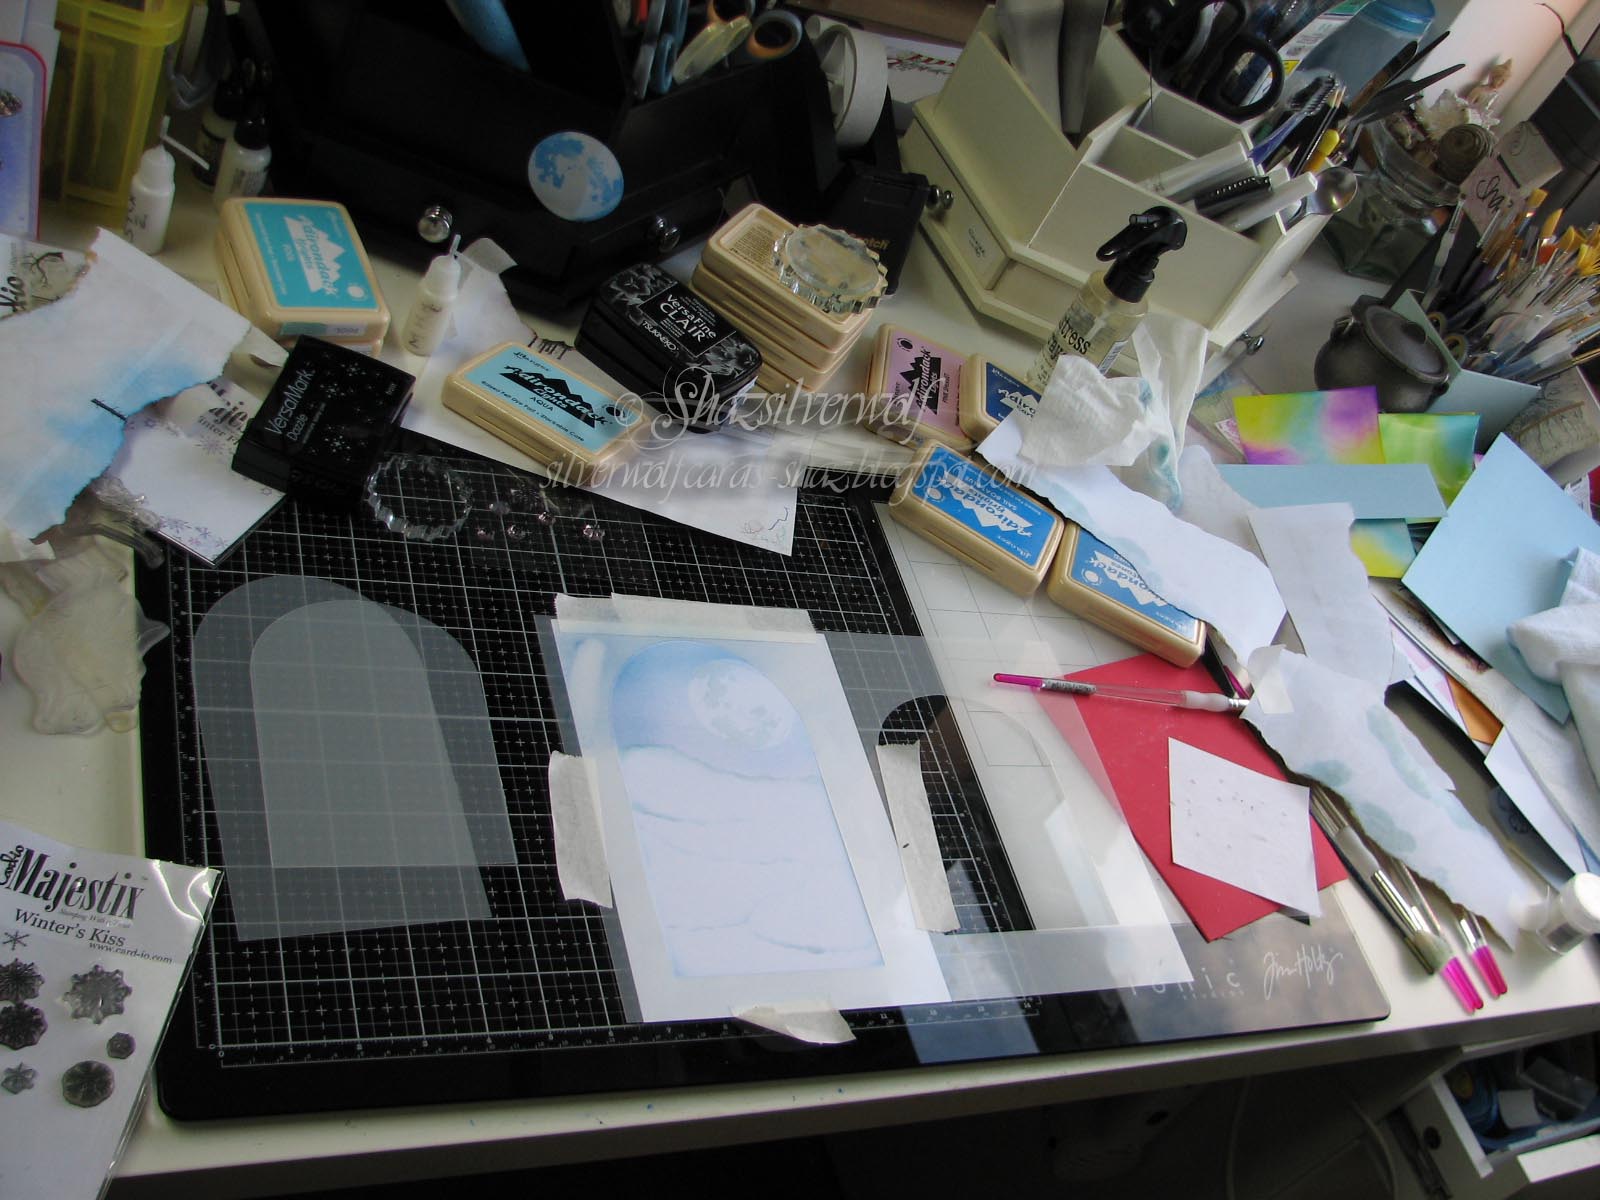
 Anyone see where January went? Crazy that we are almost half way through Feb already. Which means almost Valentines day, so that card will be my next project. Yes, I know I need to get a move on, but I have a plan. Not that that always helps! It's also youngest sons birthday that day, so that card goes in the post tomorrow. He moans like mad about his birthday being that day, but I just point out that that's his own fault, had he arrived on time, and not 13 weeks early, it would have been different. I also occasionally point out it could have been much, much worse. His one Gran kept saying we should name him Valentine! Over my dead body, lol. Anyway, Wednesday it is, so desks are being bared around the world as always, you can visit them over at Julias place, The Stamping Ground. Do pop in, we'd love to meet you.
 Organising, then.

 Been making use of Beloved Hubbys labelling gadget, as I'd bought another of the Tim Holtz Alcohol Ink storage tins. They hold all sorts of reinkers too- Archival for instance, but not the DI ones, as they have a dropper top.
 They also hold Stickles, and Liquid pearls, and as I picked up a few of those at the NEC last year, I needed another tin.

The one on it's side holds the newer AI Pearls, as they're supposed to be stored on their side, as they have a little mixing ball in them.


Also sorted and labelled my WOW embossing powders- please don't laugh!

  Bottom shelf next to them is the Distress Oxide sprays, also on their side.


And so, I'm all done. No enabling this week!


Which brings us round to ......And Finally.......


Sunday, 3 February 2019

Christmas Card Club #3- Angels or Fairies.


This fortnights challenge was set by GranMargaret, and she wants us to use Angels or Fairies. I don't have any angel stamps in my stash- apart from a set of tiny ones from Card-io-, but I do have fairies. Lots of fairies.

 My scenes were inspired by this card on Pinterest, which unfortunately has no name or blog attached to it, so I can't provide credit to them.


I cut the masks I used myself from Stencil material, which I bought from E-Bay. The circle used a die, the outer circle from a Crealies Patchwork die set. The Bell & tall arch were cut on my Silhouette.


I cut two sizes of the arch, but in the end used the larger one, which is roughly 7" x4".


I used my much loved Adirondack pads for all the inking, and Versafine Clair in Nocturne for most of the stamping.
 I stamped the moon stamp in Adirondack Aqua, and blended a pink, pale blue and medium blue for the sky. All the hills were inked in using Adirondack Stonewashed.The tall tree has Liquid Pearls in Peacock & Garnet as baubles. An acrylic star added to the top. The Fairy, Fairy Fir Tree (2) & Moon all Lavinia Stamps. The treeline was created with Card-io stamps,Mini Tall Trees. The single tree is from a Visible Image set, Peace, Love Hope. Greeting from a Crafters Companion set, Festive Sentiments.

 The small snowflakes are from Card-io,an older set called Winter Flurry. I stamped them in Versamark, then added WOW! Opaque Bright White EP. This is an A4 folded cardstock base.


The inking was done the same way on this bell shape, and the stamps used here are all Lavinia stamps, Fir Tree, Fairy chain (small), and Moon. The sentiment is from a Phill Martin set, Scribbled Christmas Petite Sentiments. The fairies & the sentiment were stamped in Clair Twilight.
I outlined the bell with a pale blue gel pen, then went over that with a Gelly Roll Clear Star pen. The card base is a 7" square scallop.This one also has embossed snowflakes, but hard to see in the pic.
 Stickles instead of  Pearls used for the Baubles.
 I guess I could call this one Rockin' around the Christmas Tree!

Final card, and this one uses the same tree as the first one, Fairy Fir Tree 2, just not fully stamped. The fairy, Midsummer Night is the same one too. Again some small Card-io trees from the first set used to stamp a treeline. Same liquid Pearls used, and this time the sentiment is from a Hobby Art set, Winter Wishes. 7" card blank used again. Winter Flurry stamps used for the snowflakes, heat embossed as before.

Thought you might like to see how much mess I can create!
Entering these into :
A Perfect Time to Craft Challenge.
Winter Wonderland Challenge 
Crafty Hazelnuts Christmas Challenge 
Crimbo Crackers 
Crafty Creations Challenge

Monday, 26 November 2018

Christmas Card Club Challenge #24- All Wrapped up!

Sorry ladies, completely lost track of what week it was.  This fortnights challenge is set by Carol, and she chose the theme 'All Wrapped Up'. I've taken a bit of  a liberty with the interpretation here, as I think I'm overflowing with Christmas cards this year, so I've made a bunch of gift tags!
  I ended up making 7 designs, in a pretty random number for each. The tags are more or less 3" square. I used a lot of off cuts to make these, so there is a little variation.


 This one uses a Holly stamp from Lavinia Stamps, stamped in Versafine Clair Rainforest, then I added  Stampendous Crystal Embossing Powder over them and heat set. Then Liquid Pearls in Garnet for the berries.
 The sentiment comes from a Hobby Art set, Winter Wishes. That was stamped in the same green ink, but not heat embossed.

The Bells come from a Card-io set called Merrily on High.
 I stamped the first bell in Gold Encore Pigment ink, masked it, then stamped the second. Heat embossed both then with the same Crystal EP.

The sentiment is from a Crafters Companion set.


Afterwards I added the holly sprigs using an old Rubber Stamp Tapestry set.
 I used the Garnet Liquid Pearls for the berries again too.


 Quite a lot of Card-io stamps used for the tags, this one is called Christmas Greenery. Stamped in Versafine Spanish Moss, heat embossed with the Crystal EP, and then the sentiment stamped in Versafine Majestic Green. I added  White Opal Liquid Pearls to the Mistletoe Berries.

 Another Mistletoe design, this time using a Lavinia Stamps Mistletoe Branch. I stamped this one in Olympia Green, added the Crystal EP, then stamped the greeting in the same colour. The same Opal White Liquid Pearls used for the berries too.


 Christmas Trees next, and these are from a Visible Image set, and I used the medium one once, then the small one was stamped in both first & second generation images, using Versafine Olympia Green.
 For these I used a Stampendous EP called Rainbow Sparkle, and although it doesn't show in the photo's, it makes it look like the trees are covered in lights.
 I added a tiny acrylic star to the top of each tree. The sentiment here is from a Phill Martin set,Scribbled Christmas Petite.


This was the biggest batch I made. All Card-io/Majestix stamps, the branch is a partial stamping of a tree from the Christmas Breeze Collection. I stamped in Clair Rainforest, first and second generation images.  I added a mix of baubles from the two sets,Zendangles and Bells & Baubles, using Versafine Majestic Blue and Deep Lagoon. The strings were drawn in with a very fine Micron pen.Sentiment again from the Crafters Companion set.The branch and baubles were heat set with the Crystal EP.
Last set used two Card-io/Majestix snowflake sets, Winters Kiss and Winter Flurry.Stamped in Encore Metallic Blue, and heat set with WOW! EP in Glacier. Sentiment again from the Hobby Art set, and stamped in Versafine Majestic Blue.

Saturday, 13 October 2018

Floral Honey Doo Birthday Cards

Wow, two posts in two days! Well, the makings of these were on my desk this week.


The black and white card is on an 8" square base, the Blue & white on a 7".
 The same stamp was used in both cards, Floral Corner Flourish by Honey Doo.

On a recommendation, I recently bought some Sheena Douglas Stamping Card from Crafters Companion, and I have to say it does stamp beautifully.
 I'd cut one square for each card, and I've said this before, but when using square pre-made card bases, the dimensions given are  the envelope size, not the card base!


Meaning, one called 7" is actually going to be closer to 6¾", so you need to cut your matt layer & stamping layer accordingly.
 I stamped the image using my Tim Holtz Stamping Platform, and that makes the positioning easy, as there's no need to move the stamp, just rotate the cardstock 180 degrees. They were both stamped in Versafine Clair ink, Nocturne (black), and Paradise (blue).
 On the black card I sprinkled WOW! Black Twinkle embossing powder, and on the blue, a Stampendous powder called Stardust.
  I also stamped them onto white pearl paper multiple times, heat embossing them too. Then fussy cut them out.


Lots of extra flowers here, as I've also stamped some other images ready to make more cards. The tray they are sat in is intended for party snacks. I found a pack of them unused in a cupboard, and thought they'd be really handy in my craft room!
 Those scissors you can see are great for when you have a lot to cut out. They have a small pair of blades with a fine pointed tip, and a shear action, so you don't end up with aching fingers.

These were by X-Cut, but there are a few other brands out there as well.

I sorted out 4 large flowers,and 4 smaller ones. Shaped them around the pokey tool, and then just pressed down in the centre with the ball stylus.


Two flowers on each of the larger ones, added with a drop of Glossy Accents.


Then a single flower on each of the smaller ones, and finished off with one of the resin Dotted Rhinestones. The ones that sort of look like glass?
 I'd matted the panel onto the base before adding the flowers. It's layered onto Black Glitter card.
 The sentiment is another Honey Doo set, called Happy Times, and also includes a Happy Anniversary stamp.


Again, stamped in Clair Nocturne, and embossed with Black Twinkle. It was matted onto more black glitter card, and the labels were cut with Spellbinders Labels 4, large & small. You can just use one of the two set sizes, but by combining the two sets, you get a smaller border.
 I stamped first, then placed the die where I wanted it and die cut the shape.


The blue version was done in exactly the same way, just using  Clair Paradise, and Stardust Embossing Powder. I also used slightly smaller dies to cut the shape for the sentiment, as there was less room for it. I have no idea where the sentiment is from, sorry. Just added a couple of sequins to it, as there seemed to be too much white space.

Friday, 12 October 2018

Wedding Anniversary card

Yep, this week saw our 9th Wedding Anniversary, and this is the card made for Beloved Hubby.
 It features a UTEE embossed heart, and also a sentiment die cut treated the same.

The card base is an 8" square one, and the design is matted onto some black linen cardstock, cut to size on my Rotary trimmer with a deckle blade, to match the card base.


The heart was die cut from thick card using an old Red Sizzix die of a large heart.
 I applied red pigment ink, then a single layer of red embossing powder, one from Moonglow Two Toned powders, called Hollyberry Red/Gold.
This was followed with 3 or 4 layers of UTEE, with Versamark ink being applied before each coat. It is possible to add the UTEE without the Versamark, but you have to work quickly, and it's risky, as the heated UTEE is VERY hot, and sticky.  Safer to let it cool, Versamark, then add another layer of UTEE.
 You can use normal clear EP if you don't have UTEE, but you will need more layers.

Plan A had been to include some Mica powder, which you can sprinkle lightly onto a UTEE powder layer, then carefully melt with the heat gun.
You need to hold the gun higher than normal, to let the UTEE start to melt, so that you don't blow the Mica powder off. When you are finished with the UTEE layers, the Mica seems to have drifted down through them. Unfortunately, the original heart was cut from a smooth white coated piece of thick card, and by the next day the embossing had started to shrink away, and the more I tried to fix it, the worse it got!


 This is what it looked like with the Mica powder, and some WOW! Coral Beach Sparkle Glitter added. It's much more red than the coral the name suggests..

It worked fine on the words die cut, so it was clearly the cardstock I used for the heart.

This die cut sentiment is from Tonic Studios. I can only find it available on E-Bay, so I'm guessing it's discontinued.


 Here was the original, all finished. You see the dimple on the left of the heart? If that happens, just heat again with the heat gun until it melts. You can also heat it and sprinkle a few grains of UTEE on it, then continue heating.


The 9 comes from a Tim Holtz set called Mini Numeric. Coated in Gold Pigment ink, then gently stamped into the top layer of UTEE whilst still hot. Because the UTEE is still liquid, you need to take care not to move the stamp as you press it in. Be gentle, you do not need to press as firmly as you would when normally stamping.
Leave for a few seconds, then lift off, and your number/image will be permanently set into the UTEE.
If it does go wrong, you can wipe away the ink with a baby wipe, although a little may remain, then remelt and try again.


The heart and sentiment were added to the card front with some dabs of Pinflair Glue gel. You may want to place some acrylic blocks on top whilst it sets.
The Peeloff sentiments for Happy Anniversary were added when the heart was set, 2 on each side, with a tiny peeloff heart between them.

Thursday, 4 October 2018

Birthday cards for Guys.

  Trying out the Eclipse technique again, this time to make some cards that would be great for male cards, or the female music fans in your life.


It sort of started with a FB friends post from one of her friends, about her younger brother being in hospital for his 13th birthday, and asking anyone who wanted to send him a card to do so, to help brighten his day.


My card is the dark blue one in this pic, with SAM done as the Eclipse.


As I had all the stamps and stuff out, I thought I'd make a few more, in different sizes and colours.


Ive used Versafine Clair inks in Monarch (purple) Medieval Blue (dark one) and Paradise (bright blue). Versafine Clair Nocturne was used to stamp the images. The red is Versafine Crimson Red.


The stamps used are from Visible Image:
Rock Out, Guitarist, smaller guitar and Star border.
Feel the Beat, Drummer & Phrase.
Music Speaks, Large guitar.
Universal, the swirl & star in the background.


I have the original packets of Music Speaks & Feel the Beat, the packs now have extra stamps in them.


The cards all use the same method, just different colours, and using a different font set for the Die cutting.


 I also stamped and cut rough masks for the images.


After stamping and masking the main images, I used the star border stamp to go all around my cardstock in Paradise, and using second generation stamping.


I heat embossed the stars with WOW! Icicle EP.

To get a matching cardstock matt, I sponged another sheet of cardstock with the relevant Clair ink, this one was for the dark blue one. Then I matted the image onto white, trimmed to a thin layer, then matted onto this sponged card.

To matt onto this, dst won't stick to the damp ink, so you either need to let it dry, or use a wet glue instead.

  
 These were the four panels all stamped. A 5,6 and 7 inch square  image, and one A5.
 One tip when working with square card bases, if you have bought the ready scored packs. Whatever the measurement given on the pack, it actually applies to the envelope, NOT the card base. So, a 7" square card is really closer to 6¾", so you need to cut your panels accordingly.

 I used four different Alpha dies for cutting out the words, the other set is the iCraft Upper Case Alpha set I used in the NOEL Eclipse cards.
 From top left, these are X-Cut Wedding Alphabet & Numbers,
 Coles ABC, by Lawn Fawn,
and one by DieNamics called Bottom Line, which seems to be discontinued.


   In each case, I cut from the stamped image cardstock, then from white fun foam.
 When doing this technique, remember to keep all the little bits from inside letters like A,B and so on, as you will need to replace them into your cut out after you've added it to your matt/card front.
Refitting the tiny inner bits is fiddly with small dies, but makes all the difference  to the finished result.You don't need it from the fun foam.


 If you don't have fun foam handy, you can use a few layers of scrap cardstock die cuts, how many layers depends how dimensional you want it.


When adding your letters to the fun foam/card stack,it's wise to dry fit some letters first before adding glue. Depending on the font, some letters like O,H, maybe Y or W, can look as if they are symmetrical, but I found they are not necessarily so.

Another tip I found useful. When using smaller letters, Lay them out along a ruler, and a T Ruler is good for this, then gently lay some low tack tape across, and press to the card.  It's also a good idea to actually do this on top of the plate you will be feeding into your die cutting machine.This helps to stop them moving about.


On this one I staggered the letters across the design, but again used tape to hold them down to cut.


The four finished cards.


The matt layer was created exactly the same for this one.

Neither the red nor the purple have matt layers, as the card bases were an almost perfect fit.


An End of an era

An end of an era

I write this with a broken heart, that only time can heal My beautiful, wonderful wifelet Shaz (Silverwolf) passed away peacefully in the ea...