A warm welcome to all my visitors,

Thank you for taking the time to come and look at my blog, I really do appreciate it. I would love you to leave me a comment, even if it’s just to say Hi. It means I can come visit you!

All my designs are original, so copyrighted to me. If I have been inspired by someone elses work, I have named them in the post, and where able, I have provided a link.

Please feel free to use my designs for inspiration, I just ask you to credit me, and provide a link back to my blog.

Thanks, Shaz XX

Wednesday, 26 January 2011

LOVE BLOG Award

 I was given this award by my co-Mother in Law, Maggie C, Silvercrafter. 
 Thank you Marg, it is truly appreciated.

 For myself, the blogs I would like to pass the award onto are:
   Hels Sheridan, Ink on my Fingers,
   Donna Heber, Donnas Designs
   Helene, Helenes Papercraft
   Tuire Flemming, Strange Enchantment
  Jinny Holt, Creative this & that


 As always, the hardest part is to pick who to pass this on to, there are so many bloggers I could give it to, so....... I have chosen you.  All of these blogs have such wonderful, inspiring art on them, and I'd like to thank you all for what you share with us.  
  Sorry I couldn't choose more of you lovely blogging friends. The rules say a maximum of 5 .

There are a couple of conditions for the award:
If you want to take part, then create a post where you post the 'LOVE BLOG' image.
You should also blog the persons link that gave you the award and inform her/him that you accept the award.
You can then choose 3 - 5 favourite blogs which you also link in your post, then each blogger will inform you that they have been tagged.

WOYWW #86

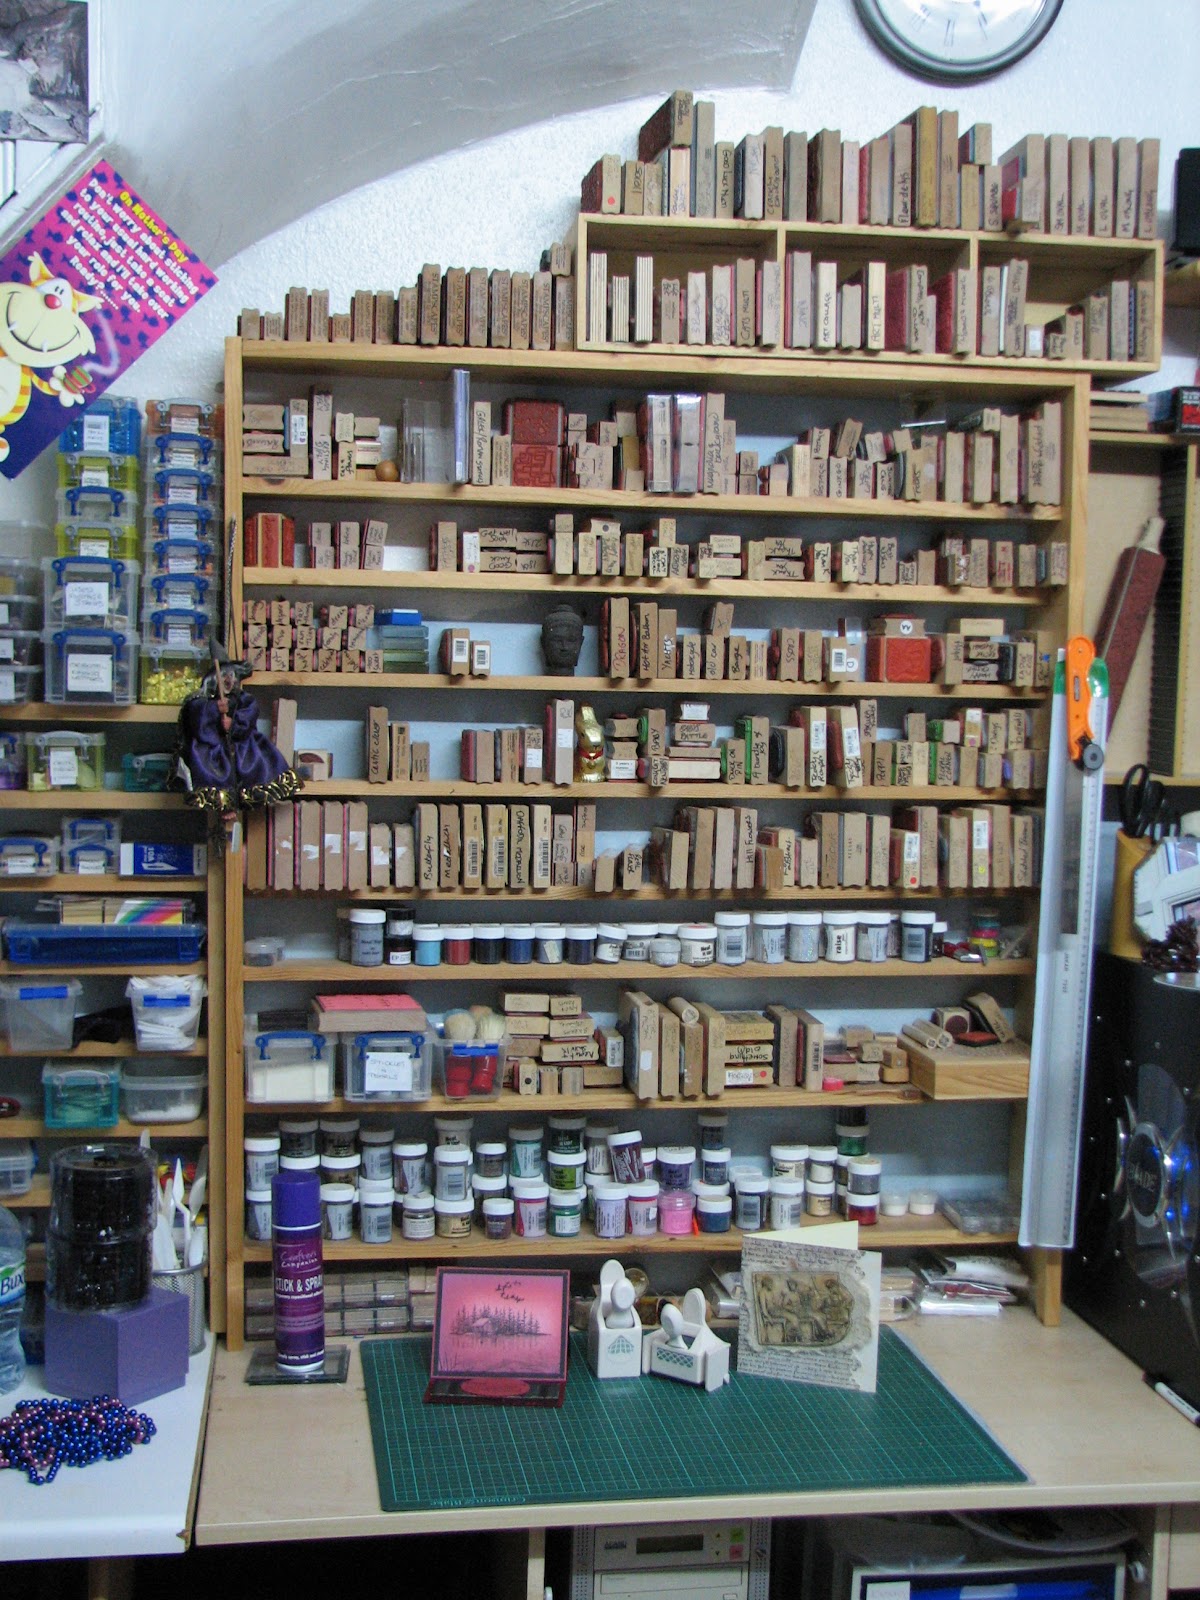
A shot of a different desk this week, the one in front of my wood-mounted stamps, looking fabulously tidy, as I have just put away (almost) everything that was piled on it-well moved it to the left out of shot, anyway. That still counts as tidying. On the desk is a finished Stampscapes Easel card, a part finished project using a greek/roman style stamp, a set of Martha Stewart Punch around the Page punches, which are a new purchase this week and a can of Stick & spray (Repositional)  from Crafters Companion, also a new purchase. The shelf unit was built by my Beloved Husband, as was the smaller one next to it. Embossing powders also on here, and on the left hand shelves, lots of little Really Useful Boxes with small stuff in.The square purple box had a Christmas present in, and now joins the stuff waiting to be turned into something else, lol, and on top of it is two rolls of tiny tinsel in black, picked up cheap in the after Christmas sales, and a couple of lengths of Christmas tree beads, which, quote, 'may come in useful,' unquote, lol.

Wednesday, 19 January 2011

WOYWW #85

This is my desk today, 3 easel cards made with some of the images that were on my desk last week. There are a couple more images matted and ribboned ready to make another couple. Over on my PC desk, is my ever present crafters fuel- coffee!

Sunday, 16 January 2011

Easel Card 1


This is the first of the Easel cards made with some of the stuff off my desk for WOYWW this week. I thought I would have a go at easels, and they are really very easy & effective. I have put a short tutorial on a page HERE for the folds and construction. The stamped panel was brayered with Adirondack Sandal, Lemonade and Citrus then left to dry. The image is called Aspire by Penny Black, and was stamped three times across the panel. I inked up the stems using Distress Forest Moss, and added the flower colour using Cats Eye Terracotta then the flowers had sparkly embossing powder added and heated. The panel was then cut into three, with the centre one being slightly larger, and matted onto dark red card. I cut my base card to the width of my stamped image, then scored and folded to create the easel.The part the card will stand on was covered in a dark green paper. I trimmed down the offcut from my card to make the panel that is the stopper.A piece of clear vellum was embossed with the D'vine Swirls Embossing Folder, cut down to slightly larger than the card panel, then edge punched with a Fiskars Heart Border punch. I added this to the panel with a small piece of DST in the centre only, where it will be hidden by the sentiment.The sentiment was stamped & heat embossed onto an offcut of the red card, then onto an offcut of the dark green paper. A silver Heart brad was added at either end. The lacy panel was adhered to the card base with foam pads, then the sentiment added to this with silicone glue, so I could angle it upwards slightly. The image panel was then added to the card 'front' with DST, and a butterfly made from Fusible Fibres was stuck down with silicone glue.

   TIP: to emboss vellum successfully in a cuttlebug folder, either use a very thick vellum, as it is available in different weights just like card/paper, and PDA card & paper (link in the sidebar) do a nice thick one that works well, OR if your vellum is thinner, use two/three sheets in the folder at the same time- this helps prevent the vellum from tearing, as it does not stretch in the same way card or paper will.

Easel Card 2

A piece of white card was brayered with Adirondack Shell pink, then left to dry completely. The Penny Black stamp 'Aspire' 3381K, was stamped 3 times across the panel in Ancient Page Flannel, which is a dark grey, then the flowers only had a little sparkly embossing powder added to them and heated. I cut the image into three panels, with the centre one being wider than the two outer ones and matted them onto a piece of pale mauve card.This was trimmed to leave a narrow border, and a length of dotted mauve ribbon wrapped around and secured on the back with DST. A small bow was made and added with a glue dot.
My base card was cut down to the width of my stamped panel, scored and folded.The part of the card that will form the base it stands on was covered in a Purple lined paper, again adhered with DST.
To make the 'stopper', I cut a panel of silver card, and punched two strips of dark purple vellum to make the lacy edge. This was done with a fancy corner punch with the guides removed. The vellum strips were attached either side of the silver panel  with DST. I punched another strip of the purple vellum with a butterflies punch, from X-Cut, and stuck this along the centre of the silver card then edged with silver peeloff border. The whole thing was then trimmed to size and mounted to the base with foam pads. A sentiment was stamped and heat embossed, then cut out using a petite scalloped oval Nestie die. A hole was punched either end, and a small piece of the dotted ribbon threaded through, and mounted with silicone glue.

An End of an era

An end of an era

I write this with a broken heart, that only time can heal My beautiful, wonderful wifelet Shaz (Silverwolf) passed away peacefully in the ea...