A warm welcome to all my visitors,

Thank you for taking the time to come and look at my blog, I really do appreciate it. I would love you to leave me a comment, even if it’s just to say Hi. It means I can come visit you!

All my designs are original, so copyrighted to me. If I have been inspired by someone elses work, I have named them in the post, and where able, I have provided a link.

Please feel free to use my designs for inspiration, I just ask you to credit me, and provide a link back to my blog.

Thanks, Shaz XX

Friday, 14 February 2014

Happy Valentines Day!


 I saw some Visible Images stamps back last year, and was very taken with the gothic style. When I saw this set at the NEC last November, I knew instantly that they would be perfect for this years Valentine card for my Beloved Hubby, and I knew exactly how I was going to use it.


 First part of the plan involved making some post-it note masks of the two roses, and some heatproof acetate.


This is the two sizes of rose, and I stamped onto the acetate with Versafine Onyx Black, so I could add Black detail embossing powder and heat set.

I started by stamping a large rose in one corner, then adding a mask over it.


 I continued adding rose images, both small and large, and masking each one.

  The first corner completed- as its on acetate, I could do all the stamping, then emboss it all, as the ink won't dry. It WILL smear though, so you need to be careful.


Now I repeated this process in a second corner, just not making it as large as the first one.Added embossing powder and heat set.Then I cut around the rose edges, to give me two corners.
 
The plan was to glitter the roses on the reverse, and the heated embossing powder would preserve the rose images.


The first rose getting the glitter treatment. One tip, when you add your glitter, let it sit for a few minutes to allow the glitter to sink into the glue, that way you get a much stronger glittered image.


 2 roses done with red glitter, and the glue added for the black glitter. On the smaller corner, just one rose was glittered in red.
  Black glitter added, and you need to make sure you get right up to the red, so you don't have any gaps showing.


Now it needs to dry, and I left mine on the top of a radiator overnight.


 I don't think it shows in this picture, but I lay the two corners in place on my cardstock, in opposite corners, and lightly drew around them in pencil, so I could position the remainder of the stamping.
 The barbed wire was stamped to make corners( good old stamp positioner again),and I tried out the Love word in black and red on my scrap- I preferred the red. Everything was heat embossed with clear embossing powder, by the way.


 I made a pair of triple embossed hearts, Aged Mahogany DI on the base card, then three layers of UTEE.

 I had already cut a card base, in black card, 8x8, from an A3 sheet. Then a burgundy mat layer, then the white layer for the stamping.


Now to put it all together- the glittered roses were added with Pinflair glue gel, the larger one in the bottom right corner, the smaller top left.

The hearts were added the same way.


As I'd hoped, the detail of the roses is still clear thanks to the heat embossing.


It came out exactly as I'd pictured it, and I'm also entering it in the Visible Images blog February Challenge, LOVE.

Supplies:
 Black Cardstock, A3
 Burgundy Cardstock
White pearl cardstock
Visible Image stamps, Immortal Love
 Heat proof acetate
Red & black glitter
Clear drying glue, for the glitter
Versafine Onyx black
 clear detail Ep
 UTEE
DI Aged Mahogany


Wednesday, 12 February 2014

WOYWW #245

This week its more  a case of what's on the desk behind my desk, really.
Colouring is not my strong point, by any stretch of the imagination and failure to practice doesn't help any. I had my Promarkers stored in a couple of wallets I bought from the NEC a few years ago, and that was part of the problem. Out of sight, out of mind. I kept thinking I needed a better system, and as I ordered some more last week, set about solving the issue. Cheaply. One idea I had seen on Pinterest was using a wooden wine rack, which seemed like a clever idea. 
Don't have one, and couldn't find the sort I needed anywhere. It had to have solid sections, not the lattice sort. Then I looked at an old CD rack I had, and wondered? So out came some thick card, and I cut some pieces that would make little shelves, resting on top of the row of pens. Then I realised that would make taking pens out difficult so I cut two panels for each section, with a slit in so they would slot together, to make an 'X' shape. That actually works rather well,pens are easy to get at, and I can take all of one colour out without the whole thing collapsing. I do have another slightly larger CD rack about, which I may end up converting, as the blue section is full. So having got the pens close to hand, I decided it was practice time. I bought the Letraset Bleedproof pad back last year, and stamped up a batch of images to practice on.
Work in progress! I do think that the pale, pastel shades in Promarkers are still a lot darker than I'd expect, but I have found that the Flexmarkers, which have a chisel and brush point, are actually very,very pale, so I've been adding some of those to the collection. I also discovered that the Promarker Magenta is a nightmare! It creeps outside the lines far worse than any of the others, even by not going right up to the lines, it still wanders outside the image. And I can't colour leaves realistically at all, lol.
 If you are looking to buy Promarkers, or Flexmarkers, can I suggest you pay a visit to Cowling and Wilcox? Their prices are amazing, especially on the sets, mainly half price or less. The single Promarkers are £1.50 incl. VAT. That's not a sale price by the way, I've been buying mine from them for the last couple of years and they are always that low priced. So thats my desk this week, I shall be linking up with our Glorious Leader Julia, over at The Stamping Ground, going to bed and visiting later. That's if Blogger decides to play the game properly this week.


Sunday, 9 February 2014

Same card, different colours........

As I said I would last week, here are two colour variations of the original card.  I also used a different background stamp for the purple one, another Penny Black stamp, Scroll Pattern 2636K. Which I now think was a mistake- it looks far too busy. The Daisy pattern works much better. Proof of the concept 'If it ain't broke, don't fix it!'.

I used Encore Metallic Purple inkpad for the rose and sentiment, and Dusty Concord Distress ink for the background. That did mean I had to emboss each layer of the pattern individually, as the ink was too wet to put the Stamp Positioner over without smudging it.


The blue one is a Whispers pad, Navy Blue for the Rose and sentiment, and Distress Ink Chipped Sapphire for the background. I also used Distress Markers and clear embossing powder to edge the stamped sheets this time.

Wednesday, 5 February 2014

WOYWW #244

First WOYWW of February, as always thanks to our much-loved leader, Julia at The Stamping Ground. This is my desk on Tuesday night, before I go to work. As you can see, I am indeed trying out another couple of colour combo's for the card in the previous post. A blue and a a purple version. And just in case you are interested, here's a long shot of the whole desk.


I'll finish putting them together and post them later in the week.I think this may be my personal best for short posts, lol. Although for such a short post, you would not believe how long its taken to write, thanks to Virgin/Blogger/keyboard! The Internet keeps dropping out, Blogger lost my image twice, and don't you just hate it when you accidentally catch the CAPS LOCK button, and don't realise 'cos you are looking at the keyboard while you are typing? Then look up to see a whole paragraph in capital letters? *Sigh.* Now I just had a panic, as I previewed my post, but shut the wrong tab down! Fortunately, Blogger did it job this time & saved it. I think it may be time to step away from the keyboard......
Hope you all have a great Wednesday, see you later.
 P.S. Sorry to anyone who tried visiting after I linked- Blogger continued its hex this morning and didn't post my scheduled post! I usually quickly check to make sure its up before I link, typically I didn't this morning. In my defence, I had had a desperate NEED for Sausage & Egg McMuffins since three o clock in the morning, so we grabbed some on the way home from work,and all I had on my mind was getting back downstairs to get nomming, lol.

Sunday, 2 February 2014

A Card is Born......

I woke up the other day, and had this design in my head, for some weird reason. This post is going to be picture heavy, I warn you now, as I thought I'd share my whole process from start to finish. I think as well I will try this design in some different colours later.

 First step was the base card, and generally all my cards are made from an A4 sheet of card, this one in Pearlescent white.


Scored on both sides with the scoreboard and an embossing stylus- I find that helps to stop any cracks in the folding.
Folded, I use a tool that was in a kit of clay tools from The Works for smoothing my folds.


 I selected a sheet of black card for the first layer, then lay my next white layer over it to mark where to cut it down.


This piece was cut down with my guillotine-and a tip here if you find it hard to get a straight cut on your guillotine or trimmer. Don't butt your card up to the top plastic edges, line it up instead onto the printed or scored lines. They always seem to be straight, whereas for some reason the body isn't.


This piece was going to be embossed with a folder, and I used a Quickutz folder for this, called Diamonds & Dots.This is about the same size as the early Cuttlebug folders, so I had to emboss twice across the card to fill it. Fortunately, this design makes that simple.


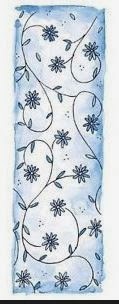


Now I needed another piece of white card to do the stamped background on. I wasn't fussy about the size here, just used a half A4 sheet, as I'd be trimming it down later.


The stamp I used is by Penny Black, called Daisy Pattern, 2642K.
As its only a narrow stamp, I needed to layer it across the card,so out came the Stamp Positioner.You could probably do it by eye, but I get paranoid about gaps, lol.


Image stamped onto the plate, and lined up for the first one to be stamped. The only thing you need to take care with using the stamp positioner is to always keep your stamp the same orientation as you first stamped.


  First image stamped and second one lined up.


The whole sheet stamped.

 
I used Versafine Onyx black, as it gives a good black image and is wet enough to still be able to heat emboss after.


I lay this against my dry embossed layer, and marked where I wanted to trim it down.
 I wanted to 'separate' this stamped layer from the white embossed one below it, but didn't want to add yet another card layer.


 I have a few of these embossing pens- had them for years and they have never seemed to dry out- so decided to draw a line down each edge then emboss with clear powder. You could also use a Distress Marker for this, the ink in them is really wet & would be embossable. In fact any marker with a 'wet' ink would do the job.

I used a ruler to draw along, one edge at a time.
 Just make sure to clean your ruler edge each time so you don't get any smudges!


 I added the powder & heated each edge one at a time.


I think I will be bearing this in mind for future cards- its a simple way to visually separate layers, without adding card/paper.


Now I needed a simple focal image, and this is a really old stamp, from Anitas, I think called Mackintosh Rose.
 Stamped in Versafine Black again, onto one of the scraps of white card from earlier. I added clear detail embossing powder, and I did that three times, quickly tipping the powder onto the heated image.


I trimmed it down leaving a narrow white border, as it was going onto a black panel, then trimmed the panel down so it was all in proportion.


Before mounting it though, I added a strip of white organza ribbon with black spots to the black card, securing it with DST on the back.


Now the layering up began.


The black panel was added close to the top of the stamped panel.


 Then the stamped panel added to the white embossed layer.


These layers were matted onto the black layer, then mounted onto the card front.


Now for the greeting, stamped in Versafine Black onto a scrap of the white pearl, and matted onto a scrap of black.


 I added that to the lower front of the card, along with a ribbon bow over the strip of ribbon, with a glue dot.


 Supplies:
 White pearl card 2 xA4, 1xA5 or scraps
 Black card, A4
Background stamp, Penny Black daisy Pattern
Focal stamp

Onyx  Black Versafine
Clear detail embossing powder
Black marker
Ribbon
Embossing folder

One thing you probably spotted in the pictures are my steel edged rulers.
 I've acquired four over time, and they are possibly one of my most used, and useful, tools.More often than not, I use a ruler & scalpel for cutting, as I tend to mount my images, then trim down, rather than cutting mats first and trying to line up equally all round.
 
Why so many? Well the thing is they all have slightly different features.


From the left, the first one is a quilters ruler.If you look closely, you can see there is a narrow gap between the marked grid and the steel edge. If I line up the bottom grid line with my cardstock, then cut along the steel edge, it gives me a perfect width narrow border.
 The second one, next to it, is also a quilters ruler, but this one has the steeledge set against the first grid line.So I can cut a super fine narrow border with that. Or no border at all.
 Next to that is my Tim Holtz ruler, who's greatest asset is that its in inches! It also has double measurements on it, 1-12 from left to right as normal, but it also goes from the centre of the ruler out (6" being 0), so you can measure a set distance from the centre in both directions. It also has solid lines at 1/4" intervals, and 1/8"  dotted lines between them, and no 'excess' ruler either end. Oh, and it has a row of pricking holes along the top, too, on the 1/8th marks.Last one is the X-cut, back to metric again, but it also has a centre point mark, and measurements going outwards, as well as the usual. It  has a wider steel strip butted up to the grid, so I can get a different border size from it.

An End of an era

An end of an era

I write this with a broken heart, that only time can heal My beautiful, wonderful wifelet Shaz (Silverwolf) passed away peacefully in the ea...