A warm welcome to all my visitors,

Thank you for taking the time to come and look at my blog, I really do appreciate it. I would love you to leave me a comment, even if it’s just to say Hi. It means I can come visit you!

All my designs are original, so copyrighted to me. If I have been inspired by someone elses work, I have named them in the post, and where able, I have provided a link.

Please feel free to use my designs for inspiration, I just ask you to credit me, and provide a link back to my blog.

Thanks, Shaz XX

Showing posts with label Whispers Stamps. Show all posts

Saturday, 18 May 2013

Playing with shadows


Back on my WOYWW post, I had some shadow stamps on my desk, and Queen Lightwell asked what that was about, so I thought a little (?) post was in order.
 This particular one is by Whispers (Do-Crafts), but a number of companies make them.
  What made me get them out was seeing a few cards on Pinterest using them, mainly Clean & Simple ones.

This is a perfect example, and you can see more on Kris McIntoshs' blog, HERE.


I spent some time playing , just stamping onto an A3 paper pad. I like to have one of these to hand, its only a cheap one from a pound shop, but its a great way of trying things out without wasting 'good' card & paper.
I inked up the stamp with a Marvy pad for starters, and found that you need to sort of tap & swipe the ink on,turning the stamp around too to avoid getting lines. I also found that brayering the ink on gets a smoother result.


This was the print from just tapping the ink on.


This one was brayered, which gave a smoother, paler impression.
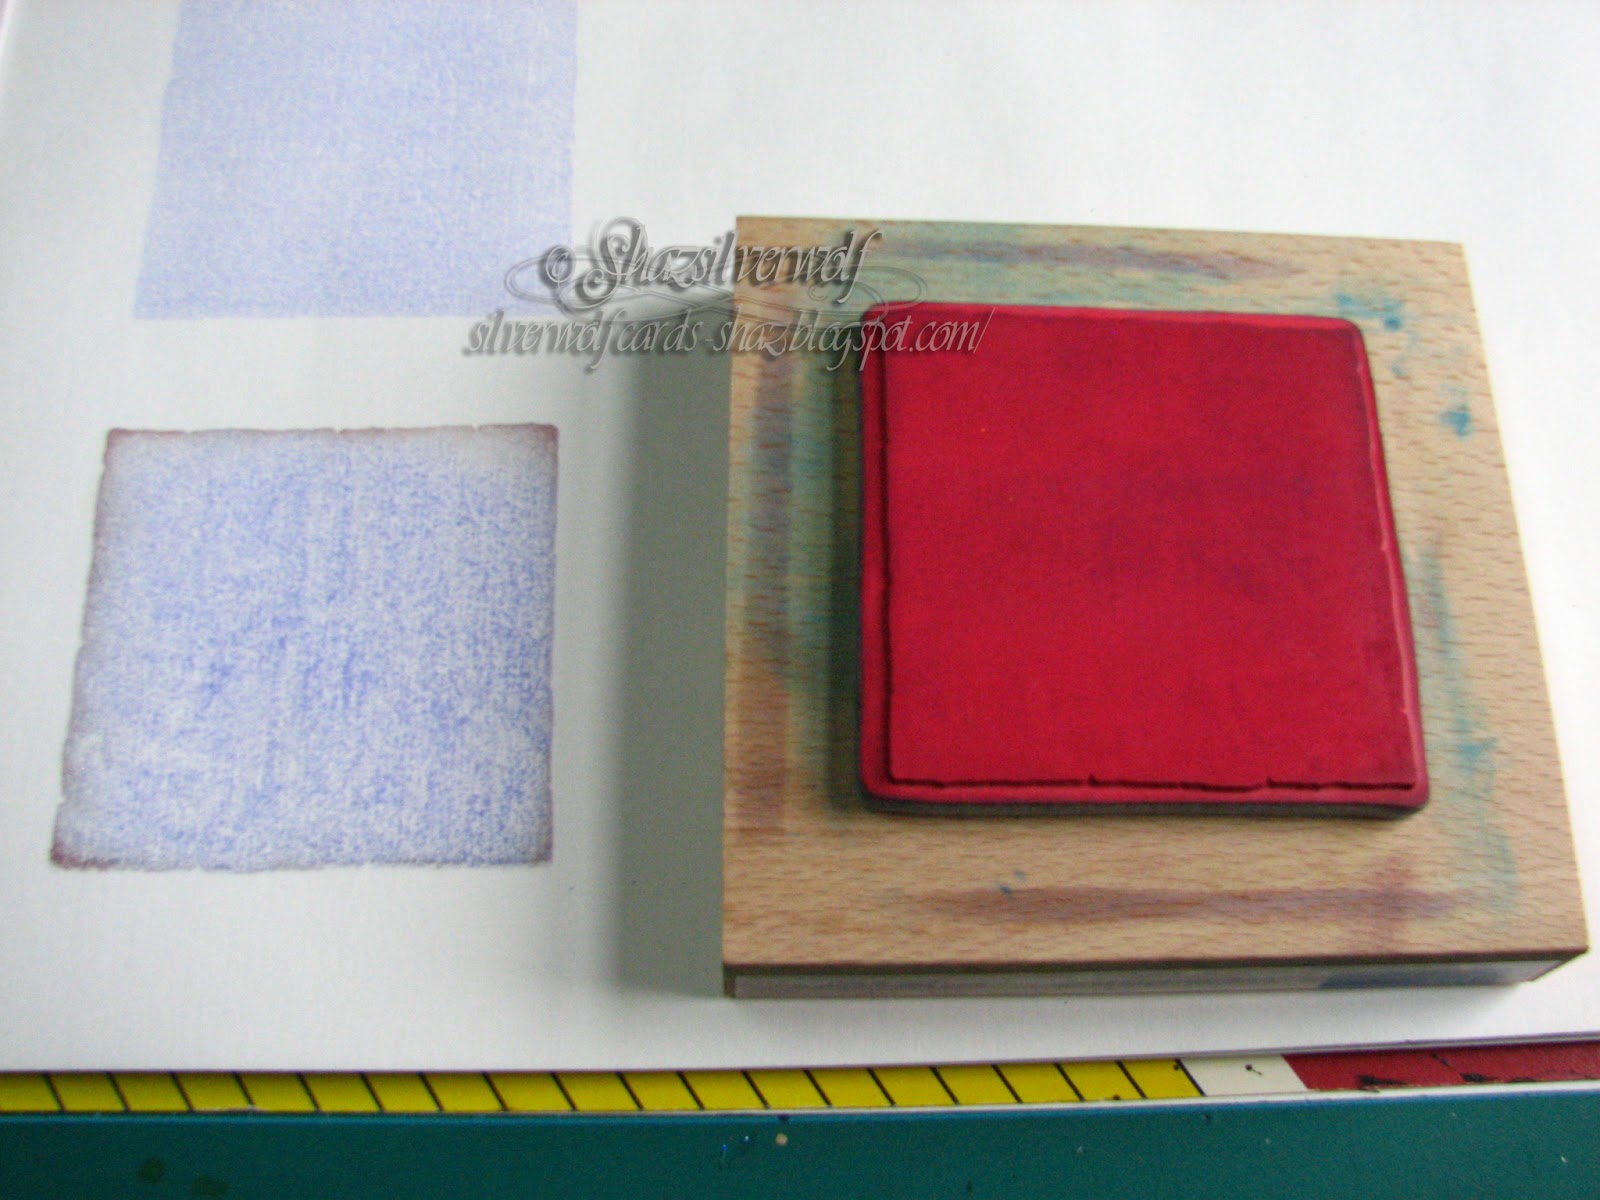


This one has the Blue Marvy tapped on, then DI Walnut Stain gently dragged around the edge.


This is my favourite- DI Mustard seed & Spiced Marmalade. I put the yellow on first, then dragged the orange around the edge- obviously not too cleanly, as I got Orange in the middle too- but I like how it came out. Of course, I have zero chance of recreating it, but never mind.


 I overstamped  this with a Penny Black flower stamp, using Walnut Stain DI.


 Another thing you can do with Shadow stamps, is put colour on them, then overstamp with another stamp, in a darker colour.


I said earlier that brayering gives a smoother finish- on this image I've dragged the inkpad across the stamp, not sure if it shows up well enough to see, but this is the print you get from it:


Another technique for shadow stamps is also called the 'kissing' technique. Using an un-inked stamp, you 'kiss' it against the inked shadow stamp, to remove ink.


I tried this with the Adirondack & DI, but it didn't do so well. I thought maybe a thicker ink would work better, as both of those are very 'wet' inks. I used a Brilliance Pearlescent Crimson pad, which is a Pigment Ink.

The stamps are 4 leaves from a Judikins cube stamp, and you can see the impression here after I pressed them against the inked shadow stamp.


That worked much better, and I think if it was done on a better quality cardstock, you'd be able to heat emboss the image after.
 Coming up in the next post, I had a bit of inspiration for making my own shadow stamps!

Sunday, 1 May 2011

Flower Tiles

Started out at a bit of a loss for what to do with these tiles I had on my desk from the WOYWW 99 post- I have done so many square cards this week, and of course, that was the first thing to mind, looking at the image. So instead I went with a vertical strip, matted first onto black. Decided I didn't like that, so un-matted them, and went with dark green instead. Then I had trouble finding the right backing paper- everything seemed too busy for these images. Finally came across a pad of papers, Laura Ashley Traditional,and the very pale green with the white flower seemed to work, and also made me think of lace- so went digging in my box of lace pieces, and added a strip of this to the front.
I've enlarged & cropped the picture here, the lace is a little difficult to make out against the pale background. I used spray glue to attach the lace. I lay anything I need to spray in my bin, on top of a scrap piece of paper, then spray it. No mess anywhere else,lol.
While digging around for the lace (which prompted me to find it a box of its own), I spotted a roll of pearl string, which I bought from a discount warehouse in Birmingham, from their florists dept.
     By the way, thats a good place to visit if you have one of these places near you- you'd be amazed at what you can find, especially the floristry part- lots of Bridal stuff, which is what this pearl string was for, masses of paper flowers, petals, ribbons, all a lot cheaper than you will get  anywhere else.
Anyway, back to the card! I wrapped the pearl string round a couple of times and knotted it towards the top.

Now the top right looked empty!
This card was really starting to feel like a battle of wills- I was determined to finish it, and it was fighting me every step of the way- normally I would put a project to one side when it feels like this, but I really think that if I had, I would keep putting off going back to it- besides, I refuse to be beaten by a piece of paper, (I was in a stubborn mood). I probably needed coffee, lol.
Off on an embellishment hunt then. Didn't want too big, or too fussy, and finally I came across these little pearl hearts. I bought these a few years ago, at one of the Hobbycrafts shows at the NEC, thinking ' ideal for Wedding cards' , and I think I have only ever used a couple. So, I attached these with a little silicone glue. I also used silicone glue to attach the stamped panel to the front, because of the lace.
Final bit was a sentiment, and I used a Whispers Words stamp, by Docrafts, 49701 Birthday Wishes. The Ink I chose was a ColorBox Catseye Pigment Pad, in Verdigris and stamped this along the front edge of the card.
At Last! Finished. Yay!!!

An End of an era

An end of an era

I write this with a broken heart, that only time can heal My beautiful, wonderful wifelet Shaz (Silverwolf) passed away peacefully in the ea...