A warm welcome to all my visitors,

Thank you for taking the time to come and look at my blog, I really do appreciate it. I would love you to leave me a comment, even if it’s just to say Hi. It means I can come visit you!

All my designs are original, so copyrighted to me. If I have been inspired by someone elses work, I have named them in the post, and where able, I have provided a link.

Please feel free to use my designs for inspiration, I just ask you to credit me, and provide a link back to my blog.

Thanks, Shaz XX

Showing posts with label Dreamweaver stencils. Show all posts

Wednesday, 29 November 2017

WOYWW #443

So here we are, at the last post before December-just- and is it me, or has this year suddenly flown in the last couple of months? I mean, the whole year has gone quite quickly, but these last few months it's been sort of blink and you missed it.
 Leaving our links over at Julias again, The Stamping Ground- I reckon there should be mince pies too soon, *wink, wink*.
Still not a lot of crafting being done, I have had some more practice time with the baubles, and I seemed to get a better result by outlining first, letting that set, then brushing on the ink. I think the nib of the pen was clogging on the ink. Might try doing the inking, then outlining a few hours later, see if that helps.


Tried  on the kraft card first- I've never really got into the whole kraft thing, the colour is just a bit to 'meh' for me, and although it inks nicely, the contrast just doesn't work for me.


Returned to black, and I'm much happier with the result, still not perfect, but much better.


I also decided to sort my UFO boxes- yes, I've now upgraded to Boxes 2.0-and I really need to get a grip and finish them all off, or get them made up, which is all a lot of them need.


 Exhibit A- and those piles all have 6-10 card fronts in them. At least. The one top right has closer to twenty.


 Masterboards bottom right, a couple of random card fronts above them, two Sweet Poppy Stencil fronts, done if I remember rightly with Imagination Starlights paints- a couple of stamped & heat embossed snowglobes, and the start of some sponged snowy scenes.


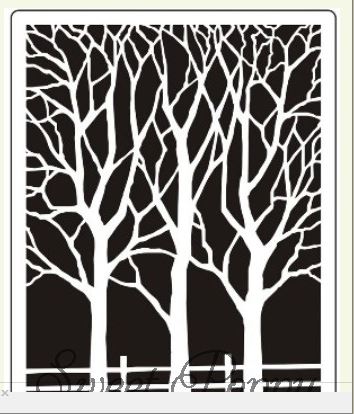
A random selection of stencilled backgrounds- all stencils are 7x7 from Clarity.


Another Sweet Poppy stencil, the cat on a wall, all done with stencil paste & glitter to get different coloured cats. I also varied the glitter on the walls on some, and two have been finished off with some foliage & tree stamping. Oh, and a masked off moon & sponged sky.


Doesn't look quite so bad when you hide them in plastic wallets!


There are also canvas UFO's- all are done with Sweet Poppy stencils & paste, a few have glitter flakes. Some backgrounds were swiped on with a baby wipe, some are Bleeding Art Tissue.  Bottom right with the Cat is Brushos straight onto the canvas.


Top right here is Bleeding Art Tissue, bottom right & centre are Brushos- centre one straight onto canvas, right hand one is a dried baby wipe from cleaning up.


Top left I have plans involving Bees- I have a Honeycomb stencil or three,😁, and the background is DI reinkers in Wild Honey & Carved Pumpkin, wiped on with a baby wipe. Bottom square has had ink brushed through a Clarity stencil, I think it needs more, and I think the other two are just random DI reinkers wiped on again with a baby wipe.


I actually found three finished cards- well, apart from the insert- these were done with the Laminator/Foil method, and a Sweet Poppy stencil.


These are again all done with a stencil- Top two are Dreamweaver ones- stencil paste and a Laminator & foil, matted onto silver glitter card, and blue. These came out fine.
 I was really disappointed  with the bottom two though. I was very happy when I foiled them, as they came out a treat- I loved the mulicoloured ribbons and baubles on the left one, and pleased I managed to get the green foil on the holly, and some assorted coloured foil on the baubles.
 I matted them onto Green glitter card, and that's when it went horribly wrong.

I always, always use Pinflair Glue Gel when matting onto glitter card- if it's not a smooth type- so that it grabs. This green glitter card has leached colour into the glue, and then through the cardstock. So, lesson here is that not all glitter card is created equal! I think that green will be consigned to die cutting trees or suchlike, where I can use DST/ sticky tabs. That may also be solution for this- foam tape on the back, then a little Silicone glue on the tape to stick it to the glitter, and the tape should- hopefully- provide a barrier.
 My problem is I love trying out new products/techniques, and get easily distracted by a new one.  So, no more experimenting till I finish these off!
 UTI seems to be clearing, now I've picked up a cough/cold, which seems to be resolving itself into a chest infection, so I'm back on Antibiotics, and extra use of the inhaler! My poor immune system just needs to catch a break so it can build itself up again after all the battering it's taken in recent weeks.  Running up to Christmas we have a few things going on- Wednesday (tonight) we are off  to Birmingham to see Stone Sour, then Friday night it's our works Christmas meal. Monday I have another works meal, for Long Service achievements, as I've been there for 15 years this year. Then next week we have a Marilyn Manson concert, and the week after, 5 Finger Death Punch, so it's all go, lol.
And now, it's time for And Finally.....

Tuesday, 26 July 2016

Look away now if you don't want to see 'C' cards!

These are the three designs I have so far. All are made with embossing paste and stencils, and were started a couple of years ago, to be honest with you.


They are a mixture of white, gold and silver embossing paste, all by Dreamweaver. I also discovered at this time that you can colour white paste- I added some green ink to it and it worked well. You do have to be careful with this, you don't want to thin the paste too much, so I'd recommend using the darkest colour of whatever you have, that way just a couple of drops will give you a good result.


These are the three Dreamweaver stencils, I'll put the numbers & names at the end.


In every case, glitter was added to the wet paste after the stencil had been removed, the glitter generally matching the colour of the paste.


For the NOEL stencil, I just glittered the snowflake which replaces the 'O'. I used silver and gold, and also green on some.


The post I did originally about this embossing is HERE.  


As long as you are careful with the addition of the glitter, then tip off the excess straight down, it's possible to avoid getting much, if any, on the letters either side.


So this weeks plan was to destash as many of these as possible, whilst also attacking the Christmas backing paper mountain!


All the toppers were trimmed and matted onto coordinating card, then trimmed again to leave a narrow border.


The Christmas backing paper mountain- 2 Really Useful Boxes, one a 12x 12, one an A4. Mainly backing paper, although I did actually find a lot of other stamped Christmas images, and also left over cards from the last few years. These I have cut down, and will probably try and make some larger cards with them.


The card blanks are from PDA Card & Paper, and were 148x105mm landscape.
I've used them here as both top fold and side fold cards,the Baubles and Trees being top fold orientation. An assortment of backing papers were used to cover the front of the cards, trying not to use anything too 'busy'.
 After they were all mounted, some acrylic gemstones were added in a few places on the baubles for a bit of extra bling.
A greeting was added in a suitable colour- I must admit this photo gave me a panic moment. I thought I'd mounted one of the toppers upside down!  Turns out I hadn't, I'd just swapped the side I put the greeting on to avoid the baubles on the paper. Phew!


The Christmas trees also have acrylic jewels added in a colour to match the mounting card. These are not quite finished, I want acrylic stars to add to the star on top of the tree, and I don't have any. Waiting for an Amazon delivery now to finish them.
The greeting is a different stamp, to fit the space available.Also, I used ink colours to match the acrylic gems.
The Noel cards are mounted onto bases covered with Christmas paper, and have an acrylic gem added to the centres of the snowflake. This Greeting is from  Clevercut.


The backs of the cards were now stamped with one of the personalised stamps I had from Visible Image. I must admit, this was a bit nerve racking,  I was worried about smudging it so much.It all came out ok in the end, but it will be easier on the nerves to do that bit first in future I think.


Recipe:
 Card base, PDA Card & Paper
CODE: SCCB-Exp
  Colour: White; Size A Single Creased - Regular: 148x105 Landscape (cut 296x105mm)
 Stencils: 
 Dreamweaver,
 LL468, Vertical Ornaments
LL573, Swirly Christmas Tree
LL511, Noel Snowflake.
Embossing paste, in white, silver & gold. 
Merry Christmas stamp, Stamps Away/Clevercut, on NOEL card. 
The other two Christmas Greetings I've had for years, and no idea who made them, sorry.
Glitter in red, green, gold, silver & white.
 Acrylic gems to match. 
 Christmas backing papers
 Cardstock to match for matting &  layering.

Wednesday, 20 July 2016

WOYWW #372

Another week flown past, and this week we're all back round at Julias Place, The Stamping Ground. Great to see you feeling so much better Julia, and lovely to be back with you. Our marvellous LLJ did a great job keeping things up and running, so a big hand for Jan, please!
 The desk then, thats what you're here for after all. This week I've made another card with the stencils, and that's in the previous post. After that it became a session of C card making, and a load of stash busting.
Thats the view from the side of my desk, I can't get far enough behind it to get it all in that way.Loads of sheets of Christmas paper here, trying to use it up.


This is the batch of cards that appeared- the embossed toppers I did a couple of years ago. I've got loads of this sort of thing in my Christmas box, and I'm using it up this year, come hell or high water.


Here are the Christmas tree ones, drying after having the bling added. Little acrylic gems to simulate Christmas lights.


Ridiculous, really. Sat in the middle of the hottest days of the year, making Christmas cards. Madness, I tell you, madness.


Last pic for the week, and this arrived for me on Tuesday. A gorgeous black & white scarf sent as an anonymous PIF.
 So whoever you are, thank you. It's gorgeous, I love it. And yes, I will continue the chain with a PIF of my own.


NEWSFLASH! 
Just had a phone call from my GP's surgery- they have the results of my MRI, and there is no sign of any cancer reappearance. There may be some disc issues, which would explain the sciatica, but otherwise, all that can be seen is evidence of how the internal workings are healing after the surgery. Today is a good day!

Tuesday, 22 March 2016

Bare Trees and Brusho's.

Still with the Sweet Poppy stencils, this one is called 'Walk in the Park'.
 I used the Glossy Black Stencil paste here, on top of one of my Brusho backgrounds from a while ago.

After I'd left it to dry and trimmed it to size, I realised it reminded me of some rainbow glitter card I've had for ages- I remember buying it at the NEC years ago!


 The colours were similar enough to make a good matting layer. This glitter card is not as rough a surface as some, but not entirely smooth, either. So as well as using DST to matt it, when I peeled the backing tape off, I smeared a little Pinflair Glue gel onto the tape.


It gives you a little 'slideability' for placing, but also ensures that the layer will stay firmly stuck to your background, which can often be a problem with glitter card/paper.
You may just about be able to see the blobs of glue squidged onto the tape here.


I used an offcut of the rainbow card to die cut a sentiment for the card, using a PoppyStamps die, called Vintage Happy Birthday.
 By the way, Poppystamps, and Sweet Poppy  are no connection to each other!
The die cuts out at 2.3"x1" (Happy), and 3"x1" ( Birthday), which is 5.9x2.6cm, and 7.7x2.6cm respectively.
 I'd mounted the image onto a 7x7" card base, then added the sentiment at the side.
 To attach the sentiment, I used something Beloved Hubby bought me a while back- Blu Sticks, by Blu Tack.


Its easy to put on the die cut, just smear it on over a scrap piece of paper. It goes on Blue as you can see, but it dries completely clear. I use a cotton bud to remove any excess that gets in the  spaces of letters.


You can see here after it's dried on an enlarged view of the card- no trace of glue showing.


This is the Sweet Poppy stencil,                                                     and this is the Dreamweaver one.
                                                   Size-wise, they are the same too.


Wednesday, 15 October 2014

WOYWW #280

Morning all, and yet another Wednesday is here. Scary how fast this year is vanishing, isn't it? This is my desk shot for the week, joining up with our (freshly holidayed) Julia at The Stamping Ground.
 Still plodding along with the Christmas cards, I've trimmed all the stencilled toppers now, trees, Noels and some baubles. Next up will be some stamped ones, using the tree stamp, from Inkylicious, just about visible on the right.
 By the way, the stencils I've been using are all Dreamweaver ones.
One thing I have done, is quickly go over the top of them with a stiff stencil brush, or a toothbrush, which removed any loose glitter. So should be less shedding when I make them up. I do sparkle quite nicely though!
And an update on the Gold embossing paste- don't know whether it was the daylight in my room, or my eyesight, but the new pot turned up this week, and it dries out exactly the same, and they both now look like gold! Go figure.


A card I made last week, for my Beloved Hubby, as last Friday was our 5th Wedding Anniversary.
The hearts are a Visible Image stamp, the one stamped and heat embossed in silver also had a little silver glitter added. The words are a stamp from Inkylicious. I added various red shades with a colour duster brush, and by swirling a darker red over the hearts, I achieved a nice shadow effect.

 I managed to pick up a chest infection last week- started Wednesday with a bit of a sore throat, that had gone Thursday, and it felt like I was getting a stinking cold, or flu. Unfortunately, that really went downhill on Thursday night, and I ended up having a couple of asthma attacks in the night. Never, ever had one before, and I don't think I've ever known anything so scary. Ended up at the docs on Friday morning, he put me on a nebuliser in the surgery, as I was struggling to breathe, and I have antibiotics, a course of steroids I finished this morning, and an inhaler.So we didn't go anywhere over the weekend, Hubby had intended us to have a day around Stratford, but as I couldn't walk the length of the room without gasping for breath, that didn't happen.Seems to be clearing up now, fortunately, as next Tuesday I'm due to start my Chemo/radiotherapy. At least it happened before that, rather than during.Went for blood tests on Monday, ready for the start, and on Wednesday I have to go see the Occupational Health Nurse at work, prior to starting back, which I intend to do on the 27th, just doing half shifts for a couple of weeks to see how it goes. Just a case of trial and error, really, as I have no idea how I'm going to feel once the chemo/radio starts.I shall make adjustments if necessary- doing less, or even being signed off again, if its too much. We shall see. 


Finally, a cause for some celebration.My youngest son, Mikey and his girlfriend, KT announced they are engaged! Apparently, they got engaged on 14th August (our Birthday), but have only just told everyone.
This pic was taken when they were having a day around the Bull Ring Centre in Birmingham, Mikey is the one on the right- wonder who he gets his dress style from? The guy in the pic was some promo thing going on. And yes, that's the closest Mikey ever gets to smiling in a photo, lol.

 I would dearly love to go to the Hobbycrafts at the NEC in November, 6th -9th, which is in four weeks, but I shall wait till closer to make a definite decision on that, again depending how I feel. It may be a 'decide on the day' sort of thing.
And one final AAARRRGH! Slipknot and Korn have announced they will be touring in January, they will be in Birmingham at the end of January, (27th) and we can't book tickets!  My main surgery should be at the beginning of the new year,so have no idea what the date will be, or how I will be by the end of the month. But short of needing to drag a drip with me, I shall be doing my damnedest to get there, lol.

Wednesday, 8 October 2014

WOYWW #279

I've remembered what day of the week it is this week, and am getting my post written in plenty of time! As you will see from the posts below this, I have actually managed to get my a** in gear, and get started on the C Cards.So for this weeks WOYWW, courtesy of Our Julia at The Stamping Ground, here it is, in all its mess glory.
Assorted embossing pastes and glitters, stencils and stamps. Actually doing more with the stencils at the moment, I shall swap to the stamps when I get bored with trailing glitter everywhere.


Talking of Embossing pastes, as I mentioned in one of the previous posts, my Gold embossing paste, which I've probably had for a couple of years, seems to have lost its colour, its not gold out of the pot, and it doesn't dry gold either. By contrast, I spotted some Aileenes Glitter snow on the shelf, and thought I'd try some white embossing.
I'd already opened this jar, and had closed it again with sellotape, but it is absolutely perfect. I'd rather anticipated it would be dried up, but no. The reason I am so surprised, is that I had to look at some old scans of Christmas cards to find out when I last used it. 2004! The stuff is 10 years old, and as good as the day I bought it. Hows that for value?
 I have sprinkled the trees with crystal glitter, and I've also done some green ones, gold and silver.
 Forgot to take a picture of the silver ones.
Final bit for today, and I'm sure it will make you laugh as much as it did me. I received this in the post, from Deb Willis during last week. She has no idea how right she is, lol. I'm not even human till after my second coffee.

Tuesday, 7 October 2014

Still at the Christmas Cards.


Still plodding along here, and I'm swapping between two stencils at the moment. I moved over to doing some sparkly trees, using another Dreamweaver stencil, as I wanted to sprinkle them with glitter, and that meant I could use the 'off-gold' paste!


Both are done with the gold paste,and the glitter hides it nicely.


I've also done some white and silver ones.


I shall be adding some acrylic flat back gems as 'decorations' eventually.


 I'd swapped to doing the trees, as I was having trouble getting the NOEL stencil to come out cleanly. I kept getting paste go under one edge of the 'L'.


Anyway, I went back to it after a while, and tried again. I discovered the trick to this particular stencil is to drag the paste down from the top, rather than spreading across the stencil from left to right/right to left.


 Once I figured that out, it went much better. I also decided to leave the glittering of the snowflake till after the paste had dried, and go back to that bit. As you can see, no nasty smudged line anymore.


When the paste was dry, and I left them overnight by the way, I lay the stencil back over the design, and using a small piece of Cut'n'Dry foam, patted a little Flitterglue over the snowflake.  Removed the stencil and sprinkled the glitter over it.
This made it much easier to apply, without having to be so careful about it sticking to the edges of the letters either side.


I've also done some white, using the Aileenes Glitter Snow paste, crystal glitter and silver glitter again for the snowflake. These were easy to glitter all in one, as I did the crystal glitter first, then the silver.


An End of an era

An end of an era

I write this with a broken heart, that only time can heal My beautiful, wonderful wifelet Shaz (Silverwolf) passed away peacefully in the ea...