 So, I appear to be getting ahead of myself this year. Christmas Cards. In January. And no, they are not late for last year! I had a thought that perhaps I get so fed up with making Christmas cards because I tend to use 2 designs every year, One for family and close friends, and a smaller one for work colleagues and acquaintances. I nearly always wait until the NEC Hobbycrafts in November, in case I find a design or stamp I really like. Despite me having a ludicrous number of Christmas stamps.And saying every year I'm not going to buy any more. Yeah, right.
I'm in to January and the Christmas stuff is still out, and armed with my plan to make 4 or 6 maximum of any design, it seems to be working. In this last week, I've made a total of 18 cards, which I will blog over the next few days. First ones up to be blogged are the first set of cards made with some Visible Image stamps. Tomorrow I'll blog the second set.
The hardest part of these cards has been getting a photo that showed the sparkle from the Glamour Dust!

 I will say right at the start that the Christmas Words stamp AND the Snowy Scene stamp are now discontinued, but there are many similar types of stamp to be found.
The card bases are the pre-scored type available from a number of places, the only issue I had with them is that the label says they are 7"x7". As you will see later, it became clear that this is not the case.
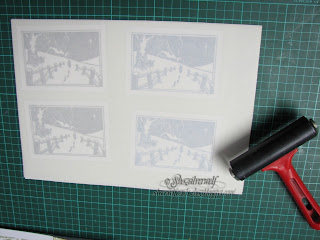
My first step was stamping the Snowy Scene onto White Pearl card. I used Versafine Ink in Onyx Black and Majestic Blue, stamping 2 of each. Then I laid over them a sheet of Double Sided Adhesive , from Stix2. I used an old brayer I keep for this sort of thing to make sure it was stuck down well with no air pockets.
Tip here: When you come to put down your adhesive sheet, DO NOT peel the covering layer off completely. Just peel it back an inch or so, and stick that edge to the edge of your card. Then slowly pull back the backing, smoothing it down as you go.
 Now you have your adhesive sheet down, cut the images down to size, either with a knife & ruler, or your cutting system. This way you only put Glamour Dust on your image, and not waste it on scrap you will cut off and throw.
Next,peel off the cover sheet on your image, place on a sheet of scrap paper, and sprinkle with Glamour Dust. I advise burnishing well with your fingers, to make sure the image is covered, and also that when you tip away the excess, what is left on the image will not shed.
Now I have all four images trimmed and coated with Glamour Dust,I matt them onto corresponding colour card and they get put to one side whilst I make the Christmas Words backing.

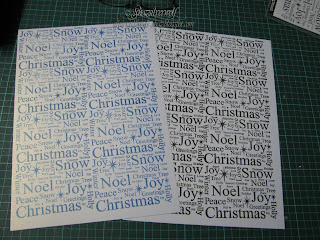
Using the same Versafine Inkpads, and two more sheets of Pearl card, I stamp up the backgrounds. No Stamp positioner needed for this step, it's easy to do by eye with a clear stamp. If I was using a Rubber stamp, a Stamp Positioner may be a good idea, to make sure you don't leave any gaps.
Two sheets finished, and before attempting any trimming/cutting, give it a blast with your heat gun, as the Versafine takes a while to dry on the Pearlescent card, so it smudges easily. Guess how I figured that one out?
My next step was to cut the background down to size, and believing my card bases to be 7"x7", I cut 4 of each colour in 3 1/2" squares.Then I ran around the edges with the corresponding ink pad.
As you can see, my pieces didn't fit.The corners at the centre should have just butted up to each other, not overlapped. So I had to cut a little off one corner to keep it flat.
Good job I tried out a 'dry fit' first.
I double checked my measuring, and yes my pieces were the right size. Checked the packaging on the card pack, and yes, 7"x7".

So I measured the actual card. Not 7"x7" at all it turns out. 6 3/4" square it seems.
Which is why my pieces wouldn't fit. I would have been really annoyed if I hadn't been covering up the centre with the focal image.
I assume that the cards have been subjected to conversion to metric sizing, and the packaging doesn't reflect that, as when measured with a metric ruler, they are 170mm.
Anyway, back to the cards. All four have the words background stuck down with double sided tape.The focal image is added with foam pads, to raise it slightly. I stamped the Merry Christmas greeting in the lower right corner in matching ink. This greeting by the way, is usually all on one line, but I needed it to have the Merry above the Christmas to fit, so I just snipped between the two words.I could have done it by masking off the word I didn't want with tape, but this way was quicker and easier. Final addition, just for balance, were a couple of snowflakes from the Creative Expressions Sue Wilson Snowflakes set of dies.I stuck these down with a Zig Glue pen, and lay them down with an acrylic block on top to make sure they stuck.
So that's my first four cards completed!
Card Recipe:
Visible Image stamps, Merry Christmas, Snowy Scene and Christmas Words
Card base, 7x7.
3 sheets of pearlescent card.
Versafine in Black and Majestic Blue
Pieces of black & blue cardstock to matt image onto
Glamour Dust
Stix2 adhesive sheet
Sue Wilson Snowflake die set.
Double sided tape and foam pads.


