 Here are some of the backgrounds I stencilled, using a brayer and
Gelli plate, with inks. I take no credit for the technique, I watched
one of Barbara Grays videos, and this was her technique. HERE is the link to the You Tube video if you want to check it out.
Here are some of the backgrounds I stencilled, using a brayer and
Gelli plate, with inks. I take no credit for the technique, I watched
one of Barbara Grays videos, and this was her technique. HERE is the link to the You Tube video if you want to check it out.I had no plans to buy a Gelli plate, this one is part of the craft stash that was gifted to me. Everything I'd seen up to now had been using paints, and that really hadn't grabbed me. This one with inks though looked more my thing.
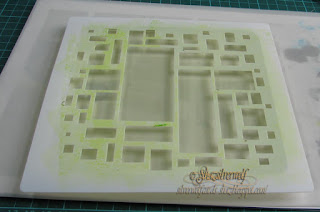
Barbaras technique is to lay your chosen stencil on top of the Gelli plate, then dab your ink pad straight onto it.
Using Distress Inks here, as they are nice and wet, and they are what she used. This one on the right was using Candied Apple and Carved Pumpkin.
Next, take your Speedball brayer, and spread the ink out evenly over the stencil.
By the way, this stencil with the oblong shapes is called Abstract 3, by Clarity. The one with the squares is called Abstract Squares 2.
At this stage, you really can't see much.
Now peel off your stencil, and put to one side. Take a sheet of cardstock- Barbara produces a 7"x7" pack especially for this, and it's very good too- and lay it down over the Gelli plate.
I had some on order, so used the plain back of some pearl card for now.
Smooth out over the back of the cardstock with a reasonable amount of pressure, and trying to make sure you cover the whole of the sheet.
 Peel off your cardstock to reveal the print.
You can see I missed a spot or two, where I didn't press very well.
Now for 'Spot the (unintended) mistake'!
I repeated the inking, after cleaning my stencil, lay the cardstock down- and then realised I'd forgotten to remove the stencil. I actually only realised when I took the picture. Good job the cardstock is double sided.
This time I dabbed Cracked Pistachio and Wild Honey.
I think this one was Wilted Violet and Mermaid Lagoon.
This time around, I added a Moon mask below the main stencil. This 3 colour one didn't work out- guess who forgot to remove the stencil again?
But these three did.
I also tried with another stencil- Jo's Bubbles.I have a feeling those are going to work well with some Lavinia stamps of fairies.
All in all I think I love this technique. It's easy to get a wide variety of backgrounds from it. I think next I may try brayering directly onto the stencil and use some of the Adirondack inks.


