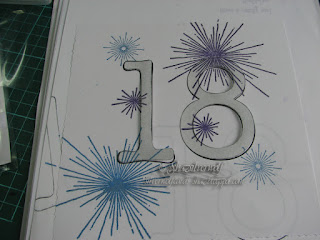
The main panel was cut with my Silhouette Portrait 2, using a file I downloaded from a forum called UKScrappers. It's a free to join forum, where you can always get help & advice about using your machine, and once you have been a member for a month, you have access- for personal use only- to the cutting files uploaded by members.
The front panel was cut from some glitter card. It's not totally glittered, just lightly sprinkled into the background card, then this was matted onto silver glitter card, then another piece of the same black glitter card as the panel. All mounted onto a 7" square card blank.
The 18 key added at the bottom is one of the plastic ones you can buy to decorate cakes with, but are great as an embellishment on cards. I found them in gold and silver colours, and there are ones for 21, weddings congrats etc.
For the insert, I jazzed that up a little.
The numbers are from a set by Dovecraft, and this exact set isn't available now, but an almost identical one is. They've just changed the font slightly. I also cut the numbers from a post-it mask, so I could overstamp.
To do the overstamping, I used two sets, this one from Visible Image, called Rays of light. This is one of the original packaging, it's still available in the new range, but comes with more stamps now.
This is one of the 3 Stampin Up stamps I own, lol. No idea if it's still available though. It's called 'It's a Celebration.'
For the numbers and greeting, I used Versafine Clair Nocturne.
I masked off the numbers, then overstamped with the 'firework' stamps using Metallic Blue & Purple inks from Encore, then heat setting with Crystal Embossing Powder.
When I stamped the sentiment, I realised the stamp was badly made and the 'Happy' part of the sentiment was not straight! I resorted to a scalpel to separate the two parts of the sentiment, and cut a new sheet for the card.
As I have other Happy Birthday stamps that are 2 parters, I'm not unhappy to have another that I can mix and match size/fonts etc.
A bit of surgery, and I had an acceptable impression.
The top image is after I split them, the bottom one is the wonky before image.
I gave this side the same treatment with the firework stamps, just remembering in time to leave room to write in it!
Not sure if you can see here, but I've trimmed the 3 outer edges with a deckle blade on my trimmer, leaving the fold edge flat.
 Which I suddenly realised was a mistake, as it's a top fold card, so a retrim was in order!
And that's my finished card, received now by the Birthday Guy, our Grandson Mortimer. That's also the last of the Leo birthdays for this year, as his falls on the 23rd of August, Leos final day.


