A warm welcome to all my visitors,

Thank you for taking the time to come and look at my blog, I really do appreciate it. I would love you to leave me a comment, even if it’s just to say Hi. It means I can come visit you!

All my designs are original, so copyrighted to me. If I have been inspired by someone elses work, I have named them in the post, and where able, I have provided a link.

Please feel free to use my designs for inspiration, I just ask you to credit me, and provide a link back to my blog.

Thanks, Shaz XX

Monday, 11 November 2013

Fixing warped Cuttlebug plates!

I take no credit for this discovery, a lady posted this on Pinterest HERE.Like any of us, I hate having to spend money on 'consumables', and new 'bug plates are not cheap, are they? As one of my 'B' plates was quite warped, and full of bits of paper stuck in the cutting marks, I thought I'd give it a try.
This was my 'B' plate before:
I don't think the bend in the plate shows up at all, but it was quite bent, despite keep flipping it when I used it.

What she did was wrap it in tinfoil, put it on a baking tray, put some weight on top of it, and then cooked it at 170C,325, or gas mark 3, for half an hour.


So I wrapped it up, and I used a good quality thick foil for it,and put it on  a tray, with 2  pyrex dishes and a stone lasagne dish on top.

She doesn't say if she had a fan assisted oven, so to be on the safe side, I knocked 10 minutes off the cooking time. When it came out, I left it to cool, then unwrapped it. The result was pretty flat, although the heat had got to a couple of the corners.
 So I wrapped it in a second coat of foil, and as I was about to cook Toad in the Hole for dinner, I waited till that had finished, then put the tray back in the oven after I had turned it off, and just used the residual heat of the oven.


And this is my 'B' plate now- nice and flat, and all the bits of paper have dropped out.
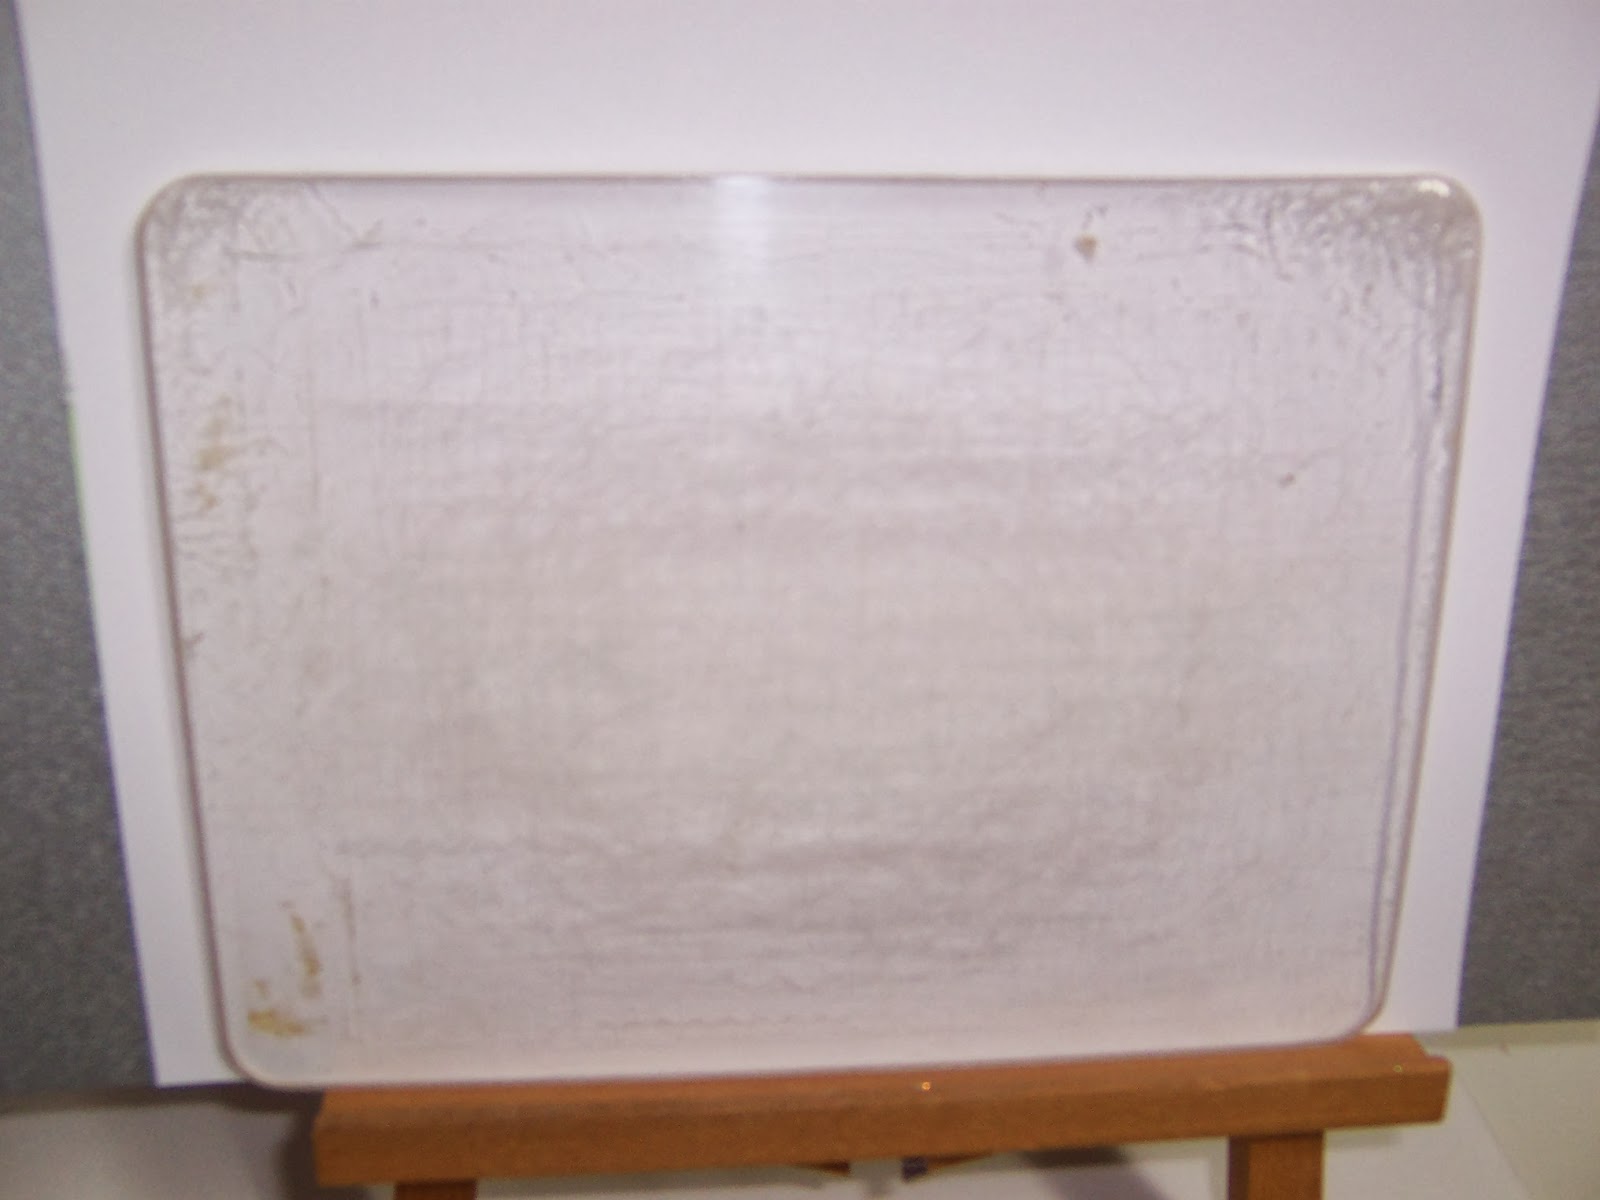

Bit easier to see against a white background- you can see the top two corners felt the heat a little too much. I'd recommend putting two tin-foil coats on it, more if its a cheaper thin foil, (which is what I normally buy from Poundland, lol, only got the Bacofoil 'cos Tesco had it going cheap!) and maybe some extra on the corners too. But it really does work! Makes them nice and flat again, and pops out all the paper. You still have the cutting marks, but that doesn't affect how they cut.


Before & After


Wednesday, 6 November 2013

WOYWW 231

Goood Morning everyone! I swear someone is pinching the days between Wednesdays- it goes so fast. Head over to the Head Desker, Julia at The Stamping Ground, click on Mr Linky and come join us, for the most fun you can have without the aid of alcohol, lol.
Nearly done on the C-cards, I'll blog them in the next day or two. So, my show & tell for this week, is a couple of (possibly) usefultips I came up with while making them.
My first thought for the sentiments was to matt them onto little banners, although I dropped that plan afterwards. But  while I was planning to do it, I wanted a quick way to cut all the strips into pointy banner shapes. I'd seen a tutorial link on Pinterest using a heart punch, but my heart punch has a slightly wonky shaped heart, and wouldn't work. Rooting about in the punch drawer. I spotted a square punch.
So I wondered if I could do it with that. And you can.


 By placing the strip into the punch like in the picture below,  you get quick, neat banners.


If you want single points, just post it into one of the corners, like so:


So thats my exciting discovery for this week, :).


Now a little bit of a (cheap) enabler. You know that expensive copper tape for edging microscope slides, dominoes etc? Retails at about a fiver a roll, I believe? Well, I was in Poundland a few weeks ago, and spotted this stuff, which I originally bought to put around my planters, to keep the slugs at bay.


 Copper barrier tape, 2 metres, (thats 6ft 6" in proper measurements) for a quid. Good job I bought a couple, 'cos this one won't be going in the garden!

 I had a couple of replies last week from WOYWWers going to the NEC on Saturday, so I'm looking forward to meeting up with them at some point during the day.You can be sure there'll be pictures next week.
 Finally, to brighten what is bound to be a wet & icky day, at least here in the UK, a bit of humour.
Have a great day!


Wednesday, 30 October 2013

WOYWW 230

 Well here we are again, the regular stalk around the workdesks of the world. New to this? Pop over to Auntie Julia's, at The Stamping Ground, click on Mr Linky and join the fun. And great fun it is too.
 Not a lot happening on mine this week, still plodding along with the C-Cards,and I've stuck all the acrylic gems (finally, they took forever) onto my stamped image,now I've had to order some plain white card to make the bases.
 All sitting in a pile, looking like a load of sparkly beer mats, lol.
 Various odds & ends elsewhere, my Bamboo plant( must give it a drink), offcuts of card etc.


The new stamps at the front I couldn't resist-who in their right mind sends me an e-mail about stamps that contain a skull, and think I might not be tempted?


I really did not 'get' the whole moustache thing- they probably will never get used, but the skull & top hat? Sold, to this lady. From Stamp Addicts, by the way.
So thats my selection for you this week- and as for the cocktail stirrers, the only thing I've made with them so far is another couple of Mohito's, rofl.

 Oh an early heads up- next weekend, 7th to 10th November is the Hobbycrafts show at the NEC, Birmingham. I will be going along on Saturday 9th, so if anyone else is visiting that day and would like to meet up & maybe have a coffee & chat, let me know. I do Saturday rather than Friday, as the NEC is a 20 minute drive from where we live to get there, and at least an hour on a Friday afternoon for Hubby to come & pick me up. M42 traffic is horrendous then.


Wednesday, 23 October 2013

WOYWW 229- The C- cards

Well, you finally shamed me into it! seeing so many people working on their Christmas cards over the last couple of weeks has forced me into starting. Bit of a struggle, I need to feel Christmasy to enjoy doing them, and I do NOT feel christmasy before the second week of December, at the very earliest, lol. Anyway, this is my desk as of Tuesday night:


 My stamped & embossed images from the previous post, cut out and corner chomped. Really like that tool, made a much better job of the corners than my normal corner rounder punch.


This is where I am now, matted onto silver card, chomped again, and some clear acrylic flatback gems added with Pinflair Glue Gel. I think I will be adding a ribbon bow, over the ribbon on the image, just to finish them off.


One more thing on this weeks desk, one of those 'I know I'll find a use for it' type of things:
We went out for an Anniversary meal,and these stirrers arrived in my cocktails! ( Mojito's and Long Island Iced Tea, as you ask),- not all on the same night I hasten to add- we went out again last weekend. They had to come home with me- be honest, would you have left them behind? So, get yourselves over to our Head of Desks, Julia, at The Stamping Ground, and join the fun.

Saturday, 19 October 2013

A new Christmas stamp, and playing with embossing powders....

Well, I saw this Penny Black stamp used for Christmas cards, and thought it would make a whole bunch of nice, easy batch cards.
Its called Adornment, a wood mounted stamp, and I got mine from Handy Hippo.
 I started stamping in Silver Encore Pigment ink, and using silver detail embossing powder (Stampendous). The image in the bottom left, you can see some ink around the print- thats one thing I dislike about Pigment pads, because they are foam, they tend to deposit ink where you don't want it! I forgot to clean around the outside of the stamp with a cotton bud before I stamped this one. One good thing with this image, its very forgiving of stray bits of embossing powder, if you miss any flecks.Although my little embossing bag did do a very good job of keeping it clear.


They look ok, but a little plain. So out came some powders with a bit of sparkle.


The first one I tried was Stampendous Stardust, and I really like how this one came out. I still stamped in the Silver Embossing ink, by the way.


              This one still showed up silver, but with a lovely sparkle to it.


 I had a few more to try out, and the next up was a WOW embossing powder, Snow Sparkle.


Its actually quite pretty, but the white does hide the silver ink.


Next to try were a couple more Stampendous powders, Crystal and Rainbow Crystal.


I like them, but not as much as the Stardust. So I will be sticking with that one.


It always surprises me how different various powders can make an image look.
Stardust embossing powder
silver detail powder

An End of an era

An end of an era

I write this with a broken heart, that only time can heal My beautiful, wonderful wifelet Shaz (Silverwolf) passed away peacefully in the ea...