

Be warned, if you like dies, the Aliexpress one may cause you to visit, & spend money! But they are ridiculously cheap, as you'll see.
So, back to the Hobbycrafts show at the NEC.
Here's a long shot- yes, some stash was bought. I blame the stallholders, they just have so many fab inspiration pieces on show, and far too many goodies.


Talking of inspiration, I bought some pots of gilding wax, due to these samples.
I also bought 3 embossing folders(!) but they were 3 for 2, and it gave me great ideas to use with my existing ones too. There are some more gorgeous examples in my post.
 These came from Pink Frog Crafts, as did another purchase, some glitter card. Now, for those who like glitter, but not the shedding, this glitter card is totally non shed, and super smooth. And you can do this with it:Yes, colour it with markers and even stamp on it. Cool, huh?
 He gave me a small sample to play with when I got home, to try it out before committing to a bigger piece, and I coloured mine with Promarkers,(right) and even Distress Oxides- Lucky Clover, another buy on Saturday. And it still has a glitter look to it.
I bought a couple of dies- couldn't resist the Polar Bear & cub, and a lovely Snowflake Border.
Heather Marshall made a comment on how to store dies on the Aliexpress post, so I thought I'd quickly share my method here.
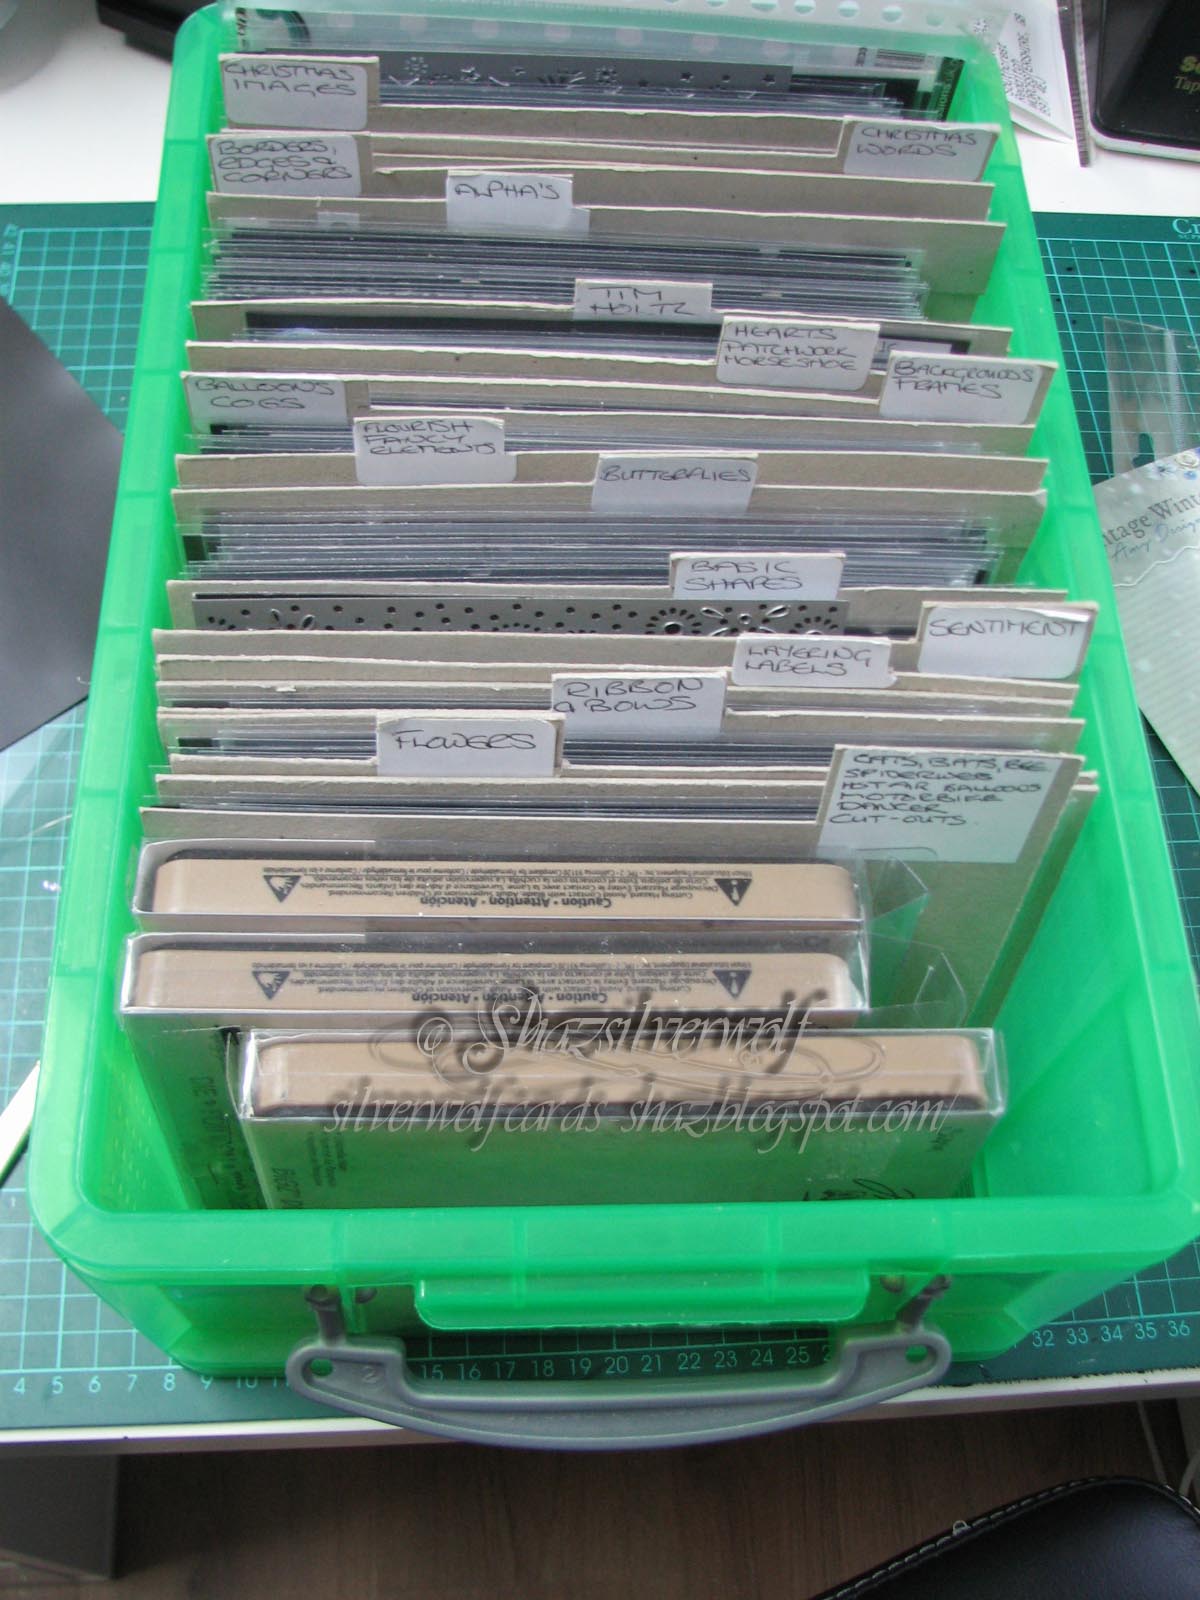
Mine are all stored in an A4 Really Useful Box, with homemade dividers, labelled with the contents of that section.The 3 Bigz dies at the front just keep them upright. I used chipboard type card- the sort on the backs of notepads etc.
I buy A4 magnetic sheets off Amazon or E-Bay- whoever has them cheapest, and cut them down to fit the Large Avery Elle pockets.
How many dies to a pocket depends entirely on die size. Some have half a dozen, some only one.

I did start out putting them on A5 magnetic sheets stored in A5 binders, but those quickly got heavy and unwieldy.
I'm liking this system, it's easy to flick through and find what I want, and I don't have dies dropping off sheets in folders! The box stays on the table I use for die cutting, so I don't have to lift it either.
Right, I think I'm done, just finish off with this- you can tell how much better I feel, my endpost funny is back!


