A warm welcome to all my visitors,

Thank you for taking the time to come and look at my blog, I really do appreciate it. I would love you to leave me a comment, even if it’s just to say Hi. It means I can come visit you!

All my designs are original, so copyrighted to me. If I have been inspired by someone elses work, I have named them in the post, and where able, I have provided a link.

Please feel free to use my designs for inspiration, I just ask you to credit me, and provide a link back to my blog.

Thanks, Shaz XX

Wednesday, 1 May 2019

WOYWW#517-The Getting there slowly Edition

Yep, slowly but surely, those stencil backgrounds from last week are getting there. Time, as always on a Wednesday to reveal our desks in all their glory via Julia over at The Stamping Ground.
 Dang, can you believe we're at the start of the fifth month? Already! Just where is the time going?

I've started off with Florals again, then switched to Butterflies, Dragonflies and other suitable stamps.

I did have some difficulties, many of my butterfly & dragonfly stamps are either too big or too small for this, which is why I went looking for other suitable stamps.
 

The blue squares uses a set of stamps from Inkwell Stamps called Pebble People.


The cats on the green one are also from them, and the cats on the brown squares are from Hobby Art.
An assortment of Lavinia Stamps in the purple squares.


Flowers are much easier to do, as using a stamp platform, I just had to position the stamp in the first spot in a corner, then just rotate the card. Move it to a centre spot, then rotate again. Doesn't matter that the flower gets stamped in different orientations. However, that makes a huge difference with all the other stamps, so they were either placed in a new spot each time, or I did them by hand on a block.


The green one with the cats is pretty much finished, as I had a bit of a disaster that I had to fix.
As you can see, bottom left, the stamp slipped on the stencil, as I'd put it back in place so the images stayed within the coloured spot. Going to cut a circle from some copy paper for next time!
 Fortunately, I had two sheets with green circles, so I just stamped 4 cats again, die cut the circles, added some fun foam circles to the back, and covered the four corners.

 
 These are all the flowers, butterflies and dragonflies cut out to add to the stamped bases.


Doug bought some stuff from Amazon the other day, and had a look at the Daily Deals while he was at it. I spotted a Yupo pad, A4 size, at a really good price, and Doug pointed out a set of make up brushes, also really cheap. They are lovely soft brushes, and will work well I think for ink blending.

The reason for the Yupo- I had some fun the other day with my neglected Alcohol inks and some Yupo, and adding foil to them.


Not sure if the pics will show it, but basically where the ink creates an edge as it dries, that edge stays tacky longer than the background itself, and foil will adhere to it. It's not a precise thing, in that you can't control how much, or how little attaches, but you may get an idea from these two below.
 You just have to give it a minute or so for the main part to dry, otherwise you get far too much sticking to it.


 This one was a disaster, as I didn't let it dry enough.


Way too much foil got attached.


This one though came out really well. I used a holographic foil, and it sparkles like tiny crystals.


Well thats me done, just leaves us with......And Finally........


I reckon most of you are with me, right?


Last thing- I will be swapping in the Birthday ATC swap, if you'd like to swap with me, let me know in the comments, and we'll swap addys.

Wednesday, 24 April 2019

WOYWW #516- The I'm Back Edition

Yes, back again, and only just! These bank holidays get very confusing, today has just felt like a Sunday, or maybe Monday, so I almost missed it. MIA last week, as we had a concert on Tuesday night booked in London, which meant driving down on Tuesday afternoon, and then a stopover, so hadn't done a post, or took my tablet with me. However, since we've been back I've been making some more stencil backgrounds to replicate some cards I made a while ago.
You probably remember seeing these, done with Honey Doo floral stamps.
 Well, it crossed my mind that as well as doing florals, I could use Butterfly/Dragonfly stamps too, and I'm sure if I have a good look, I can find some other stamps that would work for this.


 Made a number of them, and although the camera doesn't really show it well, the two blue ones and two red ones do use different colours. All Distress Inks.


These are also Distress inks.


These have a couple of Distress Inks, and some Adirondacks too.


Then I thought it might work well with a square stencil too.


And while I was at it, I pulled out another couple of stencils too. These are mainly Distress Oxides. I'm thinking there may be fairies involved with these!

  The stencils are all from Clarity, as is the cardstock, which is their Stencil Card, and perfectly sized at 7" for the stencils.

Tickets have arrived for the Happy Stampers Festival in May, so looking forward to that, and seeing one or two WOYWWers there!


I was looking at my stats the other day, and discovered that my first blog post was on April 20th, 2010. So 9 years of blogging!


And so, I'm done. Which brings us to....And Finally......


Yep, I know that well. And the reverse resultant panic when what I thought was a hair on my arm, actually turned out to be a humongous spider!

Sunday, 14 April 2019

Christmas Card Club Challenge #8- Christmas or Winter Scene.

So we're back for another Christmas Card Club Challenge, and this week it's my pleasure to have chosen the theme, which is a Christmas/Winter Scene, with the alternative of Anything Goes, if the theme doesn't work for you.

I've got two cards for this week, both using the Stampendous Snowy Postcard stamp.

In each case I stamped the image twice, then cut the centre oval out of the second image so I could pop it up with Foam Tape.
 Images were stamped with Archival Cobalt for the blue, and Versafine Sepia for the brown.
I worked through a range of blue DI's for the first one, and used a Twinkling H2O blue for the oval frame. I coloured the holly leaves with green H2O's, and Liquid Pearls in Garnet for the berries.
 The Paper covering the card fronts is from an old Papermania pad, and the embossed piece was done with an Appleblossom All Occasion  Merry Christmas folder.

The Sepia one used various Brown DI's, and a brown H2O,  otherwise all was the same. In both cases, I added some clear embossing ink to the roofs and ground, then sprinkled with Stampendous Sparkle Puff powder. It doesn't puff up as much as the Inkylicious Puffy Stuff, but it's perfect for when you only want a little dimension.

Friday, 12 April 2019

Glittered Medallion cards

 Well, this is the first half of the Glittered Medallions that I've been working on.
 One beauty of them is they can be used for almost any occasion, and because there is so much detail in the stamping and glittering, you need do very little to the card base.
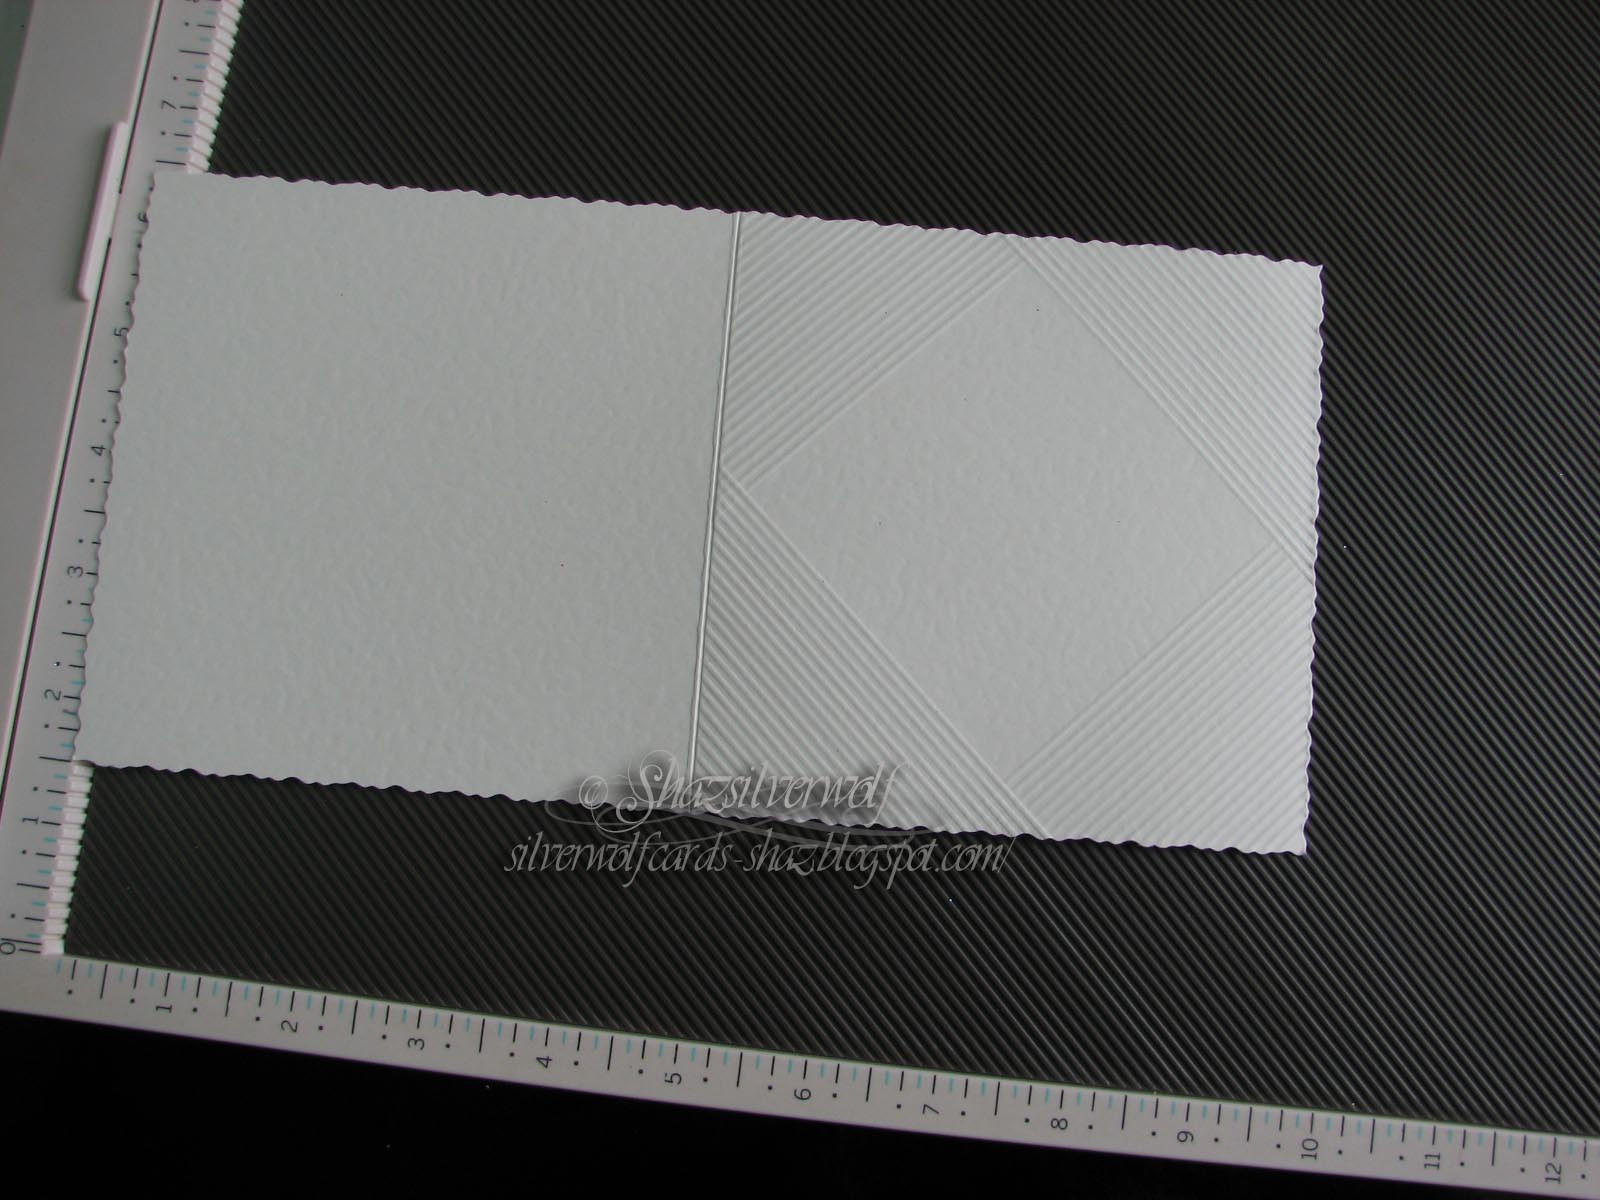
 In all of these, the only thing added was some embossed lines using a scoreboard.

I'll add some close up pictures further on, so you can see what was added to each.


These three had more embossing added, but still simply done with a scoreboard.


This is the stamp I was using, and I stamped it onto OHP film, first off using Staz-on, and then I did a second batch with Archival Black to see how that did. It took longer to dry than Staz-on, but I was leaving them overnight anyway, and by next day they were fine.


 It's an old stamp, used to be wood mounted, probably bought about 15 years ago. The image stamps out to roughly 3" square, and the majority of the card bases are 5" square.
Looking back at a post from where I used them before, it's called Striped Jewel, as was by Hobby Art.


 Glue and glitter should be added to the back, and a few tips here.
 1.  First off, take your glue partly on to the lines in the section you are working on. It won't be seen from the front when you are done. It does have a slight tendency to shrinkage, and this help to prevent too many gaps.
2.  Next, when you add glitter, add plenty and give it a moment or two to sit and settle into the glue. That helps you get good coverage. If you tip it straight off, very little glitter will sink into the glue.

 3.  Also, don't add glue to too many areas before adding glitter. It won't dry, but it will form a skin, then the glitter won't sink in as well.
4.   It's best not to try and do the whole thing at once, you'll probably end up leaning on a glittered area while it's wet. Doing a couple of colours at a time, then leaving to dry is probably best.
5.  When each batch of glittering is dry, it helps to clean off any loose glitter before continuing. First time I did it, I tried a Swiffer cloth. DO NOT DO THAT!!!!  The glitter grabs fibres from the cloth, and that gets stuck in any glue you're adding next. Best solution I found was a small stiff brush, like a stencil brush or a toothbrush.

Give it a brush over, then flick it over the bin to get rid of any loose glitter left behind.

You can just toss this, or you can save it all into a pot. I've done that with lots of glitter leftovers from bags when I've bought it, so I added the brushings off to that.  You end up with a pot of  a totally unique mixed glitter. I actually used it on one or two of the medallions too.


It took a few days, but eventually they were all done.

 It's a good idea, by the way, to leave yourself a good margin of film all around your stamped piece to make it easier to move & handle when it's wet. Once they're completely finished and dry, then you can trim them down.


 I added a little interest to the base card with a scoreboard. To do these, I lightly marked out the square on the inside front of the card, then used a stylus & scoreboard to mark out the shape, making sure I was slightly larger than the design. When I was done, I erased the pencil lines inside the card. On the left it's just a simple square around the image. On the right, I added another score line from the corners of the image to the corners of the card.


  I've taken close ups of these so you can see what I did.


This is just a basic square around the focal image.


As the images are a symmetrical pattern, you can  turn it a quarter turn, and have it placed on end.


The pieces were added to the bases with some Pinflair Glue gel, I've found a silicone type glue works best for doing this.


I got a little fancier with these two, adding lots of diagonal lines in each of the four corners. I have a diagonal scoreboard, but you could do it with a straight line one, just taping your base in place on a diagonal on your board.


This one I did by starting with a square around the image, then added a line to each corner. Then I just filled in with straight score lines.


The lines add just enough interest to the card base, without fighting with the strong central image.


Finally adding a selection of sentiments to them, cut 3 times from a plain matching cardstock, then once from glitter cardstock to match, and layering up for some extra dimension.


 This is the diagonal scoreboard. I believe it was a Stampin Up product that was being discontinued when I bought it. I don't have an SU scoreboard, but by luck- or maybe they make it too- it fits a Martha Stewart board I was gifted.


Wednesday, 10 April 2019

WOYWW #514- The Return to Glitter Edition

Gooooood Morning People!!!!!!!! WOYWW speeds round again, and time to link and visit desks around the world in all their glory. Hosted by our lovely Julia over at The Stamping Ground as always.
 I have to take the picture from the side to get most of the desk in.
 Littered with the makings of cards from those glittered medallions.
 Front corner, a stack of pastel square card blanks. Do not ask how long I've had those, the memory doesn't go back that far.

 Next to them, some embossing folders, of which more later on.  A handful of cards mounted, needing sentiments on. To the back, a bunch with their sentiments, and next to that, a half dozen not mounted yet. You can see my little glue bottle next to the stack of finished cards. Still using those small bottles, and they are working great. Nice and soft to squeeze, and as yet- and it must be 6 months- I haven't had any issue with the fine nozzles blocking up. Just wipe them with a baby wipe, and make sure the nozzle is cleared with a pin before putting the lid on. An EBay purchase, £3.14 for 10.


I'm die cutting sentiments for these.


These will get added to cards after I've finished with the first lot.


 And so, on to the Enabler Extraordinaire Award, which this week goes to Kathryn, ( Frantzlady) who joins us via Instagram.
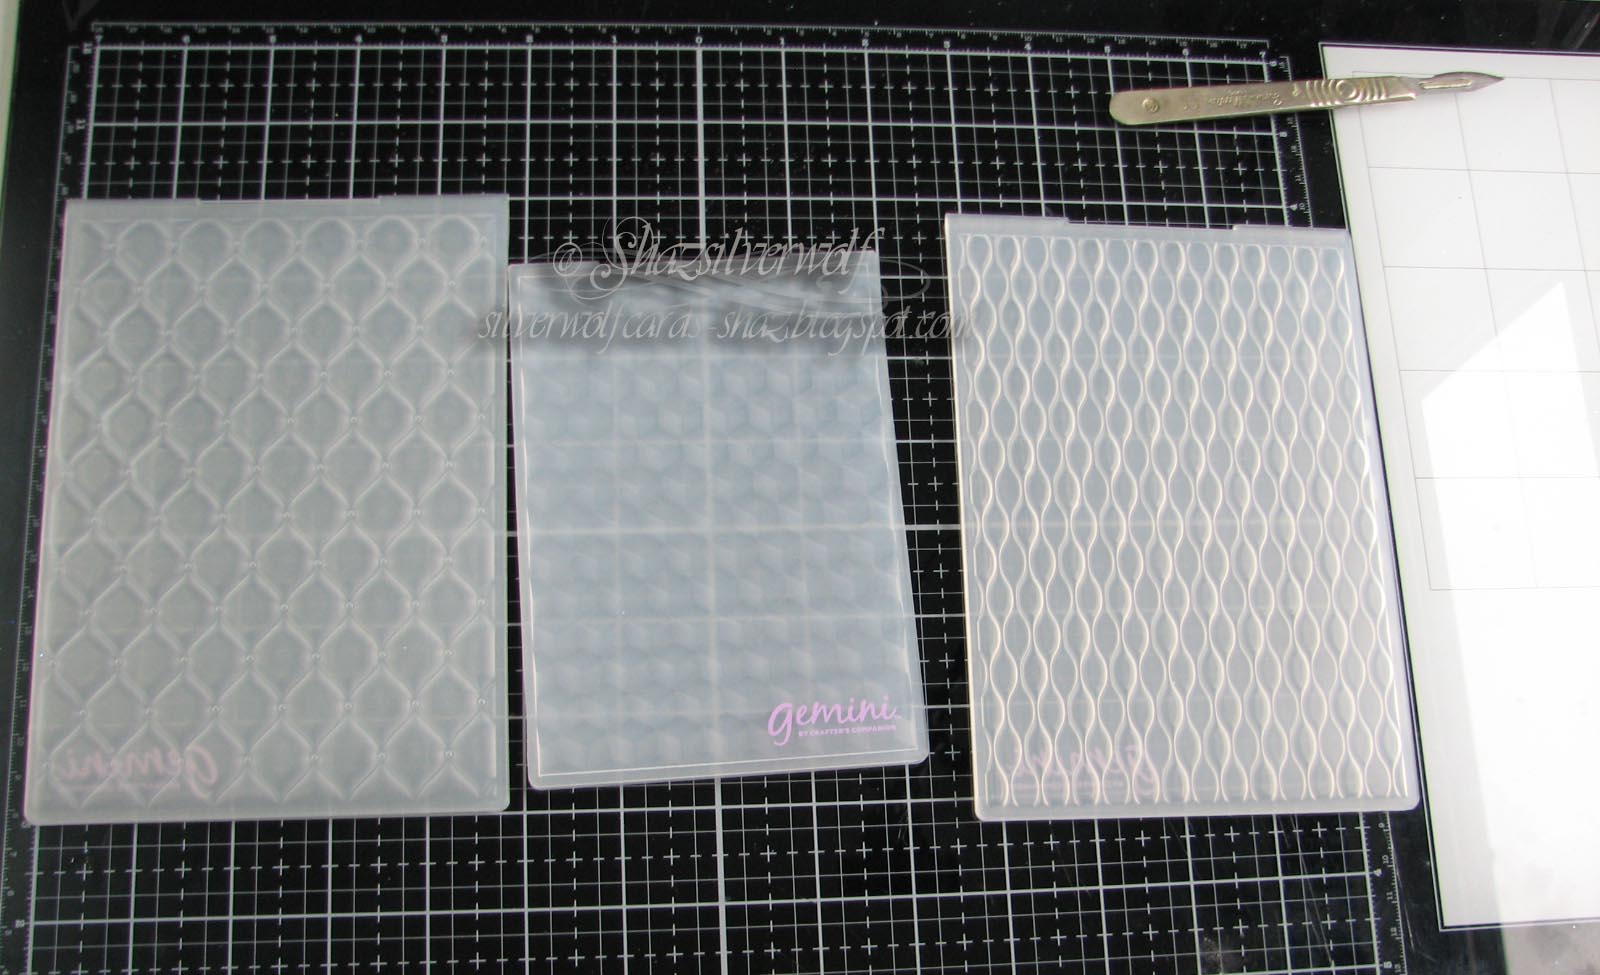
 Those embossing folders that were on my desk- 3D ones from Crafters Companion. Two are 5"x7", and one is 4" x 6". Kathryn had shown the one on the left, Studded Leather, in her post, and when I went looking for it, I also saw the other two. I did go to Crafters Companion for them, but had way too much trouble with their checkout process keep changing my payment method, so I went looking elsewhere. Which turned out to be a bonus, as I found them slightly cheaper at Craft Stash!.

 I've run them through using a white Pearl card, and they look fabulous. Had to figure out the right sandwich, as 3D ones are a bit thicker than normal folders, and it really does help to lightly mist the cardstock first. The top right I think still needs a slightly different recipe, as some of the card surface has split, but I have found that with the 3D ones, one recipe doesn't work for all.


Here they are individually, so you can see the texture. The folders are: Top Left, Studded Leather, Top Right, Seamless Waves, and bottom, Isometric Cube.

A few people asked me last week where I get my scalpel blades from- well the company is called Scalpels and Blades.
 They have a huge variety of blade shapes, my personal favourites are the Number 11 on the left, and the Number 6 on the right.  They also do a pack with a blade assortment, so you can try them out to see which you prefer. They come in Sterile or Non Sterile choices, and I only get the Non Sterile, which are the cheaper of the two. There are two handles available, a size 3 and a size 4, and you buy blades accordingly. If you already have a handle, the number should be stamped into one side of it. There is also a small blade remover, but I just use a small pair of jewellery pliers, and despite being reasonably clumsy, I've never cut myself yet! I have a small plastic tub that I've cut a slot in the lid, and I've been using that for my old blades for about 5 years, and it's not even close to full.
So, after all that, it just leaves.....And Finally......


Ha Ha Ha Ha....if I did that, I'd never get out of the house!!


Oh, and your countdown starts now! Did you realise it's the 10th Birthday Crop in 8 weeks?

An End of an era

An end of an era

I write this with a broken heart, that only time can heal My beautiful, wonderful wifelet Shaz (Silverwolf) passed away peacefully in the ea...