A warm welcome to all my visitors,

Thank you for taking the time to come and look at my blog, I really do appreciate it. I would love you to leave me a comment, even if it’s just to say Hi. It means I can come visit you!

All my designs are original, so copyrighted to me. If I have been inspired by someone elses work, I have named them in the post, and where able, I have provided a link.

Please feel free to use my designs for inspiration, I just ask you to credit me, and provide a link back to my blog.

Thanks, Shaz XX

Tuesday, 22 August 2017

Part Two- Hot foil, a laminator or an Iron.

This Butterfly was the last image I left yesterdays post with, and I think it's one that shows how stunning this process looks.Moving on with more images, again this is a photo heavy post, so be warned,lol.


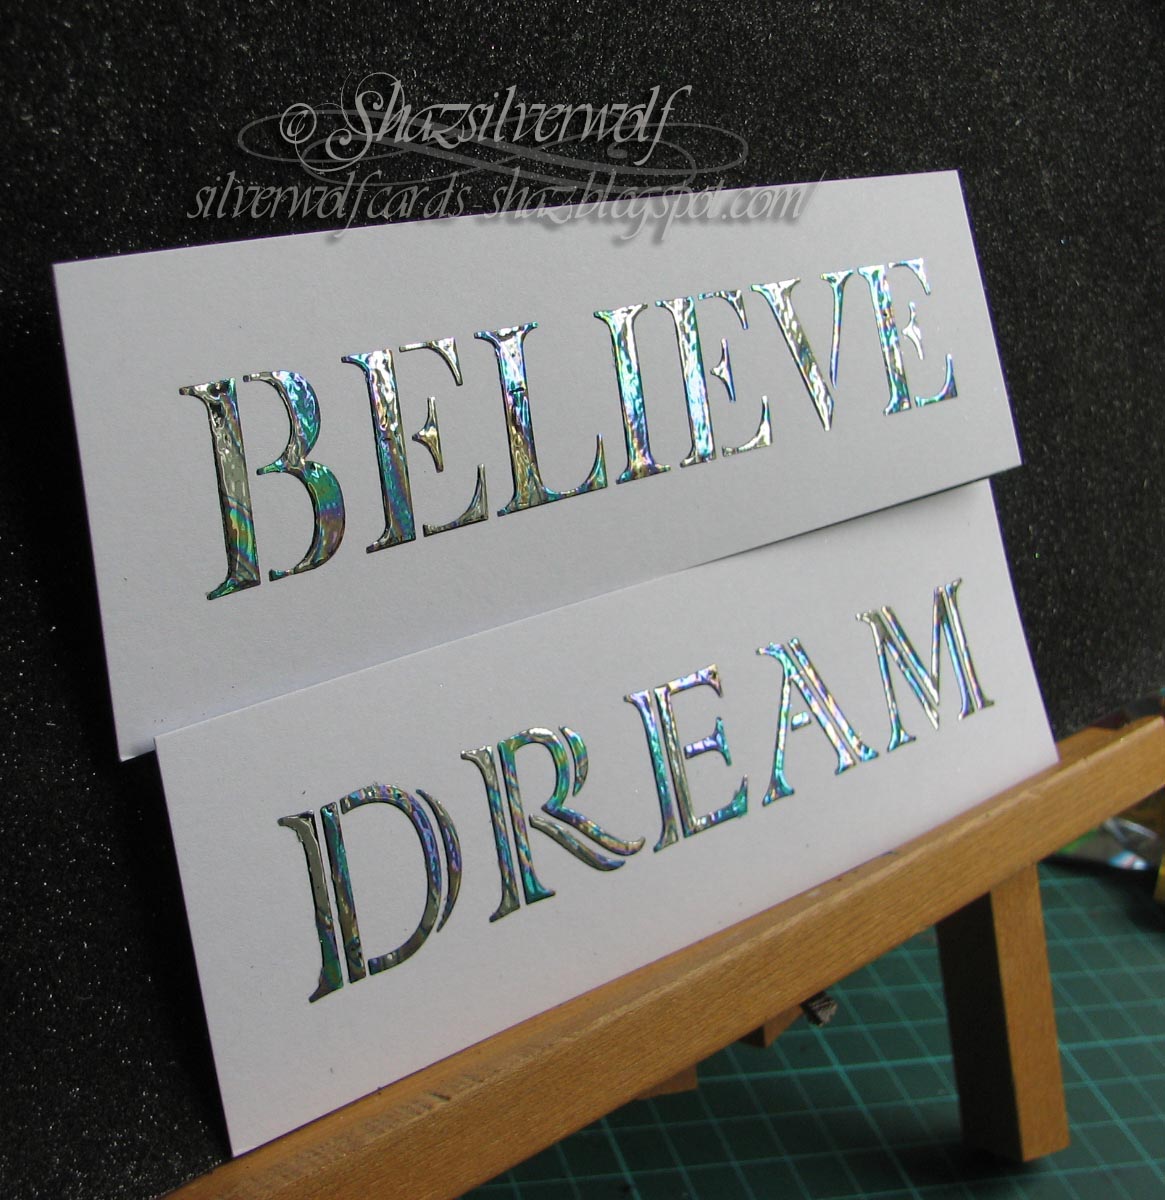
This butterfly panel, showing two views of how the colours change depending on the light source, was done with a Holographic foil.


This one used the Sunset Rainbow foil.


Back to a holographic foil for this one of two dragonflies.


I cut the base card to match the shape of the image, and it's covered in gold foil. I got this really cheaply from E-bay, from China. 50 A4 sheets for £2.49! and 29p shipping, lol.


This Steampunk dog has the same foil on it.


These are two new Sweet Poppy stencils, and I covered these with the Oil on Water (Marble) foil.


Now we come to the pieces I did with my iron. I'd wanted to have the stems green, and the flowers a different colour, and this was a bit of a fiddly process to be honest.


Requires some patience, and preferably the ability to hold your breath for long periods. It's a bit like working with Gilding Flakes, one small breath scatters it everywhere.

 I put the image with it's foil inside my folded paper, and placed that on top of an old tea towel I use for drying my stamps, on top of my glass mat. The Iron was set to Max, and I reckon I ironed it for about 20 seconds, maybe 30.

Turned out perfectly, as you can see. The flower heads look jewel like, almost as if they are covered in Acrylic gemstones,or sequins, but without the bulk.


 I did the same here, using a foil that came in blue strips for the flowers.
 I chose these pieces to Iron, as I thought there was more chance of the small pieces moving as I fed it through the laminator, and I wanted to see how well an Iron would work. So two birds, one stone.
 By the way, there is nothing special about my iron. I wasn't going to spend out for a 'Craft' iron, and intended buying a travel Iron to do craft stuff with. However, I couldn't find one anywhere, so I just bought the cheapest Iron either Tesco or Argos had, can't remember which I got it from.


So, if you don't have a laminator, but do have stencils & paste, then you can still do this technique easily.


Right, we're almost at the end now, this is the last piece.


This foil is called Tropical Sunset, and I'll list the foils and where I got them at the end.


So, I love how these turned out. Most I think need nothing more than a sentiment adding.
 I still have a few experiments I want to try. I want to see if this works with ordinary rub down transfer foil for one. And I also wonder if this will work with rubber stamps and a glue pad. I've never had much success with Glue Pads, they've never seemed to stick properly in the past, so it's worth a try. I'll try both of those with the iron, in case the laminator gets too hot for them.
 I also want to see if this works with Dreamweaver Stencil pastes, as I have a few of those in my drawer too.
 And I want to see what the result is with different colour pastes.


It seems to me I should have given the basic instructions somewhere, and I haven't.
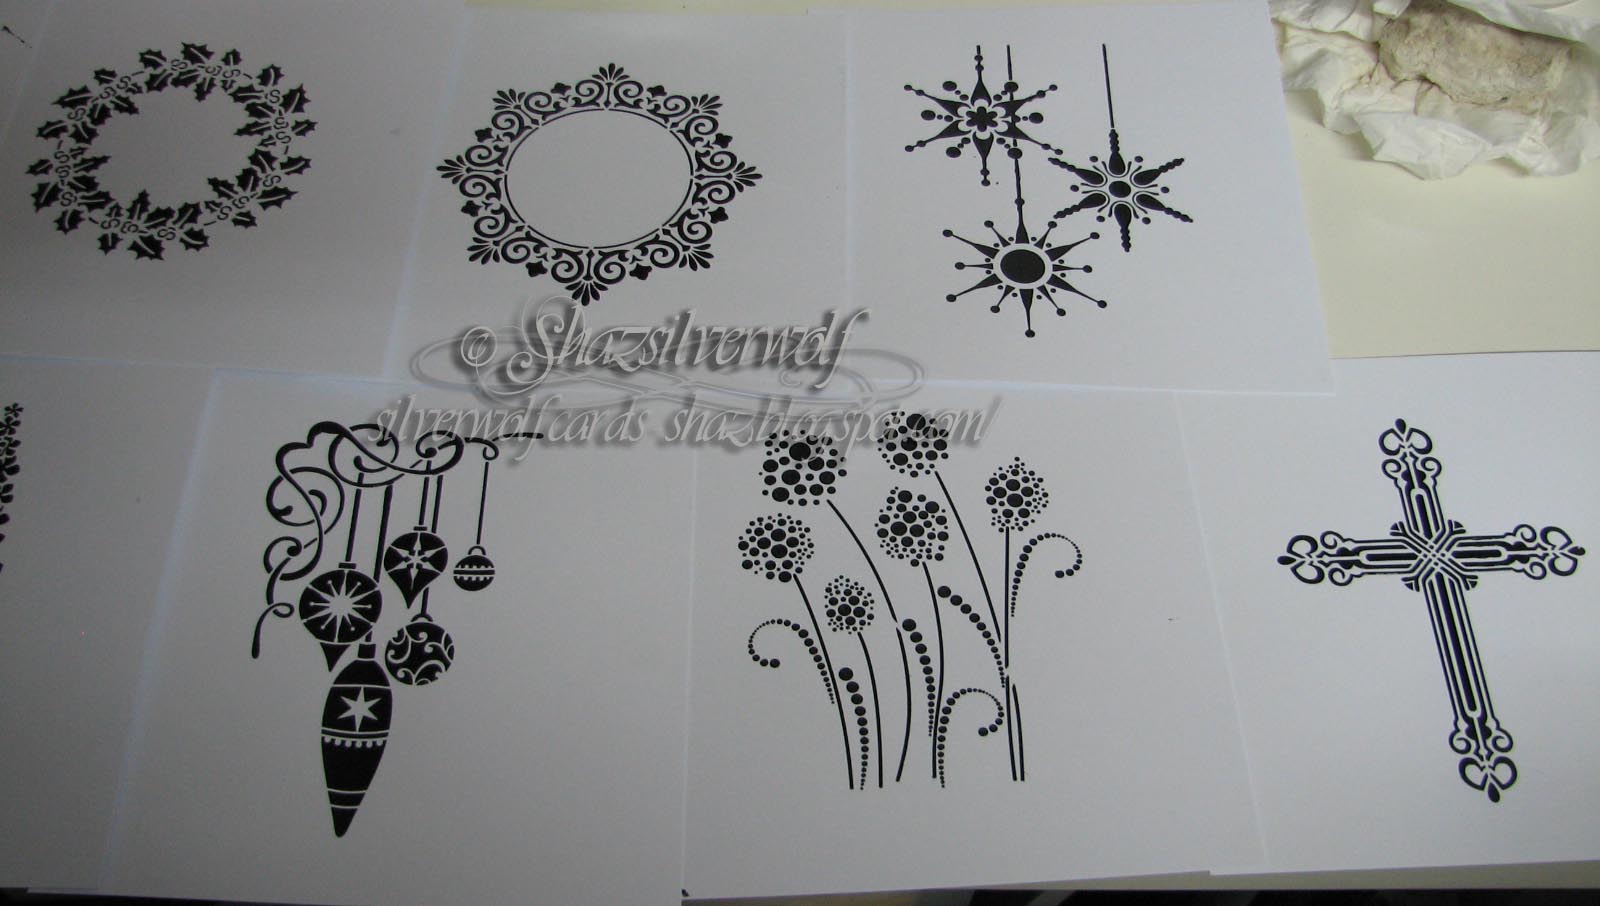
 You need to create your stencilled image, and Julie used Sweet Poppy Glossy Black Paste, which is what I used. I tried Glossy Bronze paste on one, and that seemed to work fine. Then leave the image to dry overnight, before adding the foil. And that's all there is to it.
 I love ideas that give me new ways to use stash, and this does that, as well as employing my laminator for more than just creating stamp storage sheets!
 I shall be trimming down the foil sheets I peeled off, as most have reasonably sized usable areas left, ideal for creating designs using more than one colour.


 Foils bought from Tonertex.:

Multi Coloured Assortment pack, which contains:  67 sheets 100mm x 100mm:
12 sheets Tropical Sunset
15 sheets Turquoise
12 sheets Slimline Rainbow
8 sheets Carnival
10 sheets Hologram Silver
10 sheets Hologram Gold
 I added to that Marble Foil and Seasparkle foil.


Foil bought from Patsy May Crafts: (on EBay)
Silver Mirror Pattern ( Holographic)

Gold Foil from E-Bay


A bit of advice on foils- when you are looking to buy them, you want TONER foils, NOT TODO foils.  I was ordering from Patsy May, and she was kind enough to take the time to advise me that the TODO foil I had ordered would not work with a laminator, apparently it's designed specifically for the TODO machine, and works with pressure & dies. It has a sort of adhesive on the back, so will stick completely to the card. So, as long as it says TONER foil, it's fine.


Monday, 21 August 2017

Hot Foil & a Laminator

Right then, finally I'm here with those images I was going to try through the laminator. Firstly, let me say that it was a project shared on Facebook, by a crafter called Julie Rose, who is a DT member for sweet Poppy Stencils. I've linked her blog to her name, and you can go see the fabulous project that really inspired me.
As you can see from the pictures, it worked really well.


The ones at the back look black in the photo, but the light wasn't shining on them. You will see further on just how great they look. I will warn you this post is VERY picture heavy- some projects have 2 or 3 pictures, so you could see the colours better.


This is all of the images I ran through the laminator, but I'll show them individually throughout the post.


I also tried achieving the effect using an ordinary iron, and that works perfectly too, so you can do this even without a laminator.


 If you do want one, you can get a cheap one for about £15- Amazon, Argos & Staples all have them around this price. You only need a basic A4 one.


I sandwiched my projects inside a folded piece of A4 printer paper. Then I discovered a couple were too big to be completely covered by that. I found I had an old A3 size sketchpad, I think from Poundland, so tore out a sheet of that, folded it and trimmed it down in width to fit the laminator.


 I will say that I think it's wise to feed the folded edge through first, so no risk of anything getting wrapped around the inner rollers. You do need to let your laminator get completely hot, so make sure the 'Ready' light is on before feeding anything through.


Okay, right here I'm going to put my hand up to being a bit dumb! I'd trimmed all my images down, and run them through the laminator with  different colours of foil, then set them aside to cool. I even did the ones with the iron too. Then I  took the first one, and began to peel off the foil.
It hadn't worked! None of the foil had stuck. Now, right at this moment, there are probably quite a few of you laughing at this picture. Me, I'm stumped. So I ran them through again. Still no good. So, I tried a Google search for some troubleshooting.
 The penny dropped with a resounding clang, when in answer to someones question about which way up the foil should go, the answer was colour side facing UP!
I'd put all the foil on upside down.😀😀😀
So I picked all the foil off, and lay it the right way up.


 Incidentally, I spent a while adding foil to these two, as I wanted to have green stems, and coloured flowers. These two, along with another, are the ones I set with the iron, as I thought there was too much chance of all those small pieces moving around in the folded paper 'carrier sheet'.


After  I had run the first one through, I checked a small corner. It had worked! So now I fed them all through.


I carefully peeled back the foil, after they had all cooled down.


Isn't that stunning?  I'm amazed at how good it looks.


 The pic above was lay flat on my desk, here it's stood up facing the window, so you can see how the foil shows up in the light.


This pair both have a holographic foil on them, and it's the holographic ones that give the most stunning results.


 Here I've changed the angle slightly.


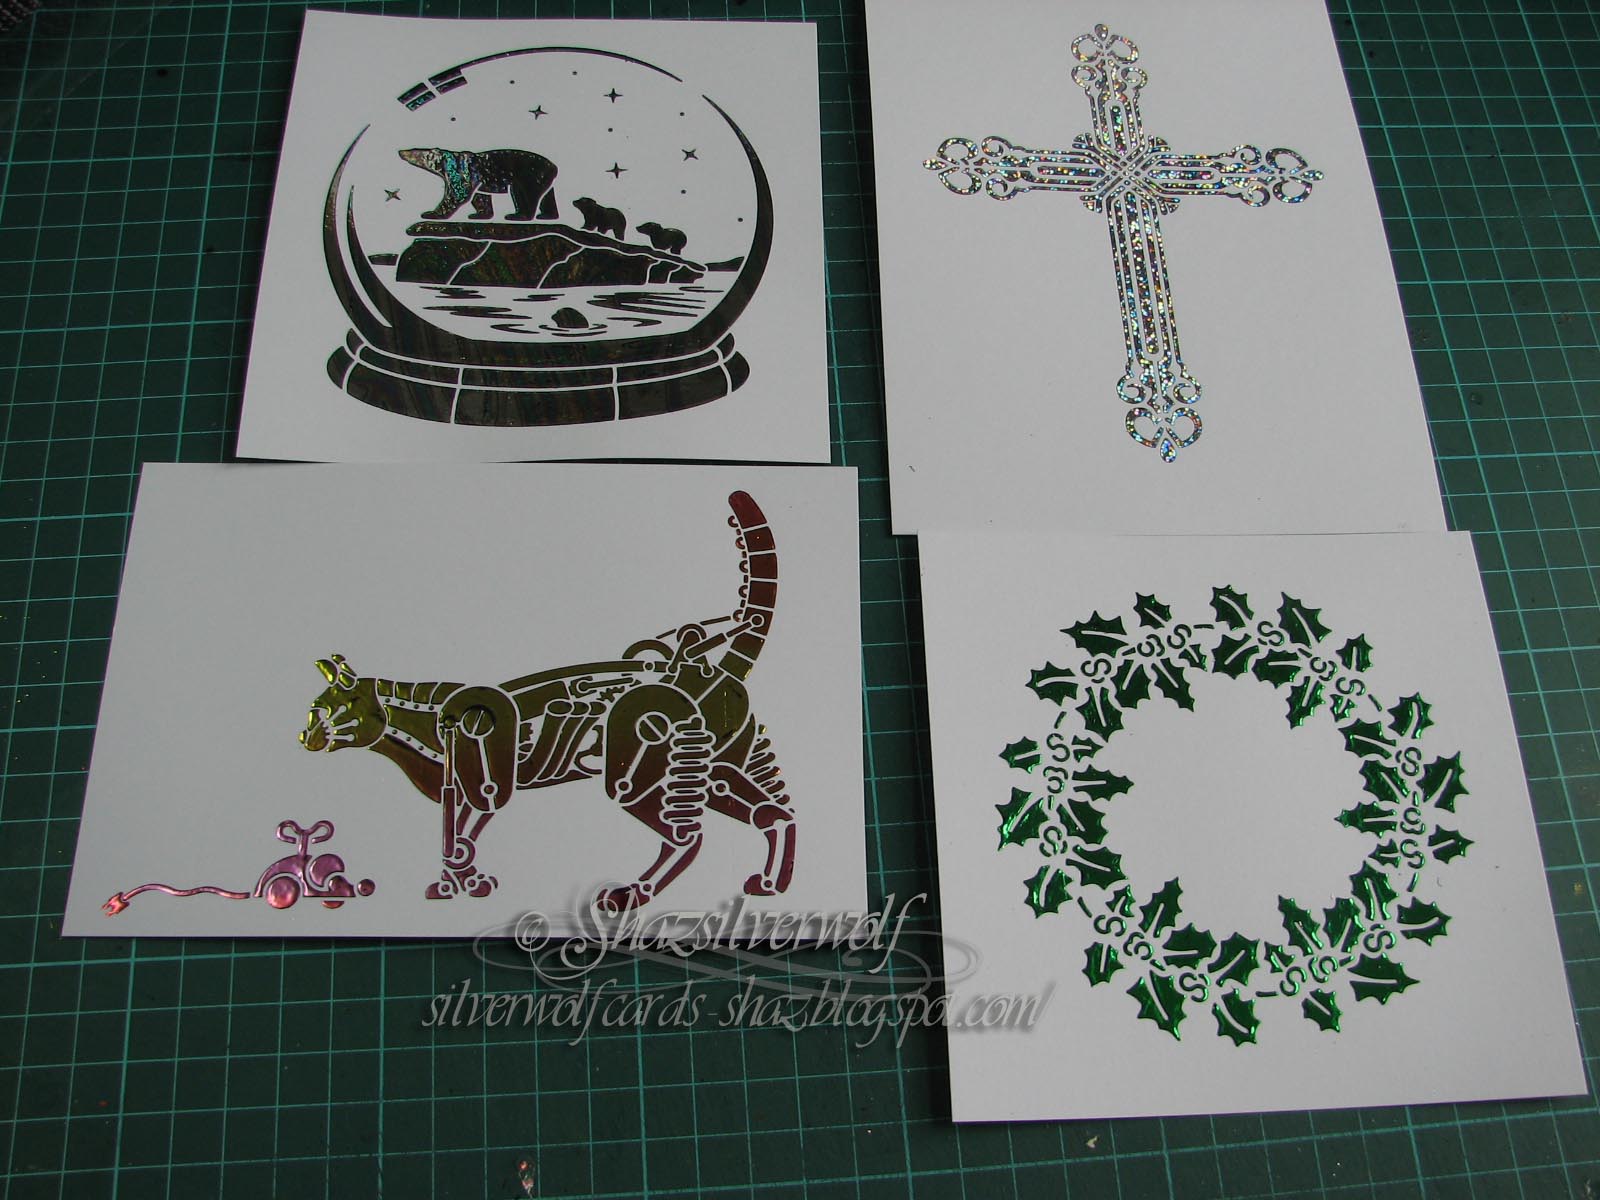
Although it looks black in this pic, the Holly wreath is actually done in Green foil.The Baubles have a Sunset Rainbow Foil on them.


This cat & mouse also has the Sunset foil on.


This cross looks fabulous, this one has a Silver Glitter effect foil on, and I love how the colours change so much.


This Polar Bear Scene has a sort of 'Oil on Water' foil on.


 The actual stencilling was done with sweet Poppy Glossy Black paste, which is how Julie did hers. The Fairy on the Moon, I did in Bronze paste, I just wanted to see if other colour pastes would work, and it seems they do.


Gorgeous warm sunset tones in the holographic foil in the top pic, and tilted a little more towards the window for more light, and there are lovely blue tones now.


This Steampunk Butterfly has fabulous jewel tones from the dark rainbow foil. I'd bought a some foil samplers from Tonertex, and this pattern had pieces about 4" square, so I laid two side by side to cover the butterfly.


Right I think for the moment, I'm going to stop there. I'll do a second post tomorrow, with the remaining pieces, or this post will go on forever.
 All the stencils I've used are by Sweet Poppy. The foils come from Tonertex, and Patsy May Crafts.


Sunday, 20 August 2017

Honey Doo Cards


 Finally getting some of those card fronts put together. All these images are from Honey Doo stamps, those on the left here are all a design called Butterflies & Flowers Large Corner. All the sentiments are from sets by Phill Martin.
 I've added some Sue Wilson Dies ribbon & bows to them, the Red one uses Lattice Bow over the Classic Bow, which is plain. The green ones use Filigree Bow over the Classic.


The sentiment on all three is from Butterfly Elegance sentiments, and the stamping was done in Brilliance Pearlescent scarlet, and heat embossed with WOW! Sparkling Poinsettia EP. I used the same ink & powder to stamp the image onto red vellum, after cutting them out, I shaped the petals using an embossing tool, the added tiny red seed beads to the centres with Glossy Accents.
 The greens were done in the same way, this time using Brilliance Pearlescent Jade, and WOW! Golden Pine EP. A corner rounder was used to add some interest, doing opposite corners in the left hand card.


Both these cards use the same stamp, Floral Corner Flourish, but in the black card I placed it centrally, and in the purple card, it's in the corner.   I added clear gems to the dots in the black card, and purple one to the purple card.Purple Glitz WOW! EP was used there, and on the black one, I used Clear Hologram Sparkle.
 The sentiments are from Scribbled Sentiments, and Scribbled Corner sentiments.
Again, I rounded opposite corners on all the layers, and also on the base card of the purple one.


This blue card is stamped with Shower Bouquet, In Brilliance Pearlescent Blue, embossed with Arctic Blue WOW! EP. Acrylic gems added to two opposite corners, and sentiment from Scribbled Sentiment Corners. The backing paper is from an old Papermania pad.


Back to Floral Corner Flourish for the pink card, stamped in Pearlescent Coral, and Clear Hologram Sparkle powder. Pink gems, a Scribbled Corner sentiment, and rounded corners finish it off.


So thats all the Honey Doo cards finished, next post will be some Emboss resist with Brushos, amongst others.


Wednesday, 16 August 2017

WOYWW #428

Well, this weeks Desk Of Delights comes to you covered in card fronts & paper! You can catch up on what all of that means over at Julias place, The Stamping Ground.
 I said last week that I intended to get some of my UFO's made into cards, and at the very least, most of them are now matted & layered. A few are now completed cards.


These need a sentiment adding, which is why some have a longer piece of backing card.


These, using Honey Doo stamps, need finishing off. I've got the vellum flowers to go on top already cut out.


The scenic card is finished, the Teasels needs a sentiment.


Same here, just waiting for a sentiment to be added.


I was fixing a bracelet the other week, and had so much trouble threading a needle with the elasticated Crystal string. So I did a bit of an internet search, and found these.
The eye is like a needle threader, which will make things so much easier.


Now, I did say I wasn't going to start anything else until I'd cleared my UFO mountain. However, I saw a fabulous card on Facebook, which basically uses a laminator to attach hot foil to stencil paste. So, I got some foil ordered- I'd not got any biggish pieces- and I've done up a batch of stencilled images, ready to give this a go.


This is a handful of the pieces I've done, they need to dry overnight, then I can try it out. I've also since read that hot transfer foil can be applied with a hot iron, so I'll be testing that out too. There should be a post about it towards the weekend.


I'll be really pleased if this works as well as the project I saw, it means my laminator will get some extra work. At the moment it gets used to laminate sheets to store my stamps on, other than that it just sits on the shelf.


Right, I'm done then. Be round to see you all a bit later. And thanks to everyone for the birthday messages, and cards for us both. Much appreciated.
As Doug was working on Monday night, we went out Saturday night for a meal. Did our exchanging of gifts when he got up Monday afternoon.

An End of an era

An end of an era

I write this with a broken heart, that only time can heal My beautiful, wonderful wifelet Shaz (Silverwolf) passed away peacefully in the ea...