
 Right then, finally I'm here with those images I was going to try through the laminator. Firstly, let me say that it was a project shared on Facebook, by a crafter called Julie Rose, who is a DT member for sweet Poppy Stencils. I've linked her blog to her name, and you can go see the fabulous project that really inspired me.
As you can see from the pictures, it worked really well.

The ones at the back look black in the photo, but the light wasn't shining on them. You will see further on just how great they look. I will warn you this post is VERY picture heavy- some projects have 2 or 3 pictures, so you could see the colours better.

This is all of the images I ran through the laminator, but I'll show them individually throughout the post.
I also tried achieving the effect using an ordinary iron, and that works perfectly too, so you can do this even without a laminator.
If you do want one, you can get a cheap one for about £15- Amazon, Argos & Staples all have them around this price. You only need a basic A4 one.
 I sandwiched my projects inside a folded piece of A4 printer paper. Then I discovered a couple were too big to be completely covered by that. I found I had an old A3 size sketchpad, I think from Poundland, so tore out a sheet of that, folded it and trimmed it down in width to fit the laminator.
 Okay, right here I'm going to put my hand up to being a bit dumb! I'd trimmed all my images down, and run them through the laminator with different colours of foil, then set them aside to cool. I even did the ones with the iron too. Then I took the first one, and began to peel off the foil.
It hadn't worked! None of the foil had stuck. Now, right at this moment, there are probably quite a few of you laughing at this picture. Me, I'm stumped. So I ran them through again. Still no good. So, I tried a Google search for some troubleshooting.
The penny dropped with a resounding clang, when in answer to someones question about which way up the foil should go, the answer was colour side facing UP!
I'd put all the foil on upside down.😀😀😀
 So I picked all the foil off, and lay it the right way up.
Incidentally, I spent a while adding foil to these two, as I wanted to have green stems, and coloured flowers. These two, along with another, are the ones I set with the iron, as I thought there was too much chance of all those small pieces moving around in the folded paper 'carrier sheet'.
After I had run the first one through, I checked a small corner. It had worked! So now I fed them all through.

I carefully peeled back the foil, after they had all cooled down.

Isn't that stunning? I'm amazed at how good it looks.

The pic above was lay flat on my desk, here it's stood up facing the window, so you can see how the foil shows up in the light.

This pair both have a holographic foil on them, and it's the holographic ones that give the most stunning results.

Here I've changed the angle slightly.


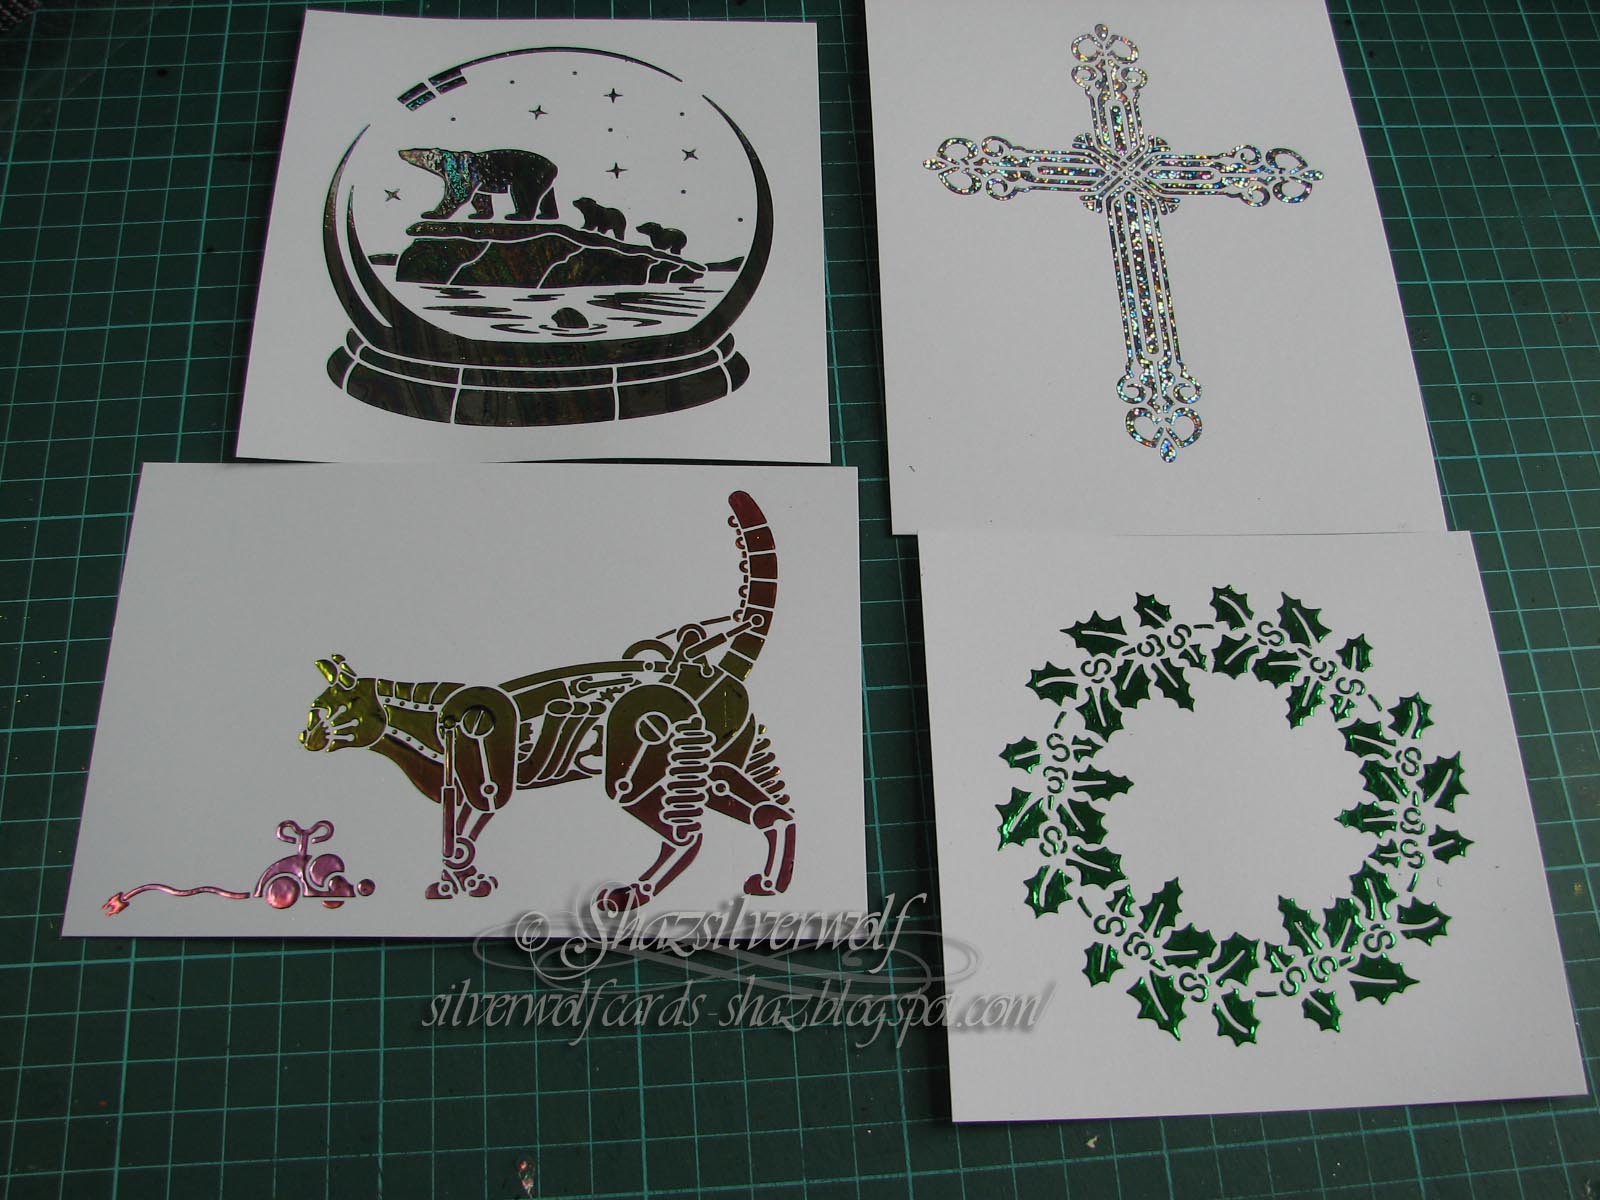
Although it looks black in this pic, the Holly wreath is actually done in Green foil.The Baubles have a Sunset Rainbow Foil on them.

This cat & mouse also has the Sunset foil on.

This cross looks fabulous, this one has a Silver Glitter effect foil on, and I love how the colours change so much.


This Polar Bear Scene has a sort of 'Oil on Water' foil on.


The actual stencilling was done with sweet Poppy Glossy Black paste, which is how Julie did hers. The Fairy on the Moon, I did in Bronze paste, I just wanted to see if other colour pastes would work, and it seems they do.

Gorgeous warm sunset tones in the holographic foil in the top pic, and tilted a little more towards the window for more light, and there are lovely blue tones now.


This Steampunk Butterfly has fabulous jewel tones from the dark rainbow foil. I'd bought a some foil samplers from Tonertex, and this pattern had pieces about 4" square, so I laid two side by side to cover the butterfly.
Right I think for the moment, I'm going to stop there. I'll do a second post tomorrow, with the remaining pieces, or this post will go on forever.
All the stencils I've used are by Sweet Poppy. The foils come from Tonertex, and Patsy May Crafts.


