
 This Butterfly was the last image I left yesterdays post with, and I think it's one that shows how stunning this process looks.Moving on with more images, again this is a photo heavy post, so be warned,lol.

This butterfly panel, showing two views of how the colours change depending on the light source, was done with a Holographic foil.


This one used the Sunset Rainbow foil.


Back to a holographic foil for this one of two dragonflies.

I cut the base card to match the shape of the image, and it's covered in gold foil. I got this really cheaply from E-bay, from China. 50 A4 sheets for £2.49! and 29p shipping, lol.

This Steampunk dog has the same foil on it.

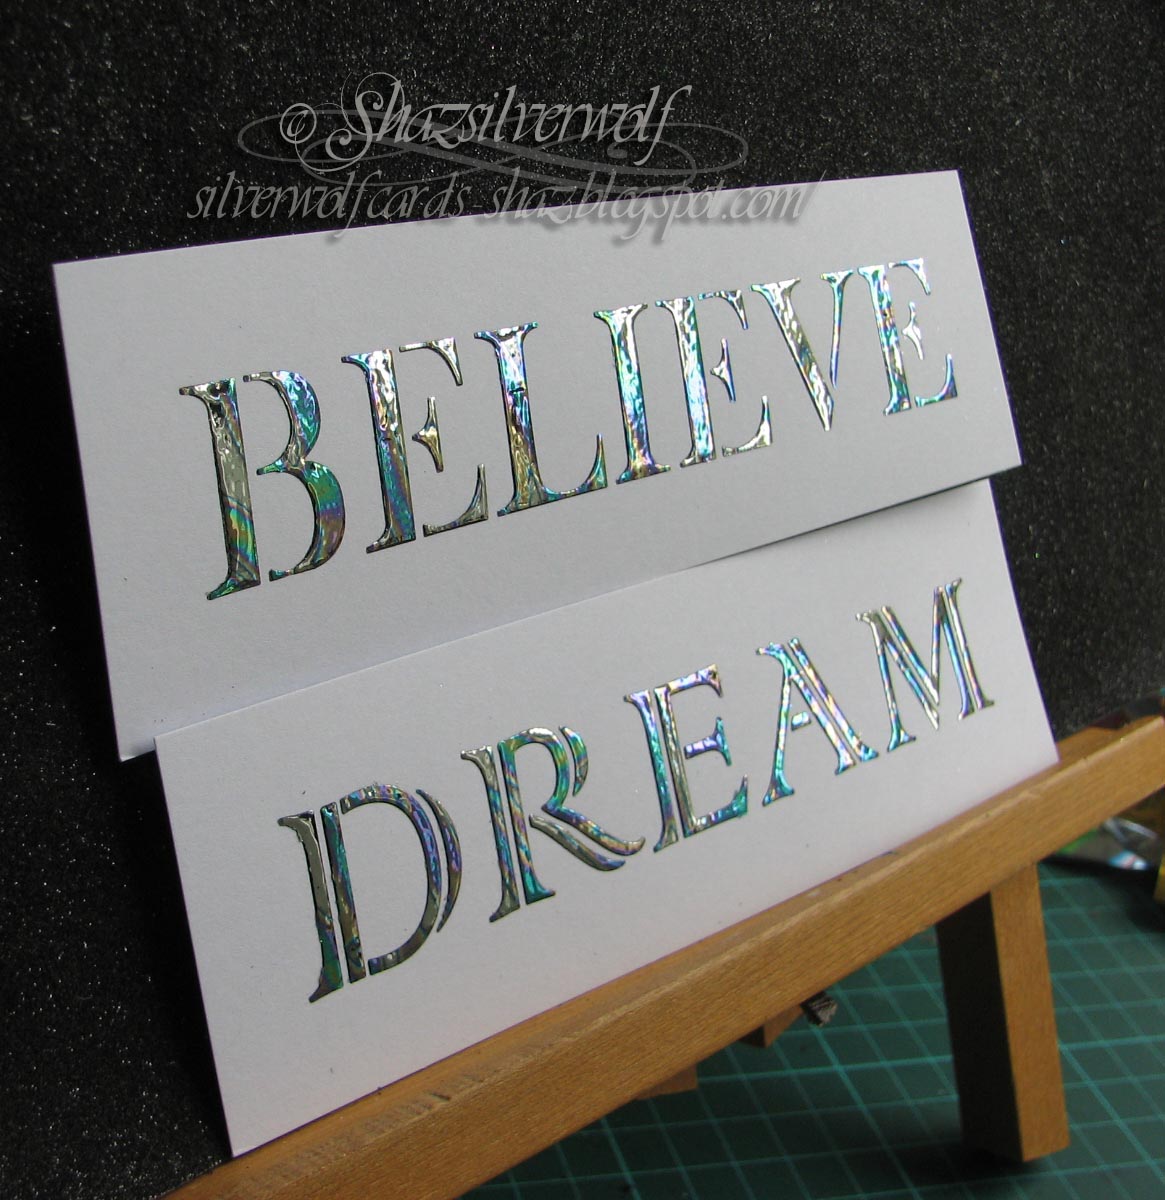
These are two new Sweet Poppy stencils, and I covered these with the Oil on Water (Marble) foil.


Now we come to the pieces I did with my iron. I'd wanted to have the stems green, and the flowers a different colour, and this was a bit of a fiddly process to be honest.
Requires some patience, and preferably the ability to hold your breath for long periods. It's a bit like working with Gilding Flakes, one small breath scatters it everywhere.

I put the image with it's foil inside my folded paper, and placed that on top of an old tea towel I use for drying my stamps, on top of my glass mat. The Iron was set to Max, and I reckon I ironed it for about 20 seconds, maybe 30.
Turned out perfectly, as you can see. The flower heads look jewel like, almost as if they are covered in Acrylic gemstones,or sequins, but without the bulk.

I did the same here, using a foil that came in blue strips for the flowers.
I chose these pieces to Iron, as I thought there was more chance of the small pieces moving as I fed it through the laminator, and I wanted to see how well an Iron would work. So two birds, one stone.
By the way, there is nothing special about my iron. I wasn't going to spend out for a 'Craft' iron, and intended buying a travel Iron to do craft stuff with. However, I couldn't find one anywhere, so I just bought the cheapest Iron either Tesco or Argos had, can't remember which I got it from.

So, if you don't have a laminator, but do have stencils & paste, then you can still do this technique easily.

Right, we're almost at the end now, this is the last piece.
This foil is called Tropical Sunset, and I'll list the foils and where I got them at the end.

So, I love how these turned out. Most I think need nothing more than a sentiment adding.
I still have a few experiments I want to try. I want to see if this works with ordinary rub down transfer foil for one. And I also wonder if this will work with rubber stamps and a glue pad. I've never had much success with Glue Pads, they've never seemed to stick properly in the past, so it's worth a try. I'll try both of those with the iron, in case the laminator gets too hot for them.
I also want to see if this works with Dreamweaver Stencil pastes, as I have a few of those in my drawer too.
And I want to see what the result is with different colour pastes.
It seems to me I should have given the basic instructions somewhere, and I haven't.
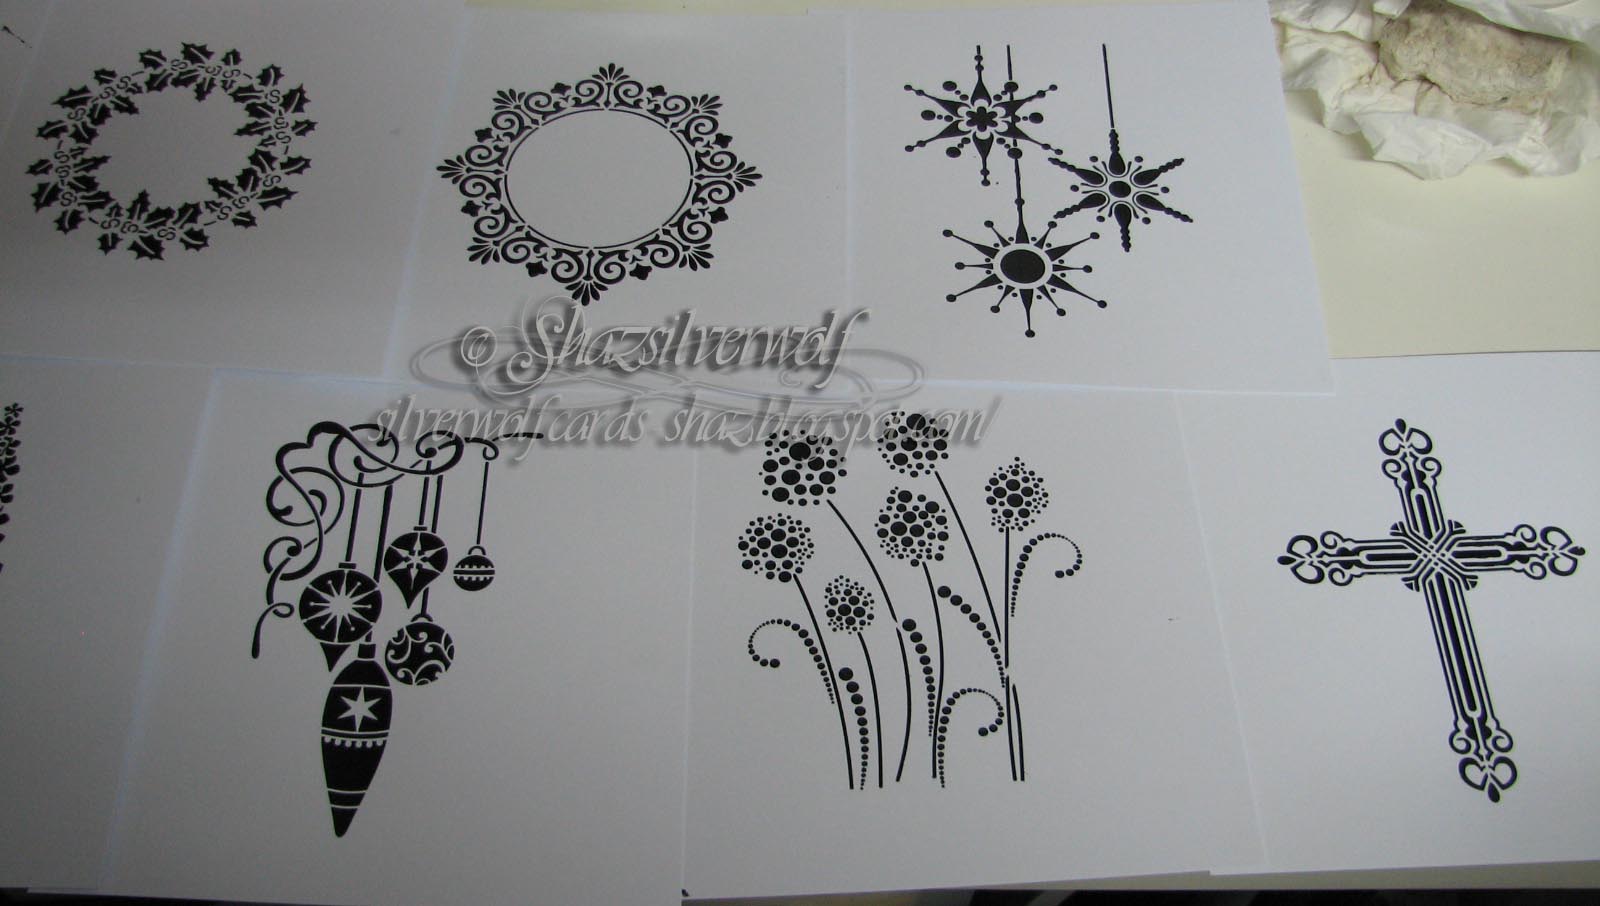 You need to create your stencilled image, and Julie used Sweet Poppy Glossy Black Paste, which is what I used. I tried Glossy Bronze paste on one, and that seemed to work fine. Then leave the image to dry overnight, before adding the foil. And that's all there is to it.
I love ideas that give me new ways to use stash, and this does that, as well as employing my laminator for more than just creating stamp storage sheets!
I shall be trimming down the foil sheets I peeled off, as most have reasonably sized usable areas left, ideal for creating designs using more than one colour.

Foils bought from Tonertex.:
Multi Coloured Assortment pack, which contains: 67 sheets 100mm x 100mm:
12 sheets Tropical Sunset
15 sheets Turquoise
12 sheets Slimline Rainbow
8 sheets Carnival
10 sheets Hologram Silver
10 sheets Hologram Gold
I added to that Marble Foil and Seasparkle foil.

Foil bought from Patsy May Crafts: (on EBay)
Silver Mirror Pattern ( Holographic)
Gold Foil from E-Bay
A bit of advice on foils- when you are looking to buy them, you want TONER foils, NOT TODO foils. I was ordering from Patsy May, and she was kind enough to take the time to advise me that the TODO foil I had ordered would not work with a laminator, apparently it's designed specifically for the TODO machine, and works with pressure & dies. It has a sort of adhesive on the back, so will stick completely to the card. So, as long as it says TONER foil, it's fine.


