A warm welcome to all my visitors,

Thank you for taking the time to come and look at my blog, I really do appreciate it. I would love you to leave me a comment, even if it’s just to say Hi. It means I can come visit you!

All my designs are original, so copyrighted to me. If I have been inspired by someone elses work, I have named them in the post, and where able, I have provided a link.

Please feel free to use my designs for inspiration, I just ask you to credit me, and provide a link back to my blog.

Thanks, Shaz XX

Showing posts with label mixed media. Show all posts

Wednesday, 8 March 2017

WOYWW #405

There is finally some crafting activity on my desk. I'd die cut all these pieces, using various Tim Holtz Mixed Media dies,back before I went into hospital, so I'd have something to help me get going again when I came out.
 It's almost 4 weeks now since I came out,and I'm finally starting to feel like doing something again.
Due in part to the fact that, as I said to Doug on Sunday, I felt like I'd finally turned a corner in so far as the pain was starting to recede. I'd been on slow release morphine for a week when I came out of hospital, then when that was finished my Doc gave me some Co-Codamol, but after a few days it was clear they weren't helping, so I went back and he gave me Tramadol, which I've been on for about 10 days, but they have helped.It's just been a constant nagging pain, and the only way I can describe it is if you've had on an underwired bra that's a little too tight- and as the day goes on it feels tighter and starts to really hurt across your ribs just below the breasts? That feeling. Constantly. The only help is lying down to take the pressure off, but then the Tramadol sends you to sleep? Anyway, Sunday  I had some Tramadol first thing, but the swapped back to Co-Codamol for the rest of the day, as I knew the pain had taken a definite backwards step, and I felt much better. And I've been improving ever since.And it's only when you start to get out the other side of this, that you realise how depressed you were becoming.
But, this Sunday I'm going to an Inky Workshop with Pauline Butcher ( DT for Lavinia Stamps, Visible Image and others) as I thought this may well help to give me a kickstart.
 My personal review of the Distress Oxides is below, and I will do another, getting a bit more use from them soon.
This is the first card from my die cut stash, I thought they lend themselves to something like a Sympathy card quite well.
I've just started a second one, but I needed to use a wet glue- which I hate doing, by the way- so it's been put to one side with some weight on top to dry.
So that's me done, I'll be visiting later, and getting round to packing the stuff I need for the workshop- last minute as always!

Wednesday, 25 January 2017

WOYWW #399

Wow, one week away from the big 400! Linking up again with our Julia over at The Stamping Ground, to show off this weeks desks of delights.
A big mess on mine this week, as I've finally got round to starting those cards I was talking about last week. Going to batch make a bunch of cards using the Tim Holtz Mixed Media dies, so I have a few for all occasions- birthday/new home/ good luck/congrats and so on.


I'd started by cutting a load of cardstock down to a size that would go through my 'Bug, and set to work.
 It's a messy job, all those bits that come out of the die cuts. What's on my desk is nothing compared to how many have ended up on the floor.


Later today I will get around to making them up. I have had a few cards on my desk this week, a couple of Christmas cards in the post below, and a card I can't show yet, as it hasn't been sent.

For those who were interested in the dies from China, there is a post below the Christmas Card one about them. Be warned you'll be best to settle down with a cuppa, as it's a long post and very picture heavy, so you can see what they cut like.
 So, short and sweet this week,and there'll be a post about these cards soon.
All cat owners , or should I say slaves, will recognise this!

Wednesday, 18 January 2017

WOYWW #398

Wednesday again, and another link up with Julia at The Stamping Ground.  I did intend having some part started cards for you to have a browse around, but that'll no doubt be later today now, as I'm writing this late on Tuesday, and somehow or other the day just got away from me. I do have a couple of things for you to see, some more of those cheap from China dies for starters. An 8 piece stitched stars set,which cost me a whole £2.95, and a holly wreath die, £1.29.


Then there are a couple of Hobby Art stamp sets- well they had a sale on, it would have been rude not too.


I finally finished that book cover I was altering, there's a full how-I-did-it in the post below.
There's a post below that about shaving foam backgrounds too.


In other news, I finally have a surgery date! It'll be Tuesday 7th of Feb. At last. Can finally get this over and done with. Hopefully. Unfortunately, The Heartlands hospital where I'll have it, has a bit of an unfortunate track record for cancelling ops due to bed shortages. So, not exactly past the post yet!
Well I think that's all from me this week, so I'll be seeing you later.

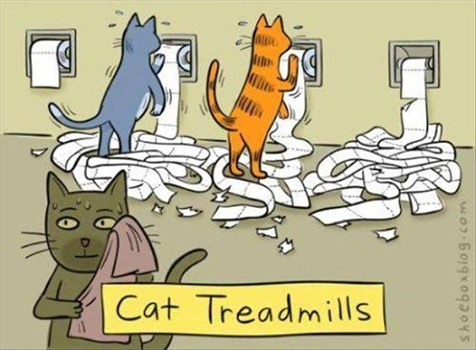
A funny at the end for you- this really made me smile when I saw it, as my Mum had a cat a few years ago who did just this. She had to make sure she closed the toilet & bathroom doors properly, and also remember to take the kitchen roll off the holder every night, or she came downstairs to this.

Monday, 16 January 2017

Mixed Media/Altered Birthday Book- it's done!

Well, for my first attempt at Mixed Media/Altered Book cover, I have to say that I'm surprisingly pleased with it.
 There were a lot of stages- probably more than needed, but it was a learning curve- and did come out pretty much as I was planning it to.


This was the original cover.

I wasn't a fan, but it was the only one I could find at the time, so, as I'd already made some alterations to the pages, it seemed that this was up next.


 The 'envelope' for storing the cards was ridiculous- maybe I could have slid one card in there, if it was flat- so I slit the sides, added a cut down document wallet, and then glued the flap back down.


But, onto the cover. First job was a coat of white gesso, then some crumpled tissue paper over that.


I gave that time to dry, then added some texture to the surface with black stencil paste and a Sweet Poppy stencil.


Just a few patches, front & back.


I had some metal pieces bought from a local craft shop, a whole load of wooden ones, and a bunch of die cuts.
 The die cuts I glued 3 or 4 pieces together to make them more dimensional.
 Everything, including the covers now got a coat of black gesso.


Next I started laying out shapes on the cover.


I had the front pretty much as I wanted it, so time for the back.


I didn't want to make the back too bulky, and remembered I had some sheets of chipboard numbers, by Woodware, bought a few years ago at the NEC.


The cameo was from a pack of four bought at The Works, and sits on top of a chipboard frame.Thats the most dimensional bit on the back cover.


Added the numbers, a few cogs and a dreamcatcher to the back, then everything got another coat of black gesso.


Now to add colour, and I realised my mistake here- the sprays wouldn't show up on black! So, gave it a very rough coating of white gesso, which I forgot to photograph. I still wanted some areas of black to show, so didn't cover everything.
I used some Dylusions sprays in London Blue, After Midnight and Crushed Grape.


 After these dried and went paler, I added some Distress Stains in Faded Jeans, Wilted Violet & Seedless Preserves.

I realised I'd have to paint the hinges & lock again in black, as they were also coloured by the spray, and I wanted them black.


First though, I wanted to put a sweep of micro beads down the dress form, so ran some Glossy Accents down it.


I already knew which beads I wanted to use, but when I was getting them out, I spotted a jar of mixed black, blue & white ones, and decided to use them.


However, I didn't like it when it was on, the colours were wrong, so I scraped them off and went with my original plan.

A bright blue, and that looked much better. I also randomly added some to the flower petals. By the way, these 'microbeads' were dirt cheap, I picked up a couple of packs of assorted coloured ones from Poundstretcher, intended for nail art.


 I've used some black Starlights paint, from Imagination crafts to re-colour the  hinges on the back, then did the same on the front.
 I also decided I'd hidden too much of the black base colour, so dry brushed some  of the black paint into random areas. The paints have crushed Gilding Flakes in them, and have a lovely sheen to them.


I then thought I could enhance the colours a little by dry brushing on some Amethyst and Saxe Blue too.


I'd decided that it was time to stop, it looked pretty much as I wanted it to. And it was only a matter of time before I went too far.😀


So time to put it all back together. Which is when I realised I had missed something important. I hadn't covered the insides of the cover. I'd intended to do that anyway, but now, thanks to inky painty smudges & fingerprints, it was a definite.
Quick troll through various papers and card to find something suitable, that was big enough to do both sides, especially as it is slightly wider than A4.
Came up with this, which is sort of like a very thick tissue paper.
 After giving the edges a coat of black gesso, I stuck the paper down with some Aileenes TIOO glue.


While that was drying, I removed the original wire binder from the book pages. I'd left it in till now, as it kept all the pages in one place!


And on to the final assembly then.


I used four book rings in the end, and you can probably also see I applied some rub on gilding in places, both front and back.


I *might* add some photos into the little frames at a later date,and I was thinking off adding something to that wooden tag, but not sure what yet. Maybe a stamped word.

Wednesday, 11 January 2017

WOYWW #397

Good Morning all😀. Julia, over at The Stamping Ground is hosting our regular worldwide desk stalk, snoop as usual. Well, the Squirrel of Judgement certainly got me creating,😀. It all happened in a bit of a round about way, but creating nevertheless.
 It started out as me putting away some spare die-cuts, and while I was at it reminding myself what was already in there. Stored in a box, it's very much a case of out of sight, out of mind.
I also decided to do something I'd seen elsewhere- don't ask me where, I have enough trouble remembering what I came into the room for- which was making use of the wallets that Tim Holtz Framelits/mixed media dies come in, after you've taken them out to store on magnetic sheets. Someone was using them to store die cuts in, and that seemed an eminently suitable way to use them.
 Anyway, while I was sorting, I came across a number that I thought might be useful for the covers of that Birthday Book. No, I hadn't forgotten about it, just had no clue where I was going with it.


I had a number of each die cut- dressforms, hinges,cogs etc, so I stuck 3 or 4 of each together, to make them a little thicker.


There are  quite a few, and I shan't use them all, but at least I have a little choice.


Now they were stuck, so they all got a coat of black gesso, as well as a few wooden shapes I'd picked out.


And this is as far as I've got.The front is almost done, embellishment wise. Just maybe the key to the lock to go on yet, but I'm thinking about that. Now, when the glue is dry, it will get another coat of gesso. The back has the hinges in place, and I've yet to figure out what's going on there next.

So this is what the desk looks like right now. Bits I haven't used yet, glue, glasses, gesso,box of brads- there's a thing. I glued the hinges down on the front, then thought after I should have put brads in them for the nails. I hadn't stuck the back ones down then, so I added the brads. I was going to  poke a hole through the front cover to add the brads to the hinges, then had a thought. Maybe, black acrylic half pearls would be about the same size as the brads? And they were, so there's a cheat on the front cover.😇


 People who do a lot of this make it look so easy- I watch videos where they do this in an hour or so- even if it was sped up, they probably took maybe 3 hours. So, far, I'm at 3 weeks, lol.
 And just for a giggle, there's this:


 By the way, those Avery Elle pockets? I emailed Avery Elle, to try to find out if they were being discontinued, as I couldn't get them anywhere.  I got the reply that the packaging was in the process of being changed, but were available from them, and would be shipped to retailers soon. From a member on SCS, who also asked them what was going on, they said the new packaging would read 5 1/2 x7 1/4",whereas the older ones read 5 5/8 x 7 3/8". Just measured mine, which are old stock, and it looks like nothing has actually changed, it's just that the new measurement reflects the actual usable area of the pouch, rather than the overall dimensions.
Quick Edit to this:
Just had a look on Amazon, and the new pockets are on sale there now. Link HERE to them, the LARGE size, which is what I've been using, and just a tad smaller than our A5.

Wednesday, 7 December 2016

WOYWW #392

Hello again, and I'd be curious to know where that last week vanished to!Linking up as always at WOYWW Towers, otherwise known as The Stamping Ground, home of our Glorious Leader, Julia.
A few things on my desk today, all related to each other. This pic is a Birthday Book I bought from Wilkinsons last week. Well, it's the covers from it, anyway. You see, I bought the book, then when I unwrapped it, I realised it was totally useless as it was.The 'pockets'- and I use that term very loosely- were just a piece of paper across the bottom of the page. I could possibly have got one birthday card in it. Maybe. So, I thought I could improve that, I slit down each side of the paper, then taped a plastic pocket to each page, then stuck the paper with the date list back on top.
Like so. Then I decided I didn't like the covers anyway, and I keep saying I'm going to dabble in some mixed media, and the next thing you know, I've got the covers off!
 I've given them a coat of gesso, as the surface was slightly shiny.
 And thats as far as the plan goes, at the moment. Not a clue what I'm going to do next, to be honest.


However, that does take me neatly to the next pics. First, a pic of some stuff from a visit to the former  Pink Tulip, now called Amelias Creative Crafts, back last weekend.
I have to say that it is much improved since my visit a while ago, and a lot more products being stocked, so it looks like they are investing in the business.
 Anyway, these metal pieces were 3 for a £1, I got a box of little wooden pieces, and a couple of bags of small wooden words. Plus the pack of Woodware book rings, a large size in a pack of 24 for £2.50. Didn't have a project for them then, but now they'll be very useful. I'll use half a dozen to put the book back together, instead of the wire binder that it had.
 It also caused me to start having a hunt around amongst my stuff for other odds & ends. I'll put most of the pictures in the post when I start making it, but suffice to say I had a lot of 'Wow, I'd forgotten about that' and 'So that's where I put them' moments, 😁😁.


Then, I went off over to the town for my regular walk, and called in at The Works. Found loads of these little wooden things, at £1 each, and a whole alphabet set in wood for £2.


This tub of stuff was given to me by Beloved Hubby a few weeks ago. Anyone care to guess what they used to be? I'll tell you next week.😎

I tell you what, looking out all this stuff took me right back to when my eldest, Ant, was about 10-11 years old. He seriously got into model making, and he had this humungous box in his room, filled with all sorts of broken stuff, bits of broken toys/models,screws, nuts,paper tubes, lids from bottles- you name it, it was in there. Way ahead of his time, lol.


He still does the same sort of stuff now- some of these started as kits, and he's added stuff to them to change the appearance. Real 3-D altered art.


This is just a fraction of the models he builds- many of them are packed away as they are just too large to have out.


So, I'm almost done. I'll be around to visit later, as I had an appointment come through finally to see the Thoracic surgeon, at 9.10 this morning. I rather expect we should get a surgery date today, so, I'll add any info I get as an edit when we get back, and if you've already visited me by then, I'll let you know in my comment.

EDIT: 
Back from the appointment, not exactly happy. When we got there, the surgeon wasn't in clinic, we saw his registrar, and he now has to speak to the surgeon about scheduling the surgery! So don't actually know when it will be, but it does look like mid-January is likely. They have no surgery listings for next week, which would take us too close to Christmas if it was the week after.  We did find out that as it turns out, all the areas of my lungs are operating at the same level, which was not what he was hoping for, so the surgery will have an impact on my breathing. Hopefully it will be keyhole, and they will take out the nodule with some surrounding tissue to make sure they've cleared it all.  Fairly certain it is a new primary Lung cancer, as it has grown, only by 4mm since June, but  still it is growing. The likelihood of it being a secondary Bowel cancer was never very high, as there was no sign of any spread to lymph nodes when that was removed. So not really any further forward.

An End of an era

An end of an era

I write this with a broken heart, that only time can heal My beautiful, wonderful wifelet Shaz (Silverwolf) passed away peacefully in the ea...