A warm welcome to all my visitors,

Thank you for taking the time to come and look at my blog, I really do appreciate it. I would love you to leave me a comment, even if it’s just to say Hi. It means I can come visit you!

All my designs are original, so copyrighted to me. If I have been inspired by someone elses work, I have named them in the post, and where able, I have provided a link.

Please feel free to use my designs for inspiration, I just ask you to credit me, and provide a link back to my blog.

Thanks, Shaz XX

Showing posts with label Circa Design. Show all posts

Sunday, 13 September 2020

Christmas Card Club #19- Christmas Sentiments.

My these weeks just seem to fly past! Explains why I used to end up in a panic making Christmas Cards in November! But, thanks to our Christmas Card Clubs fortnightly challenge, that horror is way behind me now.😀 This fortnights challenge has been set by Rita, and she wants us to use Christmas Sentiments on our cards. I bought some smashing Christmas Verse stamps from Circa Design a couple of years ago, and their beauty is they look good either inside your card, or as a  focal point on the front, which is how I've used one on my cards.


The first one is in green and silver, and the dies used are an old Spellbinders one called Lacy Squares. I stamped the verse in Silver Pigment ink, then heat embossed with silver EP.

Both pieces of cardstock have an embossed design on them.


The second card is exactly the same, only this time using red & gold.


I has intended to wrap a ribbon around behind the die cuts, but like an idiot, I stuck the gold & silver card down to the card base a bit too quickly!

Tuesday, 10 July 2018

Christmas Card Club Challenge #14- White on White/smidge of colour

Well, I'm sorry to be running so late, but my craft room is unbearably hot😱 It gets full sun from about 11.00am onwards, and it's like a greenhouse in there. And we all know fans and papercrafts do not play nicely together! I've taken the liberty of combining Christines challenge this fortnight, with another I missed due to holidays- Carols' Sentiment as the Focus' theme.
 I've used a lot of my Christmas embossing folders again- and made 19 cards!


 For my 'smidge of colour', I used gold, silver, red & green embossing powder, and matted that onto matching foil card.
This sentiment is from  a Hobby Art set called Winter Wishes. The red embossing powder is by WOW, called Primary Burgundy Red.
 The green is an old one, called Moonglow two-toned Embossing Powder, and this green is called Fiddlehead Fern & Green Blue.
                           
The die used for the shapes is the same in both these cards, just a different orientation. Its from Spellbinders, and is called Labels 4, in two sizes, large & small.
 The two separate sets combined give you a smaller border than just using one of them.


This sentiment stamp is by Circa Design,XM-VS-62.
The embossing powders are the same in all the cards. The gold & silver detail powders are both by Stampendous.

                                        
Another sentiment from Circa Design, XM-VS-13.
 Matted this time onto card die cut with a Stitched Rectangle die set I bought from The Works.


Yet another Circa Design stamp,XM-VS-10. Some were die cut with the Spellbinders Large Labels, some with the Stitched Rectangles. All the matt pieces were cut with the Stitched Rectangles, as the largest Labels die was used to cut out the sentiment.


And the final group, this stamp is from the Hobby Art set, and the die is Spellbinders Lacy Squares. I've had this for ages, but it's the first time I've gotten round to using it.


Sunday, 15 April 2018

Christmas Card Club Challenge #8- Poinsettias/ Christmas Greenery.

 Back with another of our fortnightly challenges, and this time it's Mary who has set the theme for us.
 Whilst at Ally Pally last week, I bought a new Sweet Poppy Stencil and matching die for Poinsettias, so that's what's getting an outing this week.


For this one, I stencilled in a Red glitter paste- made using Translucent paste and mixing in some glitter. This works great, as when it dries you have no glitter shedding! The stencil and die have 3 sizes of flower, so you can match them to the size of your project, or layer them up for some real wow! I used all three layers here, and filled the centre with some tiny beads and Glossy Accents. These beads are red & gold, and were amongst 3 tubes I bought the the NEC Hobbycrafts show last year.
 The sentiment was stamped in Versafine Satin Red, and is from Circa Design.Stamped onto white card, and matted onto red pearl paper, as was the main front of the card.
The same red pearl paper was edged with an X-Cut border punch called Lace Trim. The Holly sprig behind the Poinsettia is, I think, one of the Cheap from China dies, as I have no brand for it.


A similar version, this time in gold & white. I'd made some white Glitter paste, but this time I only used the two smallest flowers to layer up, and the centres again filed with small gold & white beads & Glossy Accents.
 This sentiment came from a Hobby Art set called  Winter Wishes. I stamped in Encore Metallic Gold Pigment ink, and heat embossed with Gold detail powder. After I trimmed it down, I ran the gold pad around the edges, then sprinkled with the detail gold powder and heat set that.
 I double matted the sentiment onto gold paper & white card. I cut a piece of gold to fit the card front, then a sheet of white slightly smaller, which was run through an Embossing Folder called Poinsettia Trellis, from Creative Expressions, by Sue Wilson. The folder is about 8x8. Another piece of the gold paper was edged with an old Fiskars Holly Border punch. A sprig from the Tim Holtz die set Winter Greenery was added behind the bottom one, and a small flourish behind the top one.

This is the stencil & die from Sweet Poppy.


So those are my cards for this challenge, but just before I finish, I thought the rest of you ladies might like to see this:


Sylvie and I met up at Ally Pally! It's always lovely to meet in the flesh crafters you have known through the Internet.😍

Sunday, 4 February 2018

Christmas Card Club Challenge #3- Angels or Fairies.

This fortnights challenge is chosen by Granmargaret, and calls for Angels or Fairies.
Two different cards, one square in blue, and one Easel fold in brown. The papers for both come from a pad I picked up in The Works last year,and is a slightly unusual format of 15cm x30cm. Which worked perfectly for the easel card!
 The stamp is by Rubber Stampede, called Angel Chorus Collage. I doubt it's still available, as I can remember this was one of the first Christmas stamps I bought, and that would be close on 15 years ago.

 OK, I'm officially shocked! Just went off to see if it was available, and turns out it is! A UK online retailer called Carysma has it, along with a whole load of other fabulous Rubber Stampede stamps!

 The circular Happy Christmas stamp is by Circa Design, and comes as a set of three called Christmas Circles. The other two are Seasons Greetings and Happy New year.


So to start with the Blue one, I took a 6" square card base and covered with the paper. The Angel stamp was stamped onto a dark blue cardstock with gold encore Pigment ink, and heat embossed in gold. I trimmed it flush with the edges of the image, then cut some gold glitter cardstock the same size and matted them together, offset. The greeting was stamped in Archival Cobalt onto a matching sheet of blue paper from the pack, then die cut with a small hexagon die. This also was matted onto glitter card, then trimmed down and mounted with a foam tab.
This is my favourite go to technique for this stamp, and was a design I saw in a magazine a lot of years ago. Firstly the image is stamped onto cardstock and heat embossed in gold again, then stamped again onto vellum, heat embossing in gold again.
 Both pieces are trimmed down to the same size, and the vellum is torn down around the two angels.
 Next I added Vintage Photo DI around the cardstock, then a little shading on the reverse of the vellum with Promarkers. That keeps it nice and subtle. It's such a detailed stamp, it needs the subtle treatment, it's easy to overpower the image- I had a couple of fails while doing this where just that happened. I'll show them at the end.😡
 Next both pieces of vellum are attached to the relevant part of the cardstock image, and another light coating of Vintage Photo added over the top. You can add glue- either a liquid like Glossy Accents, or a snail type adhesive in small spots behind  the shading.
 The whole piece was matted onto an embossed gold cardstock, and mounted onto the Easel card base, which I'd covered with a Brown version of the same Christmas pad paper. A couple of Flourishes die cut from the gold card added to opposite corners, and a white Poinsettia made from a Spellbinders die topped it off. The same sentiment as the first card was stamped in Archival Cocoa, die cut with a circle die. I cut a second piece, this time with a  scalloped die to mount it onto, then added to the card base with a foam pad.


These two were made last year with the stamp, this time using Brilliance Pearlescent Sky Blue, and the same technique.

Both were easel cards.


 I said I'd show you my fails!
 On the left, I tried covering the image with double sided adhesive sheet and Glamourdust, funny thing is, in this picture it doesn't look too bad, but in reality, much of the detail of the stamp is lost, it just looks blurred to the naked eye.

On the right, I thought I'd try adding Gilding flake to the wings. Another fail. It looked terrible, so I went over it with a gold metallic marker, which just made it worse rather than better. I should have used some sheet golf leaf, rather than the loose stuff I think.

Sunday, 5 November 2017

NEC Hobbycrafts Show, November 2017

As I said to Doug, I don't know if the show really was better this year, or if it was simply that I walked around it without struggling at all just made it seem that way. He thinks it was not really any different to the last time we went, so it must have been my not struggling meant I enjoyed it more. As usual, my main complaint is the way the stalls are mixed in together- I get irritated by walking half an aisle, past crafts/ Hobby Associations that I have no interest in. But that's just me, lol. My second complaint is of course the prices! £12 to park your car is disgraceful.
So, first off, an overview of all my purchases after I unpacked my bag onto my desk.
 We'll start of with the shiny stuff, shall we?


Some glitter, a few new colours and a couple, the gold & silver, that I use a lot. Some ultra fine in the bottle, some bead mixes, and lots of acrylic stones, which I liked the look of for flower centres and such.


Those bead mixes- Again I use this sort of thing for flower centres, and I thought a couple of them will work well with Poinsettias.


Hot foils- I really got into this with Stencil paste & a Laminator, and of course glues. Got a nice selection of colours here, especially that coppery one in the middle.


Glitter card, and the really great thing about this stuff is that it's totally non shed, and absolutely super smooth.
I got a couple of packs of the silver, because this sample on Pink Frog Crafts stand, totally sold me.


All the different colours it comes in? No, all the colours you can achieve with Markers!
 Yes, it's so smooth, you can colour the silver with your markers, and as you can see in the bottom right sample, you can even stamp on it.


He gave me a sample to try out the colouring on before I committed to using it on a big piece. On the right, Promarkers, on the left, I've inked it with a Distress Oxide Lucky Clover, also a purchase yesterday.

3 pads of assorted glitter paper, which at a £1 a pad, was great value.


I admit to going a bit mad at the WOW! embossing powder stall, all lovely glitery powders, apart from one which is a Puffy Powder. Some of them were reduced, as the colours are being discontinued. But you get the little storage case with each 6 pots, so I'm going to sort out these, and ones I already have into cases by colour.


 The last of the shiny stuff is this gilding wax.


I got sold on this, by some samples of embossing folders, again at Pink Frog Crafts.


Just take a look at these, aren't they stunning?


The Embossing folders were buy 2 get one free, so obviously I bought three folders as well! I got the floral one, the Flourish Edges, and a Christmassy frame. It's also given me ideas to use some of my other folders.


So we move on to the basic stuff- DST,A couple of pots of Collall glue,the Oxides pad, some really fine glue nozzles,A Perfect Medium refill that was reduced, and a couple of odd Pixie Powders, also reduced. Oh, and a pot of Translucent Stencil Paste.


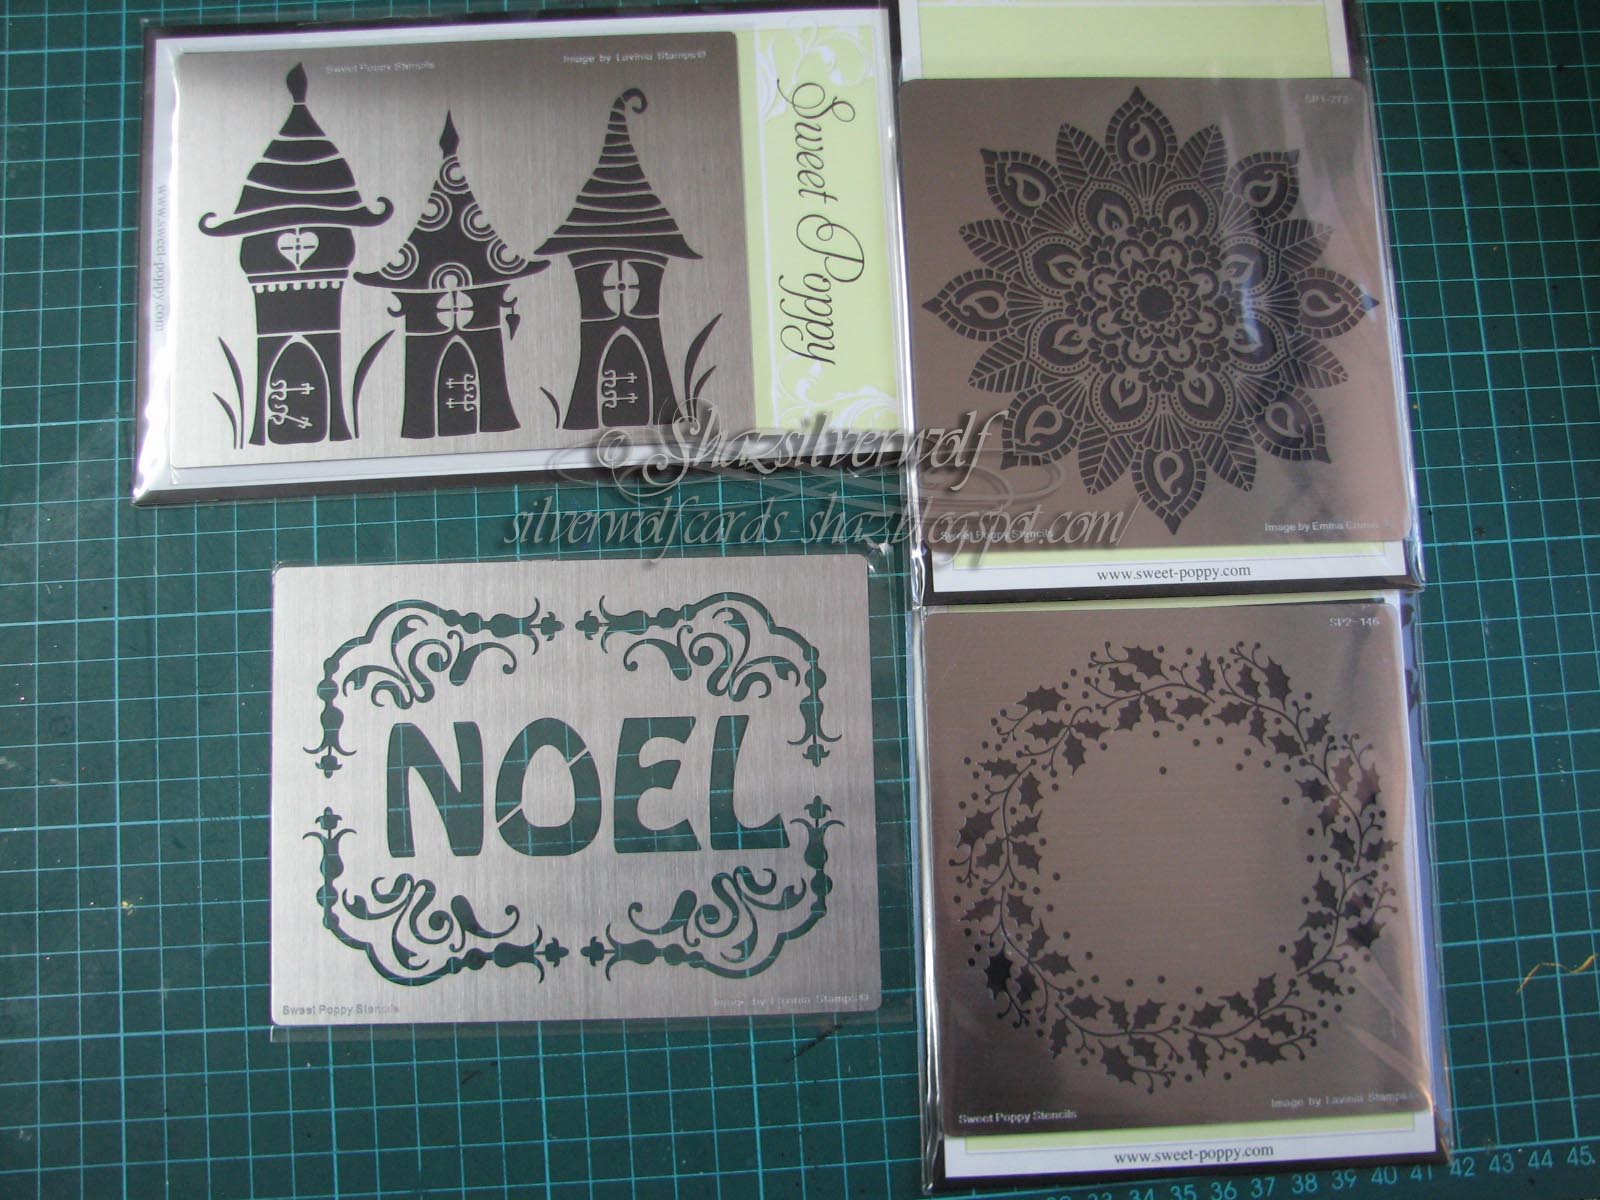
The paste was from a visit to the lovely Lucy Ellis, of Sweet Poppy stencils, where I also bought 3 stencils, and as I'd bought 3, got the NOEL one free.I think it's being discontinued.


Two Indigo Blu stamps, also reduced.


Next was a visit to Inkylicious, and I was really pleased to see the two Buddha stamps. I've been looking for a really nice Buddha stamp for ages, the nicest one I had seen was an old PSX design, which sells for stupid money, when they ever appear for sale. Two cuddling kittens, and I thought the cat with butterfly holds many possibilities- he could be ginger & white, grey and white, maybe even a tortoiseshell.

And just look at those bats! How could I not?


Honey Doo and their gorgeous florals- although they do make others besides-and I was particularly taken by the sentiment one, bottom right. Bee Yourself, Bee Happy etc. The small stamp was a freebie for buying 5 packs.


Now I do have a few stamps from this company, Circa Design,but I rarely pay them much attention at the show. This time, I wanted some verse stamps, not just to stamp inside the card, but also to be able to make a feature of on the front.


On to Lavinia stamps, and I wanted the Sacred Tree we used at the workshop a few weeks ago, and the hares are a smaller version of the ones already available. The squiggly vine one is a new one to the line, as is the fairy.


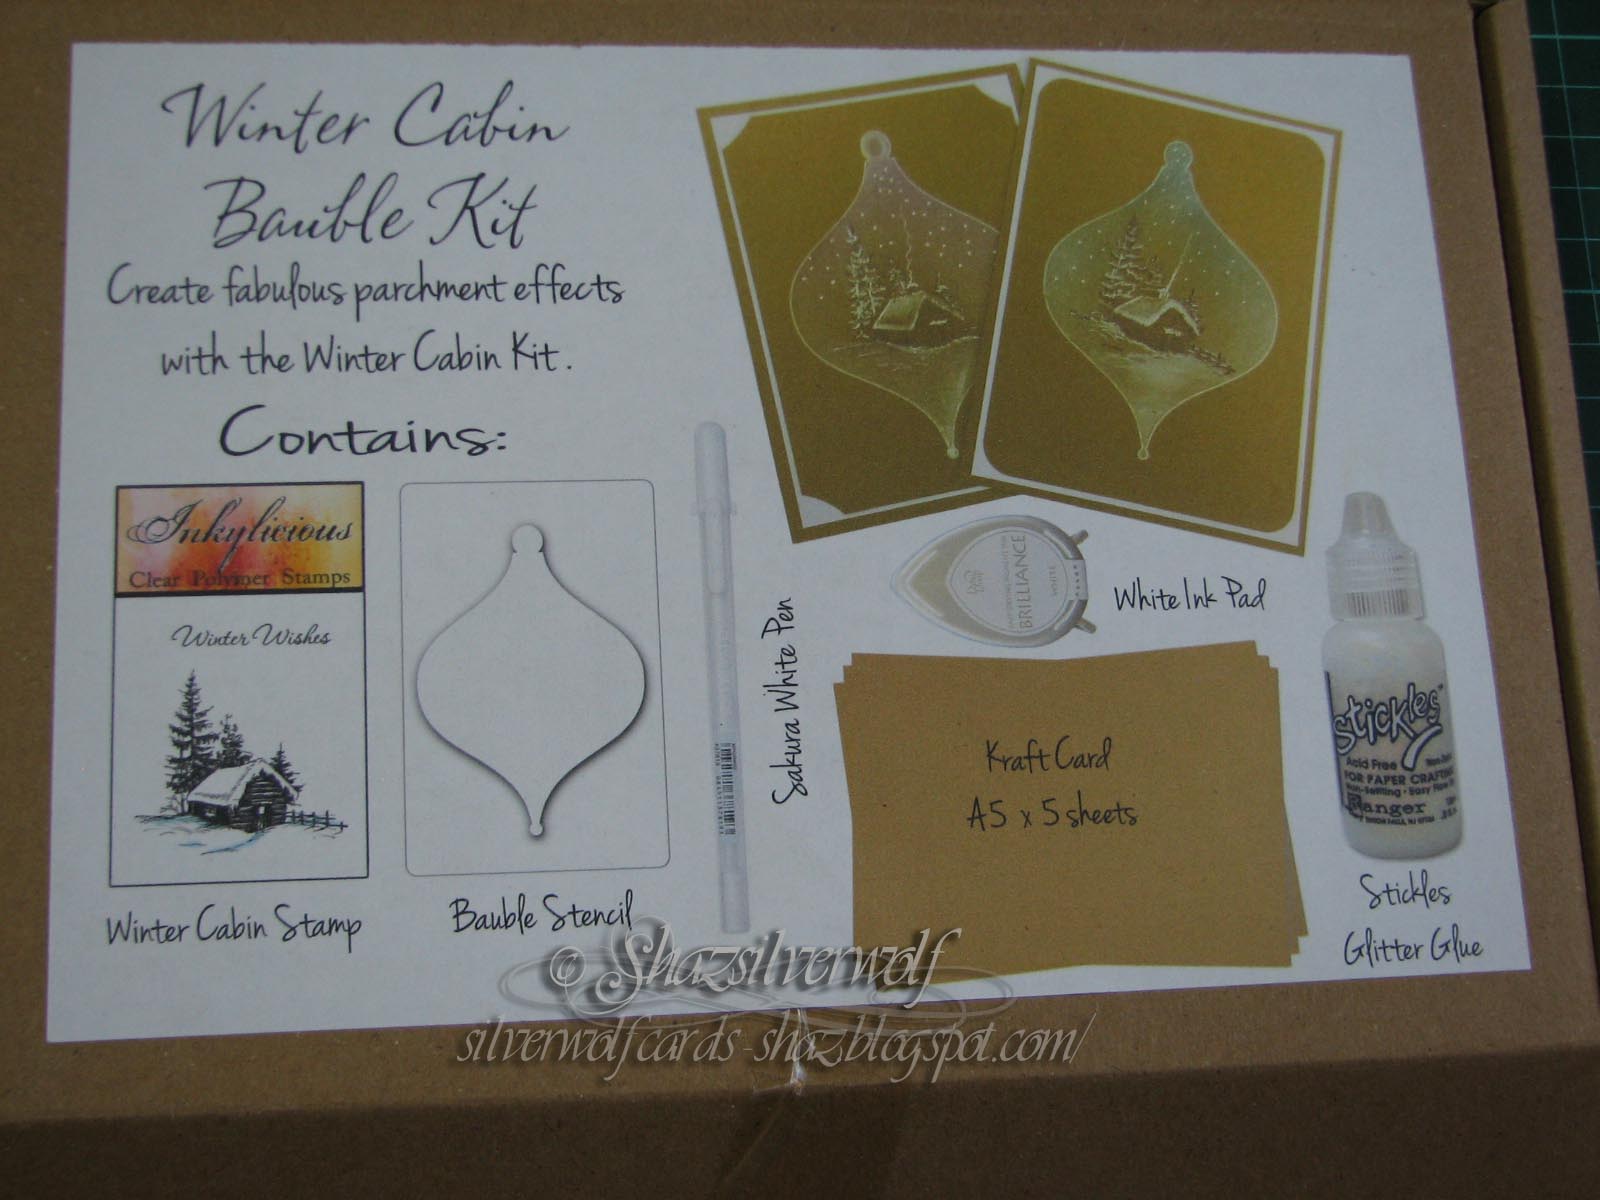
I should have put this one further up, but forgot! The kit is from Inkylicious, and contains all you need to make the project.

Stamp, card, Inkpad, Stickles & a White Gel pen, along with the bauble outline stencil.


 I also have a couple of Bauble die sets, of different shapes to the kit, so I can cut out some of my own stencils and make some more.


Last item is from Cardio, and this pack has four sets in it. 3 definitely Christmas ones, (Bells, snowflakes & fir branches) but the fourth could be used all year round.


So thats my lot, and will be my last Craft show attendance until Happy Stampers next year.It's a chance to meet up with fellow crafters, and chat to the people who own the companies. It's a great show if you've never been.  Dedicated to papercrafts, all the stalls are to do with the card making/canvases/mixed media/journaling side of crafting, so you don't feel half the show is not your thing. Also, the parking is free- they have a small car park, but there is plenty of on street parking, and it doesn't cost you £12 like the NEC! Also, and this is another big plus, the tickets are £2.50. You have to buy them beforehand, as you cannot purchase on the door on the day.

An End of an era

An end of an era

I write this with a broken heart, that only time can heal My beautiful, wonderful wifelet Shaz (Silverwolf) passed away peacefully in the ea...