

 I've seen this technique a lot on Pinterest, and thought it was time I gave it a go, as it looks really good. Simple too, and depending on your die sizes, can be made to fit pretty much any size card.
This fortnights Christmas Card Club entry too, as I don't think I have anything that fits the Challenge- Turkeys, Camels or Sheep.
These cards are an A4 sheet folded, and the top pair were made using letters from an ICraft alpha die set, which are quite large letters.
I had wanted to have the word SNOW on the front,as I was using snowflake stamps, but the letter W was too wide to allow the word to fit, so I settled for NOEL.
To get round the letter size problem, I cut the word SNOW out with my Silhouette Portrait, using 2 different fonts, as the first font was a little difficult to work with. I hadn't considered how thin some of the lines on the words were!
 So you can make sure your word is centred, you do need to cut your cardbase and panel to size before you start. I often trim them to size when I'm done, but that won't work here. I trim my card base about a ¼" from the width, as I find a full sized sheet makes it too tight a fit when putting into the envelope, even if the card is totally flat. Any embellishments/raised areas make it impossible. It also gets rid of any misaligned edges from folding, or damaged corners.
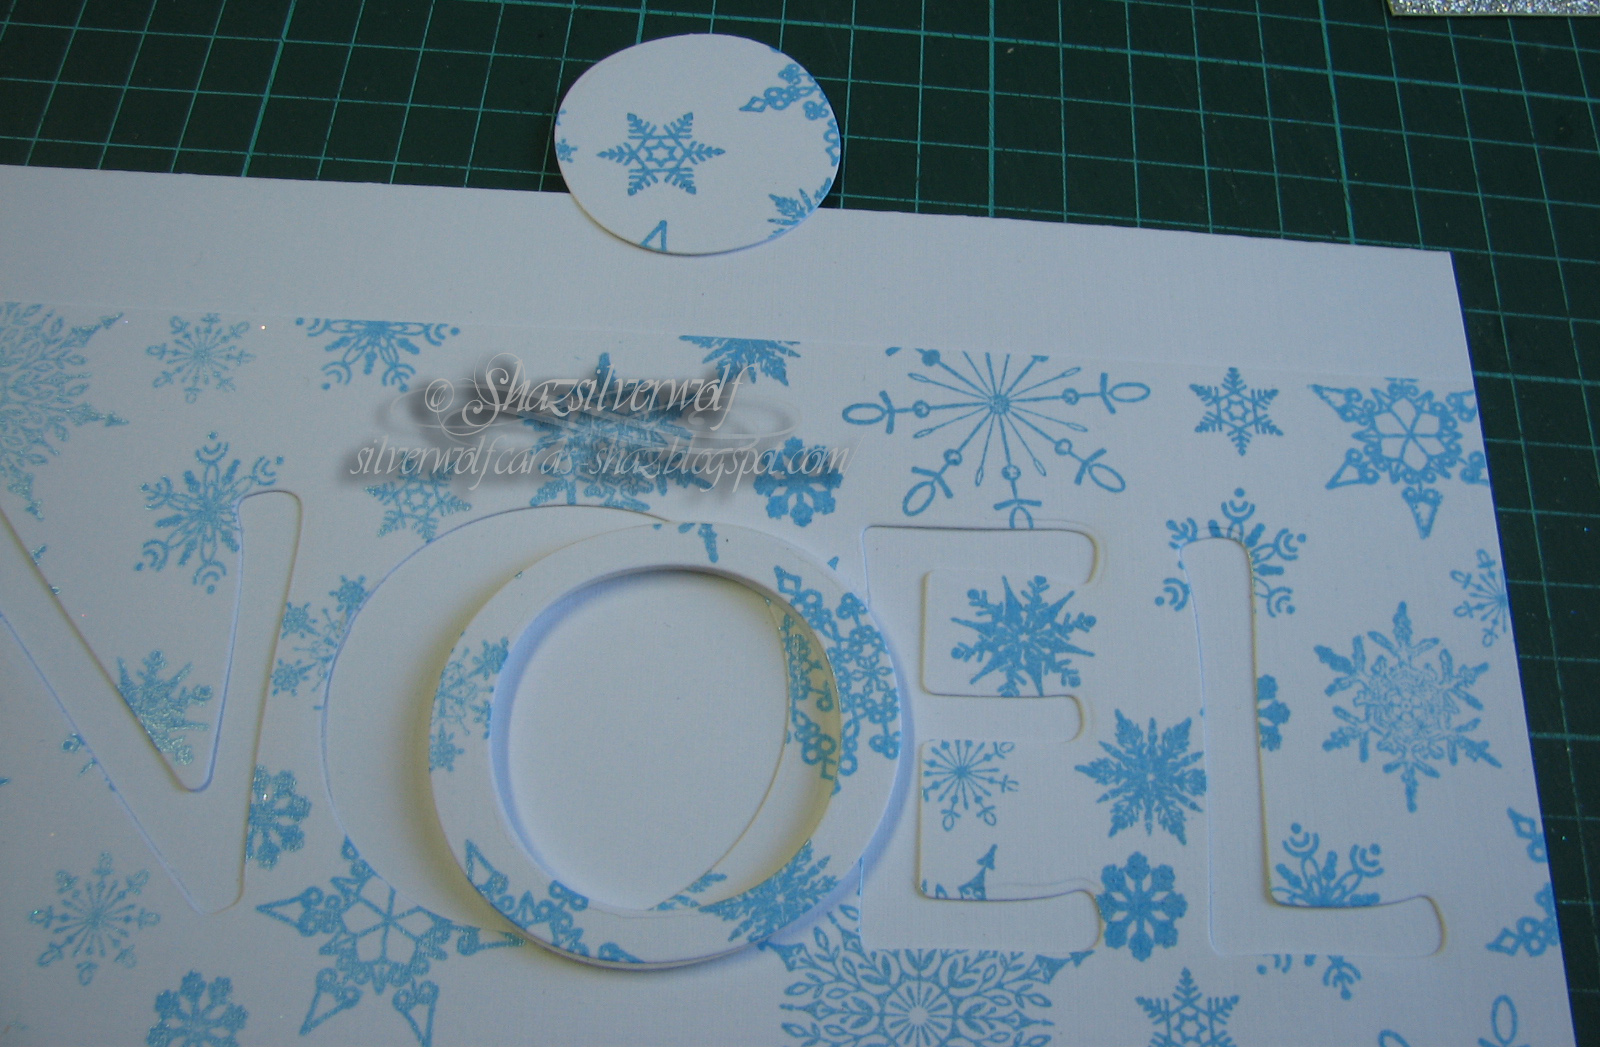
 I stamped a selection of snowflake stamps of varying sizes in Brilliance Pearlescent Blue pigment ink.
The letters were 'dryfit' first, to get the spacing right, then held in place with a little stencil tape.
Making sure your letters are level can be awkward, but a 'T' Ruler helps here. Butted up to the edge of the card, you can be sure all the letters are placed the same.
To die cut, I have the plates in my 'Bug swapped around, with the 'B' cutting plate on the bottom, instead of the 'C' plate. That goes on top. This way, you can just lay your card & dies straight down, without needing to flip it over, and potentially having your dies move. Not my idea, I saw a few You Tube crafters doing it, and realised it was a great idea.

The letters die cut out. Make sure to retain any centre pieces from letters, such as the 'O' here, as you'll need to replace it to fill in the letter on the card.
I also die cut the same letters from some fun foam, to give the dimension. You don't need the centre from the O for this.You can use a few layers of cardstock layered up if you don't have any fun foam to hand.

To add the letters on top of the fun foam, I used a ZIG glue pen. Any glue pen will do the job,as will glue with a fine tip applicator, or you could put a sheet of double sided adhesive on the front of the fun foam before die cutting.
This Zig pen has a chisel tip, and makes adding glue easy. It comes in different nib types too- there is a rollerball version, and a pointed tip version. The glue starts out blue, and turns clear as it dries.

One thing worth mentioning- 'dry fit' letters like the O before you add glue. I was surprised that although they LOOK symmetrical, they are not exact.Even the ones I cut on the Silhouette. Obviously, this depends on your dies- some may be perfect, others, not so much.


Next add the stamped panel to your card front,and I found it helpful to add tape runner to the parts of the letters remaining as well, such as the pointy bits of the N, and the parts of the E, to keep them flat.

Now you can add your other letters.
The fun foam gives a nice dimension, not too much even for mailing.
 I'd suggest at least 4 layers of cardstock, plus the stamped layer if you do it that way, as I used 3 plus the stamped layer on one of the next cards, but it wasn't as dimensional as I'd have liked. The thickness of your cardstock will have a bearing on this, of course.
To finish this off, I added a peeloff border either side of the stamped panel and stamped a greeting along the bottom. It comes from a Phill Martin set called Christmas Holly Sentiment Borders. I just masked the Holly embellishment at either end before I inked the stamp, so I just had the sentiment.

The SNOW eclipse cards were done by cutting the word SNOW on the Silhouette, and for my first one I cut the word a total of 4 times, leaving enough room above & below the first one for me to trim the panel down. I left the cardstock on the Cutting Mat to do the stamping, for which I used a stamp by Chloe, called Wavy Snowflake Border.
I twisted & turned the stamp to cover the panel completely.

This was the one I used the thin lined font on, and you can see the other words for the layers below the stamped over area.

I decided to make the next version more dimensional, so cut the words again from a second sheet of cardstock.

I used Silver Encore Pigment ink here, and a silver sparkle embossing powder from WOW! called Blizzard.


The sentiment for this one is also a Phill Martin one, from another set called Snowflake Sentiment Borders.

This is the finished four cards.


These are really easy to make, and could also be done using a Patterned paper, so no stamping required! The fun foam makes it faster, as there is no building up layers involved.
As for dimension, that is totally up to you. From one or two layers of cardstock to keep it low, to a couple of layers of fun foam or chipboard for a real WOW factor, if you are not going to be mailing the card.


