A warm welcome to all my visitors,

Thank you for taking the time to come and look at my blog, I really do appreciate it. I would love you to leave me a comment, even if it’s just to say Hi. It means I can come visit you!

All my designs are original, so copyrighted to me. If I have been inspired by someone elses work, I have named them in the post, and where able, I have provided a link.

Please feel free to use my designs for inspiration, I just ask you to credit me, and provide a link back to my blog.

Thanks, Shaz XX

Showing posts with label Dreamweaver. Show all posts

Wednesday, 23 August 2017

WOYWW #429

Do you know, I'm shocked at how fast these weeks are going! I mean, third week into August already. The C- word will be with us far too soon for my liking.
 But that means it's Wednesday, and time for Whats On Your Workdesk Wednesday, hosted by our lovely Julia over at The Stamping Ground.


On my desk right now is the pile of Hot Foil projects I was talking about trying last week. There are two posts below this about them, both are very picture heavy, which is why I split it in two. If you want to check them out, you might want to come back when you have some spare time😀😀But it works extremely well, and what's more, you can do it with an ordinary iron as well.


 The small metal stencils are for the next round of experiments- I want to see if it works with normal press down foil,like the Stix2 ones above, and also if the process will work with Dreamweaver pastes, and then stamping with a glue pad. That's something that's never worked very well, so I'm going to see if heat makes it work better. It would also mean I could foil stamped images. So we'll see.


 We paid a visit to Amelias Crafts on Friday, and these were the things that I put in my basket. I liked the Woodware Wreath stamp, that's going to make some nice simple C Cards, and that Embossing Folder has lovely wavy lines on.
 However, this picture is what Beloved Hubby added to the basket.
A Sweet Poppy Dragonfly stencil, and  a whole pile of stamps. Those feather stamps are HUGE! To give you an idea, that pack is A4 sized.


This pic is an idea I picked up from Diana Taylor at Velvet Moth Studios blog.  She was storing spare die cuts in trading card/ currency pouches in an A4 binder, which I thought was a great idea, so I've just done the same with all my spare ones.


...and finally......


Tuesday, 9 August 2016

First three cards from Embossed panels.


First batch of cards made with the previous posts panels. LINK HERE to the post, which has a link to the You Tube video which inspired these.


Starting with this one, the panel itself uses Tim Holtz Flourish stencil, embossing paste  and 3 colours of Embossing powder.


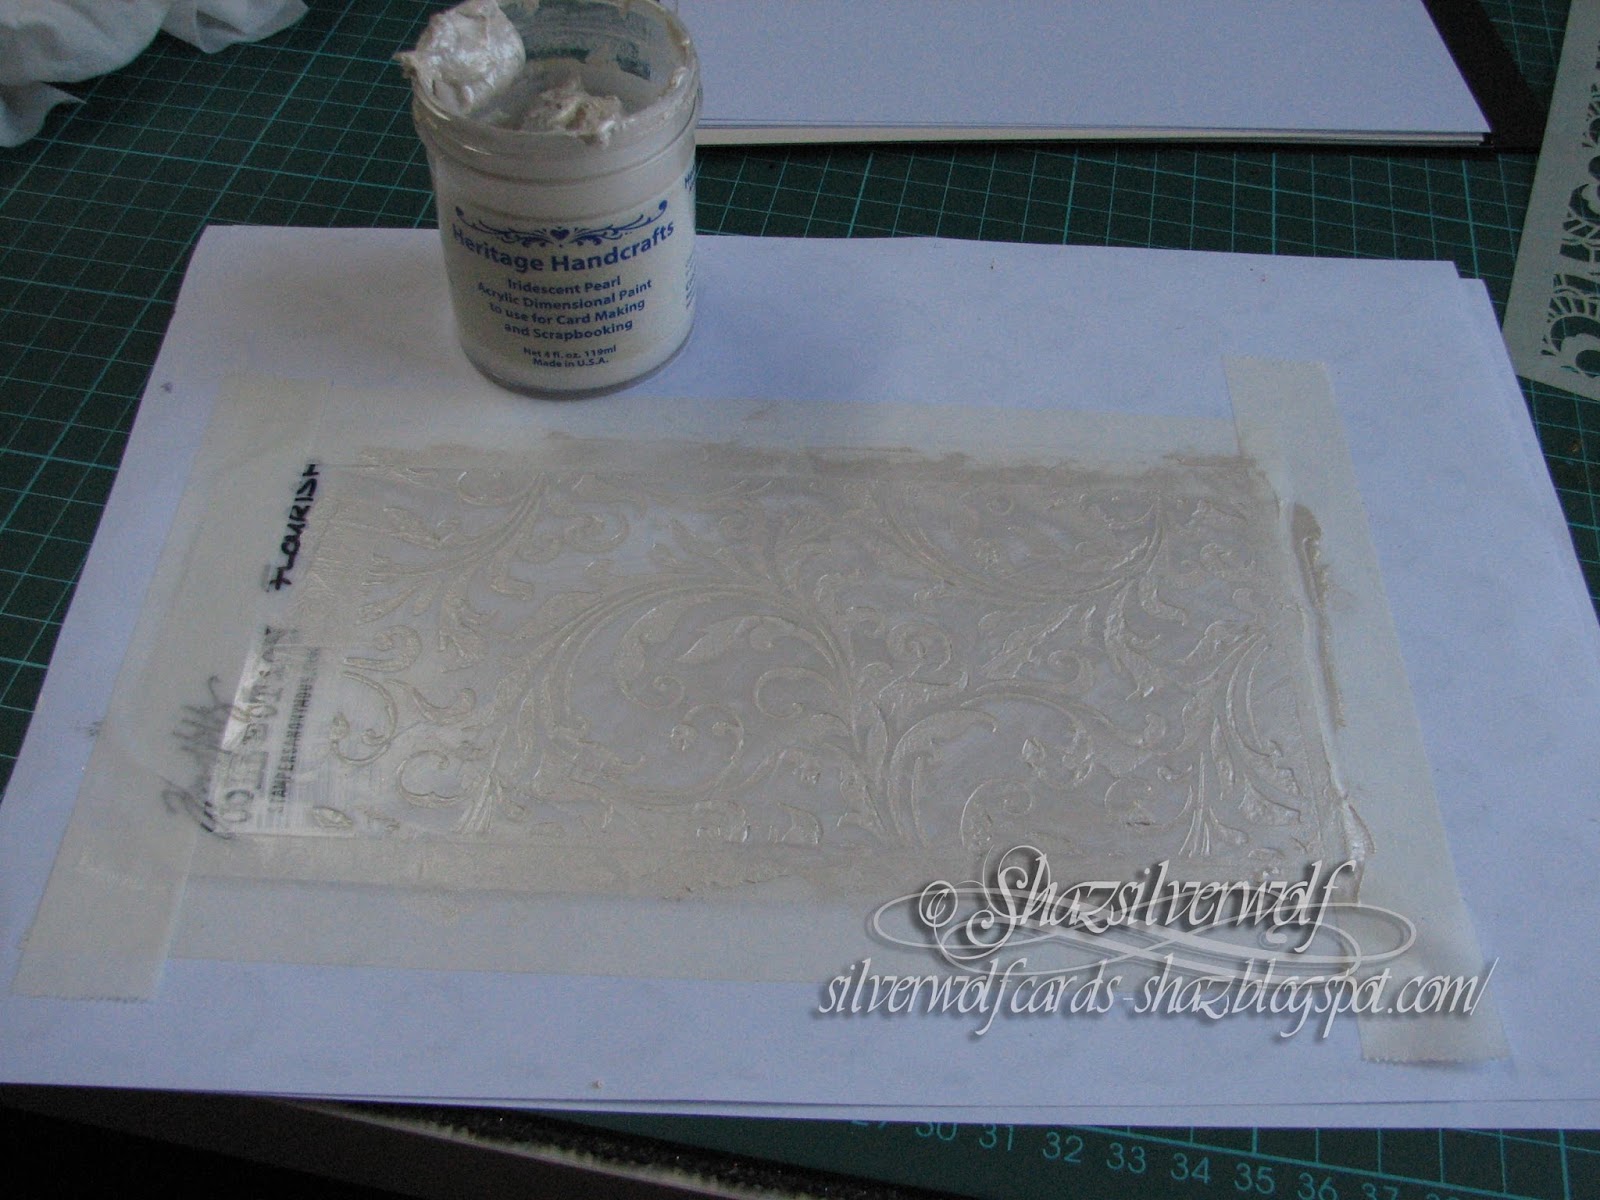
The embossing paste is spread through the stencil, and you don't need to worry too much about getting it flat, as the embossing powder will hide any imperfections.
 Remove the stencil, and either drop into water, or wipe it clean straight away.
Now start sprinkling one of the powders over the paste. Tap off excess and return to the jar. Repeat with however many colours you are using.  As you can see, I have three, all 'Heat it Up' brand, I've had for a while. Blue Glass, Eggplant and Lilac.
 Put aside to let the embossing paste dry- mine only took an hour or so.


 When it's dry heat the embossing powder with your heat gun. Be extremely careful not to touch the paste with your fingers, it gets incredibly hot.Now all that remains is to matt it and mount onto a card base.


I used a pale lilac card and some blue metallic card to matt it onto,and also scored a line across the card either side of where the panel would go.  The sentiment is stamped in Versafine Majestic Blue, and comes from a Phill Martin set called Scribbled Sentiments.


Second card uses the same stencil, but this time I used some  of the Glitter Embossing paste I was gifted- incidentally, these are also from Phill Martin.


I spread the paste in rough thirds across the stencil, letting them blend & overlap where they met.


I will say you need to take care when removing this stencil, as it's flourishes can get a little stuck in the paste.
 This was put aside to dry, nothing more needs to be done with it.

Just needs trimming, matting and layering. I decided to use a glitter paper for this, as I have a pack I picked up one time in Hobbycrafts which has colours very close to the embossing paste.

The pieces were matted using silicone glue so it would grip the glitter better than tape.

Now for the card blank.


I took a black card base, and scored two lines either side of where the panel would sit, then a single line either side. I mapped this out on the reverse with light pencil marks first.


For the sentiment, I used the Tim Holtz set Saying Stuff. The box comes as a separate stamp, so you can choose which of the dozen or so messages to put in it. They were both stamped in Encore Metallic Bronze and heat embossed with clear detail powder.  Two star shaped copper brads were added to the panel and it was mounted using 3d foam tape.


3rd and final card of this batch, using white embossing paste and 3 colours of a sparkly embossing powder- Heat It Up's Holographic, and Stampendous Crystal and Kaleidoscope.
The stencil this time is called 'Lace', another by Tim Holtz.
 After applying the paste, I randomly sprinkled the various embossing powers across the panel.


After the stencil is removed, and put aside to dry.


I like the optical illusion here, it could be black on white, or white on black. I didn't matt this one at all, but I did again score across the front of the card base.


I thought that as the panels have so much colour and texture, it needed a fairly plain base.


Layered onto the card base.


A sentiment, from Clarity, from a set called Line Sentiments No.1, stamped in Versafine Onyx Black.


Final addition was some sparkly black eyelash wool around the spine.

I'm liking this technique as a way of using up embossing powders. I have many pots of the stuff, bought back in the day when I used to do a lot of heat embossing. Not so much anymore though, so this is certainly going to help stash bust it!

Monday, 8 August 2016

Tim Holtz stencils, embossing paste & stuff

Right then,I was watching a You Tube video by Kamila Rotsis, called ' 4cards using one stencil by Tim Holtz and Embossing Paste'.
She used just the Flourish stencil, and 4 different ways of treating it- colouring the embossing paste with Distress inks, Colouring over the embossing paste with DI's, Adding Embossing powder to the paste, then heating it when it had dried and  finally just leaving the pearlescent paste plain.
The whole process caught my imagination, and as you can see from the two pictures, I've now got a whole bunch of panels for cards. I also tried the techniques out with more than one stencil, another few of Tims, Lace,Rays and Bricked,  a couple of Crafters Workshop stencils, and a couple who's makers I don't know. I tried a few variations on the theme too- some worked well, but not all. One or two I'm not so happy with, but I will find a way of using them, even if that's cutting them up to form smaller panels or mosaics.
One of my favourites is the black and white one top left. It seems to be black embossing on white, but it's actually the other way around. Bit of an optical illusion. Not so happy with the black sparkle on black below it, that didn't work as well as I expected.
 I'll briefly go through the process in this post, then link back to this as I blog each card that gets made.
First off,  choose your stencil and cardstock. For the ones where you apply DI's as a watercolour over the top, use Watercolour paper, and I also found that the ones where you colour the paste with DI work better on watercolour paper. It takes a while to mix each colour to apply, and the normal cardstock starts to buckle part way through. As the stencils are not totally rigid anyway, this makes it far more likely you will get seepage under the stencil.


It helps if you tape the stencil in place, and also to tape at least one side of your cardstock to the work surface.


Once the paste is added  remove the tape and carefully peel up the stencil. Put  the panel to one side and clean off your stencil. It's easier to clean if you do it whilst it's fresh. I used a baby wipe over some kitchen paper, but after a few uses, it's a good idea to go give it a wash, especially if you want to go from a dark paste to a light one.


If you are going to add embossing powder, now is the time to do it.  You can use just one colour, or a combination. On this one I've used Midnight Black and Copper Detail, both from Stampendous. Once you have it covered, put it aside to dry.

When it's dry you can bring it back and heat the embossing powder with your heat gun.


This is the finished panel, prior to being trimmed down.


Another way to do the stencil is to colour the Embossing paste with some DI's. I used the same colour combo Kamila did- Mustard Seed, Worn Lipstick and Wilted Violet. By splodging an inkpad onto your craft mat, you can then add a little Embossing paste, I used Pearlescent, to the ink. You will get a pastel shade of paste.
  If you have some small pots to hand, any extra paste can be stored for later use.

Add the paste a section at a time, then peel off the stencil to reveal the design. Put aside to dry.


This is the fully dried panel.


Her third method was to do a watercolour wash over the dried stencil paste using Distress inks again. Firstly spray over the design with water, and use a brush to make sure the whole design is covered. This is why you definitely need watercolour paper for this one.

Again, splodge some ink onto your craft mat, and spray with some water. Now paint this over a third of the design. This one uses Mustard Seed, Peacock Feathers and Mermaid Lagoon.

Let the ink dry, and buff any ink off the Embossing paste.

I've created about 25 panels using various of these methods and colours. I'll blog a couple of cards at a time, so that the posts are not too long.

An End of an era

An end of an era

I write this with a broken heart, that only time can heal My beautiful, wonderful wifelet Shaz (Silverwolf) passed away peacefully in the ea...