A warm welcome to all my visitors,

Thank you for taking the time to come and look at my blog, I really do appreciate it. I would love you to leave me a comment, even if it’s just to say Hi. It means I can come visit you!

All my designs are original, so copyrighted to me. If I have been inspired by someone elses work, I have named them in the post, and where able, I have provided a link.

Please feel free to use my designs for inspiration, I just ask you to credit me, and provide a link back to my blog.

Thanks, Shaz XX

Wednesday, 31 January 2018

WOYWW #452

So, we're at the last day of January already-if time flies when you're having fun, I must have been having a whirlwind of a time this month. I mean, seriously, where did it go? Another tour of the Desks of Delight then, at Julias place, The Stamping Ground.
 A bit of crafting done over the last few days- this card, in the post below is Foiling without using a Laminator- just two widths of DST.


And speaking of foil, we popped into town at the weekend, and whilst there, a visit to The Works was called for. Where I found this:
 A pack of 10 x 1 metre rolls of foil, for the grand sum of £4! It comes with a tube of glue, so you don't actually have to Heat Laminate it to work, but it will still be OK for that too. Total bargain.

 Later on Saturday, we went up to Amelias Crafts at Studley, as they'd announced a 50% off Sale, in order to clear some space for new stuff from Creativation releases- mainly Tim's I'd imagine.


Well, it would have been rude not to!


Some cool Christmas stamps, which I need like a fish needs a bicycle.


And a couple of Tim Holtz/Stampers Anonymous sets.Yet another Christmas set- Beloved Hubby liked the stags head, and the Sea themed one caught his eye, thanks to the octopus. He's rather fond of The Kraken Rum, lol.
So overall, a day of bargains, which can't be bad.

Oh, last week Magic Maggie asked about the proportions for mixing glitter & stencil paste.
 I have to admit that it's not an exact science, I just added what I thought was enough. I'd guess it was around 3 teaspoons of paste to 1 or 1 1/2 of glitter. Ish. It's easy to see roughly how it'll look if you're mixing coloured Glitter into white or Translucent paste. Harder when it's say gold glitter into gold paste. So I'd try it first with a clear/white/translucent paste to get a feel for the mix.  You want to maintain roughly the consistency of the paste- too dry will make it harder to spread over the stencil without having to keep reworking it to fill the spaces. Too much rework increases the likelihood of pushing the paste under the edges of the design. It's one reason I prefer the Sweet Poppy paste to Dreamweaver, I find the Dreamweaver to be a much stiffer paste to start with. The Sweet Poppy is much softer.
 And finally................

Saturday, 27 January 2018

Transfer Foil with DST

Right, I saw this technique last week in a You Tube Video by GinaK Designs, from Stamp TV. If you've not seen any of her videos, do give them a look. She makes some really beautiful cards- using her own products, but  can be made by substituting what you have to hand.
 Anyway, she was promoting her own line of Transfer Foils, and made a card like this, using Double Sided Tape, instead of heat transfer with a laminator.
 You need a panel of cardstock cut to fit your base card, and in hindsight I'd recommend leaving it slightly larger than you want, so you can trim it down after adding the foil, to give you nice crisp edges.
 You can probably also see here that I started off with a scrap piece of linen effect card. Again, in hindsight- and I did swap to plain card part way through- use a smooth cardstock, as the foil doesn't transfer very smoothly onto a textured cardstock.


 I started adding my DST in the centre, diagonally across the card, then working out to the edges, alternating the tape between a very narrow one, and one slightly wider.
 You do need to make sure you burnish the tape down really well. Especially at the ends. Trim off the excess when you get to this stage.

When you're done, it will look like this. I didn't measure a specific gap between the tapes, just eyeballed it.


This blue one is what I started with, but it wasn't working great due to the surface texture.
 Starting in one corner, peel off the backing to one strip of tape, and press your chosen colour of foil down firmly, and again, burnish well, a bone folder/ spoon works well for this.


It's better to work a line at a time, as that will produce less waste on the foil, as what is left on the sheet probably won't be wide enough to use anywhere else.


 Working your way across the cardstock, you will end up with this.
 You may need to trim the edges slightly to neaten them up afterwards.


Something else I'd done a while back was to laminate some scrap card with Stencil Paste, just swiped across with a palette knife, then covered in foil sheets and laminated, to give me something I could die cut sentiments from.
 Here I die cut a Crealies Happy Birthday die, and hand cut a small banner from scrap black card to mount it on.

  I added the banner with a little DST & a Copper Brad to match the foil. The whole panel was then matted onto a piece of black cardstock before mounting onto the A5 card front.


 You can see how the foil reacts to different light, the Copper foil  showing Purples & Greens from this angle.

 Photo from a slightly different angle again.


So, tips to help with this:
  1.  Burnish the DST down really well. 
  2. Burnish the Foil well too- but take care not to catch the previous rows of foil.
  3. Leave your panel slightly oversize, and trim when you're finished.
  4. Use Smooth cardstock!
  5.  Make sure you go off the edges with the DST then trim off the excess- if you rip the tape too short, any join will make a bump in the foil.

Thursday, 25 January 2018

Swirl Tree Christmas Cards.


 So, on yesterdays WOYWW, I had been working on some glitter paste Christmas tree cards.
This stencil is by Sweet Poppy, called Swirl Tree.


 I made 8, 4 on black linen cardstock, and 4 on white.

 Now the paste has dried, you can see some of the sparkle from the gold glitter I mixed into the stencil paste.


They've been trimmed down to fit an A5 card base, a greeting added with some small peel offs I'm still trying to use up, and a few red acrylic gems for Baubles.


Here they look a little dull, as the glitter doesn't start to show up properly until the paste dries.

I was asked about glitter/paste proportions, and have to admit there was nothing exact about this- I just added until it looked about right! I'd guess that the ratio was roughly 3 teaspoons of paste to 1 or 1 1/2 of glitter. You basically want enough glitter to make it sparkle, but still keep the paste fairly soft in consistency. And if you are adding glitter to coloured paste, be aware that you won't really see any evidence of glitter or sparkle till it dries.


If using white/clear/translucent, and coloured glitter, you will of course see the glitter, so will be better able to judge proportions, so it may be best to use that first time round to get a feel for it.


You can buy glittered Stencil Paste, but if you have glitter, it's just cheaper to make it yourself.


Here the stencil is taped down over the cardstock, and beneath it is a magnetic sheet, which is a great help in keeping the stencil flat and in place. Under the magnetic sheet- and I just bought some A4 sheets off E-Bay or Amazon, you want to get a fairly strong, thick sheet for this- is a small off cut of non-slip mat, bought in a 1 metre roll from Poundland.

Wednesday, 24 January 2018

WOYWW #451

Wednesday again, and time to join up at Julias place, The Stamping Ground, for our regular desk hop.
My desk in all its glory-as you can probably guess, I'm still working with stencils & paste.
 Right at the front, a tub of water for dunking dirty stencils in, on top of an old towel I keep in my room for drying stamps after cleaning, hence the dirty appearance!
 A bit further behind that, a magnetic sheet for helping to keep the stencil still, a few tools and pots of stencil pastes.
 The black tile is for mixing on, I've been mixing glitter into stencil paste, which is a great way of getting a glitter look, with no risk of shedding glitter everywhere.


This is a selection of the pieces I've done so far, using 3 different Christmas Trees from Sweet Poppy stencils.


They look a little dull at the moment, but as the paste dries, you see the glitter sparkle.


The green trees had glitter mixed into Translucent paste, the gold and silver used gold & silver glitter into the same colour paste.

The weekend saw a batch of 21 cards made using a Sweet Poppy Baubles stencil, and laminating with foil. They're in the post below this one.


Has  everyone been following all the new releases coming out of Creativation? Seen some lovely new Oxide colours from Tim, along with new tools,stencils and lots of Sizzix dies, as well as stamps. Particularly like the new Alcohol Ink storage tin- it holds 30 bottles, and will store Stickles & Pearls too.
 Something I keep meaning to mention, and always forget, for those fellow Pinterest addicts. Have you seen the new feature where you can now add sub-folders to a board? I'm loving this, as now I don't need a separate board for each type of Christmas Card for instance. Where I used to have boards for Christmas trees/Santa/ Snowflakes, etc etc, now I just have one Christmas Card folder, with each type in it's own folder. Finally, they've come up with a great new idea, usually I'm not impressed when they change stuff!

 I made this card up from one of the Mixed Media panels, to take with a box of shortbread down to the Oncology Clinic yesterday, as a Thank You for the Doc and staff there for looking after me so well last year when he took one look at me & admitted me, my not feeling well turning out to be Sepsis. I had no idea how serious that was, and since I've been out, I've seen so many news items about people who contracted Sepsis, and have lost limbs, and their sight, some even dying because of it. I'm still shocked that I left hospital without any serious repercussions. I mean, we've all heard about septicaemia, or blood poisoning, but I always just thought it was a bit of an infection mainly picked up from gardening related injuries.  So be aware, everyone, and get any potential infection checked out ASAP.
 
 And finally .................


Sunday, 21 January 2018

Damask Baubles Christmas Cards.

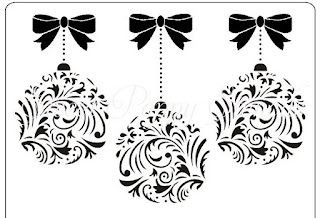
 A batch of 21 Christmas Cards made using a new to me Sweet Poppy stencil called Damask Baubles.
This is why I end up with loads of UFO's! When I've got stuff out, I tend to make a huge batch, rather than just a couple.


 These were done using Stencil paste, and then adding Heat Transfer Foil with a laminator.


I did 6 on white card, then another 15 on black card, then matted them onto A5 card bases of the opposite colour.


This is how they looked after foiling, and before matting. I used a variety of pastes, black, white, gold and silver, and they all work as well as each other for the technique.


Some were done with one colour of foil, which was the easiest way.

The bottom left one here was done on a leather effect card, and using a silver holographic dotty foil. I have this in gold as well, and both seem to leave a dusting of foil all over the card base.( You can see it on the bottom left card in the upper left image). Which doesn't actually look too bad, but was unexpected. But it's the only one of the foils that does it.

Some I made things harder for myself by using a different colour for the bows and chains.


 That's fine as long as you remember not to breathe while arranging it, and don't have any static on your fingers!
But it does give a pretty effect, and it's one way of using up small off cuts of foil.

Apologies if some look a little blurred, I think it's the holographic effect confusing the camera!


 After a bit of trimming to fit the card front, I matted them all up, then added a greeting using up some small peeloff greetings.


Not sure if they show up, but on these I added some small acrylic gems to some of the dots on the baubles, then decided I didn't like it, so didn't do any more. You can see them more clearly in the very first picture.


Next plan will be to try this stencil using paste & glitter, or probably by mixing glitter into paste first, that way when it dries, you don't get any glitter shedding.
 I also have a second stencil I bought, called Mistletoe Tree, so that will get an outing soon as well.

Christmas Card Challenge #2

So, I'm finally back crafting, and making some Christmas Cards. It feels like I've been fighting one infection after another, starting with the Sepsis in September!
 This challenge theme was Christmas Baking, but I don't have a single thing on that theme at all, so fortunately,this year it also allows us to make a card on any theme.
I recently bought a new Sweet Poppy stencil, Damask Baubles, and had been making up some card fronts using stencil paste and laminating with foil. So my theme this month is Baubles.😁


I made a total of 21 in all, 9 on white card, and 12 on black.  Story of my crafting, and why I end up with so many UFO's- I can't stop at one or two. While I've got the stuff out, I end up making loads.


I'm just showing a few here, I'll do a blog post on them all later today, or tomorrow.  Photos don't really do them justice, the sparkle is gorgeous, and changes as the light catches them.


Some were done using one colour of foil, others I used a separate colour for the bow & chain- that was a real test of patience, lol.


I finished them by matting onto an opposite colour A5 card base, and adding the greeting use small peel offs.
  Now I just need to do inserts, and they'll be good to go.

An End of an era

An end of an era

I write this with a broken heart, that only time can heal My beautiful, wonderful wifelet Shaz (Silverwolf) passed away peacefully in the ea...