
Her mix uses ordinary silicone,and either talc,cornflour or baking powder.I came across another video, and the guy had added a few drops of acrylic paint, to colour it, and a few drops of glycerine, which seemed like a good idea. So, you need:

 Optional extras: Any acrylic paint, and glycerine, which you will find in either Chemists or the baking aisle of the supermarket.
I did the mixing on a heat proof baking sheet, (Poundland).
 Important point- make sure it says SILICONE on the tube- not all these sealants are silicone, I discovered.The first tube I bought, I assumed was silicone, as it said flexible waterproof sealant,but it wasn't.
Some of these sealants are acrylic, and it does not stay flexible when it dries. Lessons learnt here; Always read the label, and never assume anything, lol.
 Squeeze a dollop of silicone onto your surface-this one is white. It does come in clear & a few other colours,you will find it has a slight vinigary smell to it. If you want to colour the moulds add a few drops of acrylic paint and a few drops of glycerine, to help keep it supple.
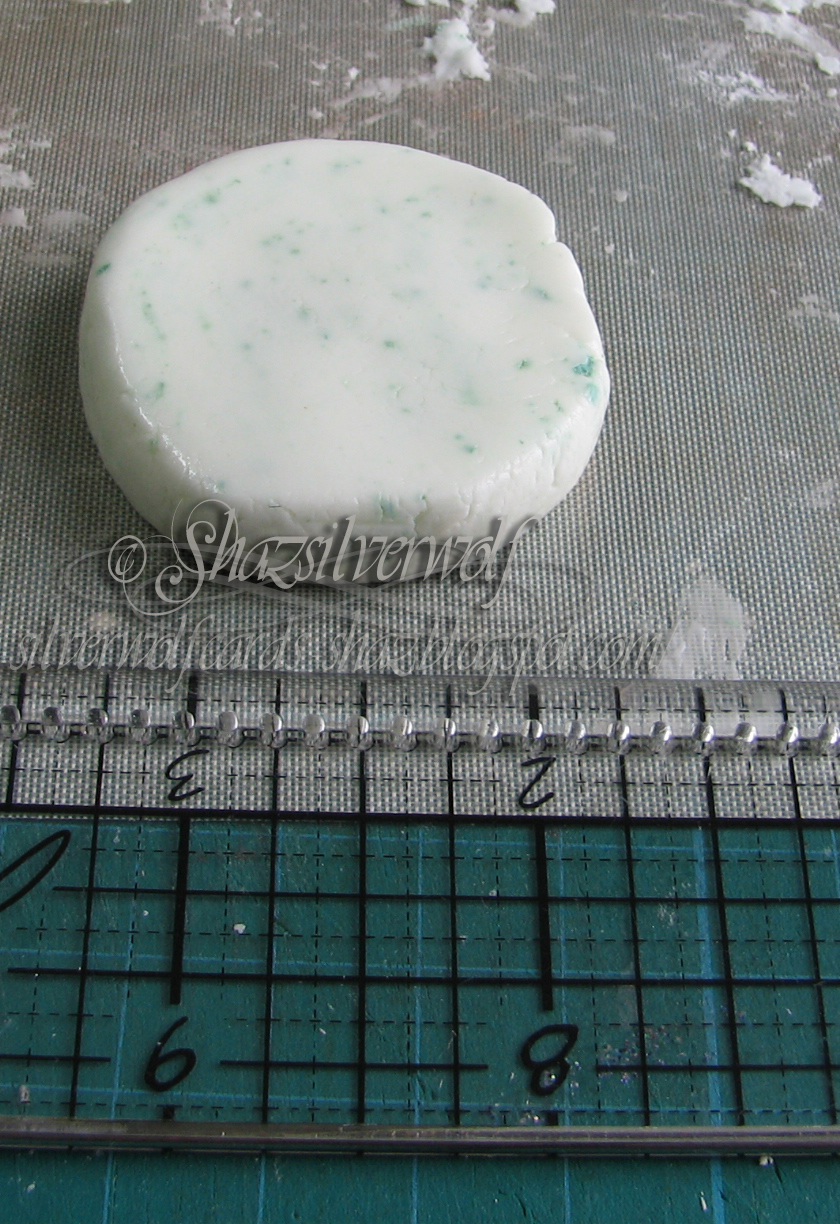
 Aim to add roughly the same amount of cornflour, etc,- its not a precise thing, roughly 50/50. You can always add some more silicone or flour into the mix if you need to. I started mixing it using an old plastic loyalty card- smear a bit of Vaseline onto it first.
I found this was slow going, so switched to mashing it together with my fingers. This is where you will appreciate the gloves. Rub some Vaseline onto them first, this stuff sticks to everything, honestly. Its a bit like making pastry, just knead it together, and you want to get to the consistency of soft pastry.Roll into a ball, and there you have it. Its that easy.

So now to start moulding stuff. I used a few metal embellishments I have, and some old ear-rings. This pic gives you an idea how big a piece I used for one mould. Remember to make it deep enough so that when you press in your embellishment, you don't go all the way through. I found if you did get any little holes because of this, you can wipe a little neat silicone over it, just to stop any leaks. Push down firmly, then make sure the mould is neat around your item. Use the plastic card to lift it off the mat, and place on something to cure.
IMPORTANT: Don't make too big a batch, I found that it cures in about 30 minutes, so you need to have your moulding items to hand, and make your moulds in that time. I used about a quarter of the tube to make a batch.

This is how many moulds I made from that quantity.
I noticed in her video, the lady says put aside to cure at least overnight. I found these had cured(set) in about half an hour- maybe humidity has something to do with it, or perhaps different brands work differently.


 All my moulds with their items.
This is a sword- yes, I had some strange ear-rings! You can see how flexible the mould is.

I coated the inside of this one with some acrylic paint, so you could see how much detail it picks out.
So, the verdict is that this stuff is awesome! Even more so as it works out so cheap.The tube of Silicone cost me £1.99, I got it from B&M Bargains, you'll get it in Wilkinsons, B&Q, Wickes etc.The gun £1 from Poundland, as was the Vaseline.Cornflour was just over a quid from Tesco, I've got a few tubs of talc lying around that I'm going to try out.


19 comments:
Wow Shaz! That is some fun project! Your shapes came out great, had to chuckle about the earrings. You never know where inspiration will strike! Thanks for sharing that how to.
Hi Shaz
that is pretty amazing thank you for sharing that with us, a great tutorial.
Do the moulds just remain flexable forever or will they dry out over time?
Ria
Wow this is fantastic, I'm definitely going to try this! Take care Zo xx
This looks loads of fun, Shaz. I look forward to seeing of the embellishments you make with the moulds,
Rosie x
Many thanks for the video link which I watched and doing a trial run too. It looks great fun and must have me a go at this as I have some lovely fossils I found in our garden that would make great moulds.
Thanks Shaz for sharing :)
Lynn xx
Hi Shaz
wow that looks amazing I'm off to poundland tomorrow, just need to get the silicon and I'm off mould making. I think I will make some buttons first, well you know me, well you do now hehe.
Also love your weird earring collection,
Wow, Shaz, that is amazing! Can you re use the moulds? If so, please can I order a sword pendant for Rhys from you and a metal heart? Let me know what it costs. Hope you don't mind me asking!!! If you can't, no probs.....
How are nights going? Hope you're ok with it and not too tired!
Hugs, LLJ xxxx
Anything metallicy would be fab! I don't know what you'd use for that, not having made anything like that myself!!
Thank you very much!
LLJ xxxx
This is brilliant, I've saved some 'molds' from a chocolate box that I was going to use, now it would be even better to 'make my own'!
((Lyn))
I am so going to have to try this! Thanks for the tips!! Thanks for visiting my WOYWW desk, well storage area, lol Waving hi from the hills of North Carolina ♥
So glad I inspired you to use the hot glue. thanks for the tutorial for making mould I am definatly going to try this
kyla
The molds look great! Can't wait to see your new embellishments using these molds!
Looks like a great project. I've added it to my list for when I've got a bit more time. x
Amazing new idea to me, and I can imagine I would get in a terrible mess doing this but I might try it one day!
Cazzy x
I went into poundland and the only silicone one they had was very small...so I will try 99p world BEFORE I go to a big DIY store....looking at your moulds it looks like it works really well though-a great tip Shaz, thanks
kyla
wow! that is brilliant... having a go at that one! jenx
G'day Shaz
thanks for dropping by my desk and leaving a comment for WOYWW. Sorry I am always the late one getting back to you LOL. Oh I have made silicone moulds before with just plain silicone...I just rubbed vaseline in a flat plastic tray. Squirted in clear silicone till 1cm deap, spread it out with and old credit card and pressed items into it that I had sprayed first with cooking oil spray and ket it all set. the next day I cut them all out and I use them still to this day. I suppose adding the powder makes it easy to use with your hands. thanks for sharing it though :o)
hugs
Annette In Oz #23
Hi Shaz. Been having a good rummage around your blog as it has been ages. I was looking for this post as you said you were going to do it at the Crop. Great post.
Glad to hear you are settling into nights well. My Hubby hates them, but that is partly due to where it is!!
Hugs
xx
Hi Shaz, I will definitely be having a go at doing this. I will let you know how things go.
Post a Comment