


This is my triple stamped and embossed card, inspired by this one from Pinterest:
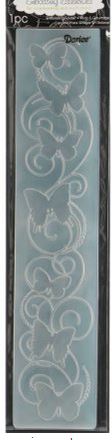
The embossing folder is by Darice,called Border Butterflies.
There is another, called Butterfly Corner, which I think may have been the one used, but the effect is similar.
I was going to use a 6x6" card base, so I worked out what sizes I needed for the embossed & stamped panels.

This was 5 1/2 ,4 1/2 and 3 1/2" square. I cut the three pieces, layered them together with some repositional tape, and ran it through my Big Shot Pro.
However, things did not go totally according to plan.

I had a line from the edge of the folder across my card.
So,I Googled a bit, and tried one suggestion I found, which was to make shims to go alongside the folder. Doesn't work.

Same result- a bit fainter, but still clearly there. So I gave the matter some thought, and a bit more Googling. Seems to be a commonly asked question, and over on Splitcoast Stampers, I got pointed in the direction of the solution.

The lady on this blog, Indigo Inklings,explained how she had got rid of the lines from a border folder.
What I needed was to emboss, but without applying pressure to the edges of the folder. Which means replacing the top acrylic sheet with something else, narrower than the folder. I cut a piece of chipboard weight cardstock into 3 lengths, all just about a quarter of an inch narrower than the folder.

To stop them moving about, I taped them together.You may be able to see they are just a fraction narrower than the folder.

The three pieces of chipboard were the perfect substitution for the normal acrylic block.

You can see, perfectly embossed, with no edge lines.

Now we come to do some stamping. I'm using a mix of stamps, some from Cardio/Majestix, and some older ones I have from Rubber Stamp Tapestry. I also selected some inks to use- Meadow, Lettuce and Citrus for the foliage, Eggplant, Purple Twilight & Stonewashed for the flowers, all from Adirondack.

I used a selection of Foliage stamps from the Summer Wreath set, and Greenery Set 1.
Then I added in some flowers,using the Adirondacks, then some dragonflies in Versafine Majestic Blue and Deep Lagoon.


The Dragonflies came from a Rubber Stamp Tapestry set called Dragonflies at Dusk.
 I finally added the Butterfly from the Summer Wreath set. With this bit done, it's time to separate the layers, and matt them onto a coloured cardstock.
 I hadn't cut these yet, as I was waiting to see what I felt was the best colour to pick out the layers . I chose a darkish blue in the end, and these are all cut to be an 1/8 of an inch larger all round than the stamped piece, so they need to be 1/4" larger in total. So, that's 5 3/4" square for the first piece, 4 3/4" square for the
second, and 3 3/4" square for the final piece.
Each piece is matted onto it's solid colour matt. Now to layer them back up again, and this is easy enough to eyeball it. By the way, this is easy to orient correctly, as only one corner is stamped, and the embossing only lines up one way. If you have an all over design, It is worth writing a 'T' for top on the rear top of each piece as you disassemble, the make the same note on the back of the solid colour matt. It's surprising how hard it can be to line it all up again after if you don't keep track of which way is up! Now it's just a case of mounting this onto your card base, and you're done.
You will notice my finished piece has a bow in the left hand corner.


