A warm welcome to all my visitors,

Thank you for taking the time to come and look at my blog, I really do appreciate it. I would love you to leave me a comment, even if it’s just to say Hi. It means I can come visit you!

All my designs are original, so copyrighted to me. If I have been inspired by someone elses work, I have named them in the post, and where able, I have provided a link.

Please feel free to use my designs for inspiration, I just ask you to credit me, and provide a link back to my blog.

Thanks, Shaz XX

Showing posts with label Really Useful Boxes. Show all posts

Wednesday, 22 March 2017

WOYWW #407

It's not a pretty sight by any standards, I agree. Detritus of  a Christmas card making session there, see the post below, for the latest challenge. Use two patterened papers was the brief. As you'll see in a minute with the next couple of photo's, not a difficult thing at all. Two? It could have been a hundred & two and I'd still be sorted.😈
 Also to be seen is the practice piece from my white inkpad review (below the Christmas card post), and one of the pieces I was doing that prompted the review. You'll see, it does all tie together when I do the card making post.


So, patterned papers then. This is an A4 RUB, and holds 6" & 8" pads, and a couple of tall thin pads, along with a selection of odds and ends.


This is a 12"x12" RUB, holding 12" square pads, 12" papers,some random sheets of paper & cardstock, and a couple of envelopes, one  with scraps and the second with spare stamped images in.


So thats how the 'getting down the patterned papers project' is coming along. Maybe in a couple of extra lifetimes, I may get close to the bottom of the boxes.

On another note, I've ordered our tickets for Happy Stampers, so thats all booked now and looking forward to that.
For anyone who has been thinking of getting the TH Tonic stamping Platform- the cheapest place I've found it, still pre-order to ship Mid April, is here, Crafts World Online. £26.49, and free shipping.
 Next bit of news, saw the surgeon last Friday. The nodule in my lung was a secondary from the bowel cancer, not a new primary. They are happy it, and plenty of surrounding tissue was removed, and are happy with me enough to discharge me from their care back to my local surgeons & Oncologist. He will organise a full body scan in the next few weeks, and it's basically just back to monitoring me now.
In other news, it seems my type two diabetes seems to be behaving well with the tablets I've been given, had two blood tests now and they are quite sure that's what it is, still puzzled as to why it just literally popped up straight after this surgery. I have to have a fasting blood test this week, then next week get an appointment with GP to get told all the do's and dont's. Although the diabetes nurse who came and saw me in hospital said it's just a case of sensible eating. Have a biscuit or two, just don't eat the whole pack. Have a couple of sweets from the tin, not the whole tin. That sort of thing. And my Mum was diagnosed as type 2 about 30 years ago, and has managed hers with tablets and sensible diet, so don't really forsee any problems. So I'll be linking up with Julia at The Stamping Ground,and coming round to have a snoop around the desks of shame a little later.

Wednesday, 30 July 2014

WOYWW #269

Happy Wednesday! A pic of the 'desk behind the desk' today, as it was a bit of a mess, lol. Where I tend to dump stuff before I get around to putting it away.
 This weeks Show and Tell, for our lovely leader, Julia over at The Stamping Ground, for our weekly snoop into the craft desks of the world.
 I will tell you in advance that I won't be getting around to any desks before tomorrow, as today is my eldest sons 40th Birthday, and we will be going to see him when we get up.Which explains the odd Facebook profile picture, for those who know me on there. Actually, you can see it in my FB badge on the right hand side. Everyone who knows him is changing their profile pic to that picture of Ant for the day, which I know he will find highly amusing.
 A little bit of blatant enabling now, and I just know that these new stamps I bought (who, me?) will grab some of you as total 'must-haves'.
Aren't they fabulous? There are a few more in the set, another couple of word stamps, a male and female profile, a pair of eyes. They are called INKCOGNITO, the latest addition to the Visible Image range,and the two word stamps are going to get a lot of use, I know.

I have to ask, but am I the only one who keeps the sheets of acetate that cling stamps come on?  I even keep the little square ones from the freebie Craft Stamper stamps! The usual excuse applies, of course- they will come in useful one day/ I have a project in mind I can use them for.


A quick look at the finished Wedding cards I was assembling last week:
The desk behind the desk after I'd tidied:


The squares of Cut n Dry foam have been stuck onto a sheet of felt, and were under the glass cutting mat to stick down- I'd forgotten I'd put them there. Need to cut them up now, for the blending tools.


And lastly, the original picture from my background:
I should have posted this up last week, as most of the picture is hidden by my ramblings.
 I may have another attempt at linking from my smartphone, last week was an epic fail. Smartphone, Dumbuser, lol.
 So have a wonderful week everyone, I'll be seeing you tomorrow.

Friday, 4 July 2014

Alcohol inks on Mirror card

Well, the Black Hole that is Pinterest does actually yield some interesting stuff. Mind you, if I wanted to make everything I've pinned, I'd have to craft 24 hours a day, 7 days a week for the next couple of lifetimes!  But still it sucks me in. However, today I spotted something, pinned it, and for once had a play with the idea there and then.  So to all of you now suffering biblical plagues and floods, sorry, my bad! The thing that caught my eye, was someone using alcohol inks onto what she called shiny card, for that read mirror card. Now I just so happen to have a Really Useful Box full of that stuff- bought back when I first started card making, and did a lot of decoupage. Always made a nice backing panel. Then I discovered stamps and ink, and was lost for ever. So if you have any of this knocking around, and don't know what to do with the stuff anymore, have a look-see at this.
I've got some plain 'pillars of light' style card, and some with patterns, so I thought I'd give both a try out. The tub of felts for the blending tool by the way- I bought a pack of felt sheets off e-bay and cut my own. A pack of 10 9"x9" squares cost me £4- the contents of that tub is from one square!
By the way, I give you fair warning now, this is a picture heavy post!

 For the first one, I tried out three of the new colours- Mermaid, Indigo and Honeycomb.


 Its not easy to show on here, but the effect is really amazing, a little bit like glass paint on a mirror.

 This next one is Purple Twilight, Raspberry and SailBoat Blue.
 Because of the holographic effect of the card, you get different colours depending on the light direction.


This is one of the pieces with stars in the foil- Poppyfield (another new colour), Pesto and Sunshine Orange were used here.


 This one used Raspberry, Wild Plum and Raisin, with a tiny bit of Black Soot added at the end.


 I thought the starry background would look good in night sky colours- Purple Twilight, Raspberry, Stream, Denim and Sailboat Blue.

       This combo is  Botanical, Honeycomb,(both new) and Sunshine Orange.


This one is Indigo, Poppyfield and Terra Cotta.


 The four completed panels.


And the three with the pattern.


Now I wondered how the plain ones would look with some embossing folder texture added.


This is a Cuttle bug folder, Gears.


The second two are Tim Holtz folders.


 As is this one.


The four sheets, all embossed. You get a lovely deep reflective colour using this card, plus the bonus of changing shades depending on the light source.

Wednesday, 14 September 2011

WOYWW #119- a bit of a tidy up!


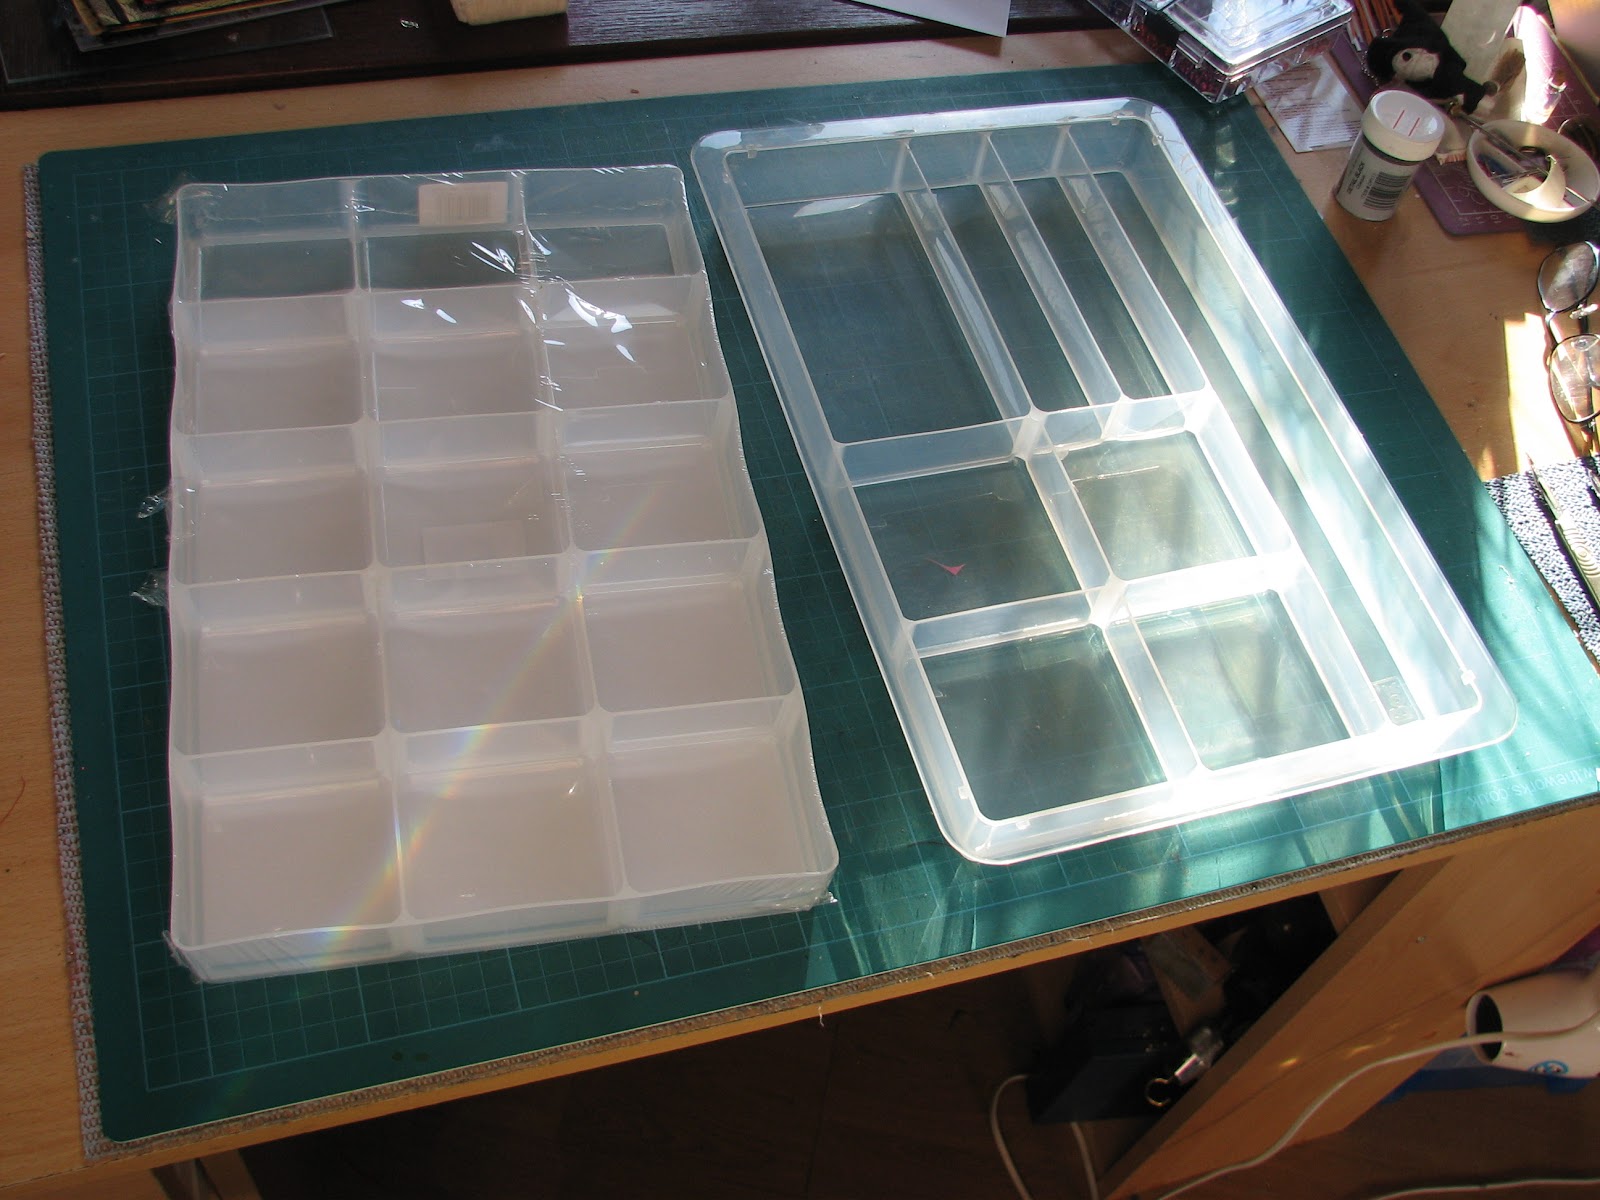
Good morning everyone, and welcome to the weekly wander around the desktops of the world, courtesy of our amazing hostess, Julia Dunnit at The Stamping Ground. The cards I have been busy on are on the posts below, but I had to share a great discovery this week at Staples. Most of you will be aware of my fetish for Really Useful Boxes- if not, go have a look at the pictures of my craft room! Anyway, I came across these really cool inserts for A4 size Really Useful Boxes- you can get two in the standard A4 size (4 litre), or 4 in the 9 litre size, which is twice the depth. My instant thought was how cool for storing little embellishments in- and they are great!

As you can see, one is straight sided, and contains 15 squares, the second has a lip around it to sit on top,and has a selection of different sized compartments.


These are just so cool- I can see a lot more of these being purchased,:)


One or two other random shots of my desk:
 
A selection of tags I've cut out and yes, they ARE in a Really Useful Box.Here are the templates I made for cutting them:
I cut them all from thick card, mountboard would be ideal, then I duplicated the sizes in thick acetate. I thought that if I wanted to cut a tag from a larger piece of work, rather than working on a tag shape, it would be helpful to see what the cut tag would look like.


Last shot of my desk, just some stuff I always have there. My scalpels, and tweezers. These are First Aid tweezers- I like the really fine point. Next to that is a pad of telephone notepaper. They were looseleaf, but I stuck all one end together with masking tape, and the back page is taped down to my desk with low-tack tape. Its great for testing paint/pens/inks on, putting a blob of silicone glue on to pick up with a cocktail stick,sticking the cut-off end of DST to, bits of peeloffs, anything sticky at all. Then just peel off the top sheet & bin it! Theres a tape dispenser with a roll of low-tack tape in it, my reading glasses- I cannot see close up at all without them!The little round white dish is actually a water/paint  bowl for painting, but I have little 'bits' in it- needles for threading, or unblocking glue tubes, Little pieces of bent wire for threading fibres through tag holes, I can see a post- it moon mask as well. Next to that is my anti static bag, behind that is Hettie, my Voodoo string doll keyring.She is sitting on her broomstick in front of a Quartz crystal. Underneath them is a free cutting mat from a craft magazine.  Oh, one more important item- the blue mat stuff under my knives. I bought some rolls of this stuff from my local Poundland- its a non-slip matting, the roll is about 3 feet long, by 18 inches wide.
I also have it under my craft mat:
It completely stops any sliding around- the little piece I use under inkpads when I am brayering, or paint pots & palettes. We even have a sheet in the back of our X -Trail to stop stuff moving about, (the boot  floor is not mat but hard plastic)  and under the mat inside the front door to stop it sliding on the laminate floor. Well, thats my desk tour for this week, hope everyone has a great Wednesday!

An End of an era

An end of an era

I write this with a broken heart, that only time can heal My beautiful, wonderful wifelet Shaz (Silverwolf) passed away peacefully in the ea...