A warm welcome to all my visitors,

Thank you for taking the time to come and look at my blog, I really do appreciate it. I would love you to leave me a comment, even if it’s just to say Hi. It means I can come visit you!

All my designs are original, so copyrighted to me. If I have been inspired by someone elses work, I have named them in the post, and where able, I have provided a link.

Please feel free to use my designs for inspiration, I just ask you to credit me, and provide a link back to my blog.

Thanks, Shaz XX

Monday, 8 August 2016

Tim Holtz stencils, embossing paste & stuff

Right then,I was watching a You Tube video by Kamila Rotsis, called ' 4cards using one stencil by Tim Holtz and Embossing Paste'.
She used just the Flourish stencil, and 4 different ways of treating it- colouring the embossing paste with Distress inks, Colouring over the embossing paste with DI's, Adding Embossing powder to the paste, then heating it when it had dried and  finally just leaving the pearlescent paste plain.
The whole process caught my imagination, and as you can see from the two pictures, I've now got a whole bunch of panels for cards. I also tried the techniques out with more than one stencil, another few of Tims, Lace,Rays and Bricked,  a couple of Crafters Workshop stencils, and a couple who's makers I don't know. I tried a few variations on the theme too- some worked well, but not all. One or two I'm not so happy with, but I will find a way of using them, even if that's cutting them up to form smaller panels or mosaics.
One of my favourites is the black and white one top left. It seems to be black embossing on white, but it's actually the other way around. Bit of an optical illusion. Not so happy with the black sparkle on black below it, that didn't work as well as I expected.
 I'll briefly go through the process in this post, then link back to this as I blog each card that gets made.
First off,  choose your stencil and cardstock. For the ones where you apply DI's as a watercolour over the top, use Watercolour paper, and I also found that the ones where you colour the paste with DI work better on watercolour paper. It takes a while to mix each colour to apply, and the normal cardstock starts to buckle part way through. As the stencils are not totally rigid anyway, this makes it far more likely you will get seepage under the stencil.


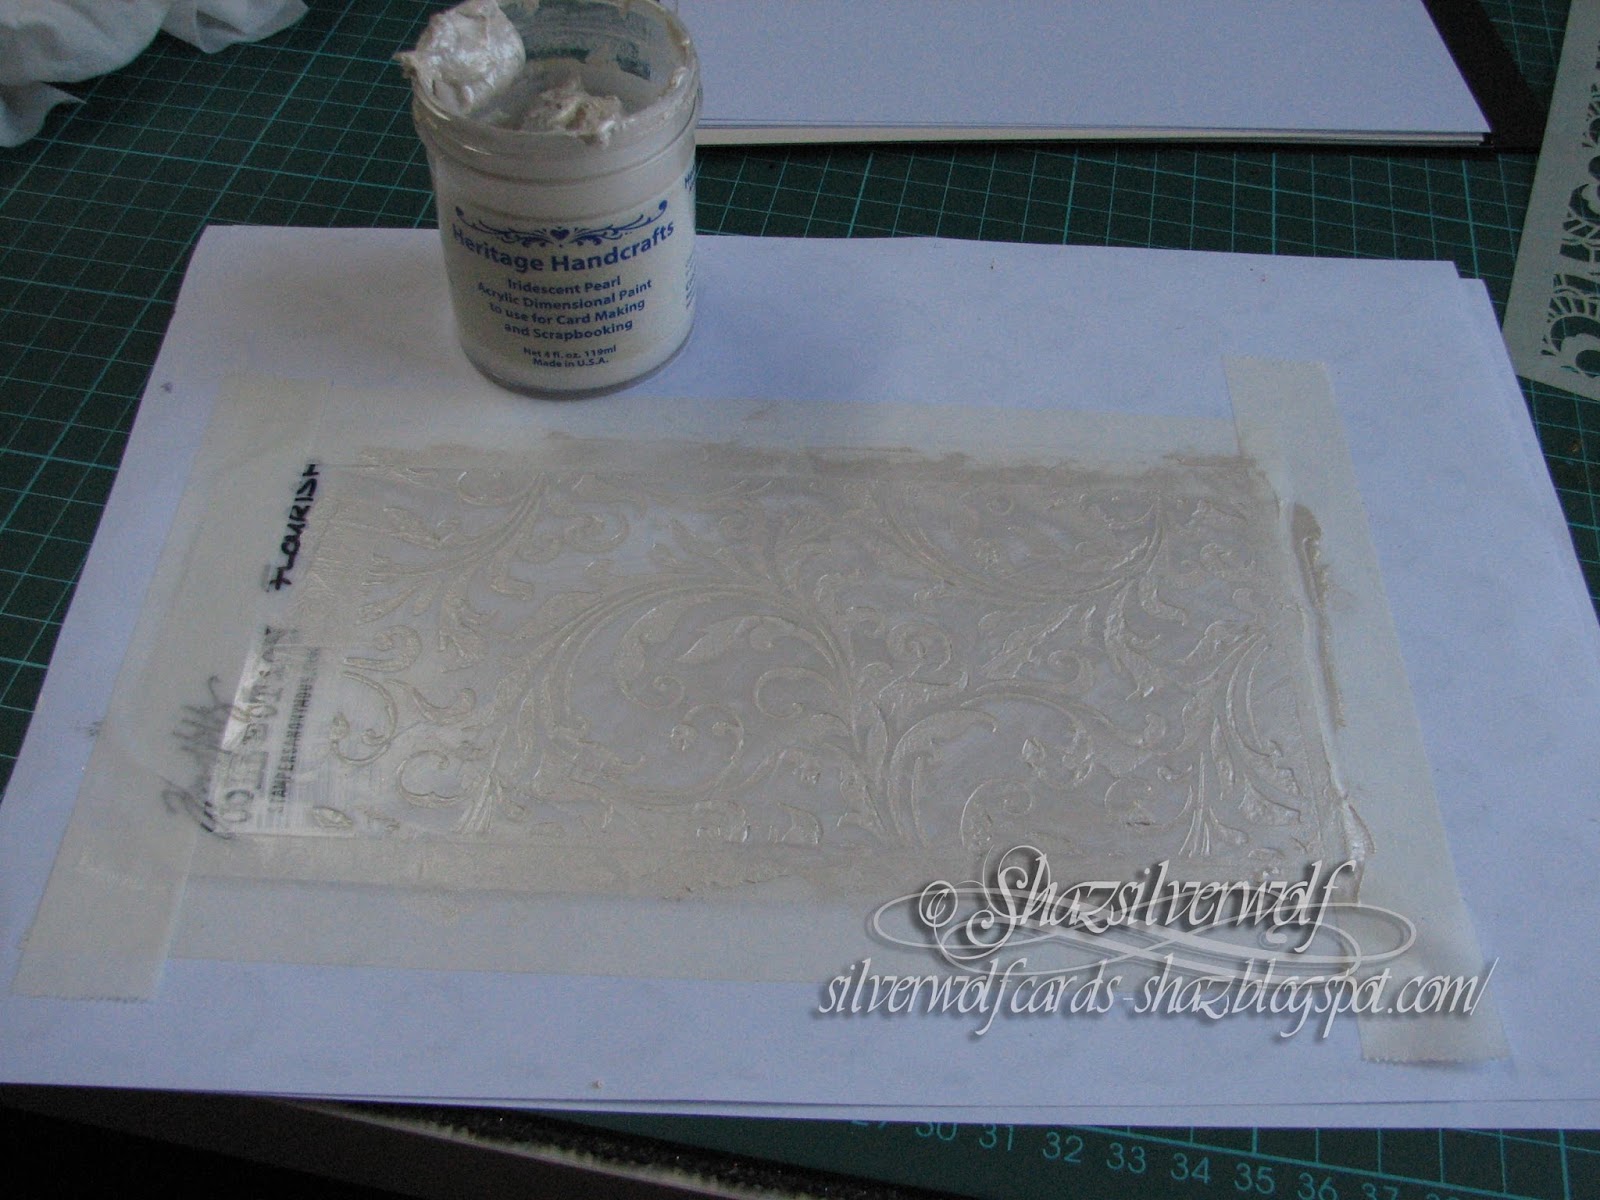
It helps if you tape the stencil in place, and also to tape at least one side of your cardstock to the work surface.


Once the paste is added  remove the tape and carefully peel up the stencil. Put  the panel to one side and clean off your stencil. It's easier to clean if you do it whilst it's fresh. I used a baby wipe over some kitchen paper, but after a few uses, it's a good idea to go give it a wash, especially if you want to go from a dark paste to a light one.


If you are going to add embossing powder, now is the time to do it.  You can use just one colour, or a combination. On this one I've used Midnight Black and Copper Detail, both from Stampendous. Once you have it covered, put it aside to dry.

When it's dry you can bring it back and heat the embossing powder with your heat gun.


This is the finished panel, prior to being trimmed down.


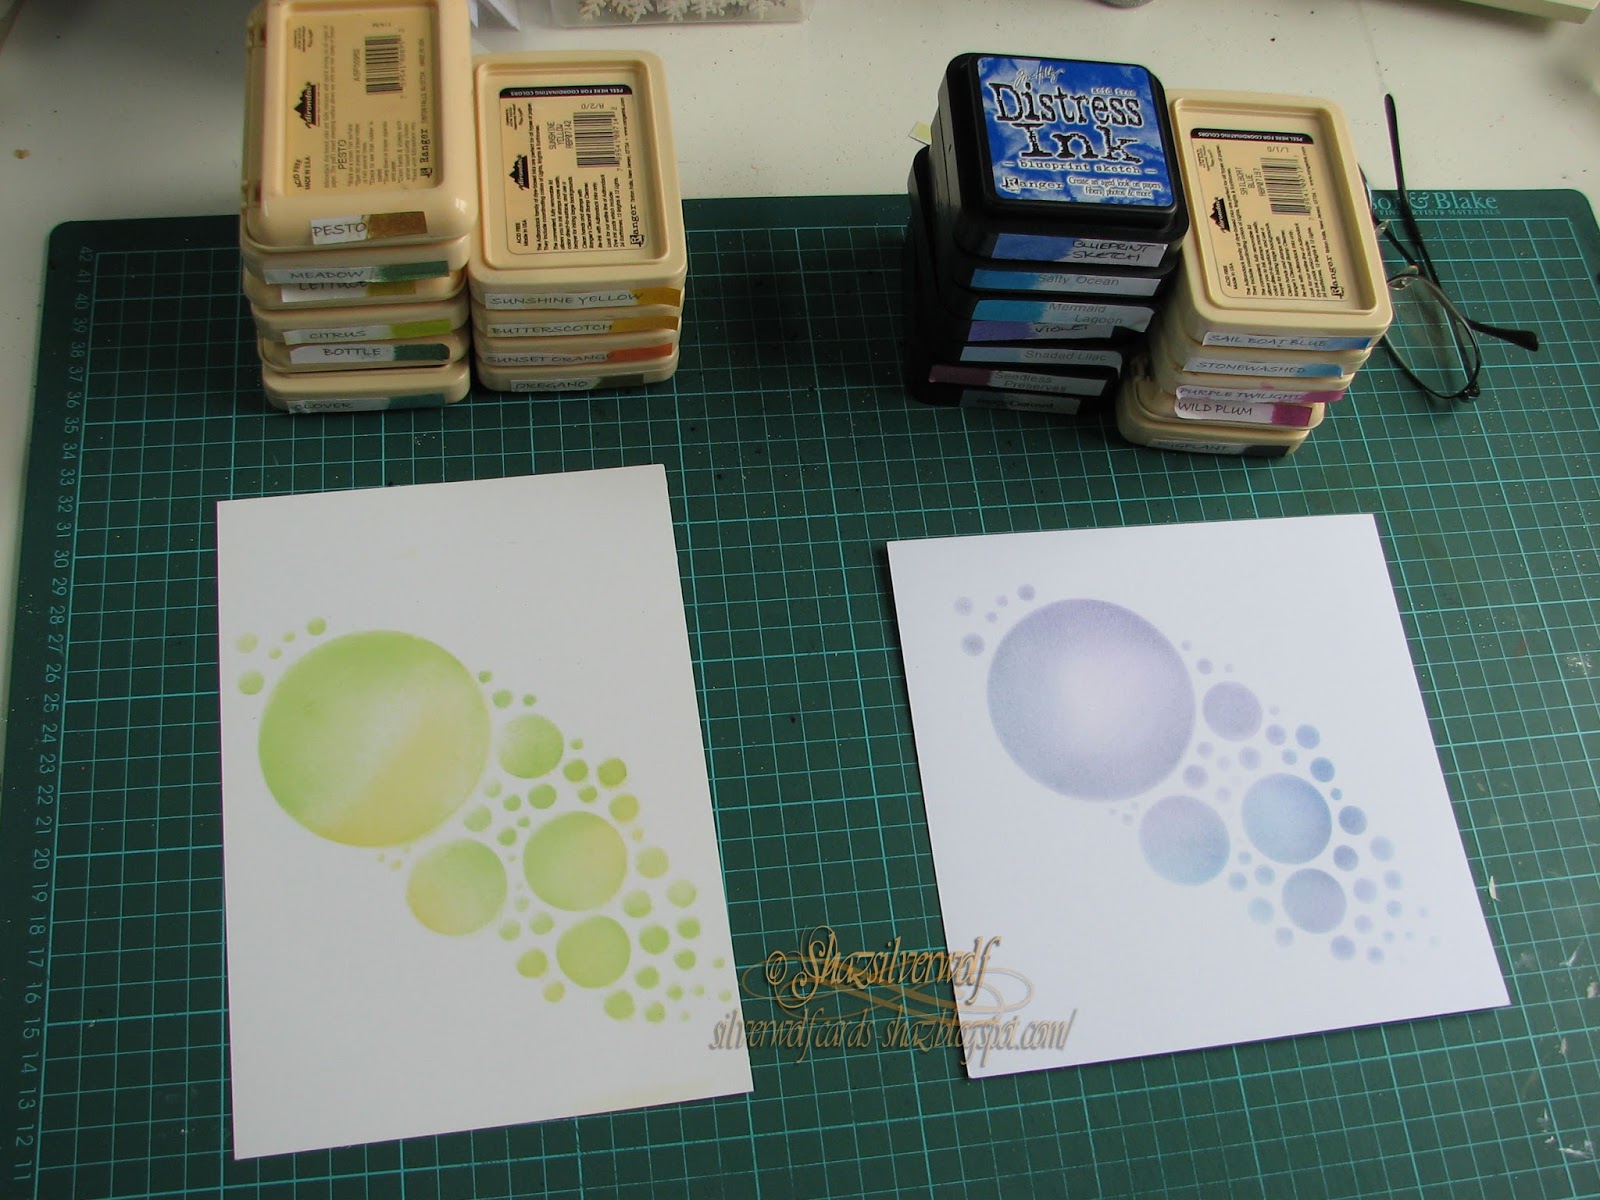
Another way to do the stencil is to colour the Embossing paste with some DI's. I used the same colour combo Kamila did- Mustard Seed, Worn Lipstick and Wilted Violet. By splodging an inkpad onto your craft mat, you can then add a little Embossing paste, I used Pearlescent, to the ink. You will get a pastel shade of paste.
  If you have some small pots to hand, any extra paste can be stored for later use.

Add the paste a section at a time, then peel off the stencil to reveal the design. Put aside to dry.


This is the fully dried panel.


Her third method was to do a watercolour wash over the dried stencil paste using Distress inks again. Firstly spray over the design with water, and use a brush to make sure the whole design is covered. This is why you definitely need watercolour paper for this one.

Again, splodge some ink onto your craft mat, and spray with some water. Now paint this over a third of the design. This one uses Mustard Seed, Peacock Feathers and Mermaid Lagoon.

Let the ink dry, and buff any ink off the Embossing paste.

I've created about 25 panels using various of these methods and colours. I'll blog a couple of cards at a time, so that the posts are not too long.

Thursday, 4 August 2016

Lavinia stamps in Jo's Bubbles

Quite a while ago now I installed a widget called ' You may also Like' which shows up at the bottom of each post. I don't know how useful visitors find it, but it does serve me as a memory jog for things I (may) have started a while ago and never finished,(who, me?) . These stencils are a perfect example of that memory jog.

The stencil itself is called 'Jo's Bubbles', and is available from Clarity Stamps. The two cards I've made here don't actually use the green & yellow one, I did stamp it, but I'm not happy, so that's been put to one side while I figure out if it's retrievable or not. But I did have another in blues and purples, a paler one, so I've used that.

First off, a selection of stamps to use. I knew I wanted to use both the Moon Fairy and the Circle of Stars in the large circle, so thought a bit of masking might be in order.


Stamped onto a Post-It note, second attempt as the first time I forgot to make sure the stamp was over the sticky bit!


She's only roughly cut out as the masking wasn't a critical thing to get right.


Stamped and masked, ready for the Circle of Stars.


The circle of stars added.  By the way, the fairy was stamped in Blueprint Sketch DI, and the Stars in Wilted Violet DI.
 I'd already decided I'd add these to this months Lavinia Stamps Challenge, which is ' No Black', and me not being able to use black is a bit like TH not being able to use brown, lol.


Came out OK in the end.


A few more stamps added- the circle directly below the Fairy has the Large Orb stamped in Shaded Lilac, further down, the circle with the Toadstool in it has the medium Orb stamped in Stonewashed Adirondack. The circle to the left of the fairy has the smallest Orb stamped in Purple Twilight Adirondack.
 Wilted Violet came back to stamp the small fairy, small toadstool and the star clusters that are dotted around the outside. I carefully used one of the small stamp cluster to add some stars into the small circles, along with a single leaf stamped in a few in Stonewashed again.
 I put this aside to dry and started on the second one.
I've oriented this one differently, with the largest circle top right. The colours are much softer too.
The Bunnies are stamped in Dusty Concord, and I used a couple of bits of Post-It to stop it going outside the circle. Some Small Mushrooms were stamped in Sailboat Blue Adirondack, next came a Dandelion Head in Shaded Lilac, again the edges were masked.


Some small birds stamped in Wilted Violet and the Star Cluster and small Orb stamped in Seedless Preserves DI.  I added a larger star in Stonewashed. This star if from a set of Lavinia Stamps that were free with a magazine a while ago. Looking at it a bit later, I thought the Bunnies circle needed something, so I masked around it again, then just stamped a portion of the Trailing Ivy stamp, using Versafine Spanish Moss.

 Finding cardstock to matt the images onto- again I can't use my goto black!

Once matted and mounted onto a 7" square card base, I added the sentiments to an open corner- both are from Lavinia Stamps. The You touch the dream one stamped in Versafine Imperial Purple, the Secrets one in Versafine Majestic Blue.
 Final touch for the Bunny card was a butterfly embellishment in the opposite corner, with a couple of acrylic gems stuck to his antenna, then some Crystal Stickles dotted on the stars and the dandelion head.


For the Moon Fairy card, a dragonfly was added, and given a coating of Stardust Stickles.The same Stickles were added to the fairies wings and dotted onto the stars.


Recipe:
 Stamps- All Lavinia Stamps:
 Moon Fairy Card
Moon Fairy, Fairy Orbs (set of 3 sizes),Small fairy-A set of three, Stars cluster- Stars1,
 Circle of Stars, Small Toadstool, Secrets are Hidden quote.

 Bunny Card
Midnight Meandering, (2 bunnies),Medium Orb,Dandelions,Small Mushrooms, Birds,
Creeping Vine, Star Cluster 1,You touch the dream quote.

Inks:

Adirondacks: Stonewashed,Sailboat Blue & Purple Twilight.

Distress Inks: 
Wilted Violet, Shaded Lilac, Seedless Preserves & Blueprint Sketch.

Versafine:
Majestic Blue, Imperial Purple, Spanish Moss.

Stickles:
Crystal, Stardust.

Stencil:
 Jo's Bubbles, Clarity Stamp.

Wednesday, 3 August 2016

WOYWW #374

Well at least I have my days right this week. Here I am, to link up with Julia, at The Stamping Ground, for our regular snoop around the worlds desks.
So what have I been up to? Well, there are some Christmas cards (again!), in the post below this, and an experiment in making my own glitter embossing paste two posts down. That came out really well, by the way.

First off I have to say a huge Thank You to Lisca, (Scrapping Cavewoman) for a lovely envelope full of goodies she sent me.She does an awesome decorated envelope, and the postage stamp is incredible.


Here are the goodies in all their glory- decoupage pieces, ephemera of all sorts,a great postcard of a flamenco dancer, rub on tattoos- all sorts of wonderful bits.


On my desk right now, a journal. I've been logging all those wonderful colour blends & combos you see on Pinterest. Yes, I have them pinned there, but the problem is that every time I go to have a look at them, to find one to use, I get distracted- well it is Pinterest- and then pouff! a couple of hours have vanished.

 
So, I thought I'd put them down on paper, then I can keep it in my desk drawer.

I don't like to print them off, as printer ink/monitor settings etc frequently changes the colours too much for my liking.


I also had a bit of a go at making some blends of my own.

I tried using some of the colours not used so much in the original ones.
It's not always easy to be sure which particular combo of colours will work as well on paper as they do in your head- that has come out badly sometimes.


Then I though while I was at it, I'd log a swatch of each colour in colour families in the back.


It's funny, we always think of Tims colours favouring the grungy browns, but there are actually more greens than any other colour, browns included.


Only by one,11 greens to 10 browns. If I'd included Peacock Feathers, which I see as a greeny-blue, it would be 12.


And, going back to Pinterest- when did they do that sneaky change? Sometime Tuesday afternoon, for sure, 'cos it was the 'normal' Pinterest when I used it around lunchtime, then, Tuesday evening, we have a whole new look.
 I'm quite sure I don't like the size of the font they've chosen for your boards- it's so large, you only see half the title! Ok, I'm done, so I'll see you later, have a great Wednesday.


Monday, 1 August 2016

Glittered Baubles Christmas Card

These are the cards I was working on before I got sidetracked with the previous experiment.


A Sweet Poppy stencil,Holly Baubles is the starting point.


I used gold, silver and green glitter over the paste.


At this point I remembered I had some Cosmic Shimmer sparkle embossing paste in a draw, from the supplies I had gifted to me recently. The one I tried out was called 'Warm Gold', but I thought when it dried it looked more coppery than gold.


Still a nice effect, but as I said in the other post, I thought a bit expensive.


Anyway, when all the pieces were dry, I took a stack of 6x6 white card blanks, from Craft UK Ltd, to matt them onto.


 I think I've mentioned this before, but don't place a great deal of reliability on the size shown on the wrapper. These actually measure 5 3/4" square, not 6". I'm guessing that is the envelope measurement, not the card.
As part of my Christmas backing paper stash bust, I also took some of this to cover the card fronts with.
 
Mainly this one, from Anita's, although a few sheets from some Papermania packs got used too.


Mostly trying to use ones that were not too busy.


The kraft trees paper was from a pack picked up in Hobbycrafts a while ago.


The far left paper is from a  pack by Kay and Co, from years ago, the right hand one from a Papermania one.


These are the Cosmic Shimmer Glitter paste ones.


All thats needed now is to add some acrylic flatback gems to the Holly berries.


 I didn't cover every berry, I tried that with the first one and it was too much, so I took some off.


In some cases, I've flipped the stencil over, so I have both left and right hand baubles.


All lay out for the gems to dry. Now all that's needed is a sentiment, and I'm still thinking about that one.

An End of an era

An end of an era

I write this with a broken heart, that only time can heal My beautiful, wonderful wifelet Shaz (Silverwolf) passed away peacefully in the ea...