
For anyone who hasn't seen these stamps, they were (and still are) designed by Kevin Nakagawa.This is a link to his Stampscapes website,where you can see all the stamps, plus dozens upon dozens of galleries featuring artwork.This link will take you to the UK site, where you can also purchase the stamps, but there is no gallery. This link will take you to the You Tube Stampscapes Channel, where Kevin demos some awesome artwork.
Basically they are scenic stamps, as you can see in this photo, landscapes, mountains, waterfalls, sky scenes, cloud bars, trees, branches, people, animals, buildings and water scenes- every kind of image you could want to create a scene.
I know at first glance the idea of building a scene using these stamps may be a bit daunting, especially when you look at some of the scenes created on the Stampscapes site.
What I am going to show you here is how I do it, and trust me, if I can do it, anyone can!

This is a selection of my wood-mounted ones, and I also have a number of u/m stamps too.The beauty of these is that individually they make a beautiful scene, like this card here.
Another beauty of these stamps is that many are available in two sizes, most of the lge are similar dimensions to this one, and the other size is slightly smaller at 3 x2 inches.
You also have the added bonus of being able to build up scenes, using 2,3 or more stamps to create pictures.
You are not just limited to Stampscapes stamps for this, any image which fits your project, both in theme and proportion can be used.
Northern Lights Technique- see FULL POST for how-to.


HERE for these two cards

Building A Scene
I have two ways I use to build up my scenes, and the first is by using a Stamp Positioner.
This enables me to place the images EXACTLY where I want them, rather than guessing and maybe being a little 'off'.
The second part of my way of building up a scene grew out of using the stamp positioner- I realised it would be cool to be able to try out different images together, before committing myself to stamping them. I happened to have some sheets of OHP( Overhead Projector Film) / Copier Transparency Film which I often use in card making, as you would use acetate. This can be purchased quite cheaply from office supply stores, Staples for example. To give you a price idea, they are around £10 for a box of 100 sheets- and 10p a sheet isn't bad- a lot cheaper than acetate!
So what I did was to stamp some of my images using Black Staz-on, onto the transparency film, like this.
I cut the images out in blocks when they were dry. Well, most were dry- you can see a few smudges where some weren't as dry as I thought. But it does not matter, they are only for inspiration.

By the way, the Wolves image is not a Stampscapes stamp, its by Coronado Island, and is called ' The Howling'.
This method allows me to select a number of images, stack them up in the order I want to stamp them, and see if the scene works.

So, I take my first image on transparency,and lay it down on paper- any scrap or plain paper will do, it is easier to see what you are doing on a white background, rather than a craft or cutting mat.

Then I take my second image, in this case Rocky Peak, and position this so that it overlaps the Moon & Clouds.

Next I add my third image, Lakeside Cove, positioning it so that the treeline hides the base of the mountain.
Now I know the picture works, I can begin stamping.
There are two ways I can stamp this picture. Firstly, and the one I use most often, is to start stamping from the top down. Because I will be stamping onto white card, and adding colour to the images afterwards, any areas of the mountain that the sky image shows through will be hidden with the colours. If I was stamping onto a brayered/inked or oil pastel background, I would do it by masking, which I will come to later.

Here are the three stamps I will be using, an A5 sheet of white card and the Stamp Positioner. At this point, consider how you will be colouring the image, to decide which ink is best to use. I generally use Staz-on, although Versafine, Memento or Archival are good too.
One point I must make: Don't stamp onto the acrylic stamp positioner plate with Staz-on! You will need Staz-on remover to clean it, and that gradually destroys the plate, making it crackled & cloudy. You can guess how I found that out. Just use Versafine, or similar for that bit.

The first image is stamped towards the top of the white card. You do not need the Stamp positioner to place this image.

Now to add the Mountain peaks. Place the positioner plate into the 'L' angle, then ink up your stamp. Position the stamp right into the corner of the 'L', and press down. Don't worry if you do not get a perfect crisp image on the positioner plate-you will still be able to see where to place your image in the picture.
 |
| The stamped image on the plate. |

Move the plate into position over your stamped Moon & Cloud. When you are happy with it, place the 'L' around THE SAME CORNER you had it when you stamped the plate.
Re-ink your stamp, then hold the 'L' in place firmly with your left hand. Take the plate away and stamp your mountains, guiding the stamp into the corner of the 'L', just as you did when stamping onto the plate.
 | ||||||||||||||
| Now you have your Mountains and sky. |


Repeat the process again using the Lakeside Cove:
Stamp onto the plate, position the plate over your picture so that the treeline covers the base of the mountains, put the 'L' around the plate, hold the 'L' in place & move the plate, then stamp the cove.


Your finished picture ready for cropping & colouring : Moon & Clouds sky, Tall Peak & Lakeside Cove.
Here I have created another picture, this time using Star Birth instead of Moon & Clouds, but created exactly the same way.
Masking
Earlier, I mentioned using masking to create a picture if you are working directly onto a background you have already coloured. If you look closely at the two pictures above, you will see that in the open spaces of the mountains you can see parts of the stars or clouds. If you are going to colour the image, you will lose these details in the colouring, so it does not matter. If you were going to stamp onto a brayered background,for instance, and add little or no extra colour, then you would still be able to see these patches.
So to avoid this, we will this time stamp the Mountain first, mask it, then stamp the sky.

These are the three stamps I will use this time- I have swapped Lakeside Cove for Rocky Creek lge,073G.

Firstly stamp the mountains in the centre of the white card- the stamp positioner isn't needed for this one.

There should be enough ink left on the stamp to stamp a mask. I use pads of oblong post-it notes for masks, and stamp once onto the top note, peel off half a dozen post-its all together, then cut them out as a block. That way I always have spares.
When you position your post-it mask, place it JUST BELOW the outline of the mountains- you can see the black outline of the mountains here.
This will stop you getting a 'halo' around the mountains, caused by the tiny 'step' the paper of the post-it causes.

Stamp the Moon & Clouds onto the positioner plate as before, then line it up where you want the image to be. In this case, I want the moon to be partly behind the mountain peak.

Stamp your image, using the 'L' as before. Then remove the post-it mask.

Now you have your Sky and Mountains, with no overlap or halo.


Stamp up the plate with the Rocky Creek stamp as before, and line up the plate over the stamped picture. You want the treeline to hide the base of the mountains, as in the previous picture.

This is not the only way to use these stamps- you can work without the stamp positioner, just using a bit of guesswork. This is just how I work- if you want to see a lot of fabulous artwork using these, go to the Stampscapes site & view some of the galleries. There are many pages of lessons from different artists on the site, including Kevin himself.

A few more scenes I have stamped up ready for colouring.


Applying Colour to your Pictures.
There are a number of ways of adding colour to your images, the one developed by Kevin uses a tool called a Tonal Applicator:

There is a very specific way of using this stamp, and for the best instruction go to the Stampscapes lesson video Here. I am still trying to perfect this, and whilst there is no denying that the effects are wonderful, I do find it very time consuming.
You can add colour by using a Colorbox Stylus tool,or cut & dry foam.
You can stamp your image onto card that you have coloured first, either by sponging, brayering, stippling or spraying. I am not going to give directions for these, rather I will point you to the Stampscapes site, where you will find dozens of video and pictorial 'How-To's', all done far better than I could. You will also find a number of videos on You-Tube.
One of my favourites is using oil pastels, and I have given instructions for this on my Oil Pastel Backgrounds page.
These images I am still working on:
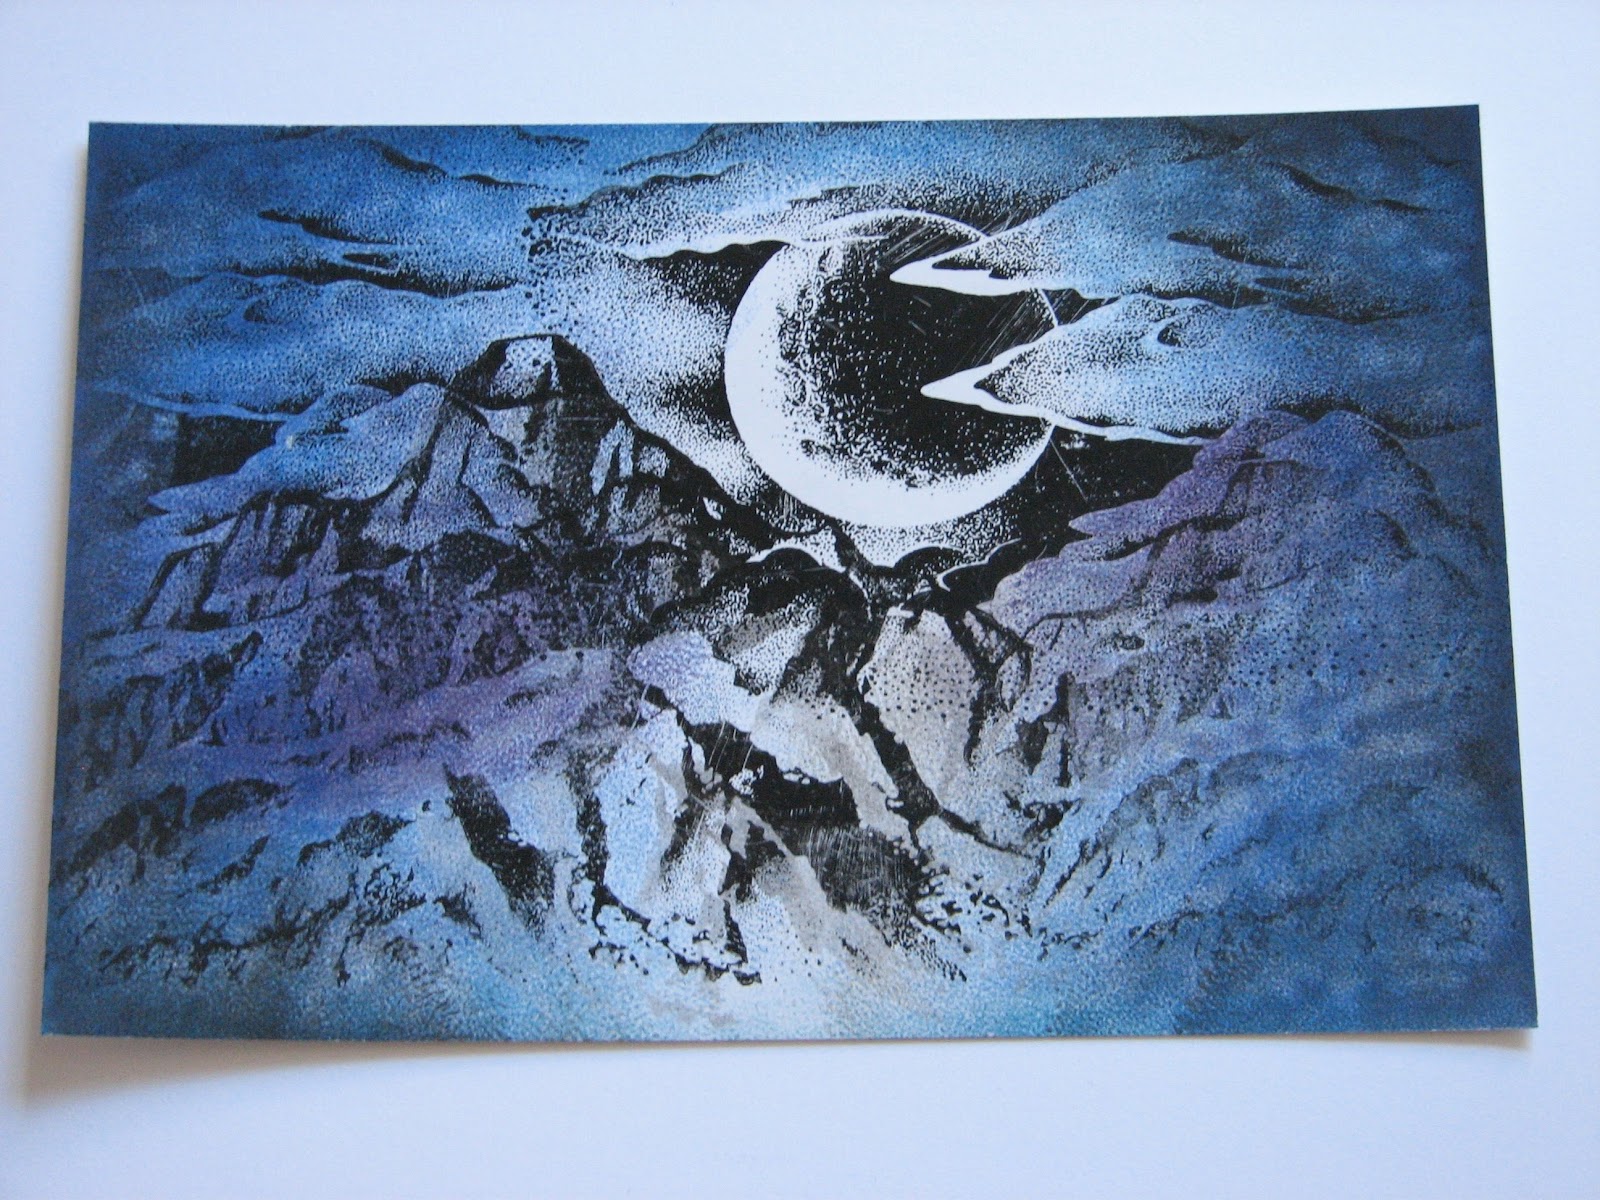
I am sponging colour onto this, but keeping a white/light area in the centre for the moonlight.

Tried this one using a Stylus tool - needs more work yet! And practice with the stylus tool, lol.

The background for this was brayered with various blue Adirondack inks, so far I have added Espresso & Latte to the rocks. The mountains and greenery still need work.

Again stamped onto a brayered blue background, browns added to the rocks, now I need to bring in some greens.

This uses the same Rocky Creek as above, also on a blue brayered background, this time with the addition of Rocky Peaks mountains in the background. I just love how these stamps all scale together perfectly- the same trees that are tall against the boulders in the creek above, seem dwarfed by the mountains in this one.

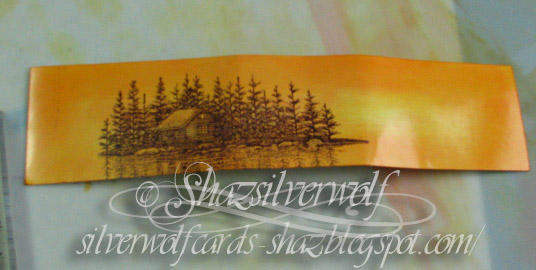
 This one has Pines & Rocks, 195G, stamped in Black onto a background brayered with lemonade, Sunshine Yellow & Sunset Orange Adirondack ink.
Here I have stamped Star Birth onto Glossy card that has been coloured with Stream, Denim, Stonewashed,Purple Twilight & Eggplant Alcohol inks.Then the image has been cropped ready for matting.

This time I have used much more Blending Solution, and some lighter Alcohol inks-Cool Peri, Pink Sherbet and Stonewashed.I also added some Eggplant and and Purple Twilight Adirondack ink using the Tonal applicator,then stamped in Denim Adirondack.Just waiting to be cropped now.
As I mentioned right at the top, you can buy Stampscapes stamps either Wood mounted, or as Unmounted Sheets. When you buy an unmounted sheet, they are themed to work together, and you get a colour sheet with them, showing the stamps, with info & illustrations to give you ideas for how to use & colour them, like these:


I think this is such a brilliant idea,giving you inspiration for scenes and colours.
They also slip in postcard size examples of artwork:


For everyone who has difficulty with Mens cards, for instance, these stamps are brilliant. Not only do you have the scenics, which by themselves are great, you also have a man fishing in a boat, canoeists, hang-gliders, surfers,hikers/backpackers and mountain bikers. You can even get a selection of these on one themed sheet.
I hope this has been a little bit of help, and maybe given you a few ideas.
More of my Stampscapes cards- I've moved most of them
to the Stampscapes/Scenic gallery


