I've had a few people wonder how the cheap wafer thin dies I've been buying from China were going to perform, and I promised a review. So this is it, and I do warn you now that it is a long post, and VERY picture heavy, as I wanted to show the cut quality for you. I'll add sizes, set quantity and price I paid with each set.In each case, I've measured at the widest point(s). For starters,
HERE is the link to the E-Bay page of dies currently on offer. There are many more besides the ones I have bought. The most I paid was £3.65, the cheapest 99p. And generally, they are free shipping too.
I'll start with one of the newest ones, a set of stitched stars. There are 8 pieces in the set, the largest being 4½", the smallest ¾" wide. They were £2.95.

All were cut in my Cuttlebug, and unless I say otherwise, were cut with the standard 'C' plate, die/card, 'B' plate recipe.
Just used an average weight of cardstock too, not too thick or too thin.
All pictures will enlarge, so you can get a close look at the cuts.
In every case, I got a nice clean cut, no shimming required.
The Happy Birthday Circle is next, and measures 3" across and cost £3.13.
It gave a nice clean cut to the outer circle, and seemed to have cut the sentiment as well.
It hadn't totally cut through the sentiment though, there were some ragged edges on the 'H' in Birthday. So I added a sheet of copy paper as a shim, and tried again.
This time it cut perfectly.

Next we have a pair of butterflies,the largest is 2"x1¾", the smallest 2" x1¼". The pair cost £1.44.
Nice clean cuts on the outside edge, and all the bits popped out easily.
Next up is the butterfly border. That measures 3¾" x 1½", and cost 99p.
I little trick here you may or may not know. Using a tumble drier sheet between the die and cardstock helps to stop the diecut sticking inside the die, in much the same way as waxed paper will.
This can be handy if you want to add colour to your die cut after, so don't want any wax residue on it.
Again, nice clean edges, and you can see the whole thing has come straight out of the die.
Another nice cut.
Next up is a die for a small bow. this cost 99p, and the finished size of a folded bow is 2" x ½".
It has a serrated edge to it, but doesn't pose any problems with the cut.
You also get some nice tiny heart confetti when you poke out the heart details on the bow!
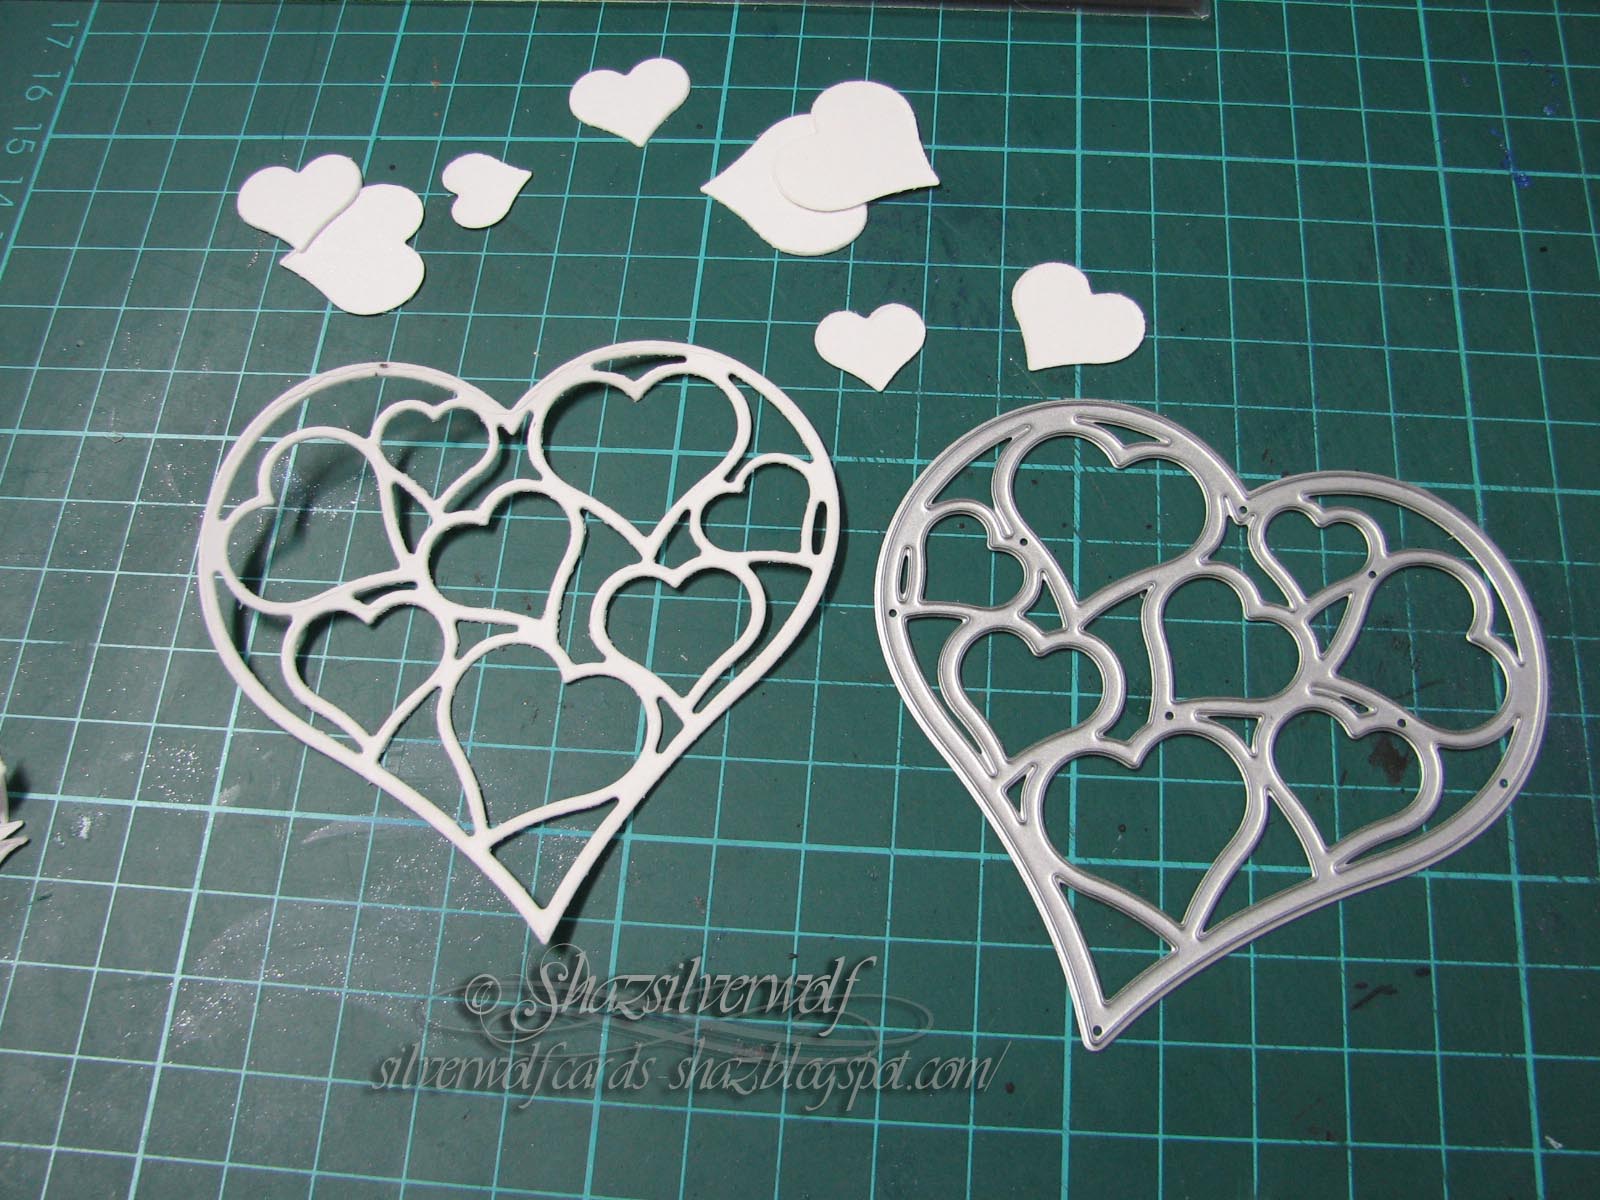
This next Heart full of Hearts measures 3" and cost £1.75. It also gives you some nice small hearts.
Nice clean cuts, and no pieces left behind.
The next die is a Winter/Christmas scene, measures 3¼" x 2¾" , and cost £1.80. I've used some more drier sheet on this one, and it all just popped straight out.
Again, no cutting problem, nice clean cuts.
This die is a frame with an oblong section and 3 small squares.
It cost £3.09, and measures 4½" x 3¼".
The frame has a stitched detail, and cut nice straight edges with no problem.
The next one cuts a circles background, and measures4" x 2¾", and cost £2.09.

The cut was perfectly clean on all the circles, however, I did notice that the edge of the die left a slight indentation on the cardstock in places. Which would be fine if you are going to trim it down with a border, but if you wanted to use it on a larger sheet of cardstock, it would need some shims cutting to slightly smaller than the die, and replacing the 'B' plate to prevent this.
Next on to a large Holly die, which is 4¾" x 3¾", and cost £1.21.
Again, cut easily with no problems.
Following this is the second new die this week, which is an Ivy wreath
This measures 2½" and cost £1.29.
Gave a lovely clean cut, which sort of surprised me. I'd expected some problems with this, but it was fine.
On white cardstock, so you can see the detail.

Now we'll move on to the Stitched Squares set. There are 7 pieces in this set, ranging between 3" for the largest, to ¾" for the smallest. Cost was £1.79.
First 4 cuts, and all cut cleanly.
The largest square, and you can see, cuts nice and clean, with clear 'stitching' detail.
Now the stitched circles, 8 pieces in this set, and cost was £2.39. The largest circle is 3½" diameter, the smallest ¾".
Looking at this, it crossed my mind that the bottom two would make an excellent snowman! 😀
Here are all the sizes, and every one cut with no issues.
A Merry Christmas die next, and this one is a good size, 4" x3", cost was £1.49.
My first cut with this was not a successful one, it only cut the outer edge.
So I used the thin metal shim from Cheery Lynn underneath it for the next attempt, as the inner part of the die had barely made an impression, so I thought it would need more than a paper/card shim.
That method cut it out fine, and when all the bits were popped out, and it was removed from the die, it was perfect.
So, a simple fix for that one.
Last but one now- congratulations if you've stayed with it this far!- a set of stitched curvy lines.
4 in the set, they are approximately 6" long,and cost £2.69.
Again, all cut fine, and the stitched detail is nice and clear too. Of course, you have the option to use the non-stitched edge, if you wanted.
I thought these would be really useful for making snowy/hillside masks, instead of tearing, and getting ragged edges.
OK, so now we are on to the last die, and I've deliberately left this one till last, as I had trouble when I first tried it.
This snowflake background is the largest die by far, at 5¼" square. The cost was £3.65. At first with my cuts it was cutting around the outside edge, but not in the centre.
Now, to be honest, I think this says more about the uneven pressure from the 'Bugs rollers than the die, as it's not the first time I have had problems with the very centre of the machine.
Anyway, the first cut.
As you can see, it cuts into the cardstock, but not all the way through, apart from the edges. I also tried it with copy paper, and the result was the same.
I tried a number of different shimming options, but none was more successful than the others. I was just about to give up on it, when I thought I'd have one last try, this time adding the shim BELOW the die/paper/'B' plate, instead of on top of the 'B' plate. I cut 4 sheets of copy paper to 5¼" square, then used a little low tack tape to hold them together.
And success! I had just one spot, on one arm of a snowflake that I needed to cut through, but otherwise it turned out fine.
So, I've stored that shim in with the die, so I don't have to try and remember how it works next time!
Just had to edit here, as I forgot to say that I still needed to turn this die 3 times and rerun it through, but it did eventually get the cut.
So, overall, I have got to say that for me, these dies have performed just as well as those that are way more expensive. Those Stitched Circles, for instance. Mine were £2.39, most Name Brands are in the £20 region. So yes, I'll be buying more when I see some I like.😀😀
Final pic- my 'Bug cutting plates!
As you can see, well used, and marked! So, if you're new to this, don't worry when your plates start to get marked. Although I will add this advice here:
- Try and keep one plate for the top, which will get marked,and one for the bottom, which doesn't. As you can see, I failed there. Although I do have a brand new spare pair I got cheap.
- Alternate the side you use of your top plate, to help minimise warping. They will warp, this just helps to keep flattening them.
- Don't panic when you hear cracking sounds! It's (usually) just the die cutting into the top plate, or the warped plate flattening a little.
- Take your time when getting to know your machine, and what it's capabilities are. Not every machine will accept the same sandwiches- I've seen people use sandwiches in their 'Bug that mine would never accept. If you need to experiment with shims, take one plate out of the sandwich, and shim with cardstock till you get a good cut. Then see if you can swap out some cardstock for a 'B' plate. You will eventually get to know what your machine will and won't accept.
- If your sandwich does not go in fairly easily, and the handle turn also fairly easily, then stop. DO NOT try to force something through. Strip down your sandwich and try something else. Better scrap cardstock with poor cuts, than a broken machine.


 Wow, one week away from the big 400! Linking up again with our Julia over at The Stamping Ground, to show off this weeks desks of delights.

 All cat owners , or should I say slaves, will recognise this!


