

Sunday 22 April 2012
A Perfect Day Silhouette
Craft a Scene Silhouettes


Each coaster is made by choosing a background, then a frame, then I picked an inner background, finally adding various elemnts to create the picture. All the component parts are fully adjustable for size and scale- the only limit is your imagination!


These are the type of images I worked with, you can see how you can combine them to create whatever scene you like.
Winter Moon Post-it note Holder


First I stamped in Distress Black Soot onto a piece of White Pearlescent card. I then stamped the image onto a couple of joined together post-it notes, and cut out the moon to use as a mask while I sponged on the colour.I used Sailboat Blue, Stream & Denim, then added some Eggplant round the edges. I also masked off the lower half of the image while I did this, again using post-its.


 Trimmed down to size, and ready for mounting,which I did onto dark blue card.I cut a base card to the same size as the mounted image, and folded it Easel style.On the bottom I added a strip of the dark blue card that I ran through my 'bug in a Lattice folder, then mounted a pad of Post-it notes with DST.
A really useful and quick to make pressie for someones desk, and you could swap the stamped image for a photo- or a little frame so the photo could be changed.


Wednesday 11 April 2012
WOYWW # 149, Paper Flowers

These were the Tim Dies I bought recently, having admired what people were doing with them. So I've spent a few days cutting out loads of flowers in different papers.

 I've have been putting some together for a couple of Wedding cards in Black and White that I have to make.I used black and white pearlescent paper, along with some glittered vellum for a bit of sparkle.
 Here I've layered them all up, and also added some seed beads in Black or White to the centres. So that's my desk this week.
Roof Update:
 We now have a roof over our bedroom, lol, just in time for the glorious (!) Bank Holiday weather we had,and we have someone coming into plaster the room next weekend. The kitchen roof is coming off now, as well as taking down the chimney stack at the end of the kitchen. We have an old Victorian house with the galley- style kitchen:
According to the guy you can see taking it down, the only thing keeping it there was gravity!!!
Hope you all had a lovely Easter, and have a great Wednesday.
Tuesday 10 April 2012
Playing with Punches
 As I have been having fun with the Tim dies for the Tattered Florals, it reminded me that I used to use my punches to do similar things.
As you can see, I punched loads of different flower shapes out of various papers, even mulberry paper.

 This works best if you 'sandwich' the mulberry paper between ordinary copier paper, the mulberry is too flimsy on its own and just tears rather than punches.
I'm using a large ball embossing tool and an old mouse mat to give the flowers a little shape.

Then its just a matter of layering them up together
in various combinations. I use a little Glossy
Accents, or silicone glue for this bit.


 Final touch is the centres, I use either Glitter Glue, Stickles or Glossy Accents with either seed beads or loose glitter.
Last but not least are the leaves- again these are mainly punched from mulberry and handmade paper for effect. This fern leaf punch is by Woodware.

Wednesday 4 April 2012
WOYWW #148
Not so much Whats on my Workdesk, as the view from my Workdesk today.

Scaffolding.
We
are having a new roof, and this has also shown up some cracked
brickwork between two floors.
So at some point soon, all the brickwork
above my window has to come out, have a steel lintel put in, then
re-bricked. Great. How much mess is that going to make?

This is a 'before' pic of our bedroom, which is on the attic level,and you can see the slope of the eaves either side, and the height of the ceiling over the widow. Beloved Husband has hit his head more times than I could count on that slope! He is also going to redo the built-in cupboards that were to the right of the window, and we have used the need to shift everything out to have a damned good clearout.

Having the dormer widened, and the ceiling raised was Hubbys idea, and I have to admit that its made a HUGE difference to the room.It looks, and feels, twice the size now.
 |
| This is what it has looked like. |
Work is still ongoing on the roof, but at least now we have some solid-ish covering. For three or four days, it was tarpaulin between us & the sky. I feel like I've spent the last week in a tent.
So not a lot happening desk-wise,(but you can see some new Tim dies I bought recently in the previous post) so its time for everyone to visit our Mistress of Ceremony's,
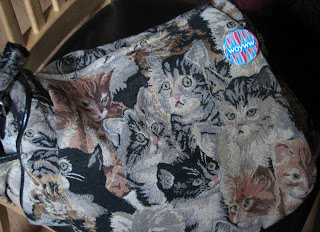
Julia Dunnit over at The Stamping Ground. Oh, and a big Thank You to Julia for my WOYWW badge I received last week. Its fabulous, and pinned to my handbag in the hope that one day it will be spotted by a co- WOYWWer.
 Have a great Wednesday, this post took forever as Blogger didn't seem to want to post pictures today, so I had to try to upload them from my pc, wait for them to 'vanish' then upload them again from Picasa! Duh!!

Have a great Wednesday everyone.
Subscribe to:
Posts (Atom)
An End of an era
An end of an era
I write this with a broken heart, that only time can heal My beautiful, wonderful wifelet Shaz (Silverwolf) passed away peacefully in the ea...

-
 A couple of weeks ago I mentioned that I had bought these, the new Tim Holtz Embossing Diffusers. You have probably seen, like me, the...
 -
 I take no credit for this discovery, a lady posted this on Pinterest HERE .Like any of us, I hate having to spend money on 'consumables&...
 -
 This is the first of the batch of seven cards I made, thanks to some Pinterest inspiration. Here is the card that caught my eye,...
